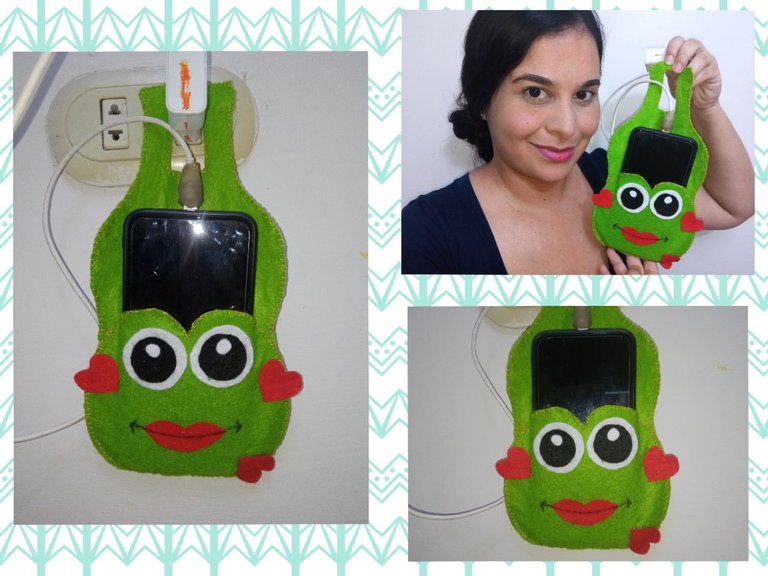
Hello! Good morning, friends of #HIVE, I hope that this new dawn is of great benefit to each of you and that God rewards you with an abundance of life and health so that you continue to enjoy the pleasant company of your loved ones. My project of the day stems from the need to make my own support to charge my mobile phone, the truth is that the outlets at home are quite high or almost at ground level, so it is always a great inconvenience for me to leave dropped my phone on the floor while charging or moving chairs and tables to reach nearby power outlets, so after searching the web and putting my meager hand-sewing skills to the test, I've crafted this lovely charging case my mobile on the occasion of a cute and charming little frog that is very much in love with life and then I will share with you how I did it so that you can also get down to work and do it in your homes.
¡Hola! Muy buenos días amigos de #HIVE, espero que este nuevo amanecer sea de mucho provecho para cada uno de ustedes y que Dios les bonifique con abundacia de vida y salud para que continúen disfrutando de la grata compañía de sus seres amados. Mi proyecto del día nace de la necesidad de elaborar mi propio soporte para cargar mi teléfono móvil, la verdad es que los tomacorrientes en casa quedan bien sea bastante altos o casi a ras del suelo, por lo que siempre es un gran inconveniente para mí dejar tirado el móvil en el piso mientras se carga o mover sillas y mesas para alcanzar las toma de electricidad cercanas, así que luego de indagar en la web y de poner mis escasas habilidades de costura a mano a prueba, he elaborado esta encantadora funda para cargar mi móvil con motivo de una tierna y encantadora ranita que está muy enamorada de la vida y a continuación les comparto como la hice para que ustedes también pongam manos a la obra y la realicen en sus hogares.
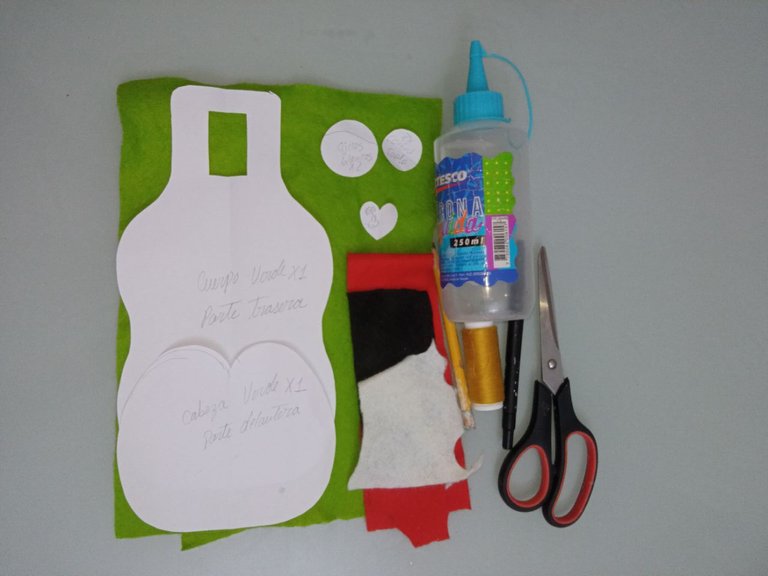
Materials used in this craft:
✓ Colored felts: apple green, red, black and white.
✓ Patterns of the cover on its back, of the frog's face, of its eyes, lips and hearts.
✓ Sewing thread to match the apple green felt and needle.
✓ Cold sylicon.
✓ Black marker.
✓ Pencil.
✓ Pair of scissors.
Materiales utilizados en esta manualidad:
✓ Fieltros colores: verde manzana, rojo, negro y blanco.
✓ Patrones de la funda en su parte trasera, de la carita de la ranita, de sus ojos, los labios y los corazones.
✓ Hilo de coser a juego con el fieltro color verde manzana y aguja.
✓ Silicón frío.
✓ Marcador color negro.
✓ Lápiz.
✓ Tijeras.
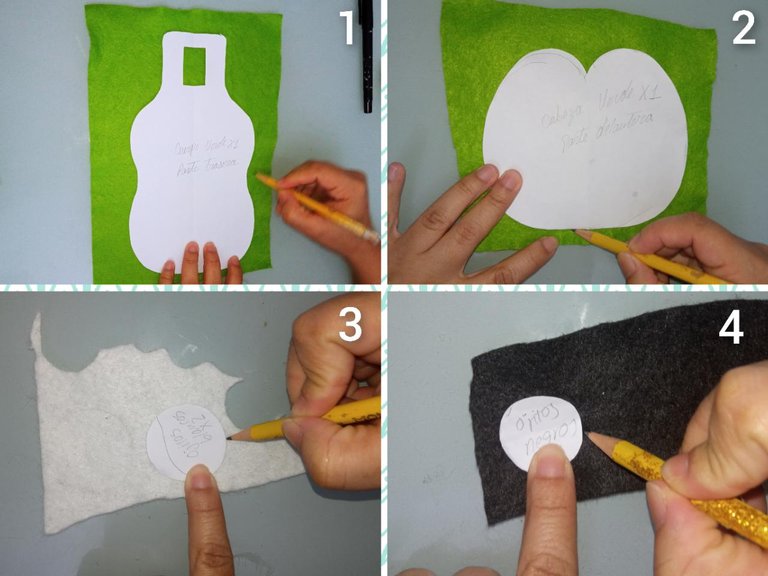
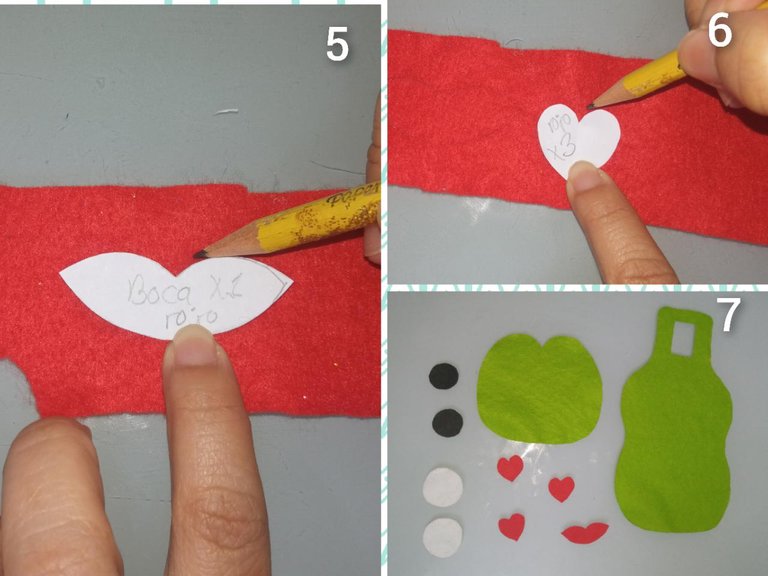
We start our simple craft in a few steps:
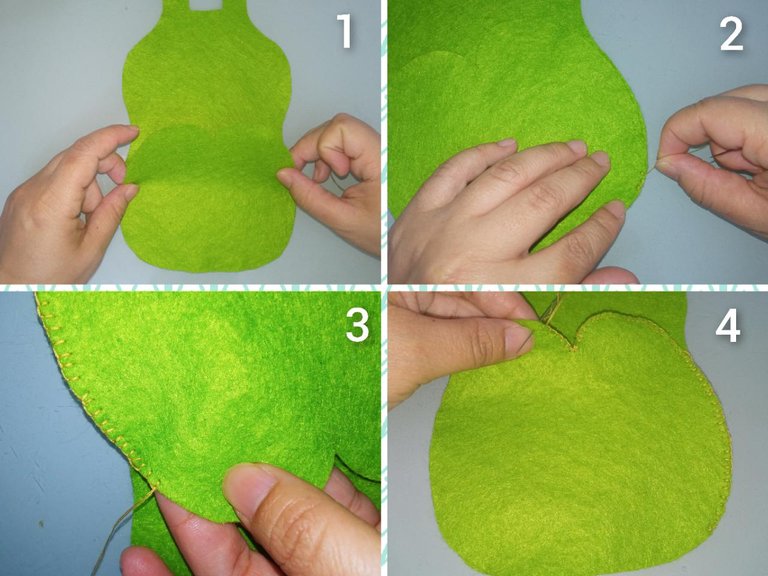
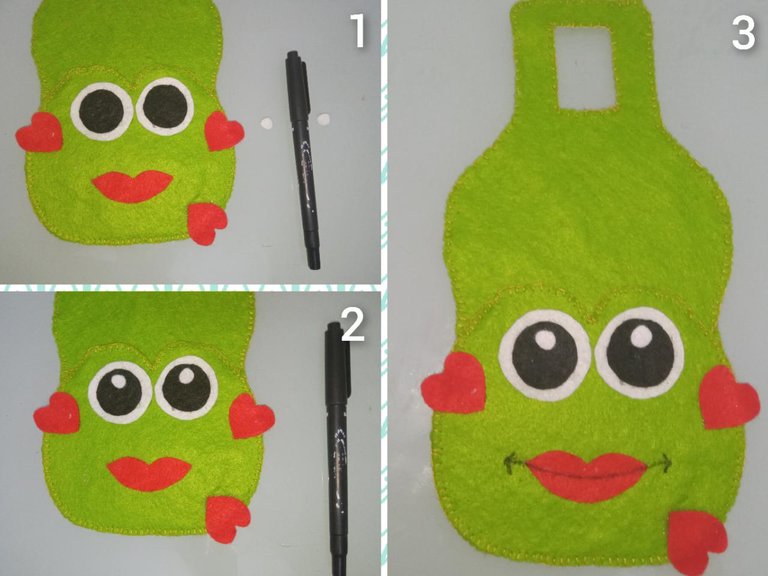
Step 1: Transfer the patterns to the felt and cut them out.
On the green felt, trace the pattern on the back of the cover and on the frog's face with the pencil, on the white felt trace its eyes, on the black felt trace the iris of both eyes and on the red felt pierces the lips and hearts of our figure. Cut out each piece with scissors.
Comenzamos nuestra sencilla manualidad en pocos pasos:
Paso 1: traspasar los patrones en el fieltro y recortarlos.
En el fieltro color verde, traspasa con el lápiz el patrón de la parte posterior de la funda y de la carita de la ranita, en el fieltro color blanco traspasa sus ojos, en el fieltro color negro traspasa el iris de ambos ojos y en el fieltro rojo traspasa los labios y los corazones de nuestra figura. Recorta cada pieza con las tijeras.
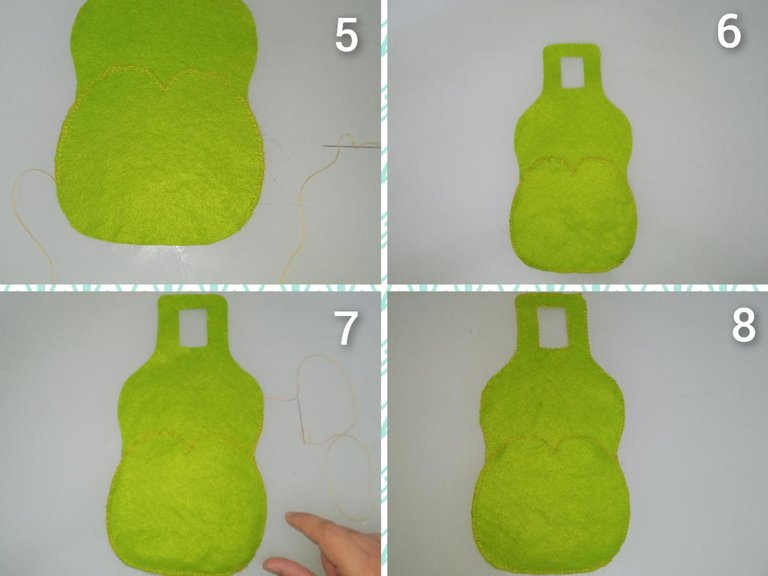
Step 2: Sew the cover.
Take the back of the cover and the felt face, overlap the face on the bottom of the cover (both pieces should join), thread the needle and start sewing with stuffing stitch (I'm not very good, I hope Salma points better to you) to felt all the edges of the cover, including the entire edge of the frog face and the charger inserts.
Paso 2: Coser la funda.
Toma la parte posterior de la funda y la carita de fieltro, soprepone la carita en la parte inferior de la funda (ambas piezas deben unir), enhebra la aguja y comienza a coser con punto de relleno (yo no soy muy buena, espero que a ustedes les Salma mejor el punto) para fieltro todo los bordes de la funda, incluyendo todo el borde de la carita de la ranita y del insertos del cargador.
Step 3: we glue each piece of the figure's face.
With the cover previously sewn, take each piece of the face of our little frog in love and paste with the cold silicone as I show you below.
Paso 3: pegamos cada pieza del rostro de la figura.
Con la funda previamente cosida, en toma cada pieza de los rostro de nuestra ranita enamorada y pega con el silicón frío como te muestro a continuación.
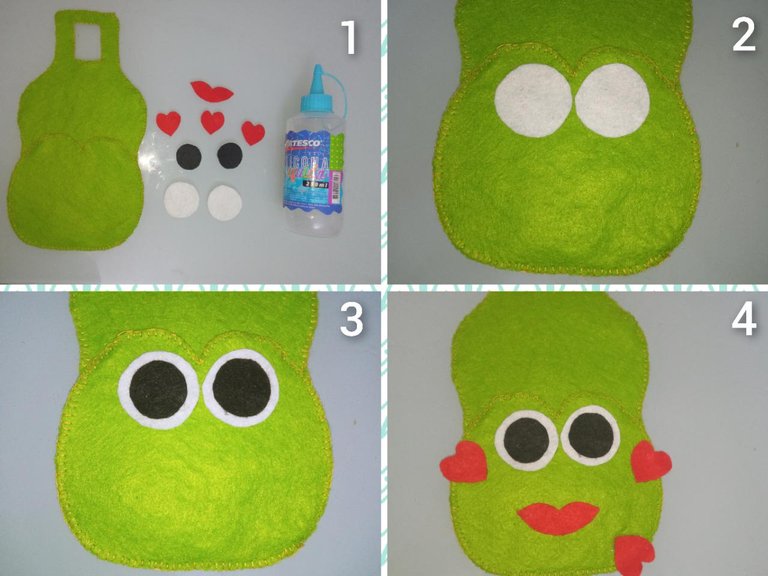
Step 4: final details.
Take the scissors and cut out two small circles of white felt that you must paste on the little frog's eyes to give it more light and with the black marker divide the area of his lips by drawing an oblique line through them.
Paso 4: detalles finales.
Toma las tijeras y recorta dos pequeños círculos de fieltro blanco que debes pegar en los ojitos de nuestra ranita para darle más luminosidad y con el marcador negro divide la zona de sus labios trazando una línea oblicua por estos.
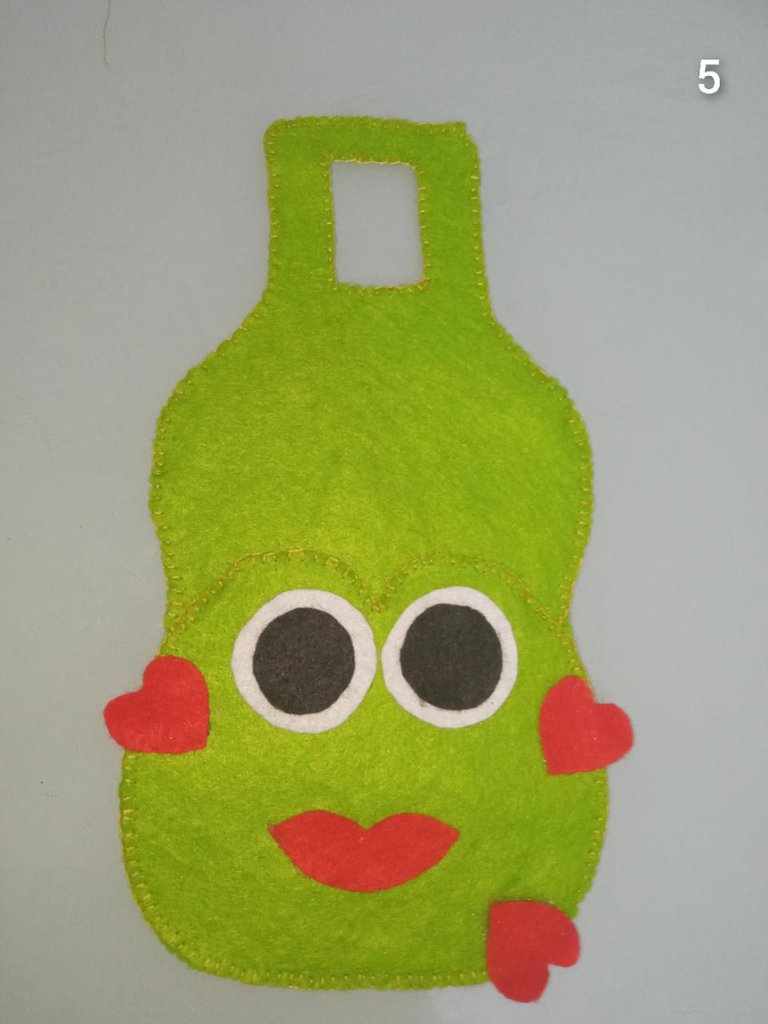
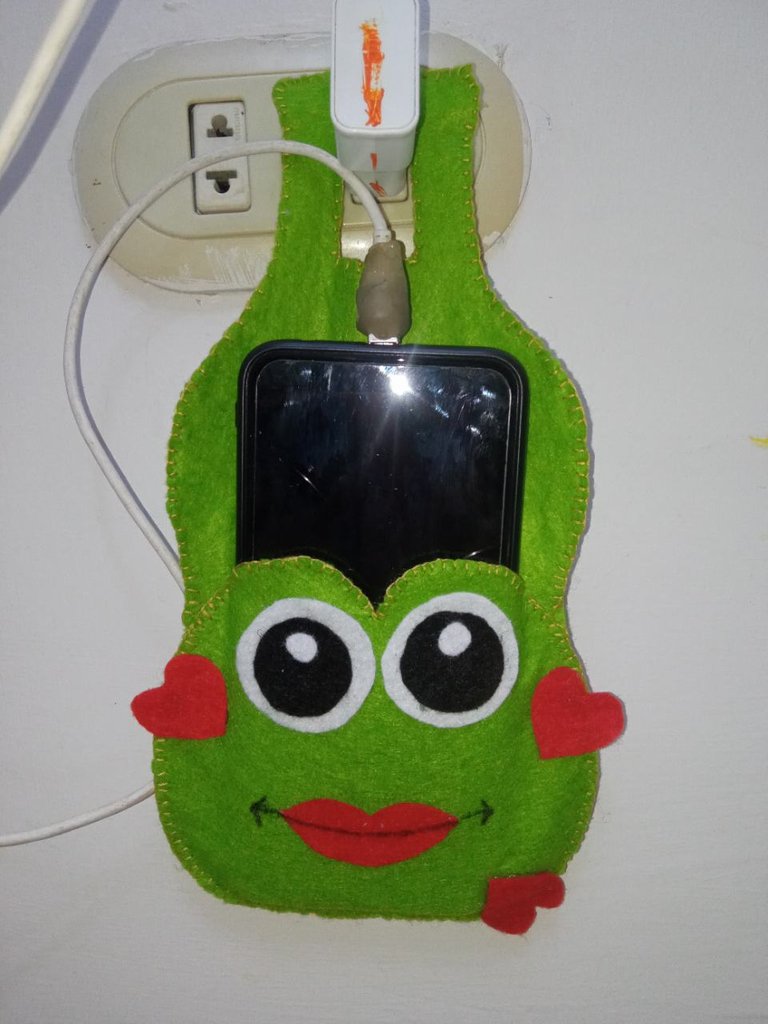
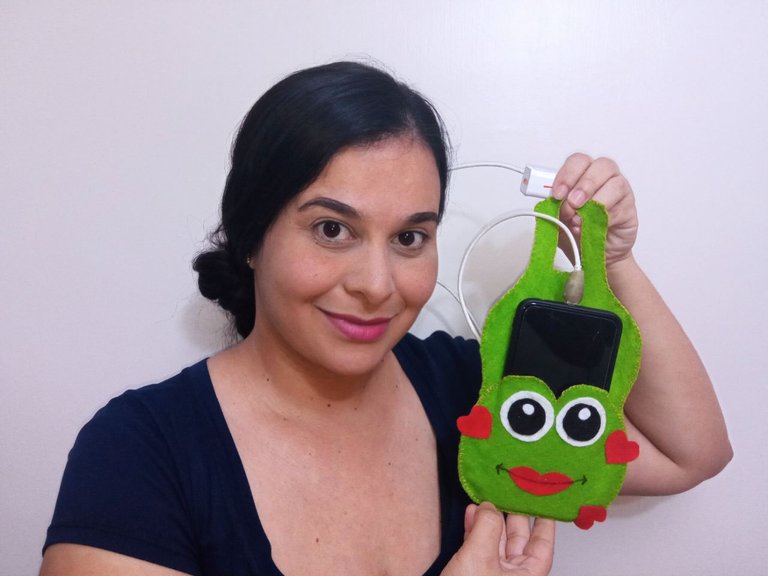
This has been the final result of my craft for the day, by way of observation you can adjust the cover a little for greater support of your mobile by sewing a little more to close the bag.
I hope you liked it, until next and happy Sunday where you share with the family
Este ha sido el resultado final de mi manualidad del día, a modo de observación puedes ajustar un poco la funda para mayor soporte de tu móvil cosiendo un poco más para cerrar la bolsa.
Espero que les haya gustado, hasta un próxima y feliz día domingo dónde se comparte en familia
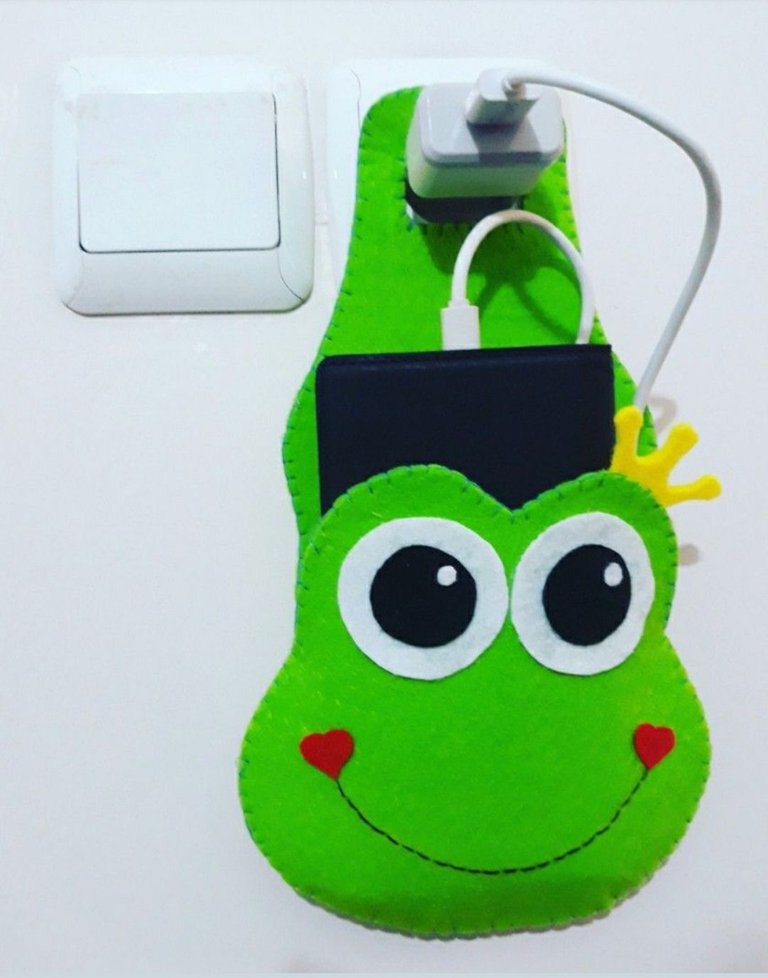
Referential image. // Imagen Refencial..
THANKS FOR READING ME // GRACIAS POR LEERME.
Translated by: google translator // Traducido por: google traductor.
Camera 13 MP Xiaomi Redmi 9. // Camara 13 MP Xiaomi Redmi 9.
All photos are my property // Todas las fotos son de mi propiedad.
The collage were made with the collage maker android app // Los collage fueron realizado con la app para android collage maker.