Gambas3, or Gambas is an IDE and compiler for Linux that mimics Visual Basic's language and functionality, allowing Basic developers to create small graphical applications even in a GNU/Linux environment. As I said before, because it is a simple language, Basic has been used in the past to teach beginners in programming, and it is based on this that we are going to create a beginner-level application using Gambas and a Linux system today.
the installation
To install Gambas on Ubuntu just run the following command:
sudo apt install gambas3
Depending on the version of Ubuntu you are using, you may need to install some additional package. In my case, for example, it was gambas3-gb-form-print, but this can vary:
sudo apt install gambas3-gb-form-print
And now for the project creation
the project
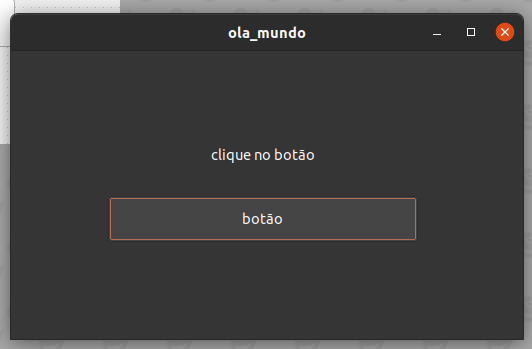
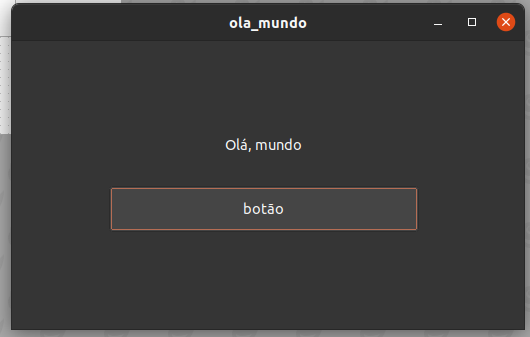
Our project consists of just a small screen with a message to click a button and a button. When clicked, the button changes the sentence text to "Hello world":
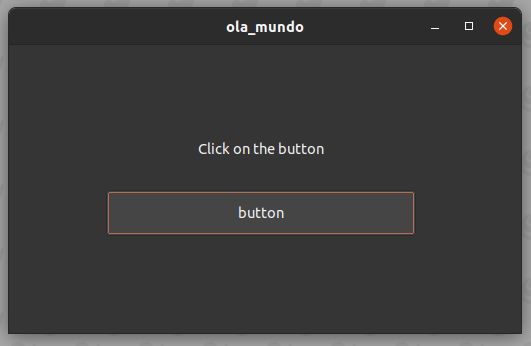
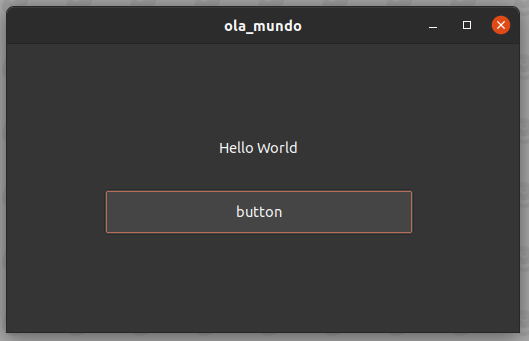
starting the project
Open Gambas3. A screen like the one below will appear:
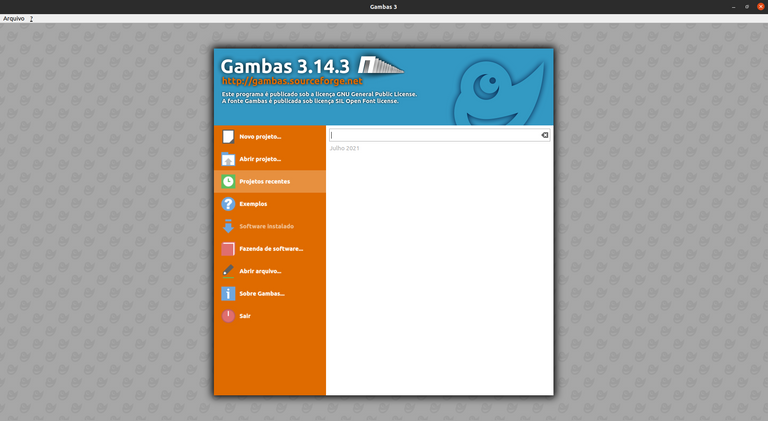
After that, select the "New project" option and then choose the project type. For our project we will use "graphics application" (the name may vary depending on the Gambas version):
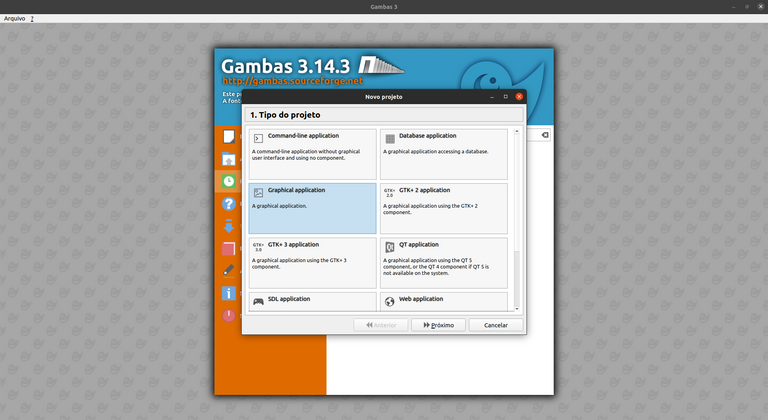
And choose the project name:
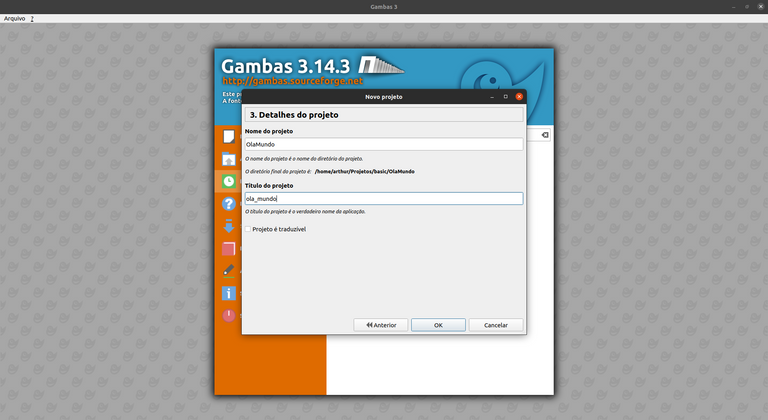
And now for the screen.
Creating the canvas
When opening the project you will see a screen like this:
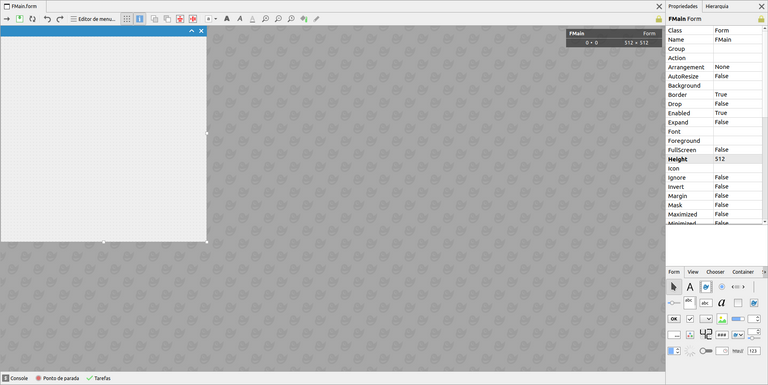
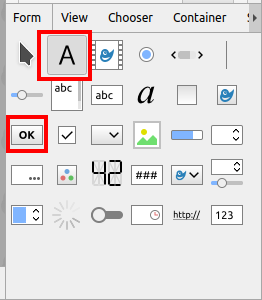
Select the "label" (text) and "button" components in the component grid and place them at your discretion. On my screen, they correspond to the following items:
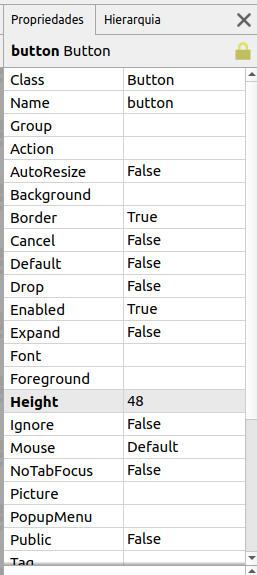
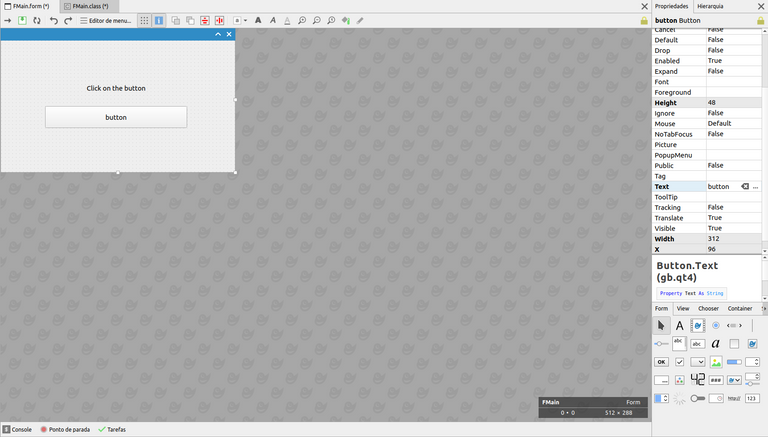
Me too, by clicking on the component on the screen and then going to the properties screen (top right) I changed the Name properties (which corresponds to the variable name) to names that make more sense, like text and button and Text (which corresponds to the component text) for cuter text:
If you followed the steps so far you will have something like this now:
schedule
Double click on the button and you will be transferred to the programming tab where you will see the following code:
Public Sub button_Click()
end
Now let's change the text of our text component:
Public Sub button_Click()

  text.Text = "Hello world"

end
And that's it, just press F5 to see the program running. You can still change other component properties, like FMain.background:
Public Sub button_Click()

  text.Text = "Hello world"
  FMain.Background = Color.Cyan

end
If you liked it, give your upvote below and follow me for more programming tips and tutorials.
Gambas3, ou Gambas é uma IDE e compilador para Linux que imita a linguagem e funcionalidades do Visual Basic, permitindo a desenvolvedores Basic criarem pequenas aplicações gráficas mesmo em ambiente GNU/Linux. Como eu já disse anteriormente, por ser uma linguagem simples, o Basic já foi usado no passado para ensinar iniciantes em programação, e é com base nisso que vamos hoje criar uma aplicação de nível iniciante usando Gambas e um sistema Linux.
a instalação
Para instalar o Gambas no Ubuntu basta rodar o seguinte comando:
sudo apt install gambas3
Dependendo da versão do Ubuntu que você usa pode ser necessário instalar algum pacote adicional. No meu caso, por exemplo, foi o gambas3-gb-form-print, mas isso pode variar:
sudo apt install gambas3-gb-form-print
E agora, para a criação do projeto
o projeto
O nosso projeto consiste em apenas uma pequena tela com uma mensagem para clicar em um botão e um botão. Quando clicado, o botão muda o texto da frase para "Olá, mundo":
iniciando o projeto
Abra o Gambas3. Aparecerá uma tela como a que está aí embaixo:

Após isso, selecione a opção "Novo projeto" e depois escolha o tipo do projeto. Para o nosso projeto usaremos "aplicação gráfica" (o nome pode variar dependendo da versão do Gambas):

E escolha o nome do projeto:

E agora, para tela.
Criando a tela
Ao abrir o projeto você verá uma tela como essa:

Selecione os componentes de "label" (texto) e "button" (botão) na grade de componentes e os posicione a seu critério. Na minha tela, correspondem aos seguintes itens:

Eu também, clicando no componente na tela e depois indo para a tela de propriedades (a direita em cima) mudei as propriedades Name (que corresponde ao nome da variável) para nomes que façam mais sentido, como text e button e Text (que corresponde ao texto do componente) para um texto mais bonitinho:

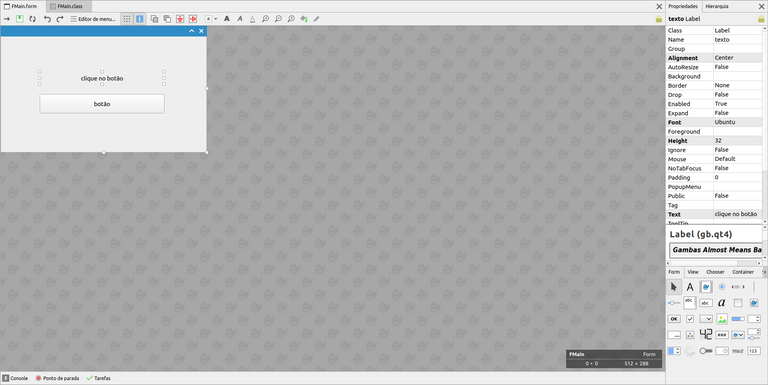
Se você seguiu os passos até aqui você vai ter algo como isso agora:
programação
Clique duas vezes no botão e você vai ser transferido para a aba de programação onde verá o seguinte código:
Public Sub button_Click()
End
Agora vamos alterar o texto do nosso componente text:
Public Sub button_Click()

  text.Text = "Olá, mundo"

End
E pronto, só apertar F5 para ver o programa em funcionamento. Você ainda pode mudar outras propriedades dos componentes, como o FMain.background:
Public Sub button_Click()

  text.Text = "Olá, mundo"
  FMain.Background = Color.Cyan

End
Se gostou, deixa seu voto aí embaixo e me siga para mais dicas de programação e tutoriais.

