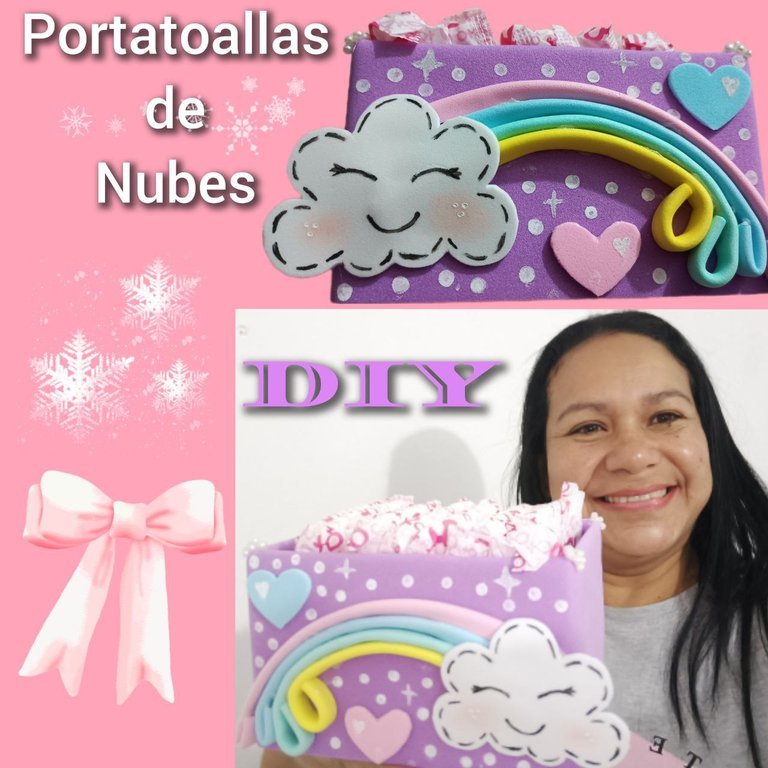
Queridos Hivers creativos el día hoy les muestro como puedes usar material reciclable para obtener una linda creación y darle el uso adecuado. Inmaginete lo bien que luce este lindo portatoallas usando la caja de celular vacia. Nosotras las mujeres usamos toallas sanitarias y toallitas diarias y es parte de nuestros días, por eso elegí de motivo para decorar una linda nube que se encuentra en el arcoiris de la vida.🌈⛅
El uso de esta creación es importante para las mujeres sobre todo para las adolescentes, que pueden colocar sus toallas en esta linda caja y ver ese momento de la mestruación con un poco de alegria.
Dear creative Hivers today I show you how you can use recyclable material to get a nice creation and put it to its proper use. Imagine how nice this cute towel holder looks using an empty cell phone box. We women use sanitary napkins and wipes daily and it's part of our days, that's why I chose as a motif to decorate a nice cloud found in the rainbow of life.🌈⛅
The use of this creation is important for women, especially for teenage girls, who can place their pads in this pretty box and see that moment of menstruation with a bit of joy.
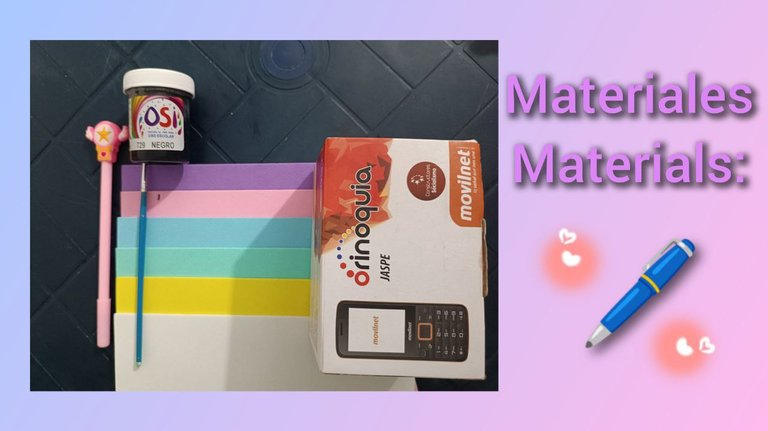
Materiales Utilizados:🌈⛅
- Caja de celular reciclada.
- Lapicero color negro.
- Foami color morado.
- Foami color rosado pastel.
- Foami color azul claro.
- Foami color verde claro.
- Foami color amarillo.
- Foami color blanco.
- Tijera.
- Silicón liquido.
- Regla.
Materials Used:🌈⛅
- Recycled cell phone box.
- Black pencil.
- Purple foami.
- Pastel pink foami.
- Light blue foami.
- Foami light green color.
- Foami yellow color.
- Foami white color.
- Scissors.
- Liquid silicone.
- Ruler.
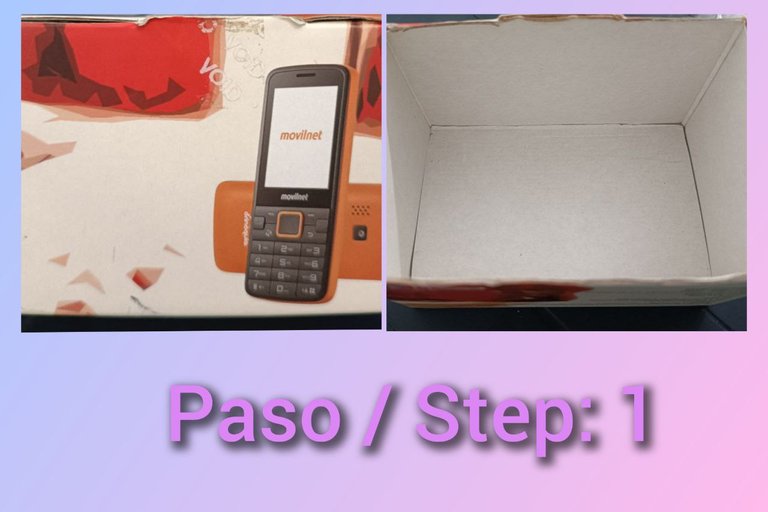
Procedimiento:🌈⛅
Paso 1: Inicie acondicionando la caja reciclada para poder usarla para mi creación de hoy. Entonces use la tijera para para corta la tapa de la caja y dejarla disponible para convertise en un lindo portatoallas. 🌈⛅
Procedure:🌈⛅
Step 1: I started by conditioning the recycled box so that I could use it for today's creation. Then use the scissors to to cut the lid off the box to make it available to become a cute towel holder. 🌈⛅
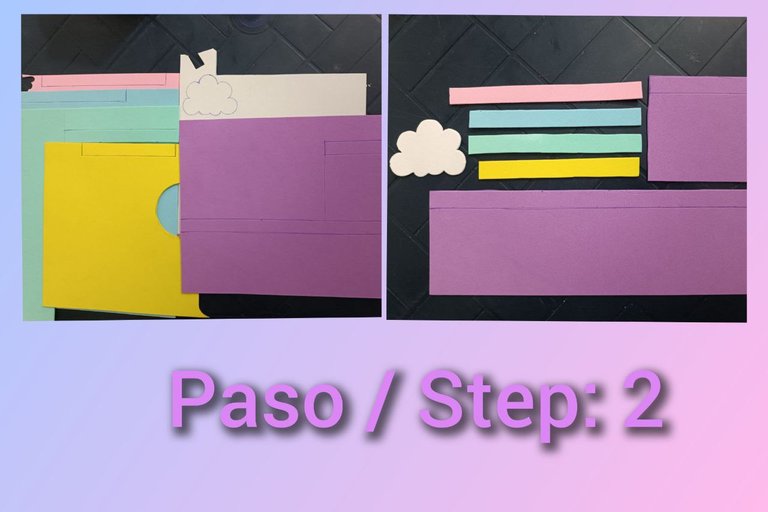
Paso 2: Ahora tome el lapicero para dibujar en cada uno de los foamis las figuras para formar la nube y el arcoiris, pueden que en la mayoria de los foamis de usa solo una pequeña cantidad, a excepción del foami morado que use para forrar la caja, entonces use la regla para medir lo que necesito para poder cubrirla.🌈⛅
Luego tome la tijera para recortar cada pieza de foami, y miren el resultado corte unas tiras de foami color rosada, azul, verde y amarillo, en foami blanco la forma dela nube y en foami color morado las piezas para cubrir la caja y el cuadrado para cubrir completamente la caja. 🌈⛅
English VersionStep 2: Now take the pencil to draw on each of the foamis the figures to form the cloud and the rainbow, you can see that in most of the foamis you only use a small amount, except for the purple foami that I used to cover the box, so I used the ruler to measure what I need to cover it.
Then take the scissors to cut out each piece of foami, and look at the result cut some strips of pink, blue, green and yellow foami, in white foami the shape of the cloud and in purple foami the pieces to cover the box and the square to completely cover the box. 🌈⛅
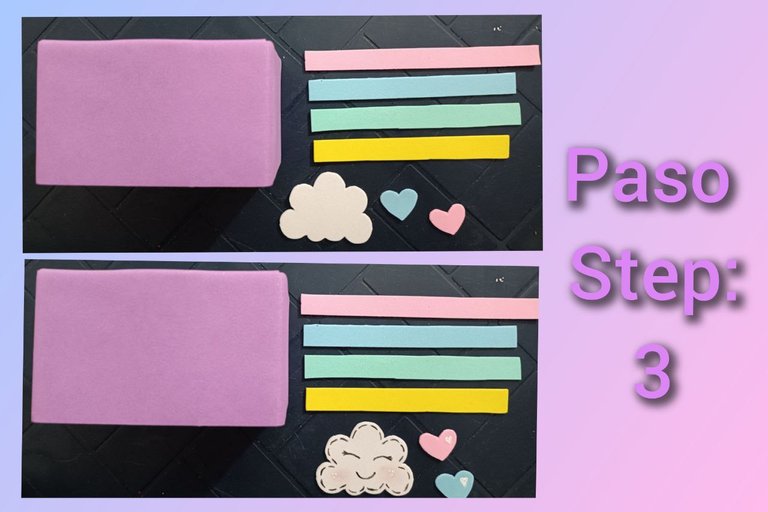
Paso 3: Use el silicon para forrar la caja con el foami color morado, y se me ocurrio hacer dos corazones de foami uno de color rosado y azul. 🌈⛅
Luego use el lapicero para dubujar el rostro de la nube y un poco de rubor para dibujar las mejillas de la nube, de esta manera luce femenina y contenta. 🌈⛅
English VersionStep 3: I used the silicone to line the box with the purple foami, and I thought of making two foami hearts, one pink and one blue. 🌈⛅
Then I used the pencil to dub the face of the cloud and some blush to draw the cheeks of the cloud, this way she looks feminine and happy. 🌈⛅
Paso 4: Con mucho cuidado doble las tiras de foami y le di un estilo de curva. Ahora use pintura color blanco para hacerle detalles a los corazones. y Fui probando las tiras encima de la caja.🌈⛅
English VersionStep 4: I carefully folded the foami strips and gave it a curved style. Now I used white paint to make details on the hearts. and I was testing the strips on top of the box.🌈⛅
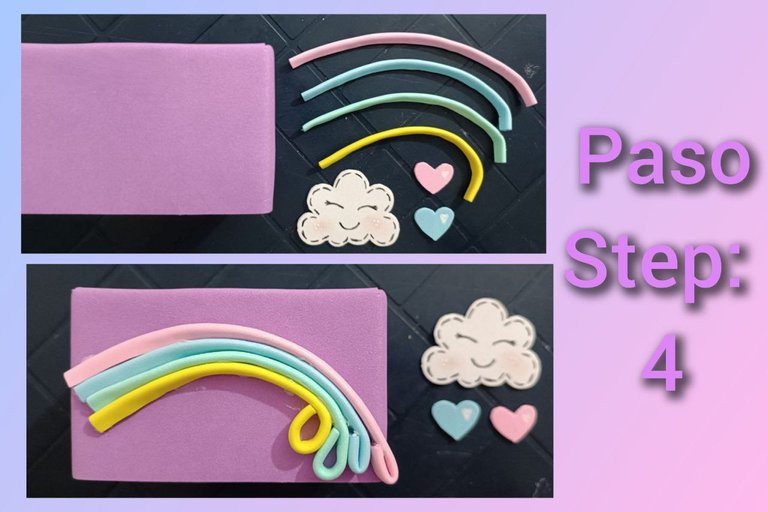
Paso 5: Empece a pegar los detalles para decorar la caja, pegue las tiras de foami para formar el arcoiris, primero la tira color rosado, luego la azul, verde y amarillo. También pegue los corazones y la forma de la nube. 🌈⛅
También use pintura blanca para hacerle detalle en el foami color morado en forma de circulo u estrellas. 🌈⛅
English VersionStep 5: Start gluing the details to decorate the box, glue the foami strips to form the rainbow, first the pink strip, then the blue, green and yellow. Also glue the hearts and the cloud shape. 🌈⛅
Also use white paint to make detail on the purple colored foami in the shape of circle or stars. 🌈⛅
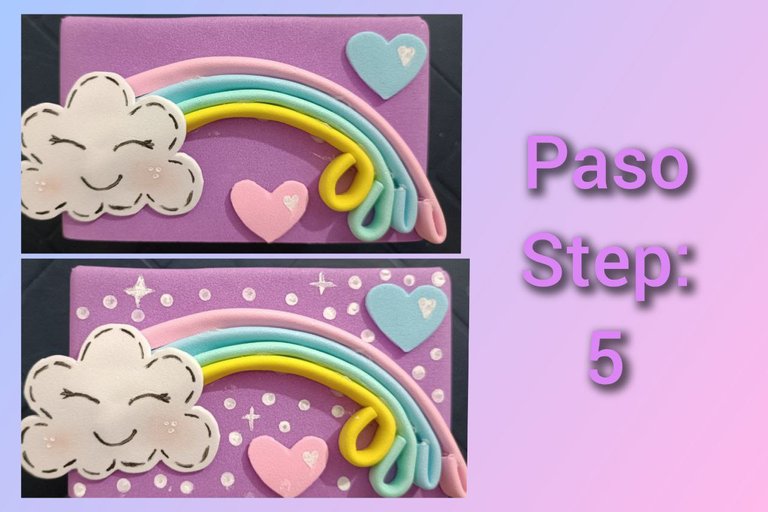
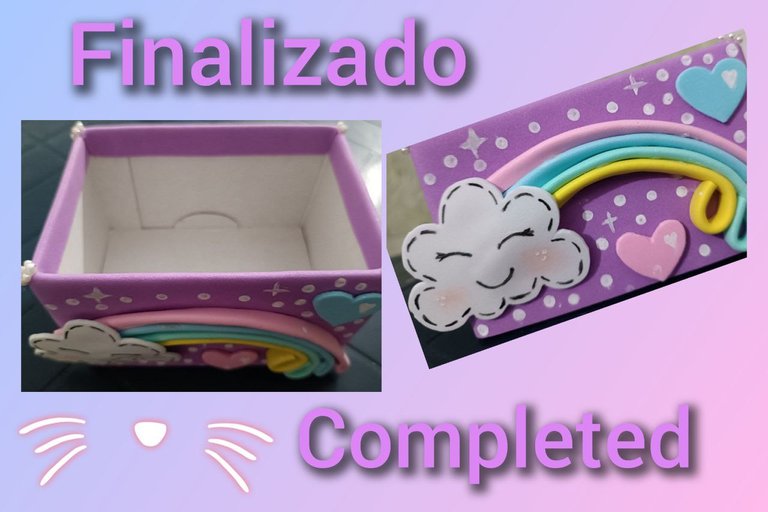
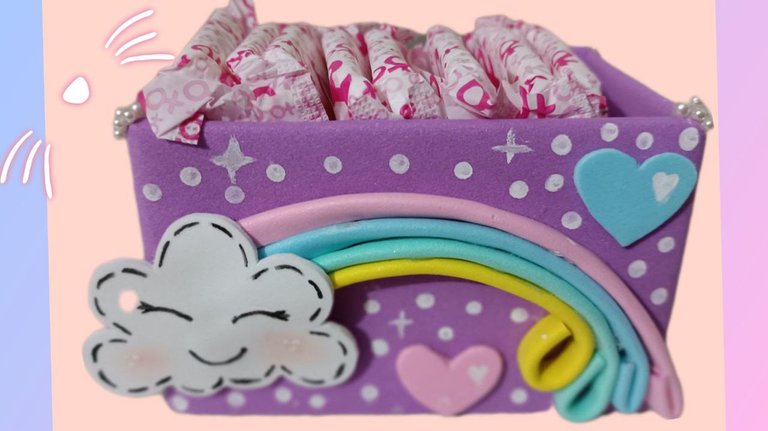
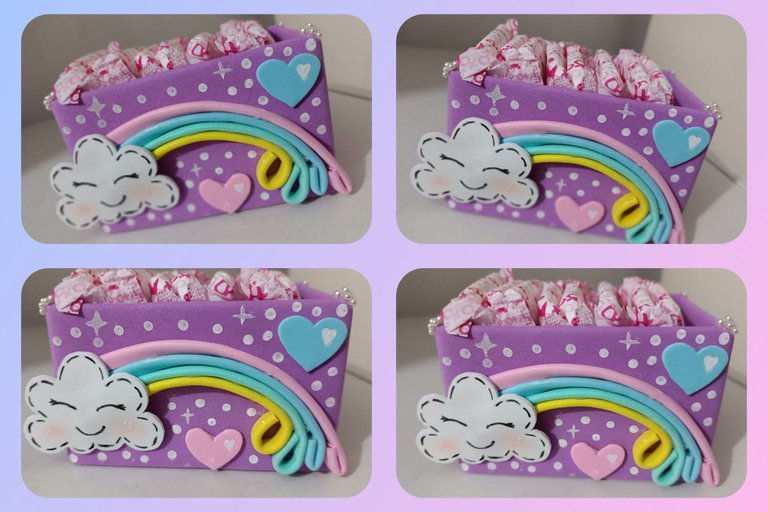
Ahora despues de finalizado la caja y la decore con nubes y arcoiris en tonos pasteles, peque en las orillas unas detalles en las cuatro esquinas de la caja y luego le coloque las toallas sanitarias para de una vez darle el uso para el cual fue creado. 🌈⛅
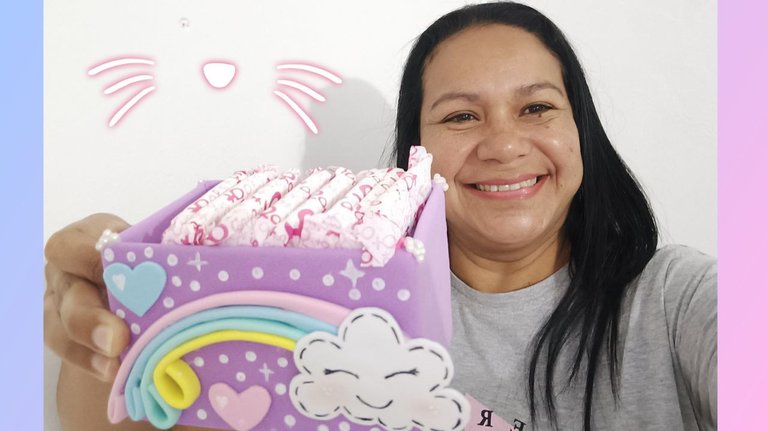
Realmente estoy muy contenta del resultado final, porque asi podre obsequiarsela a mi hija para coloque sus toallas. 🌈⛅
English VersionNow after I finished the box and decorated it with clouds and rainbows in pastel tones, I put some details on the edges of the four corners of the box and then I placed the sanitary napkins on it to give it the use for which it was created. 🌈⛅
I am really very happy with the final result, because this way I can give it to my daughter as a gift to place her sanitary napkins. 🌈⛅
- Todas las fotos son de mi propiedad tomadas con las camaras de mi Tecno Canon 18P. Editadas con la aplicación Versión gratuita de GridArt.
- Traductor usado Deepl.com versión gratuita.
Muchas gracias por leer y visitar mi post. Soy Alida Gómez
- All photos are my own taken with my Tecno Canon 18P cameras. Edited with the application GridArt free version.
- Translator used Deepl.com free version.
Thank you very much for reading and visiting my post. I'm Alida Gomez