ENGLISH CONTENT
Hello all game and craft lovers! A while ago, my friend and talented artist @yetsimar told me about the existence of Holozing. After having seen the beautiful fanarts that she has made, I ventured to take a look at the community and thus, find not only the charming character designs that are available, but also the creative artistic works that the other Hivers have created. .
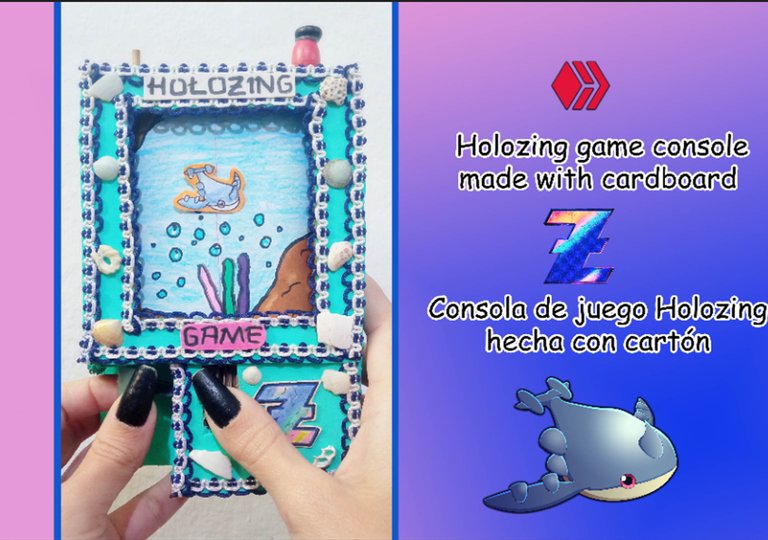
As expected, I wanted to join in and make something creative to encourage the developers of this game, so I made a console made of cardboard, which is fully functional. Next, I will show you how the process of making it was.
🐋 Materials 🐋
The materials I used were basically things I had available, which they were.
- Cardboard (I got it from different boxes)
- Silicone stick and cold silicone.
- White school glue.
*Hello white. - Colored crayons and markers.
- Paintings.
- Tall or wooden sticks.
- Transparent nylon.
- Transparent adhesive.
- Lace and seashells for decoration.
- Enthusiasm and patience.
🐋 Procedure: 🐋
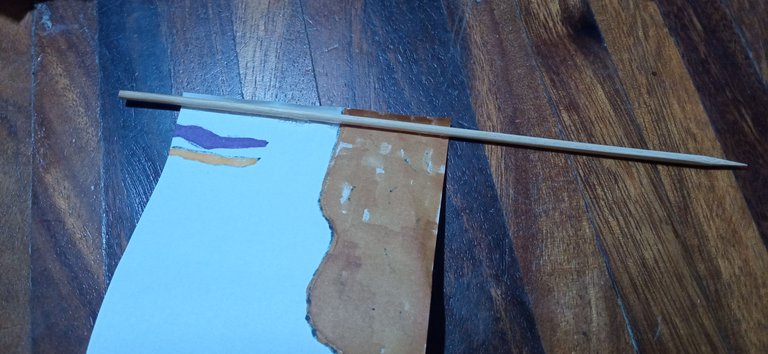
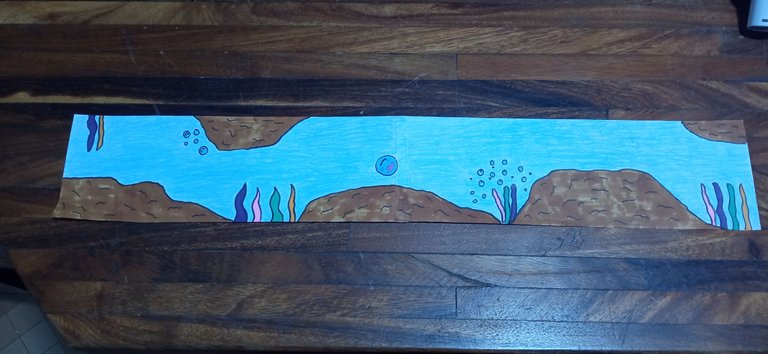
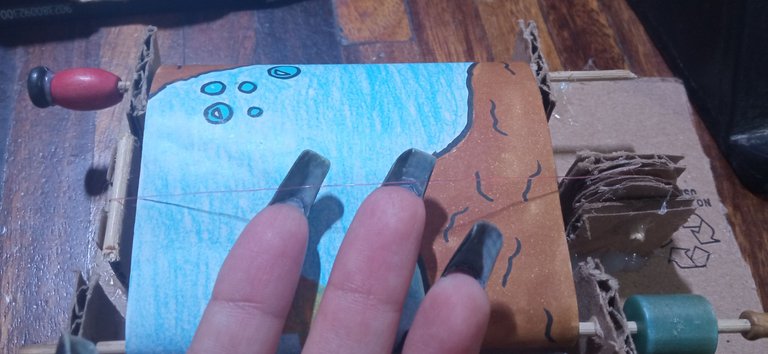
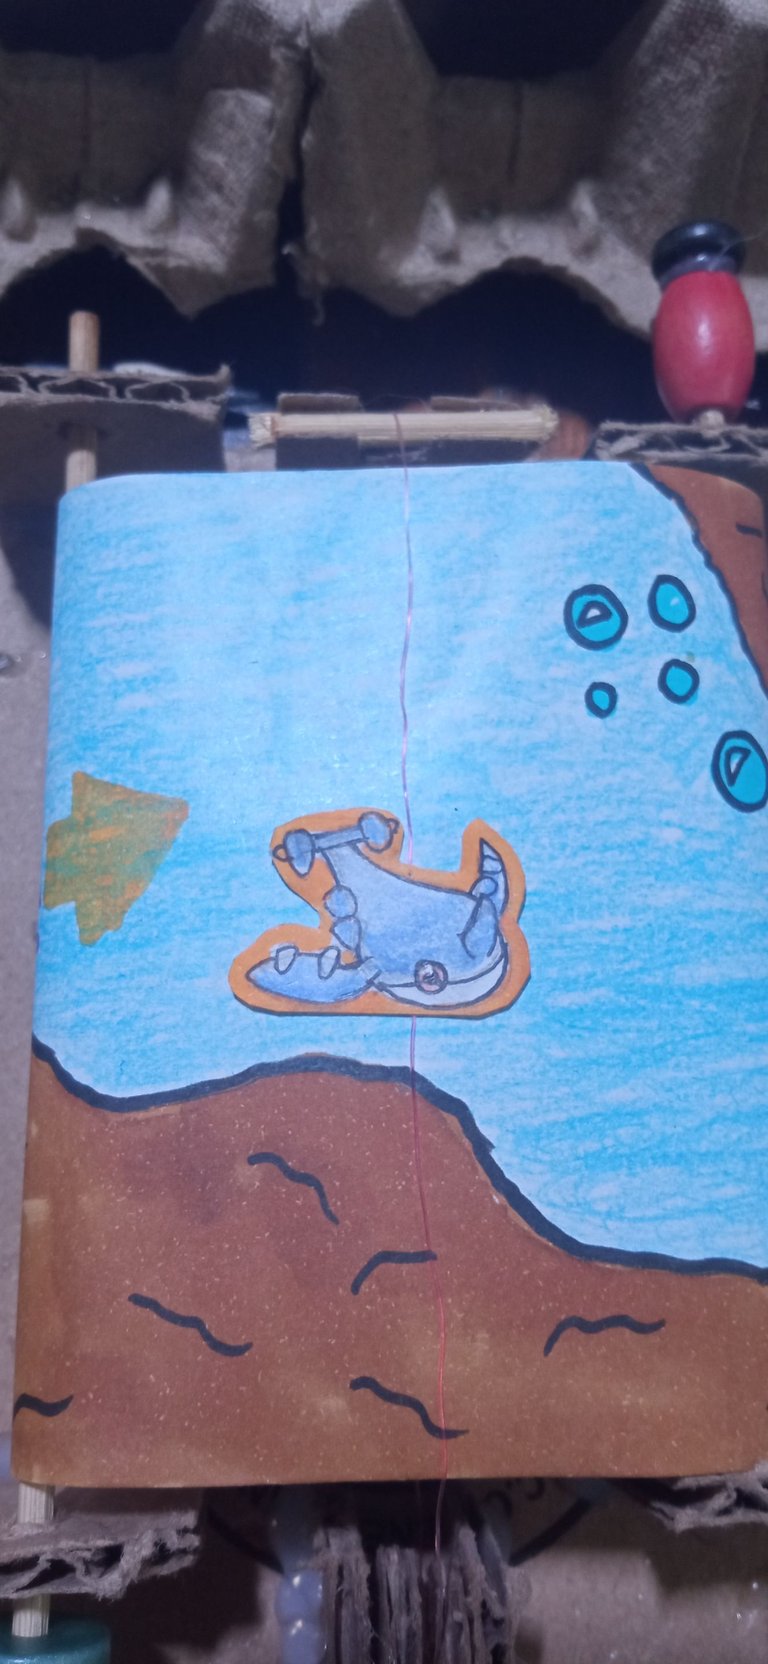
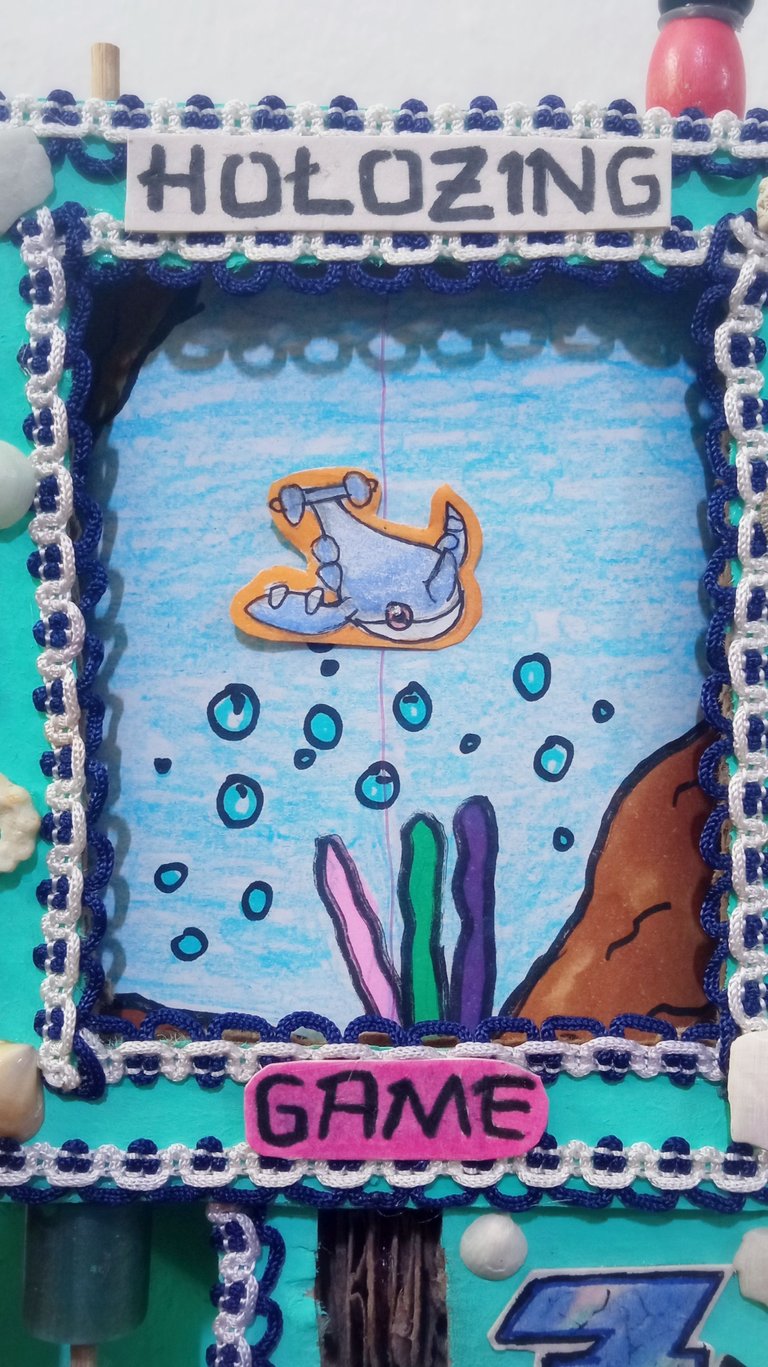
After seeing the characters and determining that I wanted to make a cardboard console, I watched a few videos on YouTube to serve as a guide. The character I chose was Water Whale, since I liked the idea of seeing the adorable whale moving through the sea. So the first thing I did was draw the scenario on a long strip of paper, which I obtained after gluing two strips with the school fees. I drew and painted the scenery (some new obstacles, I added them at the end for added difficulty).
 |  |  |
|---|
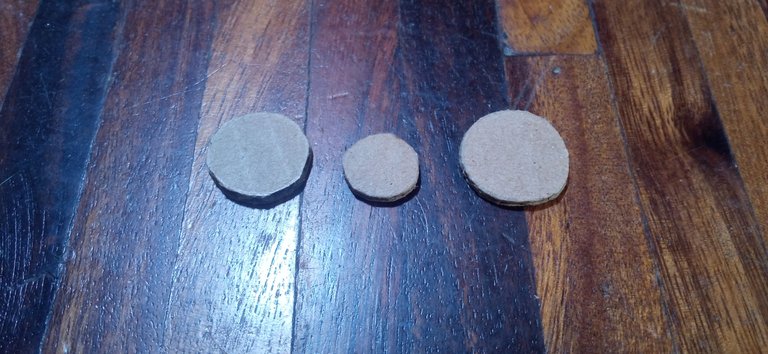
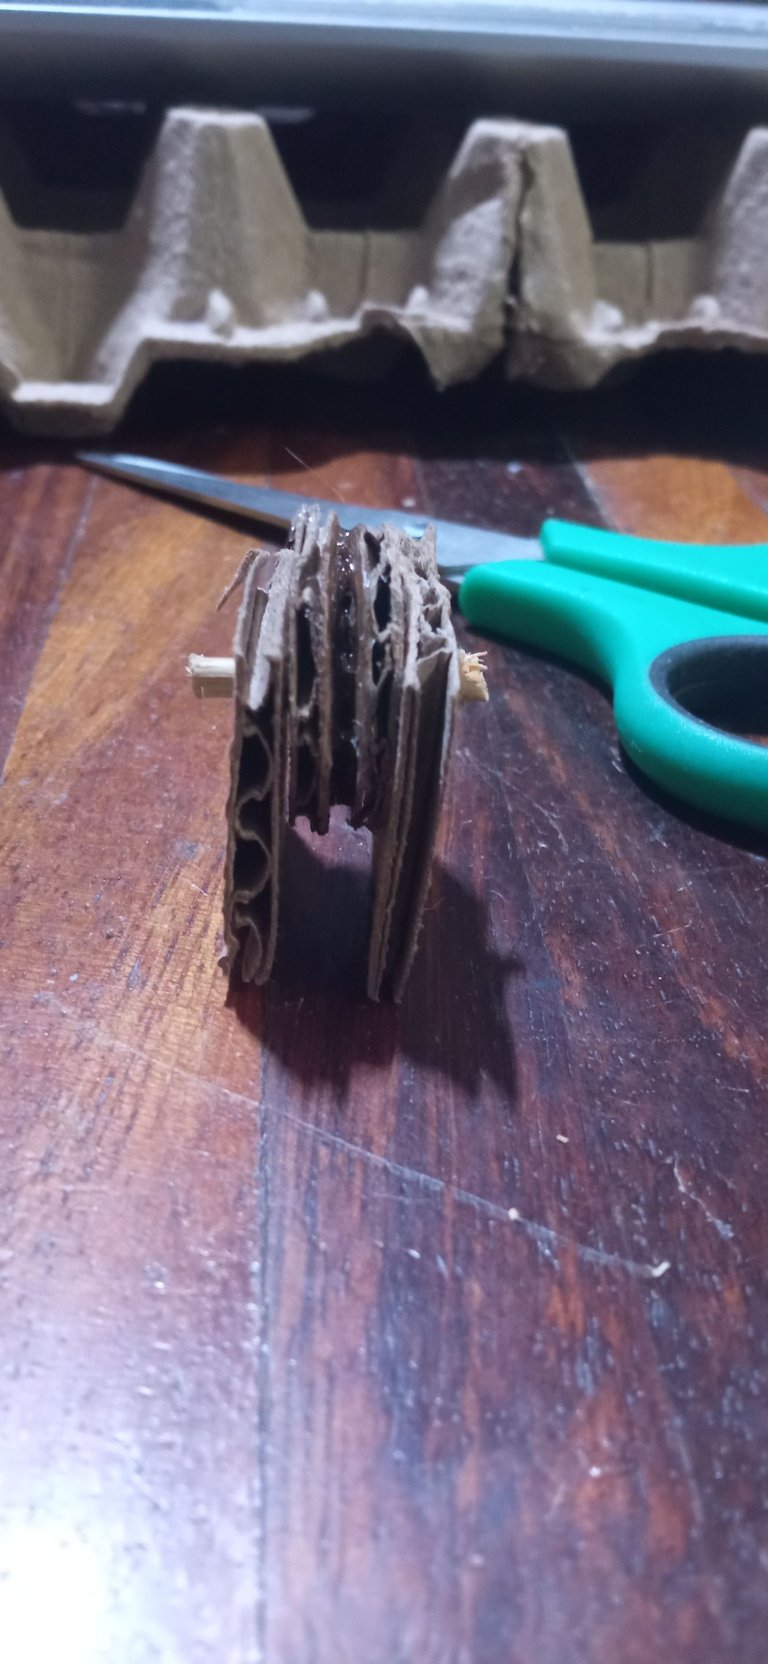
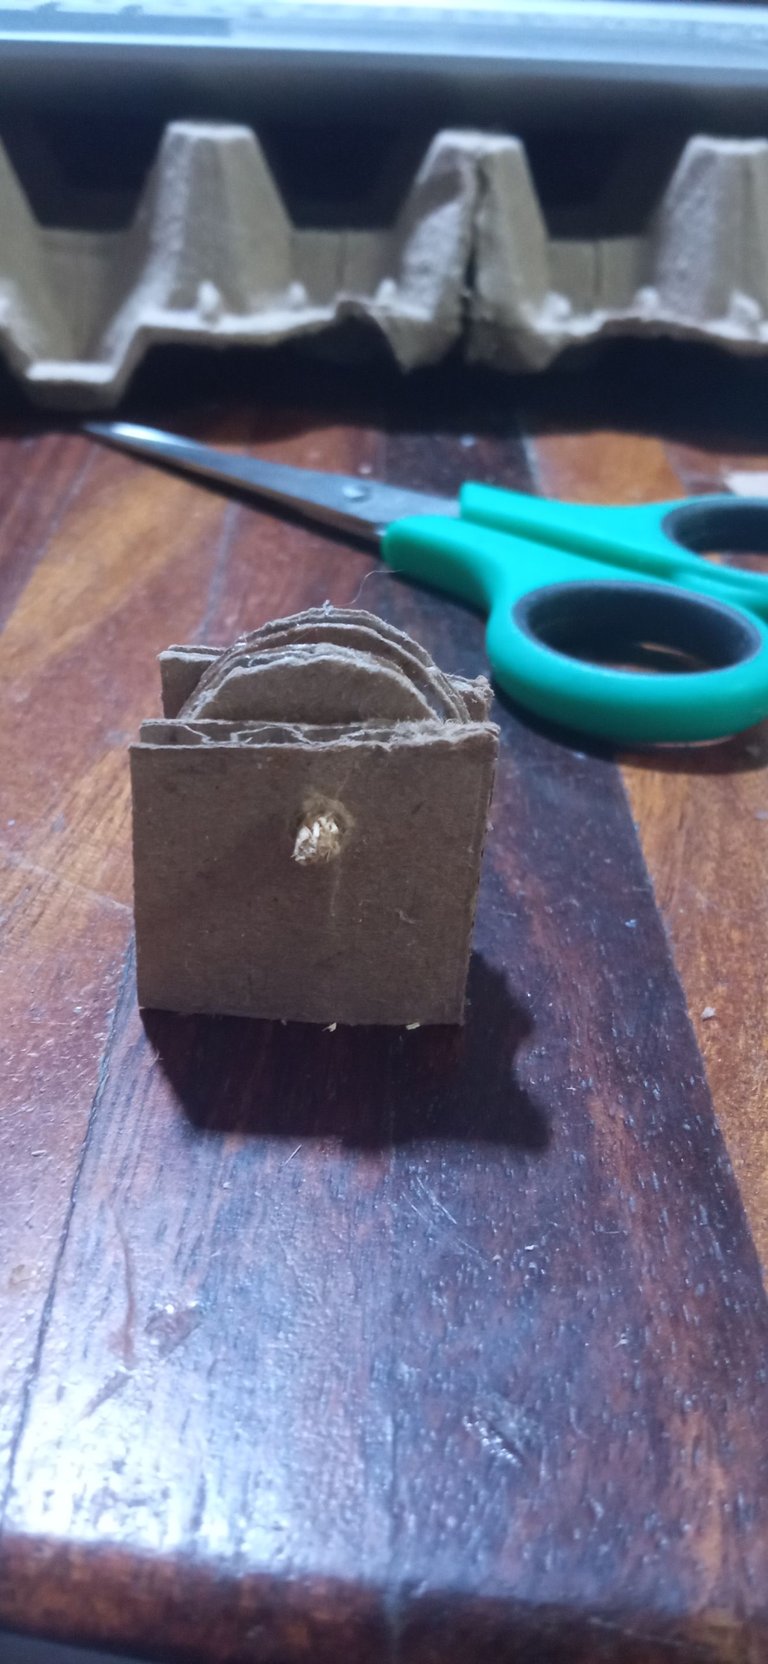
The next thing was to make a piece that would serve as a button. To do this, cut 3 cardboard circles: Two of the same size and one smaller, which would be placed in the center. I glued these circles as if they were a sandwich, gluing a cardboard rectangle to both sides. Finally, I poked a piece of wooden stick through this piece in the middle and placed some hot silicone on the ends. I tested the center circular piece to move and upon confirmation, I was able to move on to the next step.
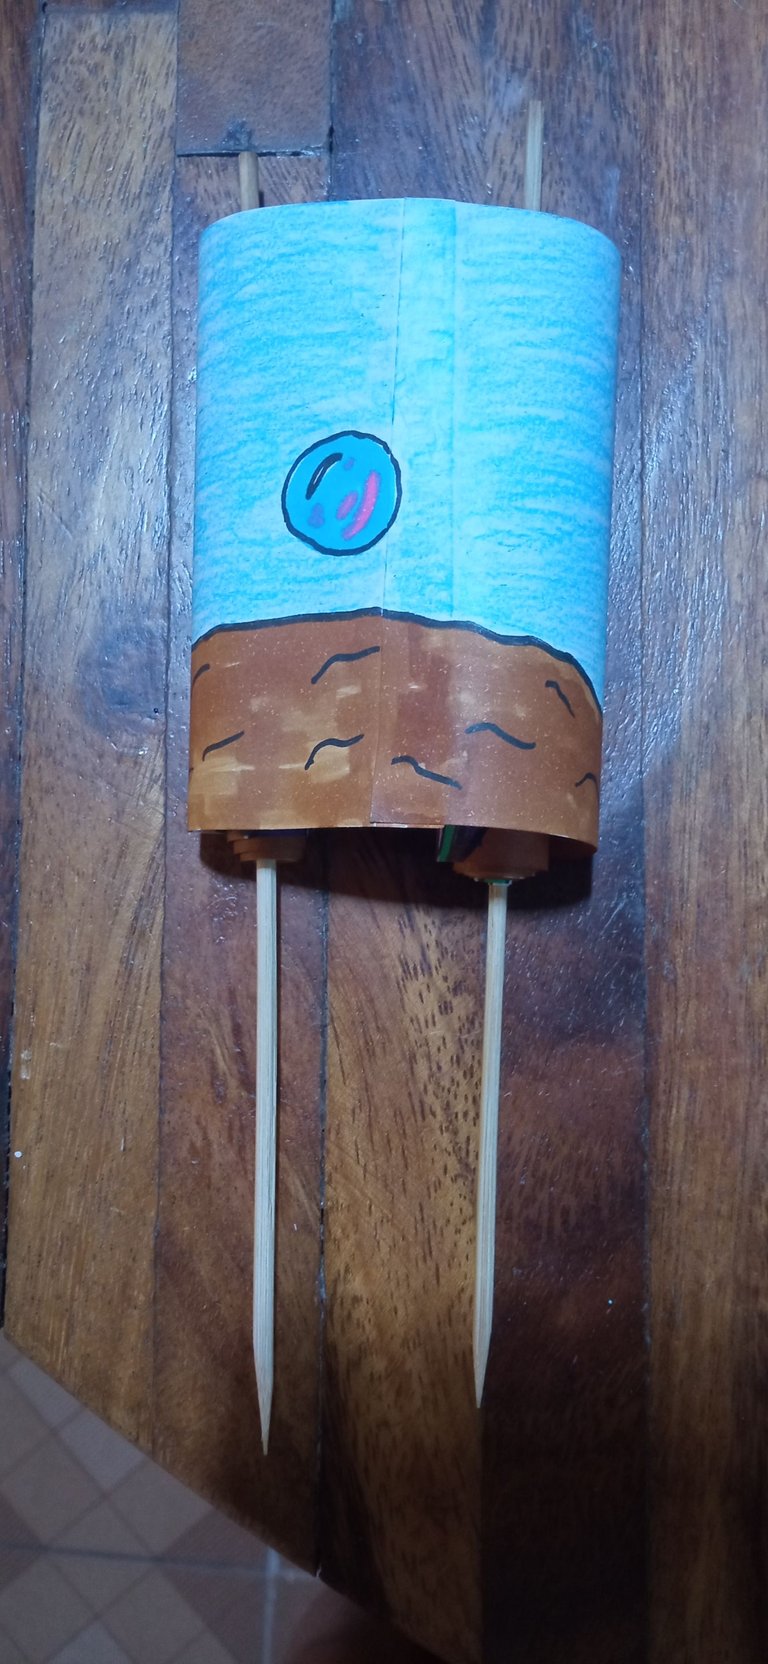
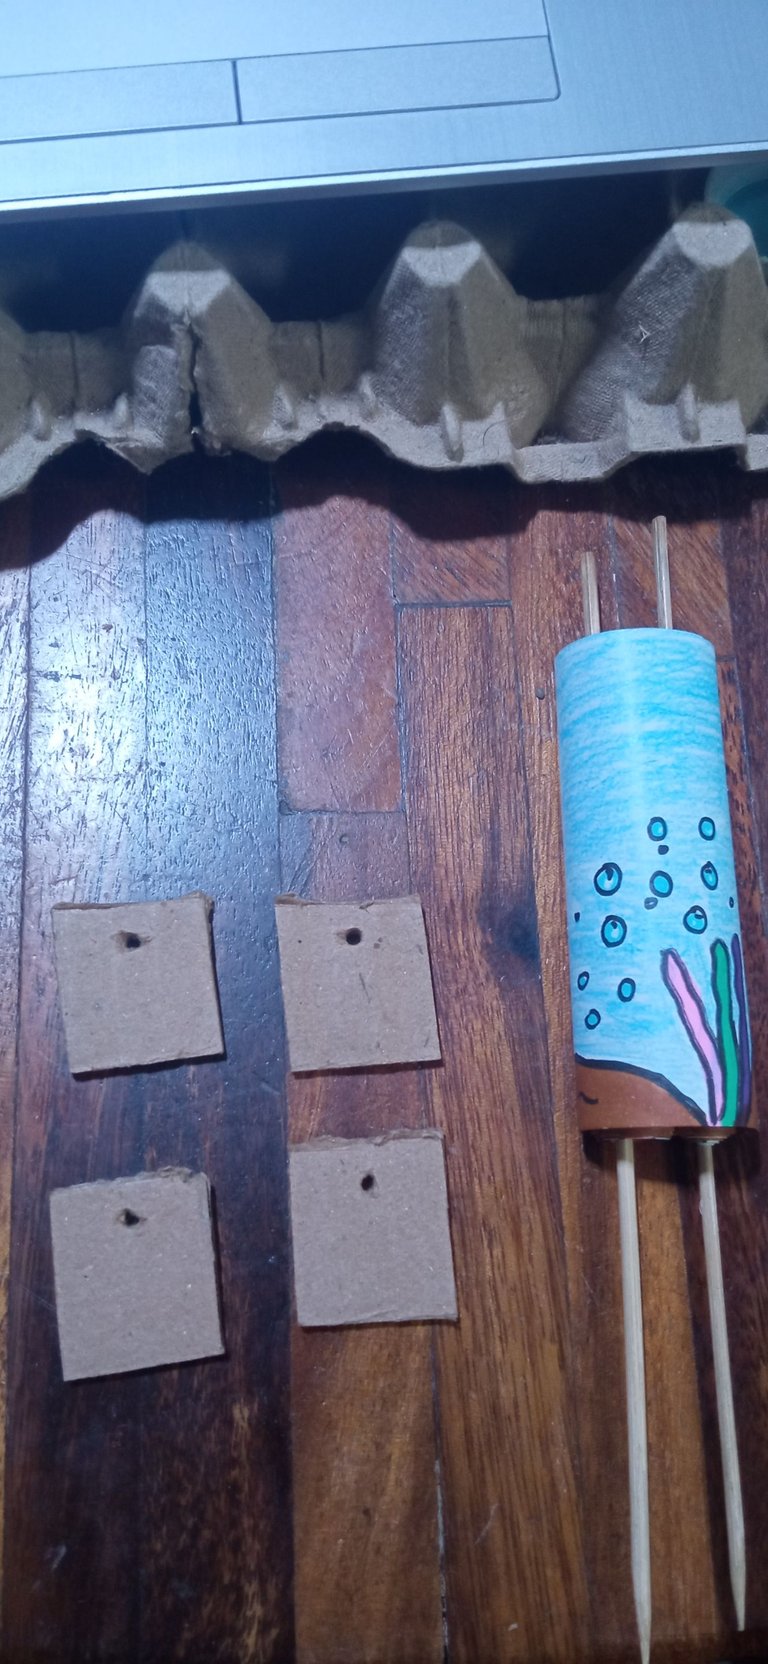
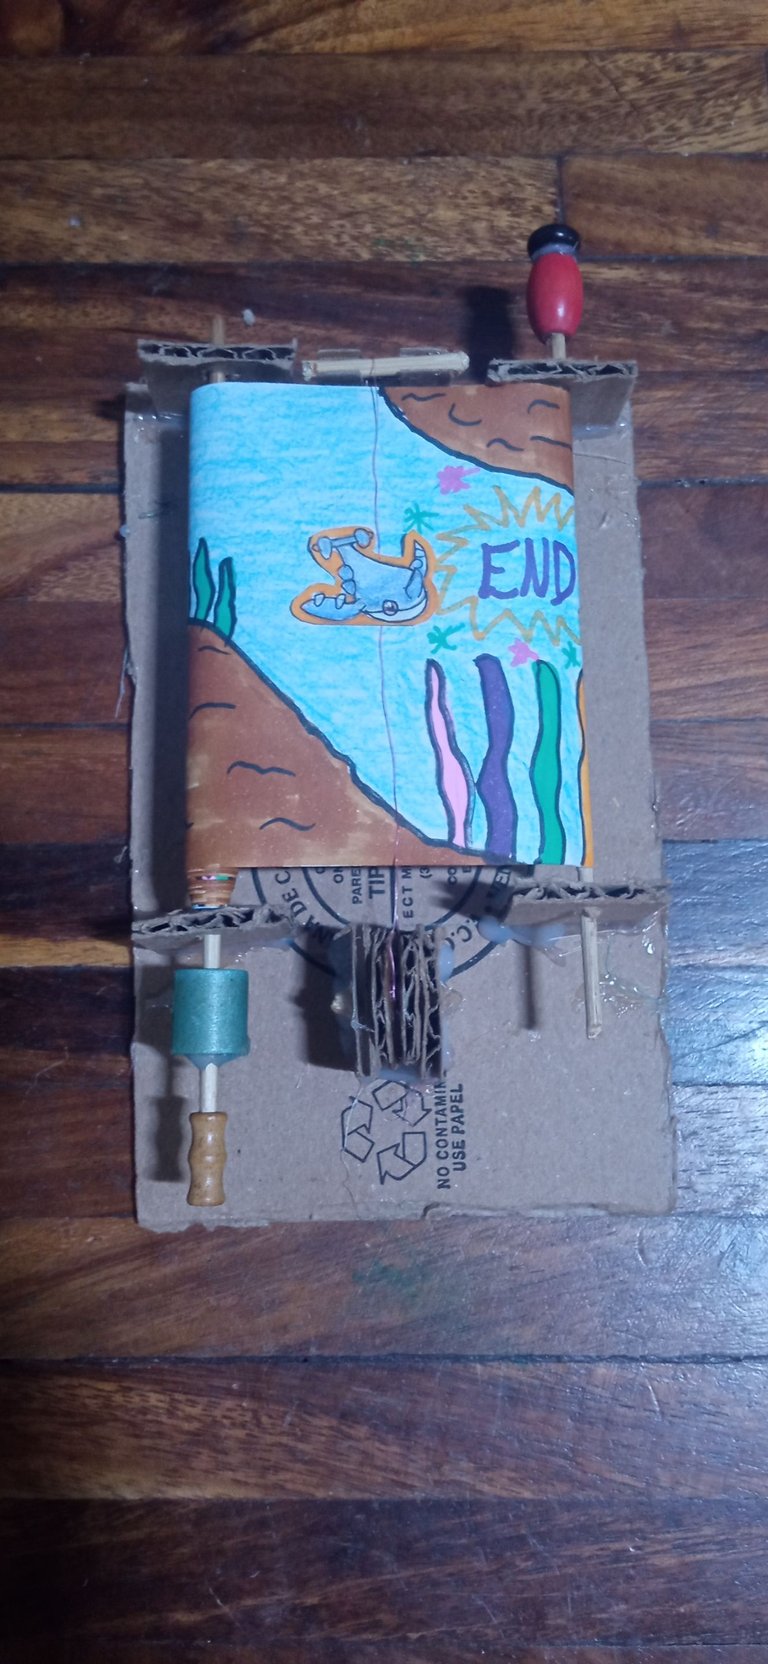
Once I had the stage ready, I glued it at both ends on a pair of tall toothpicks with cold silicone. This way, you could unroll and roll up the scene. I then cut four cardboard rectangles, which would go on the top and bottom of the toothpicks.
 |  |  |
|---|
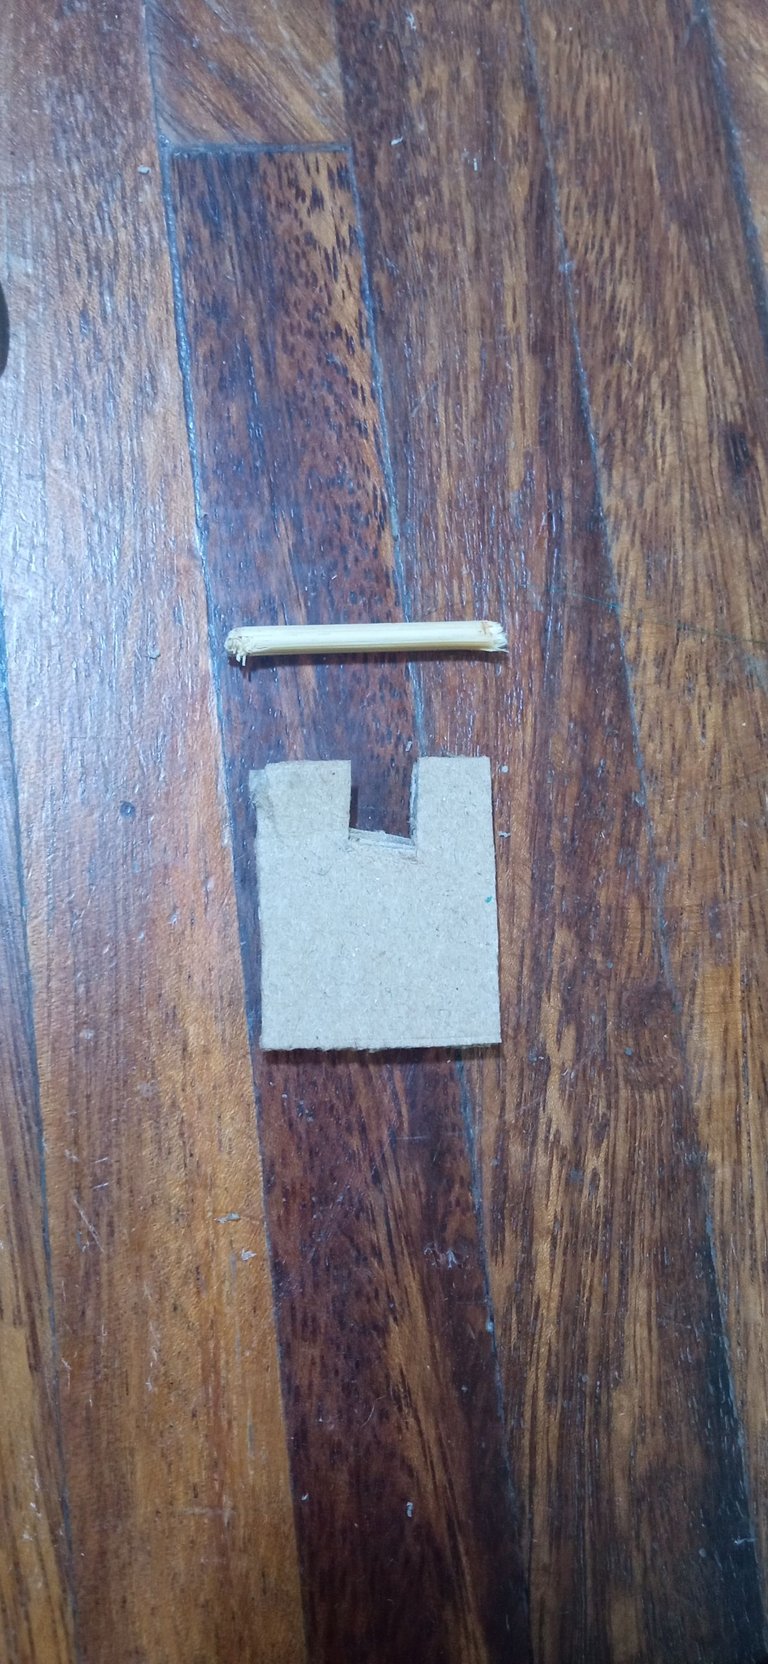
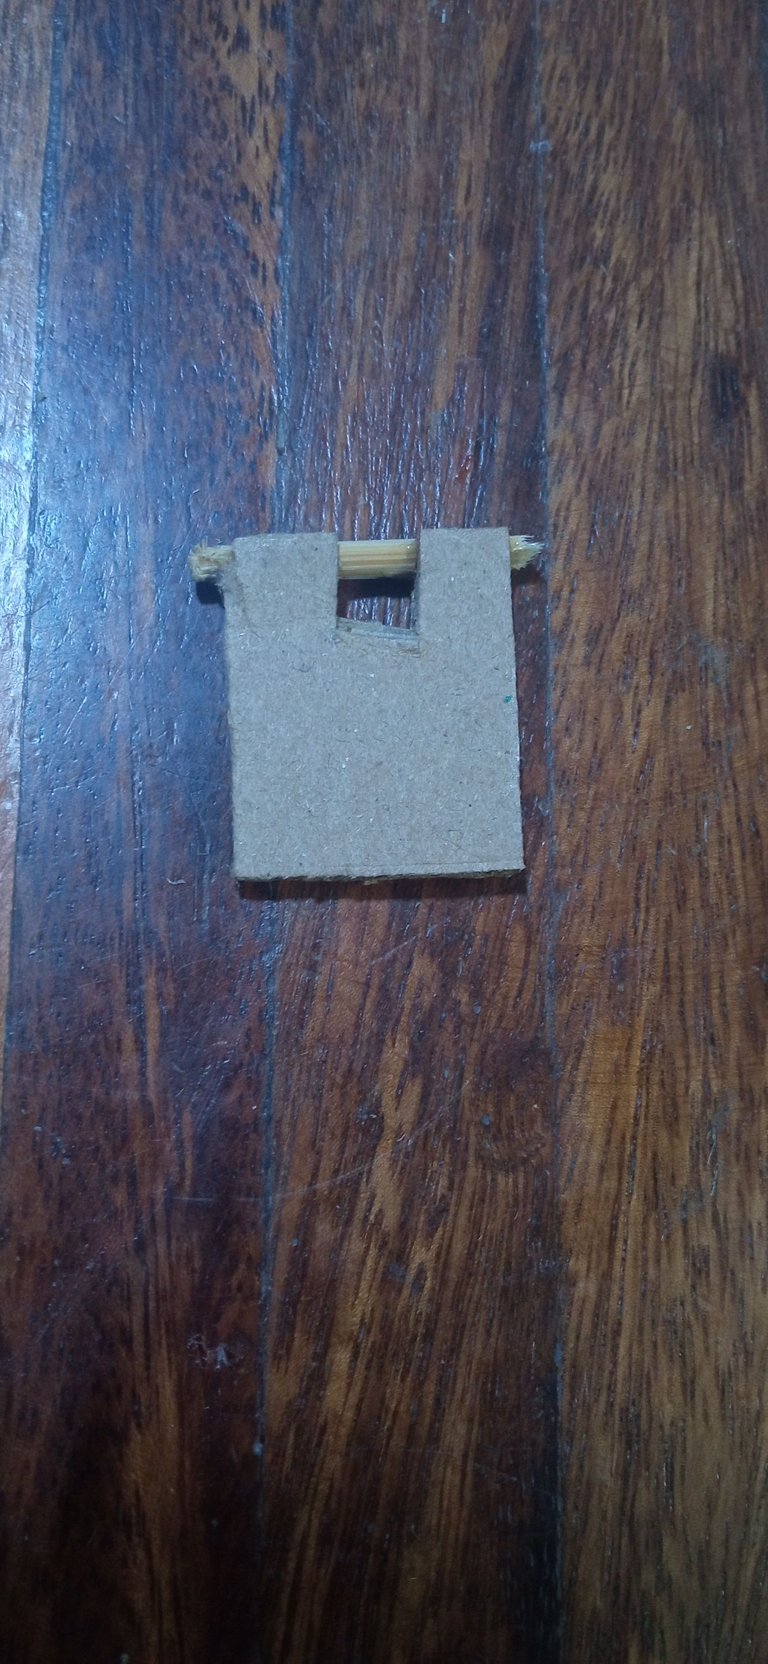
The next piece to make was a rectangle with a small opening, to which I glued a piece of wooden toothpick on the top.
 |  |
|---|
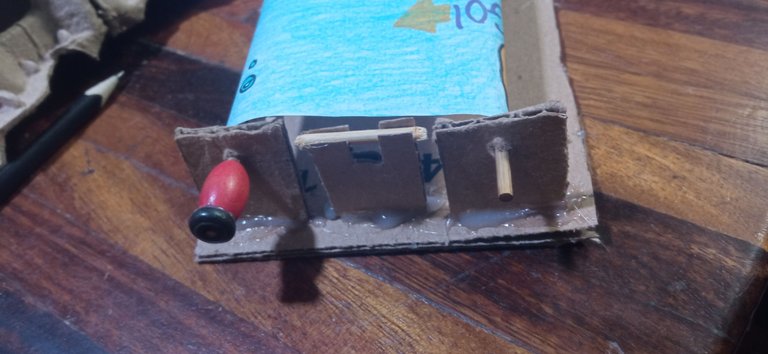
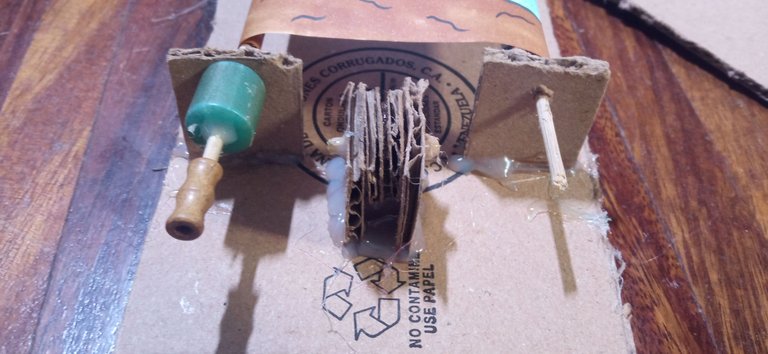
Next, I cut two rectangles for the front and rear covers of the console. On the back, I then glued the pieces as seen in the photographs. I used hot silicone, since it dries quickly, I placed quite a bit on the bases of each piece to verify that they were well adhered. For the toothpick located at the bottom left, I placed a jewelry stone that happened to fit the wooden toothpick. This stone would be the one that would allow the stage to be moved more easily. I did the same with the upper part of the wooden stick on the right side, since this would serve to roll the stage in that direction.
 |  |
|---|---|
| Console top | Bottom of console |
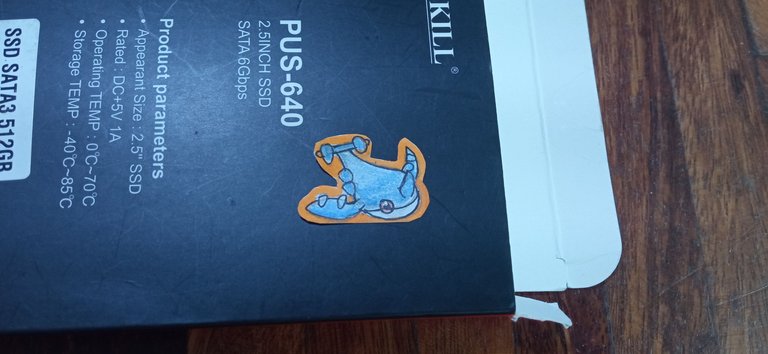
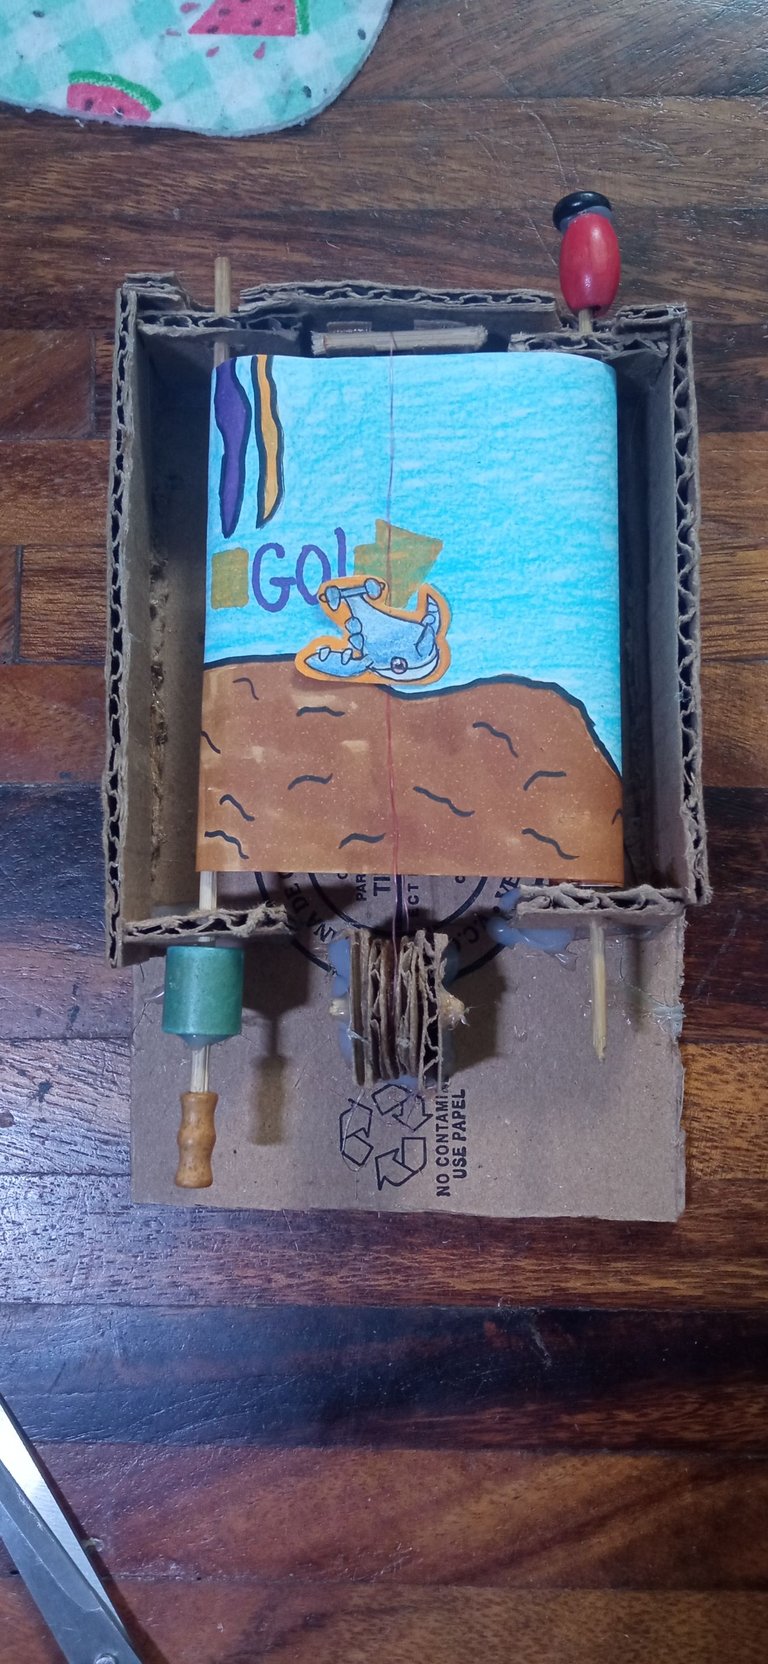
To make the character, I drew him on a small piece of paper. Then, I placed nylon from the top of the piece that has an opening with a toothpick, passing it under and above the rotating button that was made with the cardboard circumferences, making a small knot. If we did it properly, moving the "button" will make the nylon go up and down. With a small piece of transparent adhesive, I stuck the cutout of the character only on the Nylon, so that it would move next to it. In my case, I didn't have transparent nylon, but it is the most ideal so that it is as little noticeable as possible 😓
 |  |
|---|
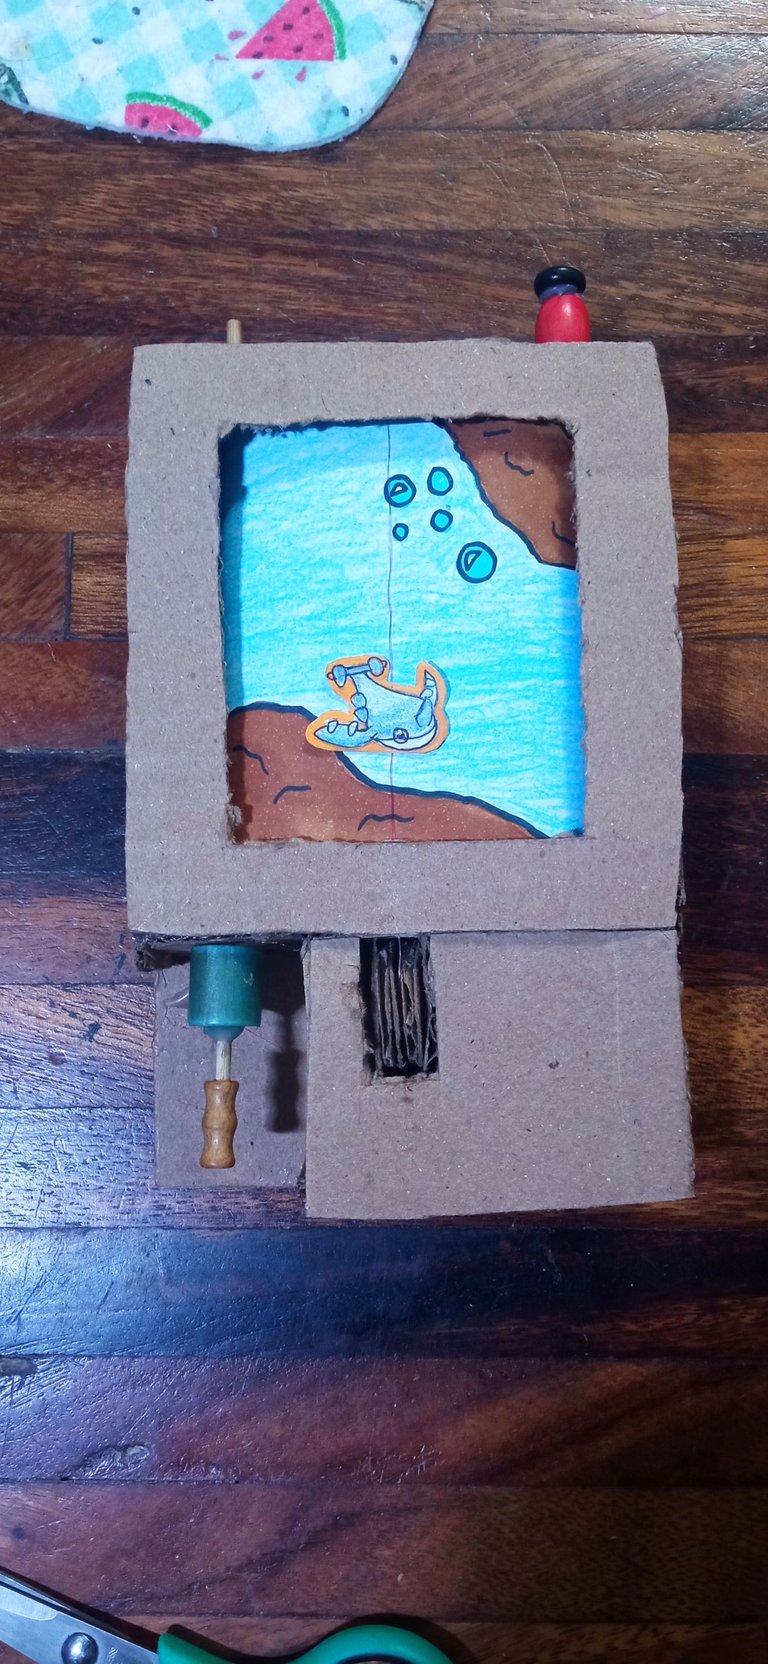
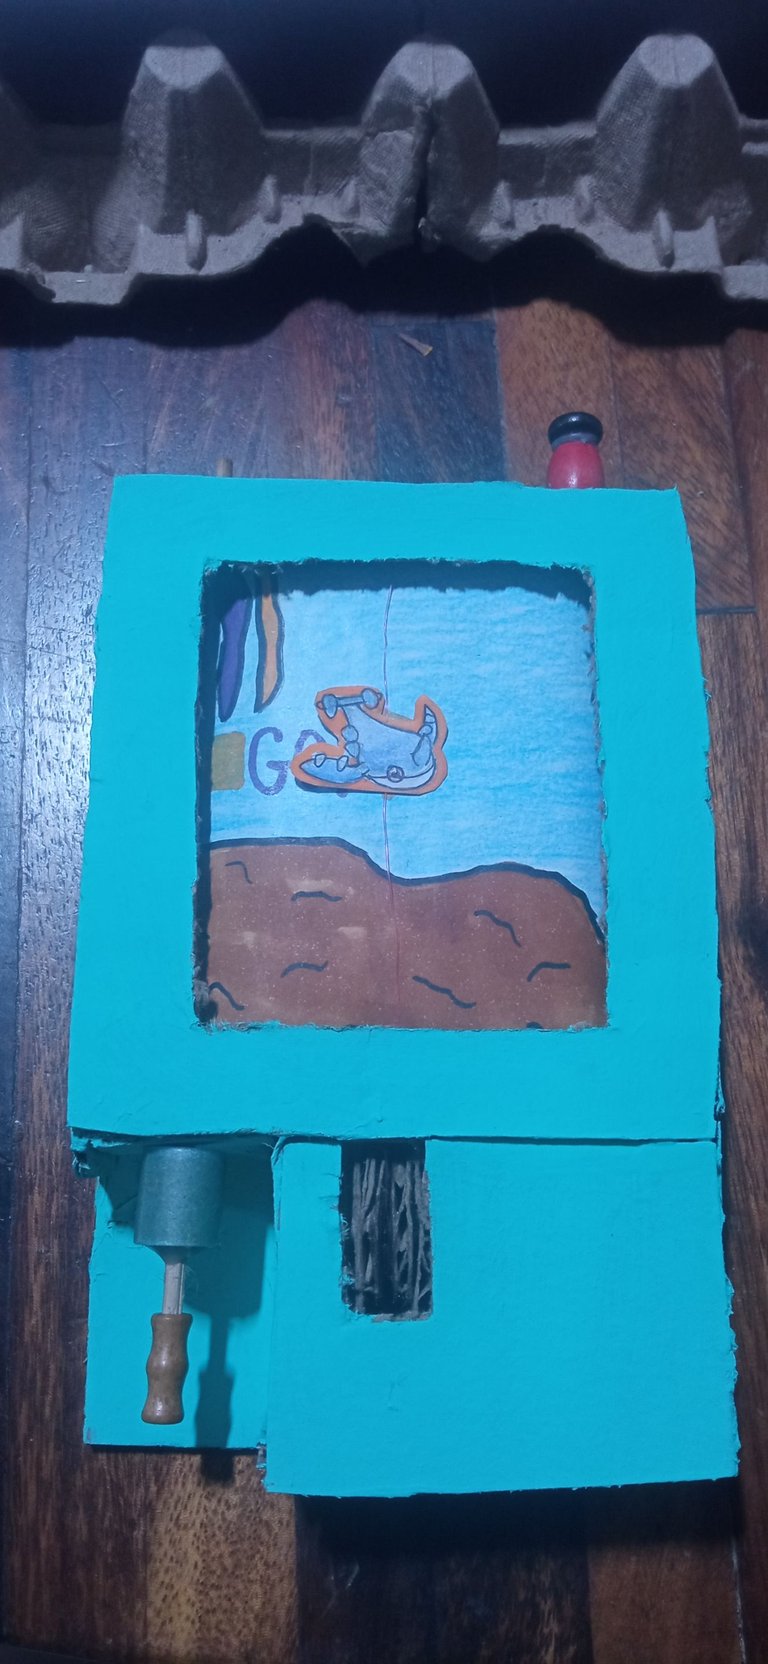
The next thing was to start covering the console mechanism with cardboard, cutting the pieces of the appropriate size so that everything was covered, but at the same time, functional; gluing it with hot silicone. On the front cover, I made a cut in the center, so that the entire game could be seen through it. It is necessary to note that the size of the sides of the console must allow the game mechanism to work. If it is done too tight, the nylon could get stuck, so you have to check at all times that there is enough space for it to function properly.
 |  |  |
|---|
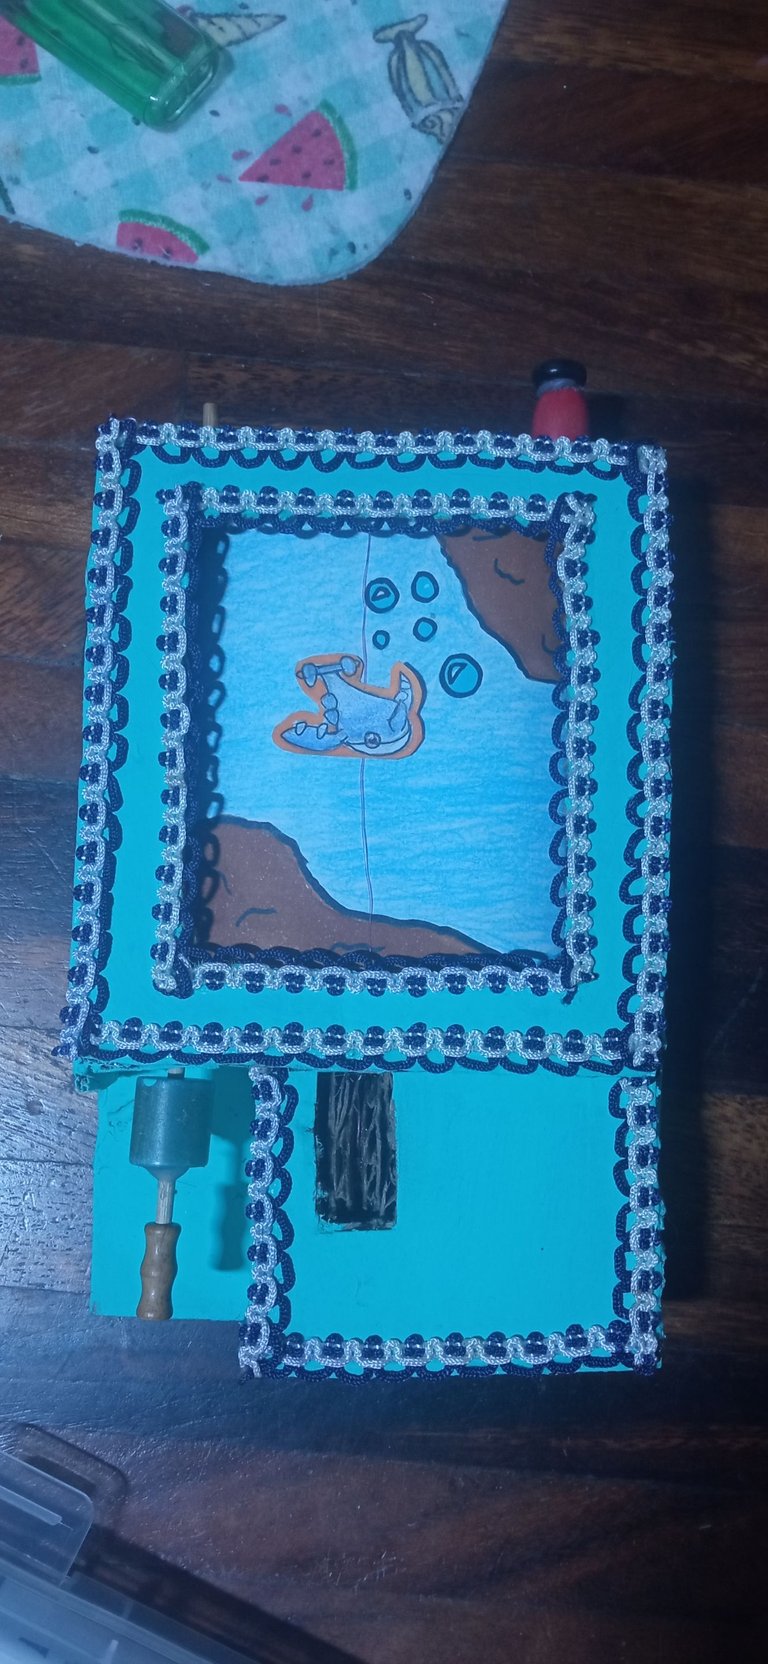
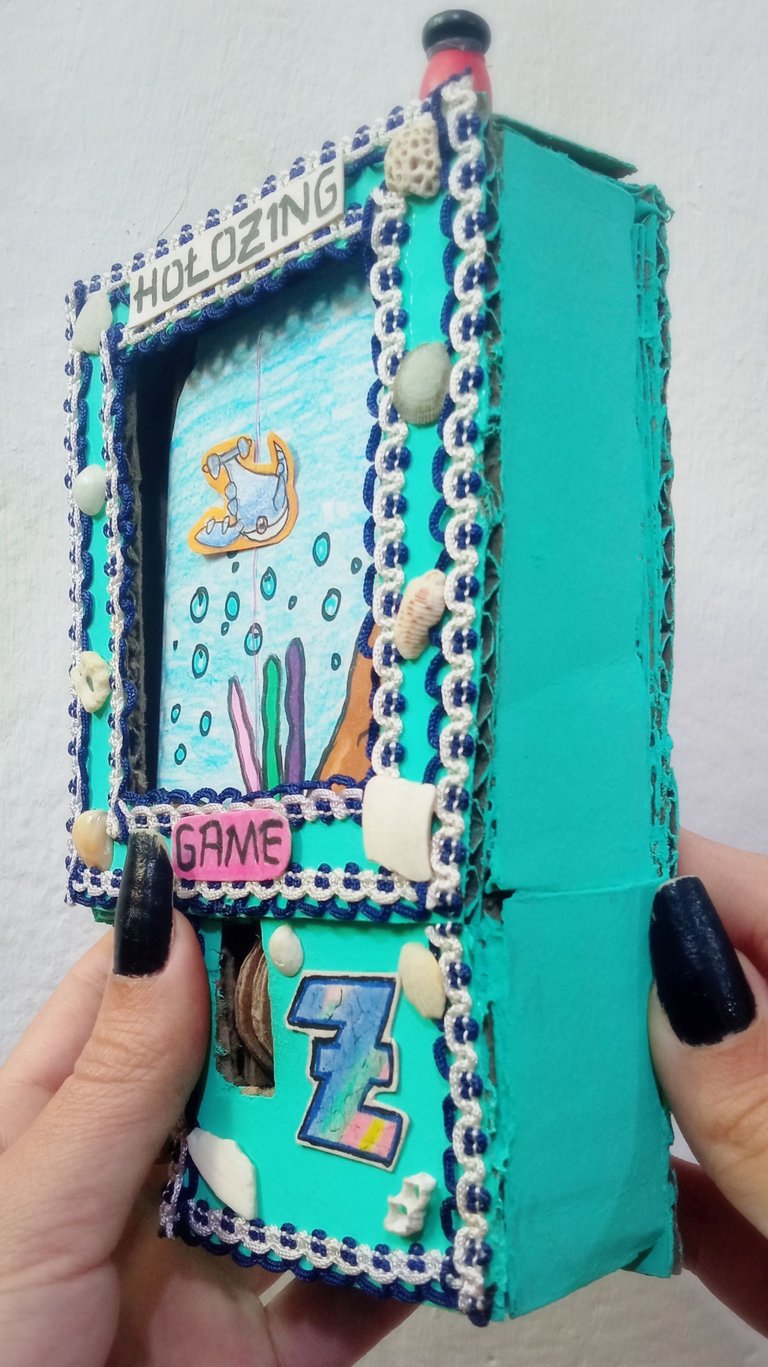
Once it was ready, the next step was decorating. To do this, first I painted the console casing with cold turquoise paint, so that it would match and because I like that color hehe. Then, I used a kind of lace ribbon that I had to place on the edges and give it a more aesthetic detail. . I glued it little by little with the cold silicone. I really liked thinking about this decoration, because I think it stopped looking "rustic" hehe.
 |  |
|---|
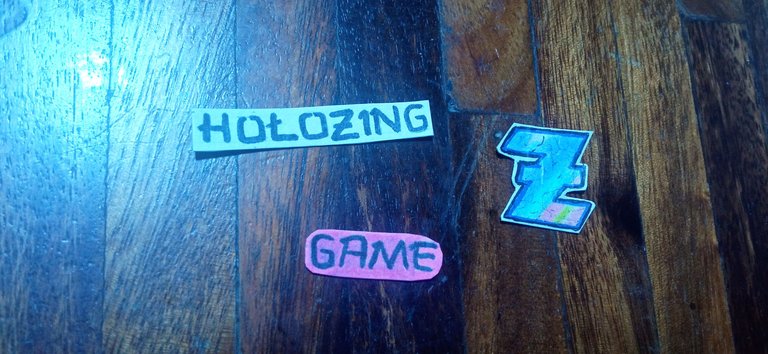
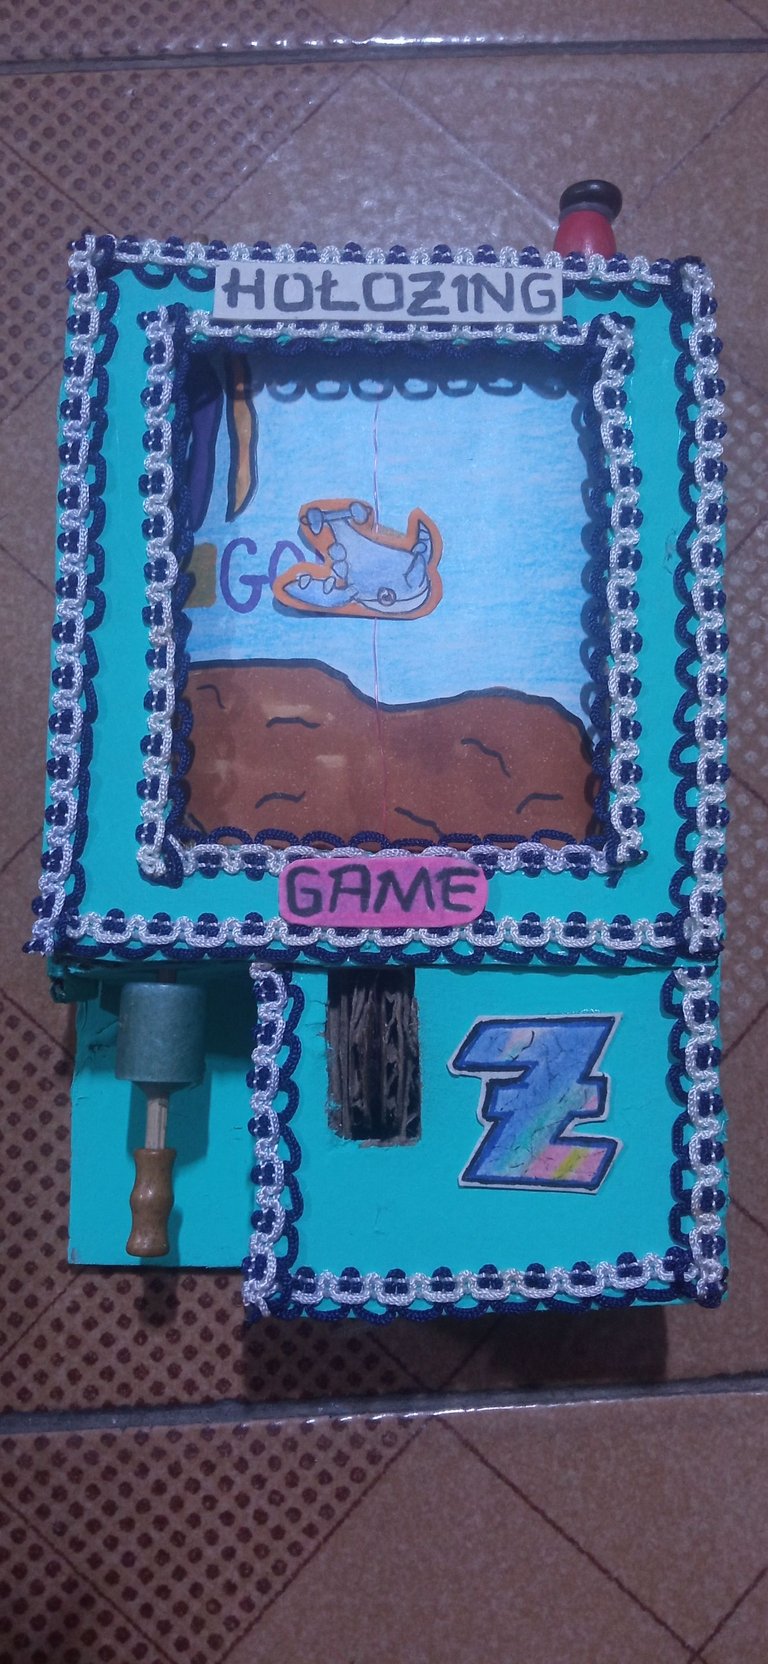
With some paper I drew the Holozing logo and other pieces for more decoration and glued them with cold silicone.
 |  |
|---|
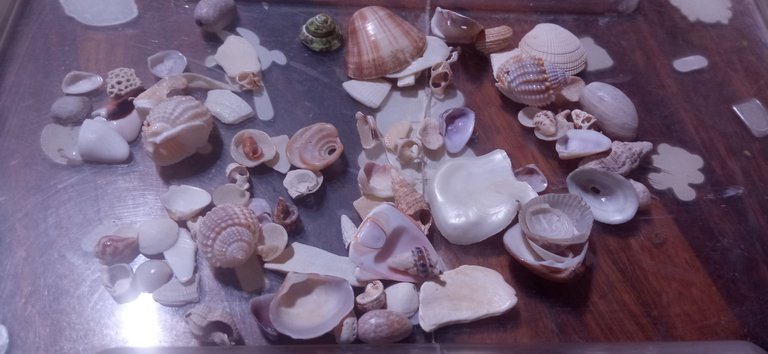
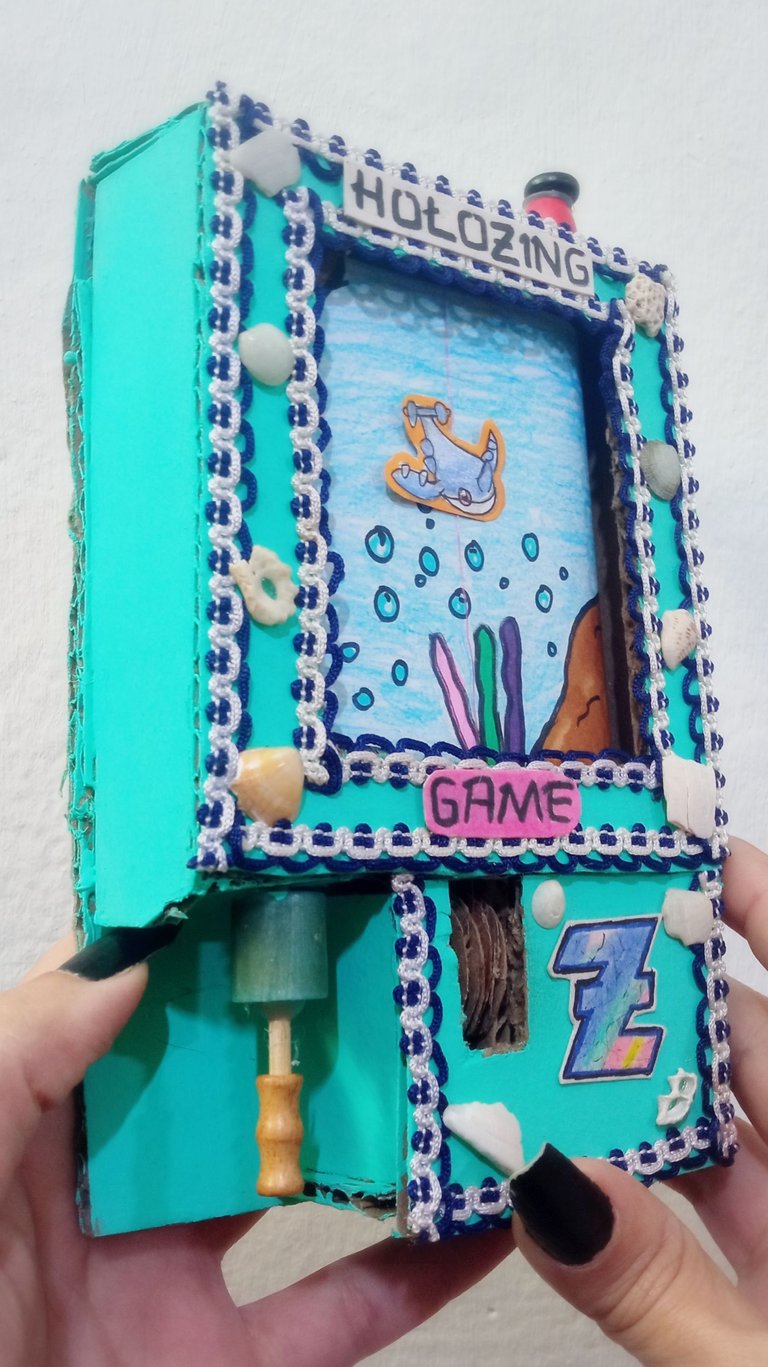
But the decoration detail that I liked the most was some sea shells that I had among my craft materials. I chose some and glued them with cold silicone.
 |  |
|---|
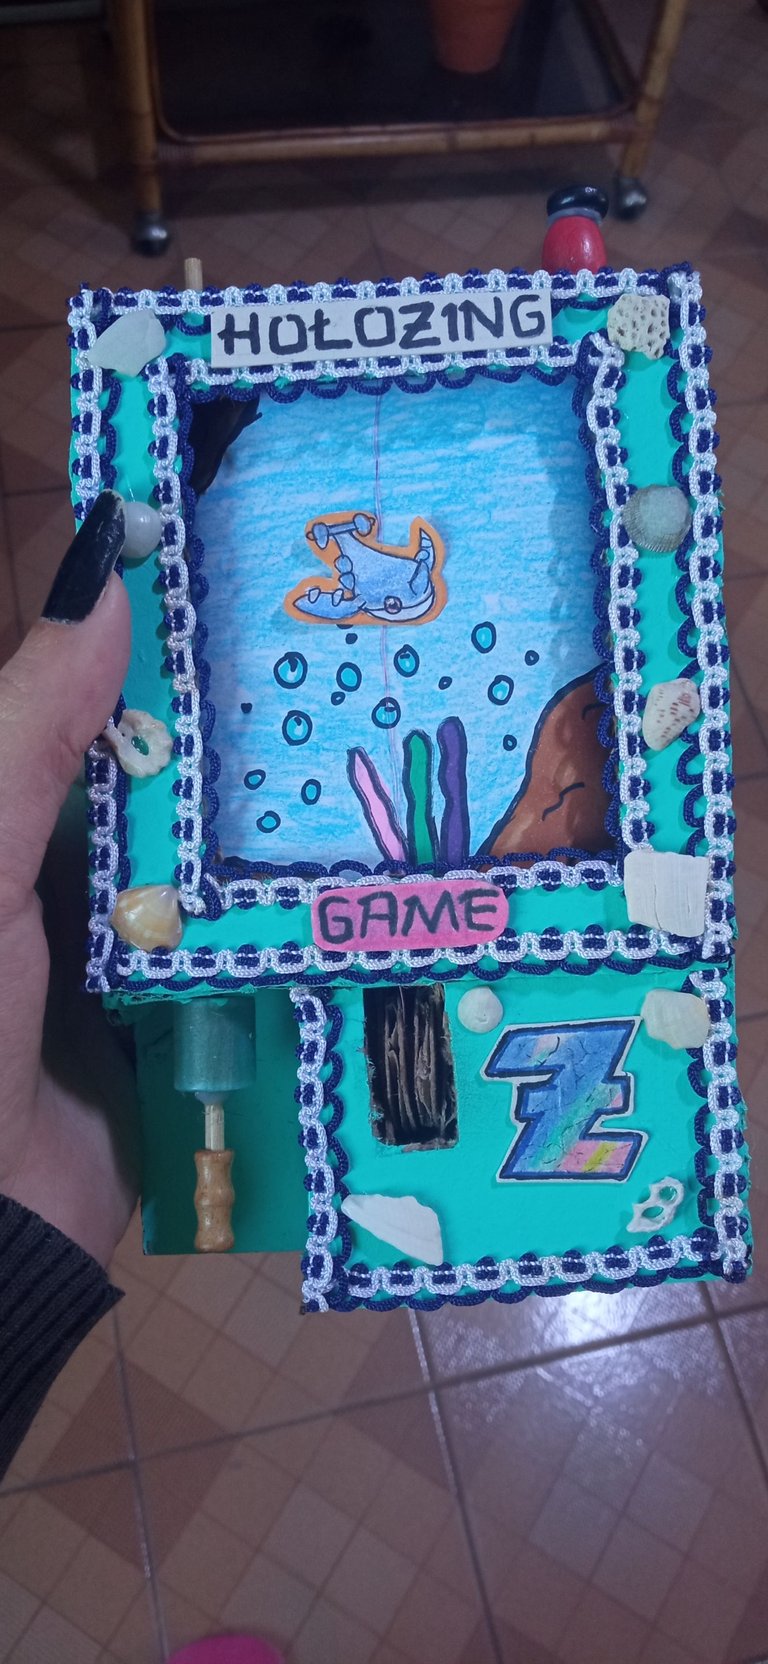
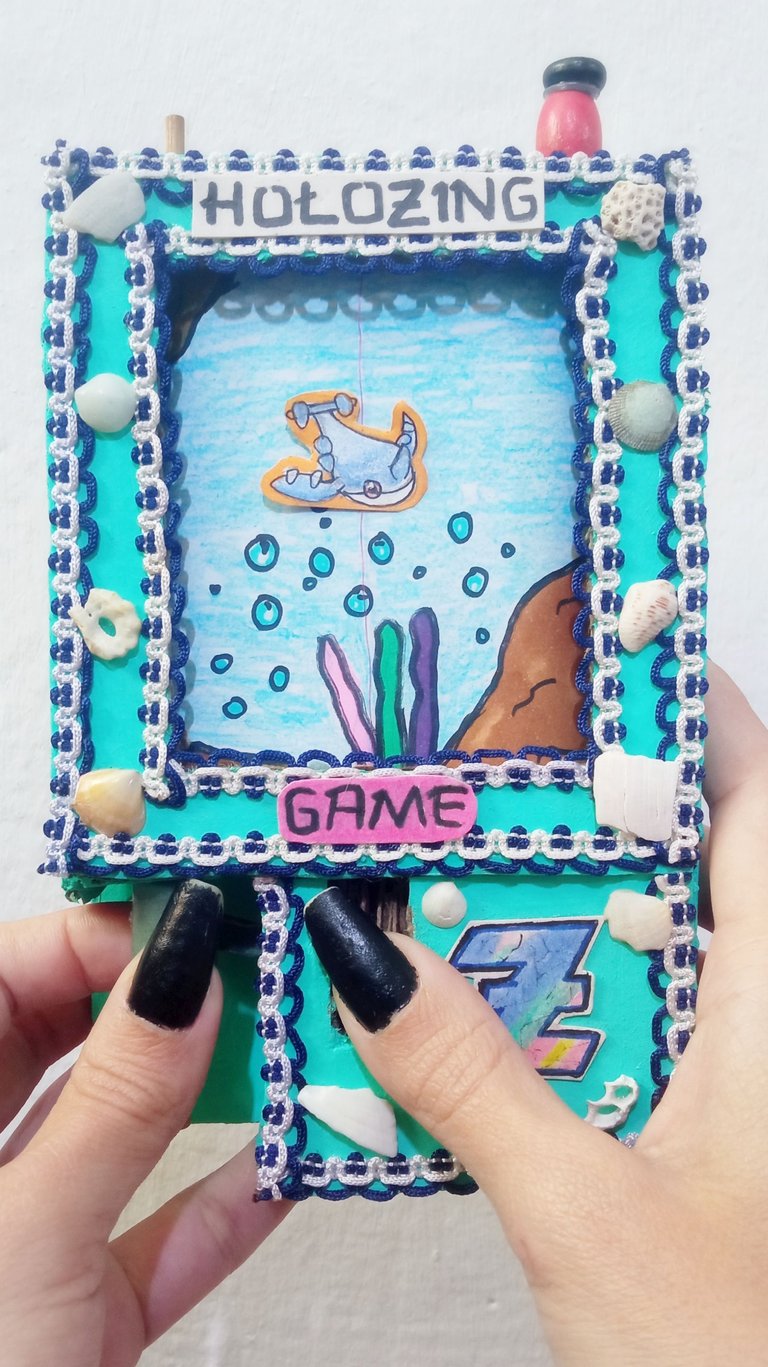
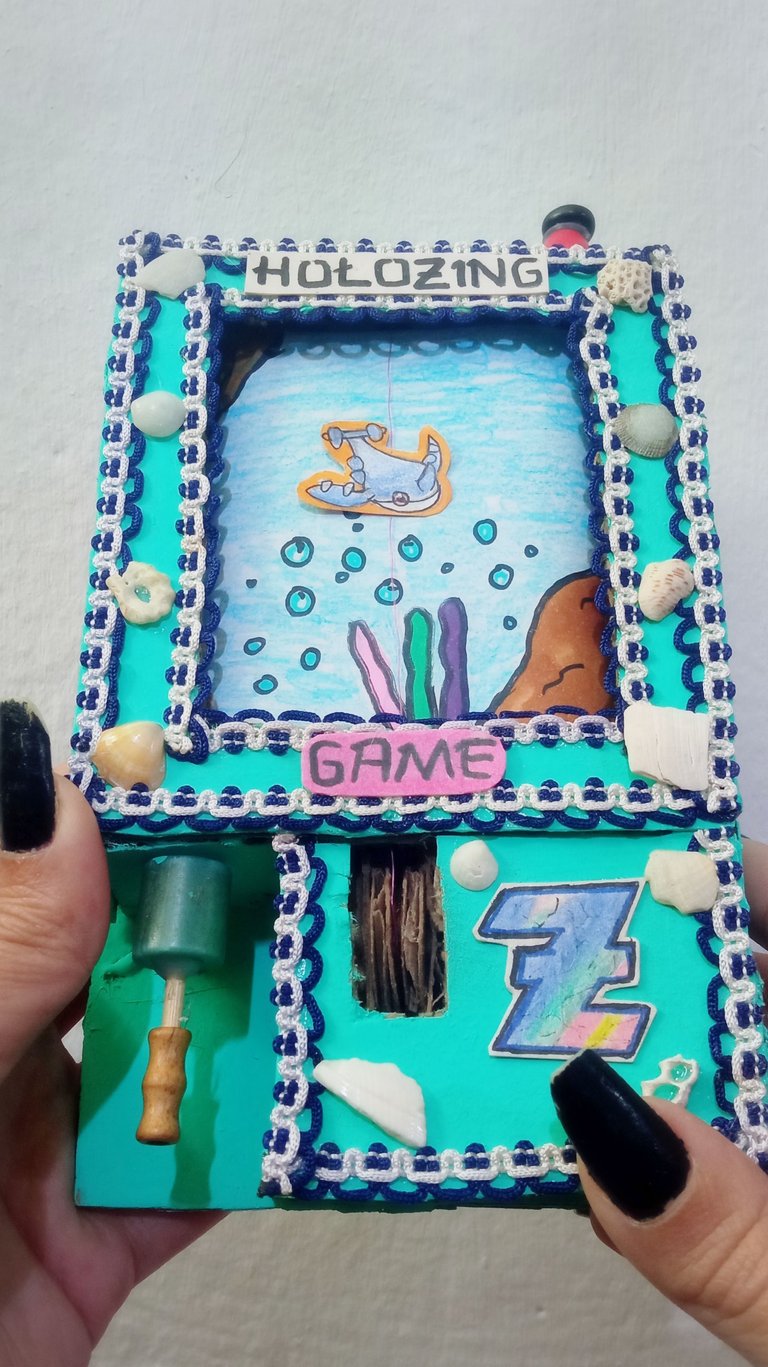
Thus, the cardboard game console was ready. It was a pretty fun project to do, even though I didn't work with measurements as such, but rather I did everything by eye, I was motivated to be able to see the finished work and I was quite satisfied with the result.
 |  |
|---|
 |  |  |
|---|
In the following video you can see how it actually works 😁
Thank you very much for visiting my publication. I hope you found it interesting.
Until next time!

CONTENIDO EN ESPAÑOL
¡Hola a todos los amantes de los juegos y de las manualidades! Hace un tiempo, mi amiga y talentosa artista @yetsimar me comentó acerca de la existencia de Holozing. Luego de haber visto los hermosos fanarts que ella ha realizado, me aventuré a echarle un vistazo a la comunidad y así, encontrarme no sólo con los encantadores diseños de los personajes que hay disponibles, sino con los creativos trabajos artísticos que han elaborado los demás Hivers.
Como era de esperarse, me quise sumar y elaborar algo creativo para alentar a los desarrolladores de éste juego, así que elaboré una consola hecha de cartón, que es totalmente funcional. A continuación, les mostraré cómo fue el proceso de elaboración de la misma.
🐋 Materiales 🐋
Los materiales que utilicé, fueron básicamente cosas que tenía a disposición, los cuales fueron.
- Cartón (lo obtuve de diferentes cajas)
- Silicón en barra y silicón frío.
- Pegamento blanco escolar.
- Holas blancas.
- Crayones de colores y marcadores.
- Pinturas.
- Palitos de altura o de madera.
- Nylon transparente.
- Adhesivo transparente.
- Encaje y conchas marinas para la decoración.
- Entusiasmo y paciencia.
🐋 Procedimiento: 🐋
Luego de ver los personajes y de determinar que quería realizar una consola de cartón, vi unos cuantos videos por Youtube que me sirviesen de guía. El personaje que escogí fue Water Whale, ya que me parecía la idea de ver a la adorable ballena movilizándose por el mar. Así que lo primero que hice, fue dibujar el escenario en una tira larga de papel, la cual obtuve luego de pegar dos tiras con el pagamento escolar. Dibuje y pinté el escenario (algunos obstáculos nuevos, los agregué al final para mayor dificultad).
Al ya tener el escenario listo, pegué el mismo en ambos extremos en un par de palillos de altura con silicón frío. De ésta forma, podría desenrollar y enrollar, la escena. Corté entonces, cuatro rectángulos de cartón, los cuales irían en la parte superior e inferior de los palillos.
| | |
|---|
Lo siguiente, fue elaborar una pieza que serviría de botón. Para ello corte 3 círculos de cartón: Dos del mismo tamaño y uno más pequeño, el cual se colocaría en el centro. Pegué estos círculos como si fuese un sándwich, pegándole a ambos laterales, un rectángulo de cartón. Finalmente, atravesé esta pieza en el medio con un pedazo de palito de madera y coloqué algo de silicón caliente en los extremos. Probé que la pieza circular del centro se movilizara y al confirmarlo, pude seguir con el siguiente paso.
| | |
|---|
La siguiente pieza a elaborar, fue un rectángulo con una pequeña abertura, al cual le pegué en la parte superior, un pedacito de palillo de madera.
| |
|---|
Acto seguido, corté dos rectángulos para las tapas delantera y trasera de la consola. En la parte trasera, pegué entonces las piezas como se ve en las fotografías. Utilicé silicón caliente, dado que es de secado rápido, coloque bastante cantidad en las bases de cada pieza para verificar que estuvieran bien adheridas. Para el palillo ubicado en la parte inferior izquierda, coloqué una piedra de bisutería que casualmente calzó con el palillo de madera. Esta piedra, sería la que permitiría mover con más facilidad el escenario. Hice lo mismo con la parte superior del palillo de madera del lado derecho, dado que éste, serviría para enrollar el escenario en esa dirección.
| |
|---|---|
| Parte superior de la consola | Parte inferior de la consola |
Para realizar al personaje, lo dibujé en un pedacito de papel. Luego, coloqué nylon desde la parte superior de la pieza que tiene una abertura con un palillo, pasándola por debajo y arriba del botón rotatorio que se realizó con las circunferencias de cartón, realizando un pequeño nudo. Si lo hicimos adecuadamente, al mover el "botón", el nylon subirá y bajará. Con un pedacito de adhesivo transparente, pegué el recorte del personaje únicamente en el Nylon, para que se moviese junto al mismo. En mi caso, no tenía nylon transparente, pero es el más ideal para que se note lo menos posible 😓
| |
|---|
Lo siguiente, fue comenzar a cubrir el mecanismo de la consola con el cartón, cortando las piezas del tamaño adecuado para que todo quedase cubierto, pero a la vez, funcional; pegándolo con silicón caliente. A la tapa delantera, le realicé un corte en el centro, para que se viese a través del mismo, todo el juego. Es necesario acotar que el tamaño de los laterales de la consola, debe permitir que el mecanismo del juego, funcione. Si se hace muy justo, el nylon podía quedar atorado, así que hay que verificar en todo momento, que exista un espacio suficiente para su buen funcionamiento.
| | |
|---|
Una vez que estuvo listo, el siguiente paso fue la decoración. Para ello, primero pinté la carcasa de la consola con pintura al frío color turquesa, de modo que combinase y porque me gusta ese color jeje Después, usé una especie de cinta de encaje que tenía para colocarle en los bordes y darle un destalle más estético. Lo pegué poco a poco con el silicón frío. Me gustó muchísimo pensar en ésta decoración, porque creo que dejó de verse "rústico" jeje.
| |
|---|
Con algo de papel dibujé el logo de Holozing y otras piezas para más decoración y las pegué con silicón frío.
| |
|---|
Pero el detalle de decoración que más me gustó fue unas conchas de mar que tenía entre mis materiales de manualidad. Escogí algunas y las pegué con silicón frío.
| |
|---|
De ese modo, la consola de juego de cartón estuvo lista. Fue un proyecto bastante divertido de realizar, a pesar de que no trabajé con medidas como tal, sino que lo realicé todo al ojo por ciento, me motivaba poder ver el trabajo terminado y quedé bastante satisfecha con el resultado.
| |
|---|
| | |
|---|
En el siguiente video pueden ver cómo en efecto, funciona 😁
Muchas gracias por haber visitado mi publicación. Espero que les haya parecido interesante.
¡Hasta una próxima oportunidad!