Hola a mis queridos amigos de Hive y comunidad de @Holozing, espero como siempre que todos estén sanos y felices. Estoy muy complacida en esta nueva oportunidad de compartir con ustedes la elaboración de un hermoso y simpático dije inspirado una nueva criatura reciente en la comunidad se trata de la simpática Cinella quédate conmigo y disfruta del paso a paso.

MATERIALES USADOS:
🐞Mostacillones rojos.
🐞Mostacillones negros.
🐞Seis cuadritos acrílicos negros.
🐞Cordón rojo acrílico.
🐞Dos mostacillas negras.
🐞Alambre de cobre calibre 26 pulgadas.
🐞Pinzas plana.
🐞Pinzas punta redonda.
🐞Pinzas para corte.
🐞Centímetro.
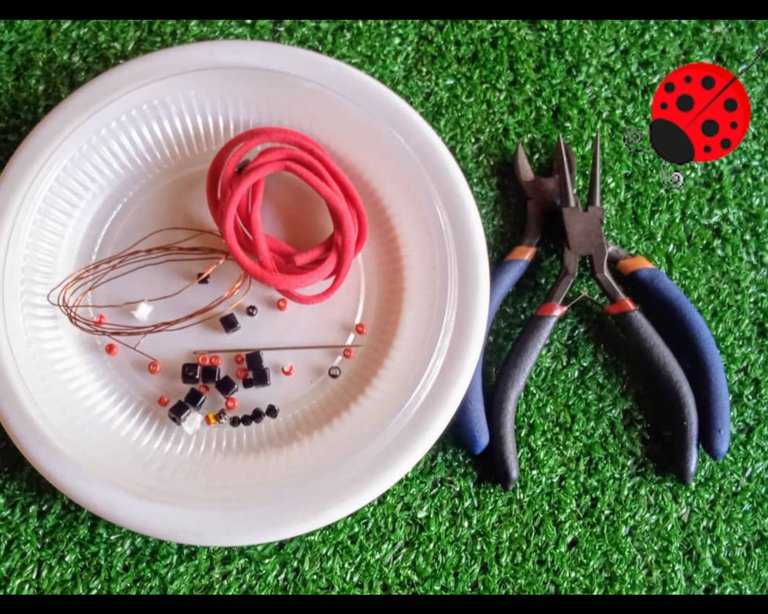
PASOS QUE USE PARA ELABORAR ESTE BONITO PROYECTO.
🐞PRIMER PASO:
Voy a comenzar con la ejecución de este proyecto de la manera siguiente: corto un alambre de cobre calibre 26 pulgadas en un largo de cuarenta centímetros; en esa medida por una punta inserto un mostacillón rojo, un mostacillón negro y otro rojo,luego dos mostacillones rojos uno negro dos rojos, estos cinco ultimos mostacillones los voy a cruzar con la otra punta, halo las dos puntas y ajusto para quedar como en la imagen.
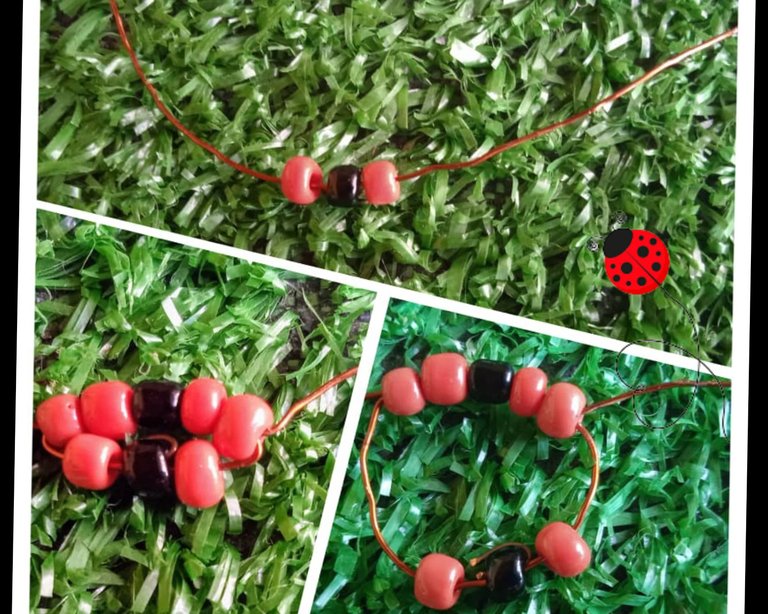
🐞Paso Dos:
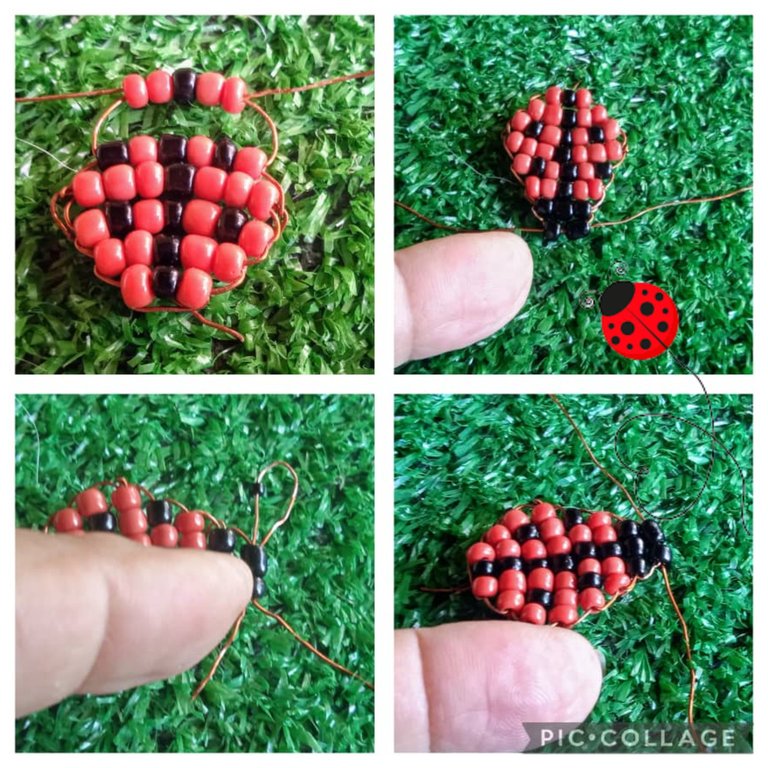
Sigo insertando los mostacillones por una punta y cruzando con la otra punta, en la tercera vuelta un mostacillón rojo uno negro uno rojo otro negro otro rojo, uno negro y otro rojo (siete mostacillones en total).
En la cuarta vuelta igual siete mostacillones tres rojos uno negro tres rojos. Ahora en la quinta y sexta vuelta disminuyo un mostacillón como se ve en el diseño.
Sigo y en esta vuelta inserto por una punta tres mostacillones negros y los cruzo con la otra punta, de nuevo para esta vuelta final inserto dos mostacillones negros y los cruzo, halo n dos puntas para ajustar bien.
En uno de los extremos del alambre inserto una mostacilla negra y voy a pasar el alambre por los dos mostacillones negros, igual hago del otro lado, como se ve en el diseño entorcho y corto los excedentes para finalizar mi linda mariquita 🐞.
🐞Tercer Paso:
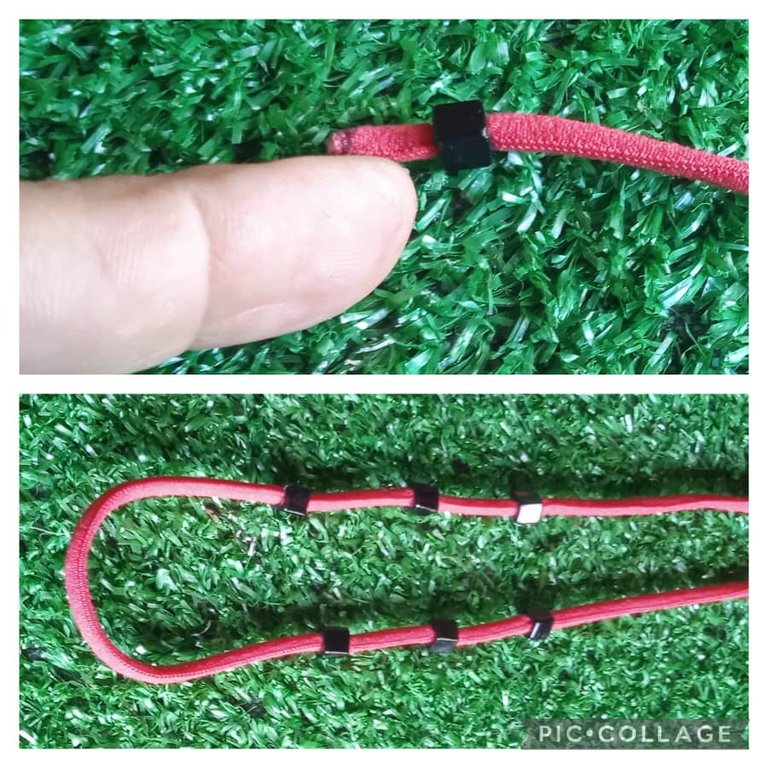
Aqui con un alambre de dos centímetros que paso por los dos mostacillones negros hago una especie de argolla para luego colgar mi mariquita en el collar, este lo hago tomando el cordón rojo acrílico y lo decoro con seis cuadritos negros, pongo la mariquita en el centro y este es el resultado de un bonito y original collar.
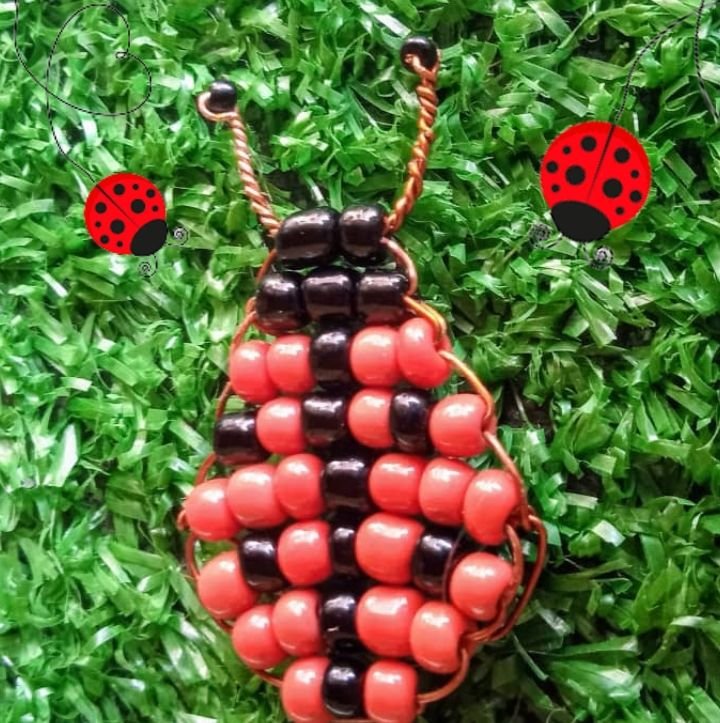
Espero que les haya gustado mi cinella y que mi tarea creativa sea de inspiración para otros.
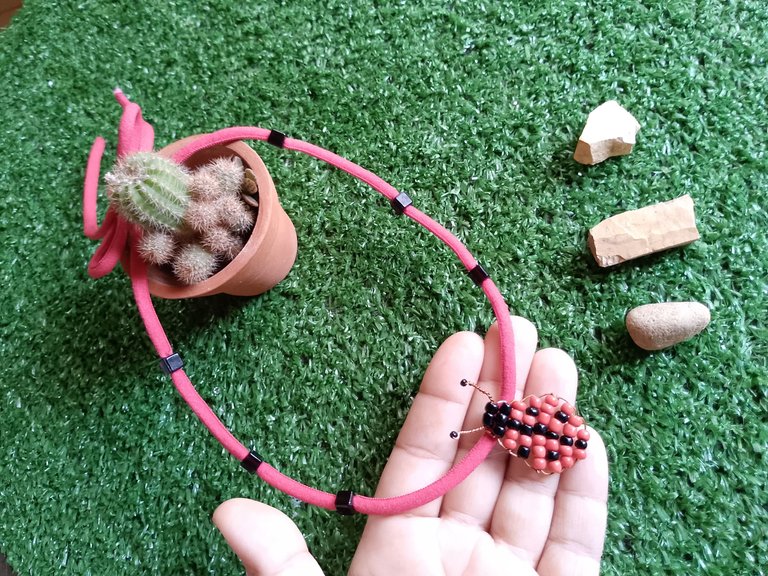
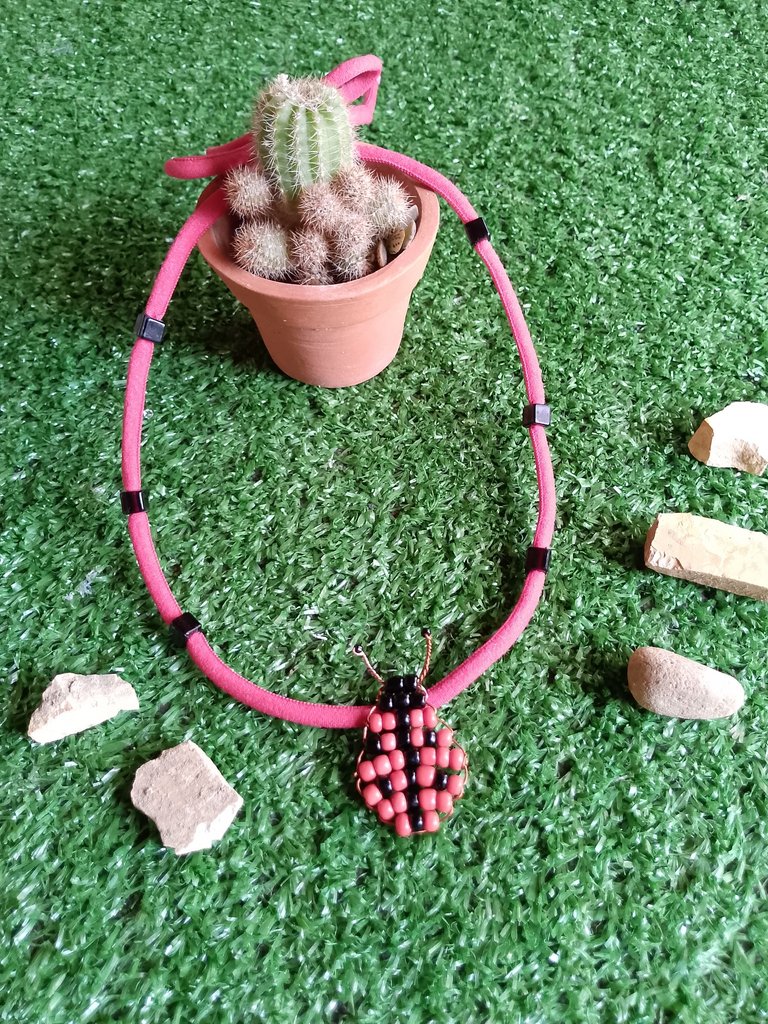
Todas las imágenes son de mi propiedad, capturadas con mi Tecno Spark 10 pro.📸 Editadas con GridArt versión gratuita.
Imagen principal y Banner final editado con Canva versión libre.
🔁Deeptraductor fue utilizado para esta publicación.📶

Hello to my dear friends of Hive and @Holozing community, I hope as always that everyone is healthy and happy. I am very pleased in this new opportunity to share with you the elaboration of a beautiful and cute charm inspired by a new creature recently in the community it is the cute Cinella stay with me and enjoy the step by step.

MATERIALS USED:
🐞Red microscillions.
🐞Black cotton swabs.
🐞Six black acrylic squares.
🐞Red acrylic cord.
🐞Two black beads.
🐞26 inch gauge copper wire.
🐞Flat clips.
🐞Round nose tweezers.
🐞Cutting tweezers.
🐞Centimeter.

STEPS I USED TO MAKE THIS BEAUTIFUL PROJECT.
🐞STEP STEP ONE:
I am going to start with the execution of this project in the following way: cut a 26 inch gauge copper wire in a length of forty centimeters; in that measure by one end I insert a red mostacillone, a black mostacillone and another red one,then two red mostacillones one black one two red ones, these last five mostacillones I am going to cross them with the other end, I pull the two ends and adjust to be as in the image.

🐞Step Two:
I continue by inserting the beads through one end and crossing with the other end, in the third round one red bead one black one red one red one black one black one red, one black and one red (seven beads in total).
In the fourth round the same, seven small beads, three red, one black, three red. Now in the fifth and sixth rows I decrease one single crochet as shown in the design.
I continue and in this loop I insert at one end three black whiskers and cross them with the other end, again for this final loop I insert two black whiskers and cross them, I pull two ends to adjust well.
In one of the ends of the wire I insert a black bead and I'm going to pass the wire through the two black beads, the same I do on the other side, as you can see in the design I twist and cut the excess to finish my pretty ladybug 🐞.

🐞Third step:
Here with a two centimeters wire that I pass through the two black beads I make a kind of ring to then hang my ladybug on the necklace, this I do it by taking the red acrylic cord and decorate it with six black squares, I put the ladybug in the center and this is the result of a nice and original necklace.


I hope you liked my cinella and that my creative work will inspire others.


All images are my own, captured with my Tecno Spark 10 pro.📸 Edited with GridArt free version.
Main image and final Banner edited with Canva free version.
🔁Deeptranslator was used for this publication.📶


