
Hello, Holozing friends!
Finding this community at the end of last year was one of the best things that happened to me on Hive. First of all, it has kept me expectant with the game proposal it brings, but during this wait I have discovered other interesting things. I started by donating a part of my HP to generate tokens that will serve for the start of the game.
Next, I will show you the Zingtokens I have obtained for the delegation of 900 HP, which I keep in staking to get a better profit. Also, thanks to this community I met the Reddit platform, where I share the content I create to give more visibility to Hive. I have also shared the content of other people I know for the same purpose.
¡Hola, amigos de Holozing!
Encontrar esta comunidad a finales del año pasado fue una de las mejores cosas que me han ocurrido en Hive. En primer lugar, me ha mantenido expectante con la propuesta de juego que trae, pero durante esta espera he descubierto otras cosas interesantes. Comencé donando una parte de mis HP para generar tokens que servirán para el inicio del juego.
A continuación, les mostraré los Zingtoken que he obtenido por la delegación de 900 HP, los cuales conservo en staking para obtener una mejor ganancia. Además, gracias a esta comunidad conocí la plataforma Reddit, donde comparto el contenido que creo para darle más visibilidad a Hive. También he compartido el contenido de otros conocidos con el mismo propósito.


I have developed my own collection of creatures from the game, and I love them. I didn't used to make amigurumis, but I've been developing this skill as I've made them. I feel trapped by it. This time, I bring you the Electric Rabbit, which is one of the designs with more details and that blew my mind the most because of its depicted position. For that reason, I decided to do it in an upright position. Here I leave you the process and I hope to receive your comments.
He desarrollado mi propia colección de criaturas del juego, y me encantan. No solía hacer amigurumis, pero he ido desarrollando esta habilidad a medida que los he ido realizando. Me siento atrapada por ello. En esta ocasión, les traigo al Conejo Eléctrico, que es uno de los diseños con más detalles y que más hizo volar mi mente debido a su posición representada. Por eso, decidí hacerlo en posición erguida. Aquí les dejo el proceso y espero recibir sus comentarios.


I used white orange and gray wool yarn for the body and legs, for the head, ears and arms I used thinner orange acrylic, some other colors for the details of the face, such as eyes and mouth. The tools I used were crochet and wool needles, pins, scissors and wadding for stuffing.
Utilicé hilo de lana naranja y gris para el cuerpo y las piernas, para la cabeza, las orejas y los brazos utilicé acrílico naranja más fino, algunos otros colores para los detalles de la cara, como los ojos y la boca. Las herramientas que utilicé fueron agujas de ganchillo y lana, alfileres, tijeras y guata para el relleno.


I started by knitting the head with orange acrylic yarn and stuffed it with wadding before closing it.
Empecé tejiendo la cabeza con hilo acrílico naranja y la rellené con guata antes de cerrarla.


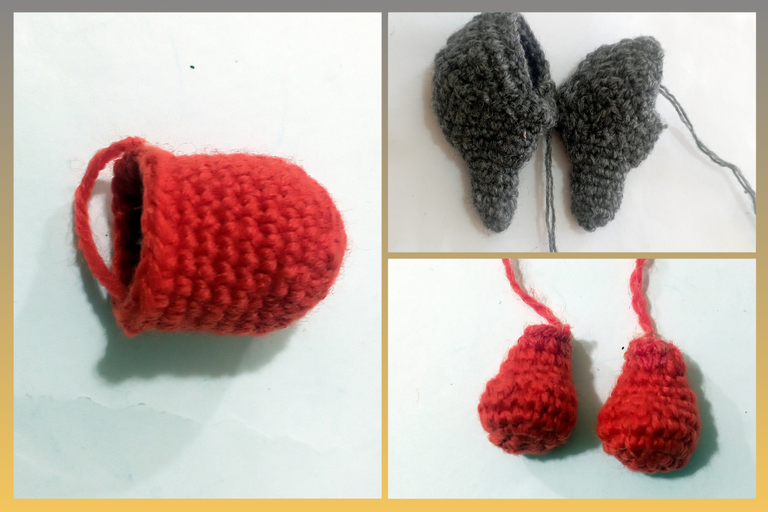
Next, I made the body and legs. I made these pieces in two colors, orange and dark gray, always making the back legs much wider than the front ones. I stuffed all the pieces, always allowing flexibility to the amigurumi.
A continuación, hice el cuerpo y las patas. Estas piezas las hice en dos colores, naranja y gris oscuro, siempre haciendo las patas traseras mucho más anchas que las delanteras. Rellené todas las piezas, permitiendo siempre flexibilidad al amigurumi.


I then proceeded to make the muzzle and whiskers, which I made independently and sewed them to the face. I then sewed the nose and mouth to the muzzle and the eyes to the face.
Luego procedí a hacer el hocico y los bigotes, que hice independientemente y los cosí a la cara. Después cosí la nariz y la boca al hocico y los ojos a la cara.


I knitted the ears separately and finished them with a lighter thread so that they would be more noticeable, then I joined the two pieces and they were finished.
Las orejas las tejí por separado y las rematé con un hilo más claro para que se notaran más, luego uní las dos piezas y quedaron terminadas.


Once the face was finished, I sewed the ears to the head and continued sewing all the other parts. The final result of this amigurumis also pleased me a lot, every time I make one I'm happier with the final result.
Una vez terminada la cara, cosí las orejas a la cabeza y continué cosiendo todas las demás partes. El resultado final de este amigurumis también me gustó mucho, cada vez que hago uno estoy más contenta con el resultado final.


I hope you liked my work, I really put a lot of love in it, I hope you enjoy it and I'll see you later to continue creating. See you soon 👋❤️
Espero que les haya gustado mi trabajo, realmente le puse mucho cariño, espero que lo disfruten y nos vemos luego para seguir creando. Hasta pronto 👋❤️


Las fotos fueron tomadas con mi teléfono Xiaomi Note 11, unidas y recreadas en canva.
Usar Traductor DeepL
The photos were taken with my Xiaomi Note 11 phone, joined and recreated in canva.
Use Translator DeepL
