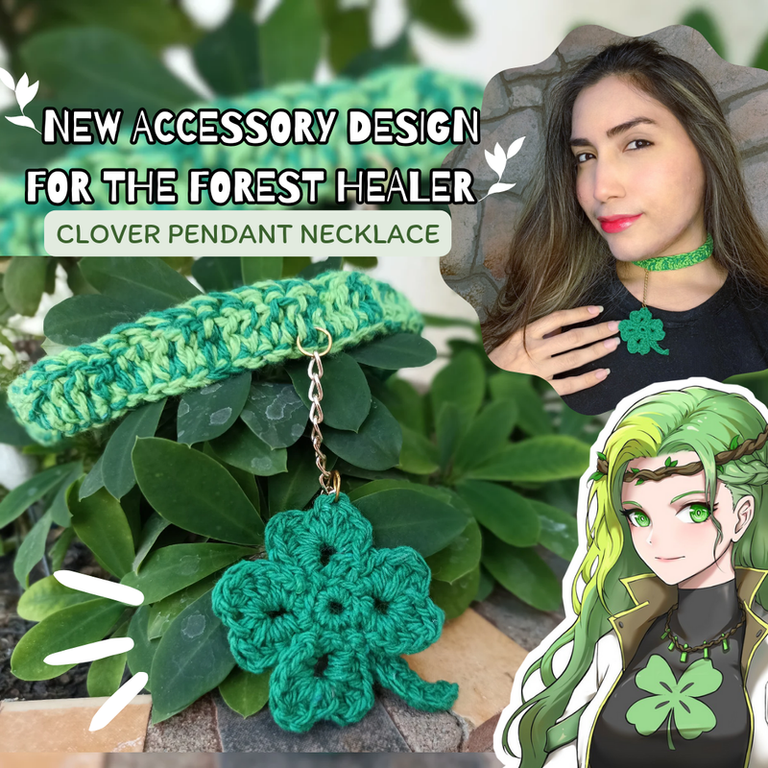

Hello friends of Hive ♥️ I welcome to my blog to all who visit me this time to share with you a new step by step to create a very original accessory inspired by Holozing, specifically in one of his characters called the healer of the forest, being also characteristic of this element a symbol represented by a clover, considered in some cultures as the symbol of good luck. Besides leaving my contribution in this community by making a Fanart inspired by some of these curious characters, I liked the idea of making something that represented a challenge for me, crochet knitting, and that those who consider themselves fans of the game would also like.
I think it could even be an alternative design of the original necklace of the forest healer, and that instead of wearing that figure printed on the shirt, I used it as a necklace where it is a clover made of crystal that hangs fastened with branches, the same ones that are made of her headband on her head. For the shirt or upper garment, I would change it for a tight-fitting white one with green crystal details inlaid to draw her silhouette, and on the shoulders I would have leaves sticking out like the petals of a shamrock.
Now I will show you the whole creative process of this crochet knitted design.

Materials
🍀For the necklace:
- Green yarn (2 shades)
- Knitting needle (2mm)
- Needle and thread for sewing
- Bead
- Scissors.
🍀For the pendant:
- Green thread
- Knitting needle (2mm)
- Scissors
- Ring
- Chain
- Tweezers


As I said at the beginning, for me crocheting is a bit of a challenge because although I have done it before, I have not put it into practice for a long time, although I can not deny that when I propose a project, I do not rest until I finish it, well something like that happened to me with this accessory that you could say is the combination of several ideas in one. First I wanted a different design to the original character necklace as a new proposal using different materials, and of all I came up with the yarn applying the crochet knitting technique. The stitches for this design is quite easy, even if you are a beginner, so if you like the design even if you are going to recreate it for another type of use, either for a phone accessory or a keychain, I hope you can use it and make it too.
The materials for this first one are quite simple, we are only going to need threads of two shades of green, the thickness of your preference although the size of the figure or in this case the accessory as such will depend on it. A pearl large enough to serve as a button or clasp to close our necklace, scissors, needle and thread for sewing and we would be ready to start.
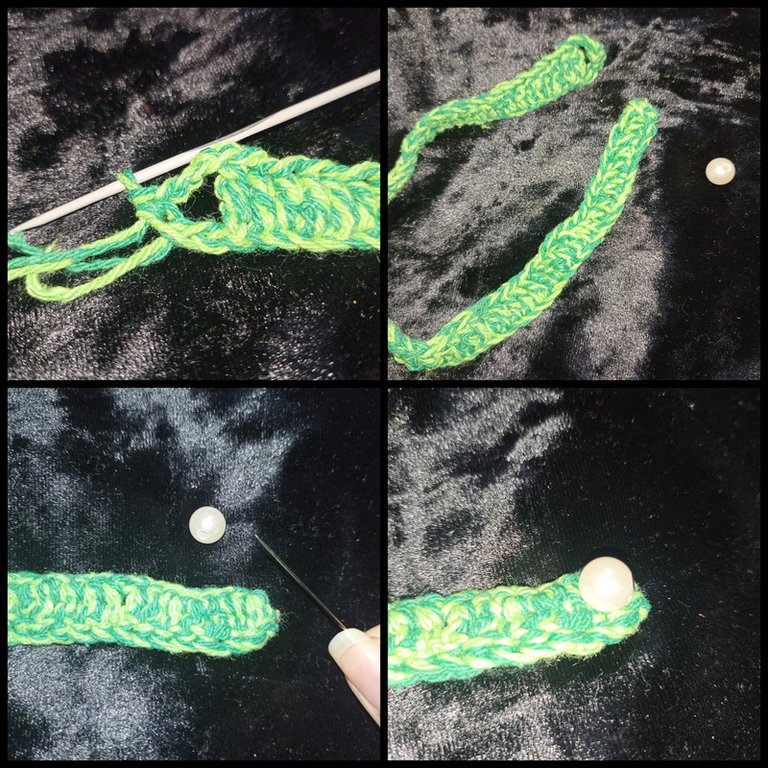
First we would start with a magic ring and then we would start making chains, the amount and size will depend on the circumference of our neck and how tight we want to wear it, and when we have the desired length, we make two extra chains and we return for the last chain, and from there we repeat the sequence making high stitches to form a kind of rectangle filled with a nice two-tone fabric.
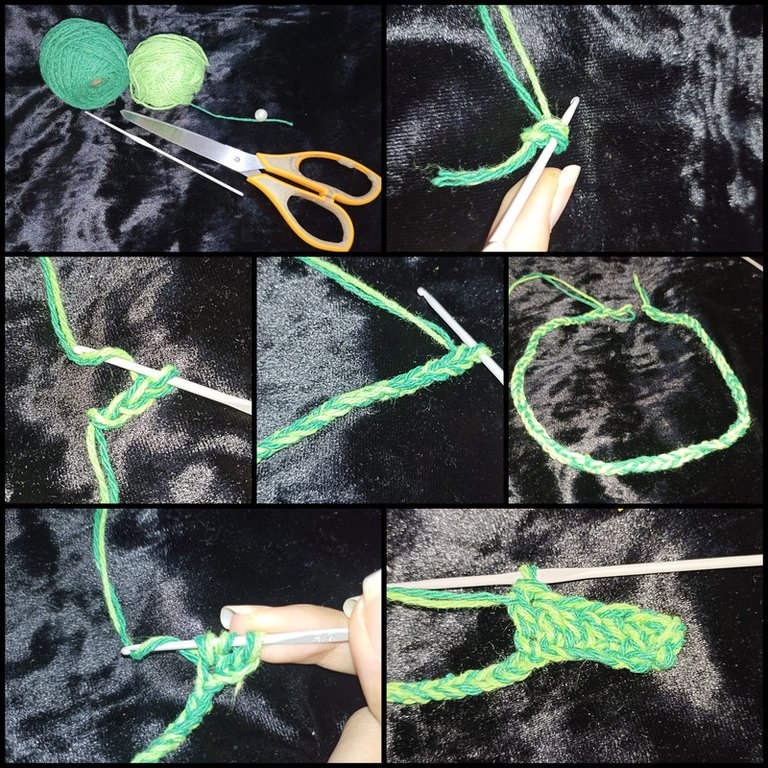
To close the necklace or choker I decided to finish with chains to form a hole. We secure by making a slipped stitch through the initial chain and close it. Then at the other end we will sew the pearl with the thread and needle, and after several knots, we cut the excess and finish this part.

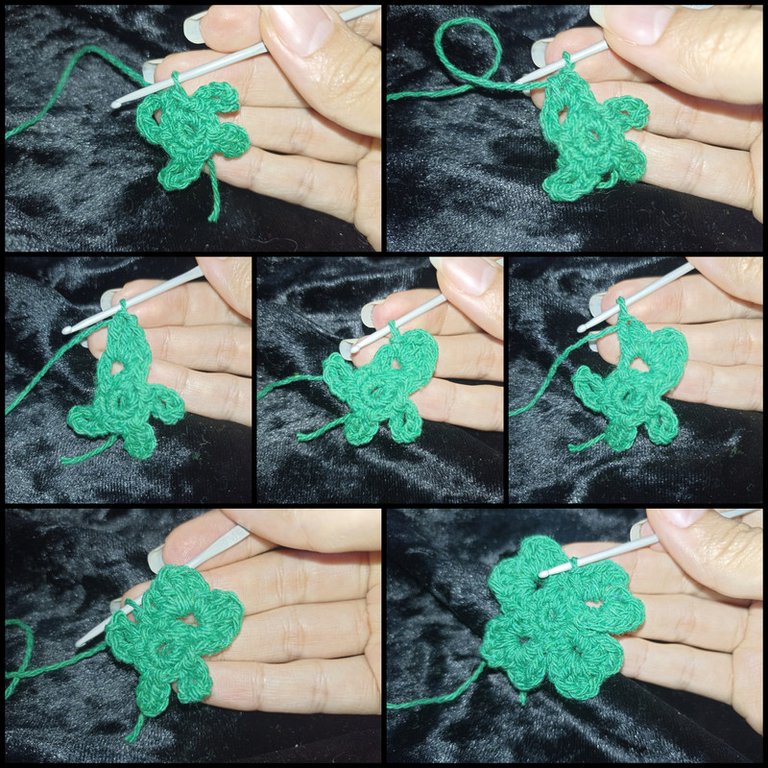
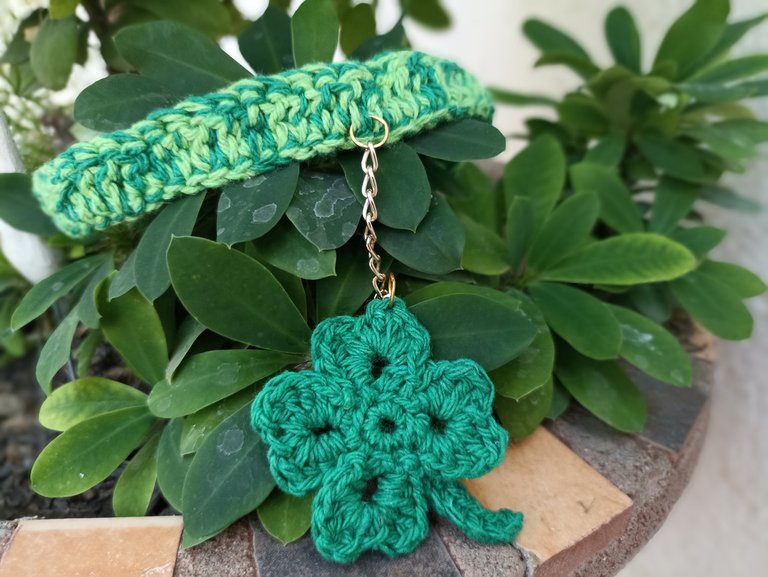
To make the figure of the clover was not as difficult as I thought, and for this we will need only a green yarn in the color of your choice, knitting needle, scissors, chain and tweezers. We are going to start with a magic ring and a chain to secure it, then we are going to make 8 low stitches and close the ring. Then we are going to make 6 more chains and go back through the starting stitch with a slip stitch. We move two more chains with a slipped stitch and repeat the same making 6 chains and we go back through the initial stitch, so we continue until we form the 4 ears of our clover.
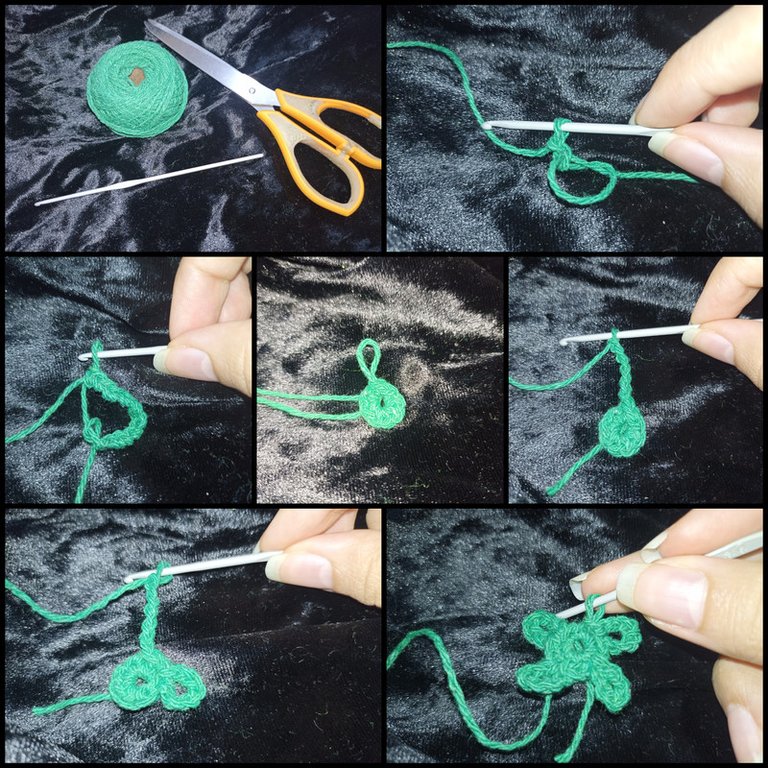
To make the petal we will make a single crochet in the first ear, then two medium high stitches, and then two high stitches, now we make a chain, a slip stitch to close the middle of the petal and again we make a chain, two high stitches, two medium high stitches, a single crochet and a slip stitch in the middle point of both ears to start the same process again, a single crochet, two medium high stitches, two high stitches, two high stitches, two high stitches, two high stitches, a chain, a slip stitch, a chain, two high stitches, two medium high stitches, a single crochet and again the slip stitch to the next ear to complete the four ears.
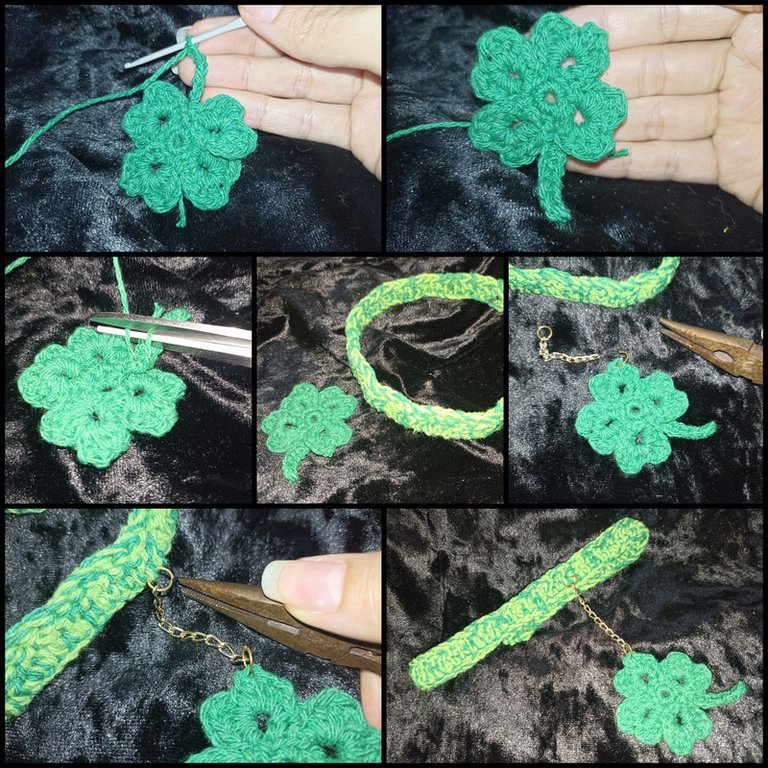
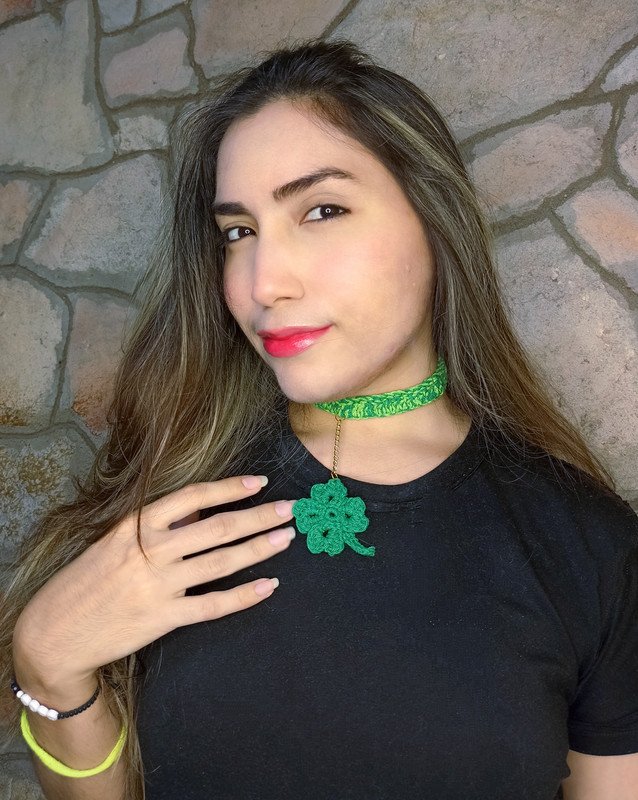
To finish this clover, I made the stem and for it I made 6 chains plus an extra one and I went back making the same amount in low stitches, once I got to the beginning I closed with a slipped stitch, cut the excess yarn and that's it. Now with the two designs done, the only thing left to do is to join them, and for this I used a chain, the length will depend on your taste, I didn't want it too long or too short, so we only have to join it in the center with some rings to the necklace with the clover pendant and we would be done.

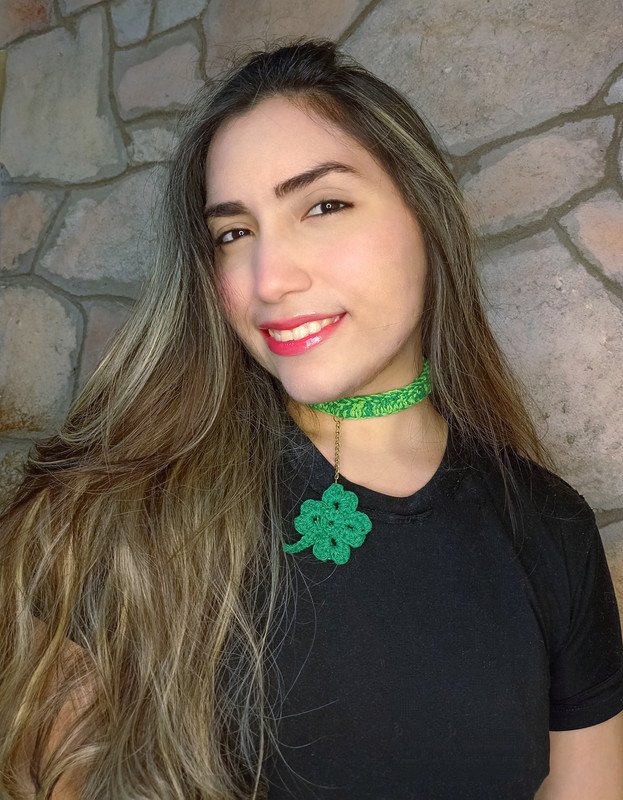
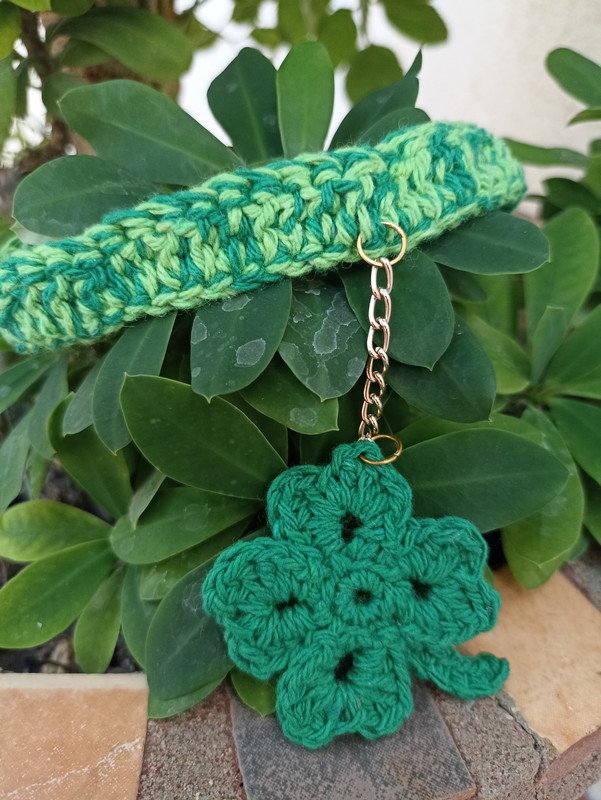
And this is how our finished project would look like...a design for a very nice accessory inspired by the Holozing forest healer...I hope you liked my tutorial showing you the whole creative process so that if you want you can make one yourself too, with love I say goodbye and it will be until next time!💕

All content is my own and images are my property
Camera: Redmi note 10s
I use an LED light ring as a base for my phone to take pictures of myself

Editing and Separator
App PicMonkey - App Picsart - App Canva
Translator
DeepL


