Hello Holozing friends. It's always a pleasure to greet you and look at your amazing designs for Holozing characters.
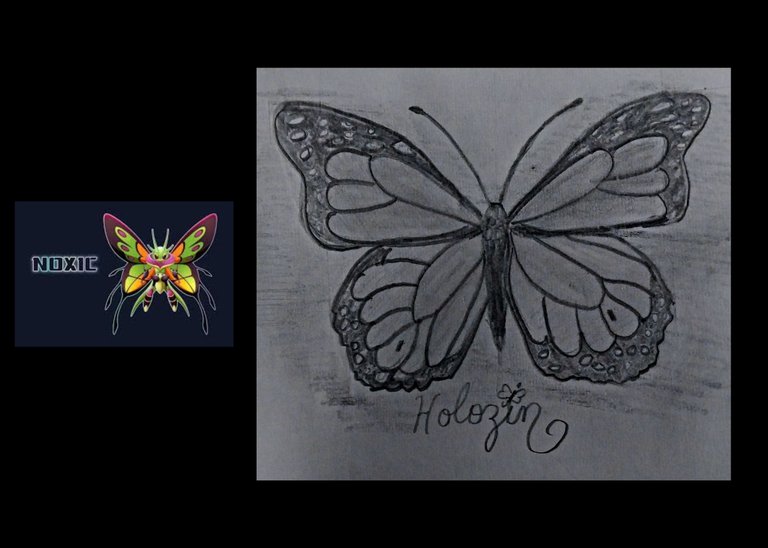
Recently a new character has been released, NoXic, a beautiful and super interesting butterfly.
So I have taken the inspiration to make the step by step of a very easy to make butterfly. I hope you like it!
1
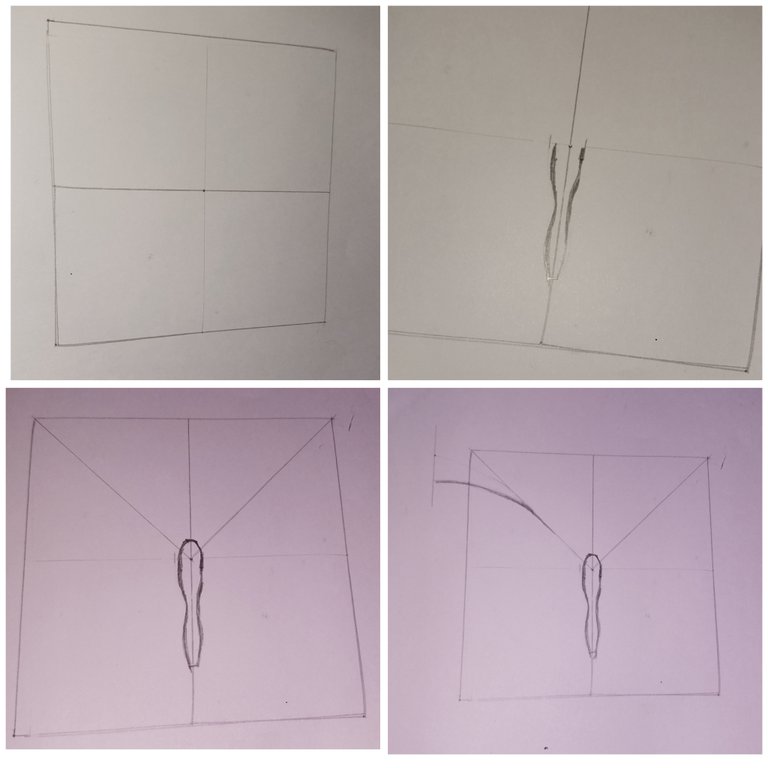
We must make a square of 10 X 10 cm and then divide this square in 4. To obtain 1/4 square.
In the lower and central area of the square we are going to make the body of the butterfly. And then we make the head.
Then from the middle point upwards we draw two inclined lines to the vertex of each upper side of the right and left quadrants.
From that line we should mark the wings.
2
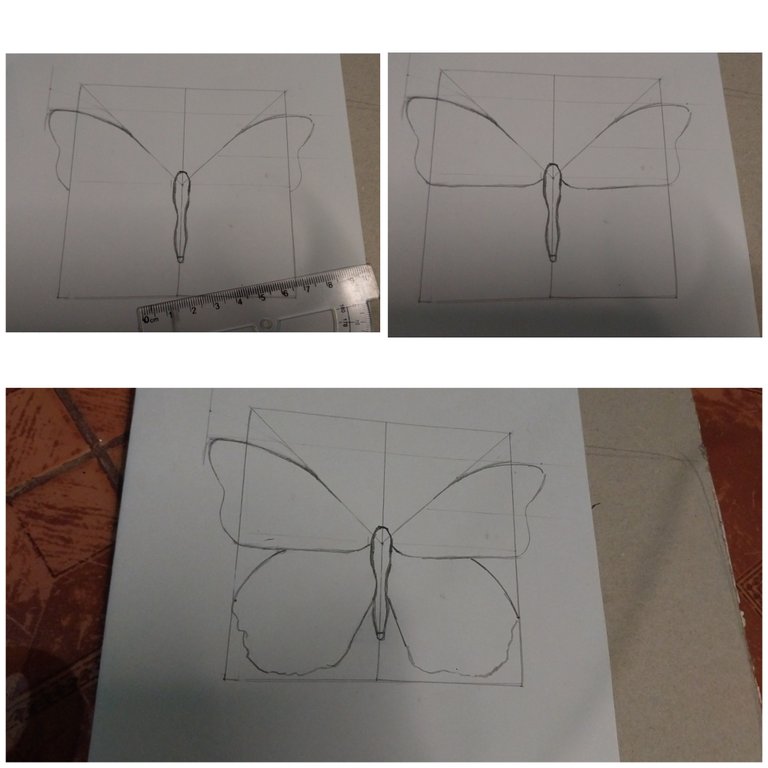
Then we make the wings reaching to the middle of the butterfly's body.
Then we make the lower wings.
3
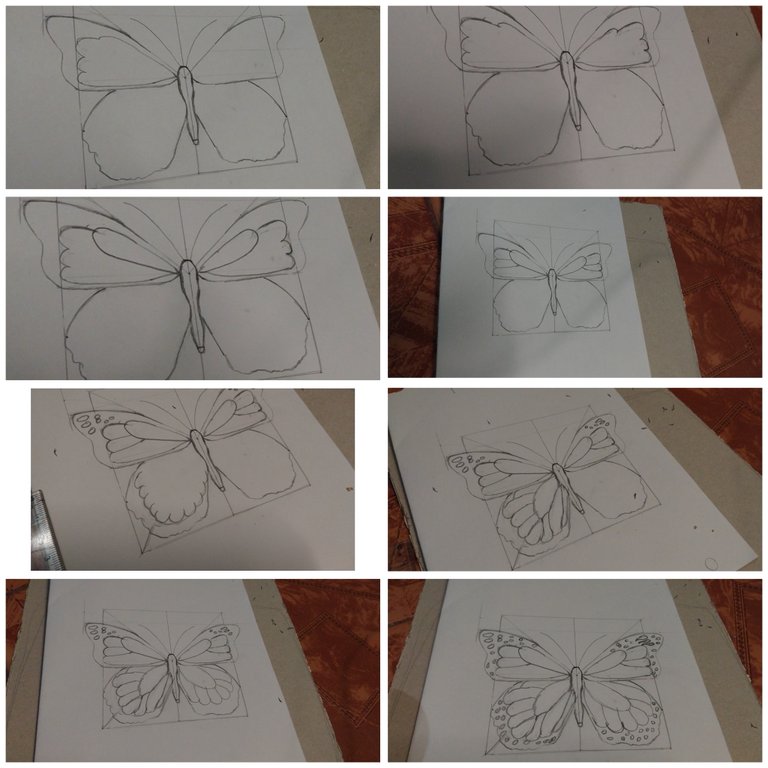
Then inside the wing we make smaller sections to embody the wings of this butterfly, the characteristic design of this one.
In the spaces near the edge of the wings we use small circles.
4
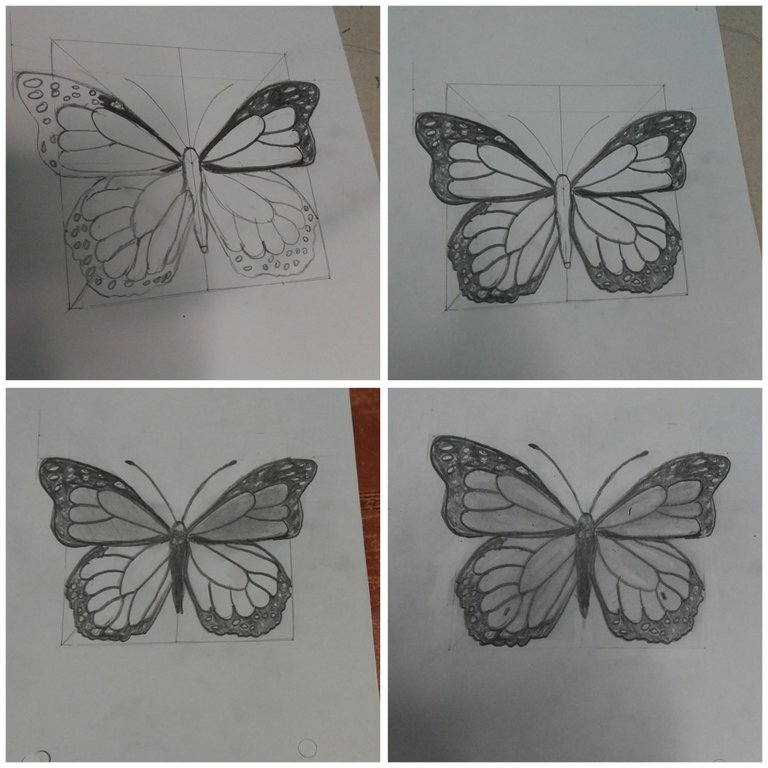
Then we take the pencil and we mark very hard the blank spaces.
Then we go over with the pencil the inner lines of the divided segments of the wings and finally we also add color to the body of the butterfly. This is the final result.
Thank you very much!
- Images belong to me
- Translator: Deepl Traslator
- Editing: Canva
Hola amigos de Holozing. Siempre es un gusto saludarlos y mirar sus increíbles les diseños para los personajes de Holozing.
Hace poco ha salido un nuevo personaje se trata de NoXic una hermosa y super interesante mariposa.
Así que he tomado la inspiración para hacer el paso a paso de una mariposa muy fácil de hacer. Espero les guste!
1
Debemos hacer un cuadrado de 10 X 10 cm y luego dividir este cuadrado en 4. Para obtener 1/4 de cuadrado.
En la zona inferior y central del cuadrado vamos hacer el cuerpo de la mariposa. Y luego hacemos la cabeza.
Luego desde el punto medio hacia arriba trazamos dos líneas inclinadas al vértice de cada lado superior de los cuadrantes derecho e izquierdo.
Desde esa línea se debe marcar las alas.
2
Luego hacemos las alas llegando hasta la mitad del cuerpo de la mariposa.
Luego hacemos las alas inferiores.
3
Luego dentro de la ala hacemos secciones más pequeñas para personificar las alas de esta mariposa, el diseño característico de este.
En los espacios cercanos al borde de las alas di usamos pequeños círculos.
4
Luego tomamos el lapiz y marcamos muy fuerte los espacios en blanco.
Luego repasamos con el lapiz las líneas internas de los segmentos dividios de las alas y por último también agregamos color al cuerpo de la mariposa. Este es el resultado final.
Muchas gracias!
- Las imágenes me pertenecen
- Traductor: Deelp traslator
- Edicion: Canva