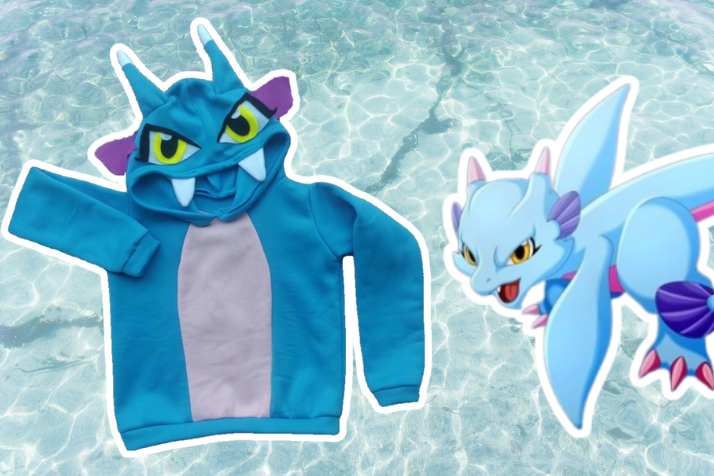
Feliz Viernes tengan todos los presentes, y muchas bendiciones los acompañen. He compartido siempre que puedo, las cosas que realizo en mi negocio de confección de ropa infantil. Esta vez compartiré la elaboración paso a paso de la creación de una Polera Infantil que ha sido inspirada en el Holo Dragón Tipo Agua.
Happy Friday to everyone here, and may many blessings accompany you. I have shared whenever I can, the things I do in my children's clothing business. This time I will share the step-by-step process of creating a Children's T-shirt that has been inspired by the Water Type Holo Dragon.
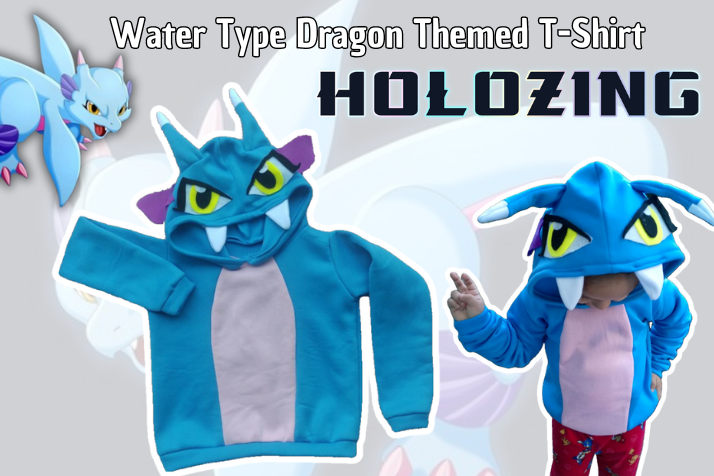
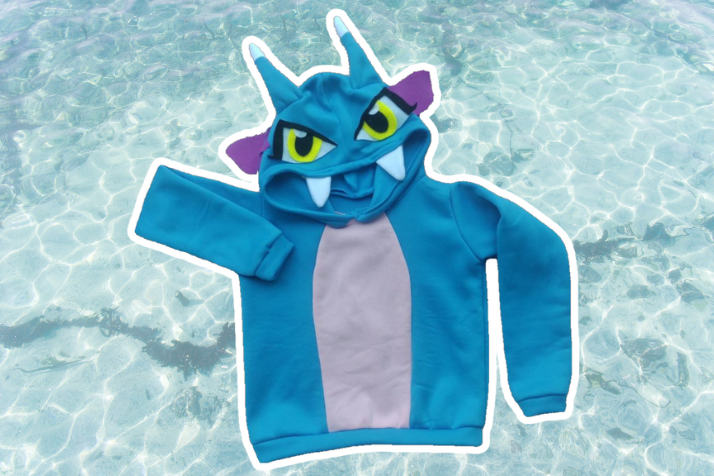
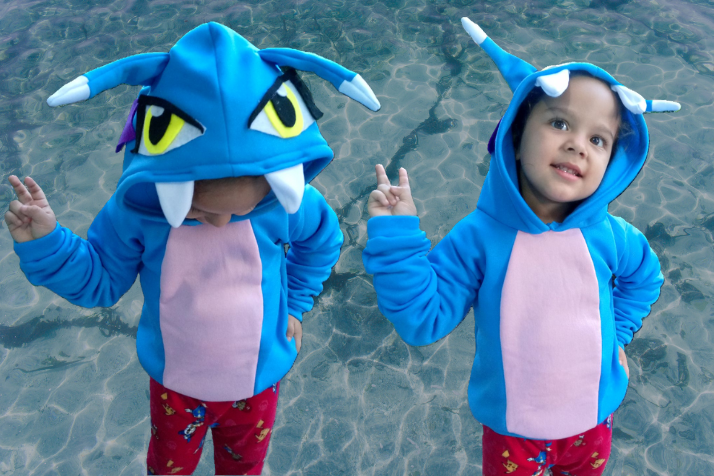
La polera fue para un obsequio especial, a la niña le encantan los dragones y el color azul, así que pensé que sería el presente ideal para su cumpleaños. La tela que he usado para elaborarla es la conocida como "tela de mono", es gruesa, strech y de colores vibrantes. Para elaborar los detalles de los cuernos y dientes, usé de la misma tela pero en otros colores y con costura a máquina fui dando la forma deseada. Los ojos y la especie de aleta morada, fueron recreados con fieltro en colores variados.
The shirt was a special gift, the girl loves dragons and the color blue, so I thought it would be the ideal present for her birthday. The fabric I used to make it is known as "monkey fabric", it is thick, stretchy and vibrantly colored. To make the details of the horns and teeth, I used the same fabric but in other colors and with machine sewing I gave it the desired shape. The eyes and the purple fin were recreated with felt in various colors.

✂️✂️✂️✂️✂️
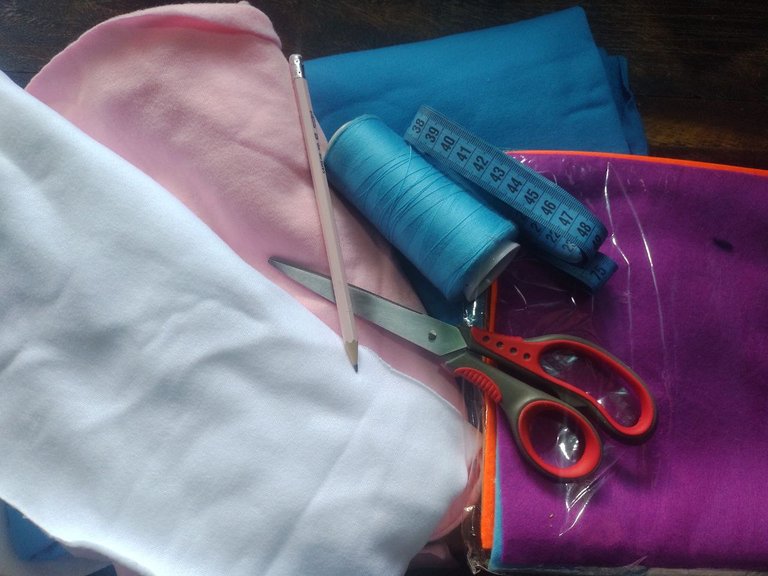
Materiales
- Tela de Mono: Azul Claro - Rosa - Blanco
- Fieltro: Blanco - Negro - Amarillo - Morado
- Tijera - Máquina de Coser - Hilo
- Silicon - Pistola para silicon
Patrón de Abrigo tipo Polera, talla 6 infantil
Materials
- Monkey fabric: Light Blue - Pink - White
- Felt: White - Black - Yellow - Purple
- Scissors - Sewing machine - Thread
- Silicone - Silicone gun
Pattern for a T-shirt-style coat, size 6 for children
✂️✂️✂️✂️✂️
Proceso de Creación / Creation Process
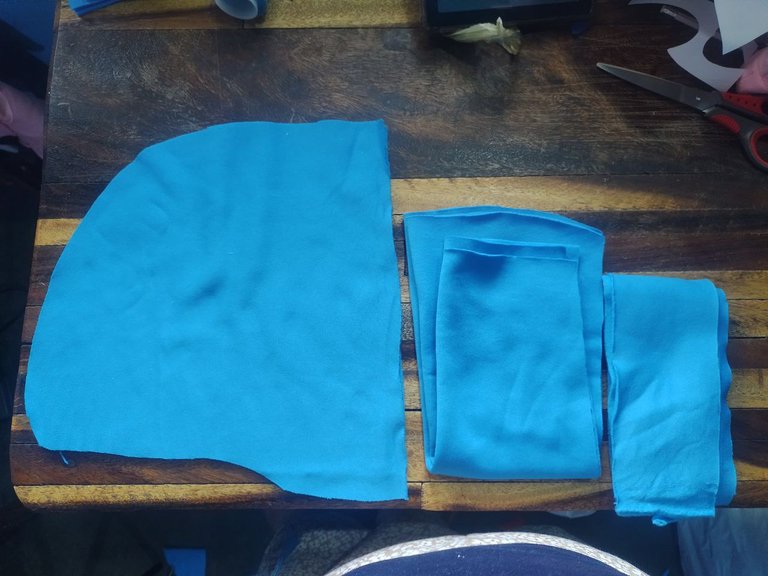
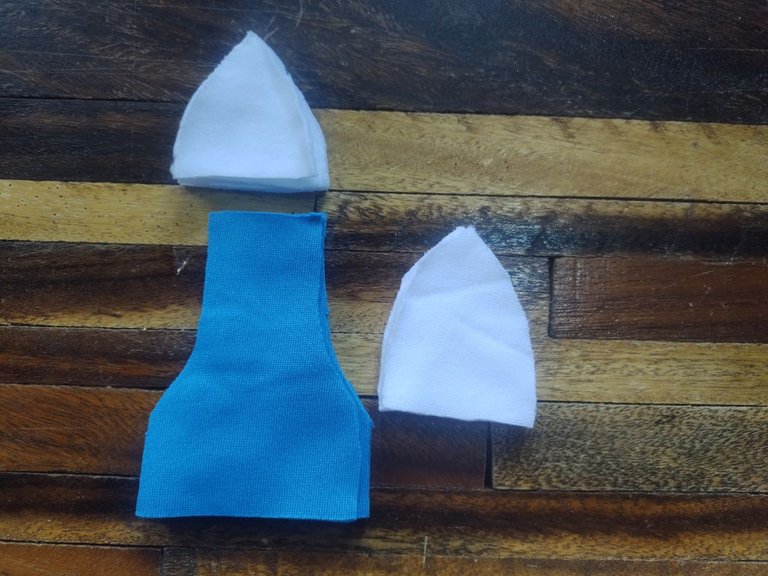
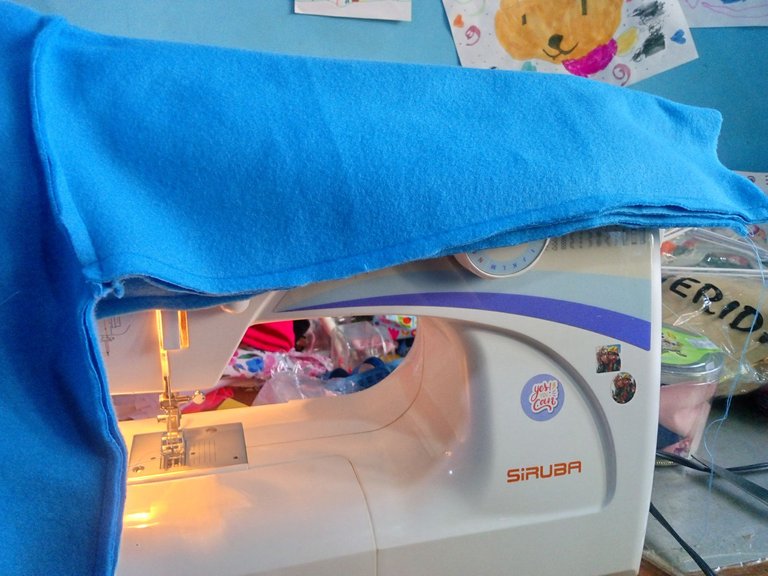
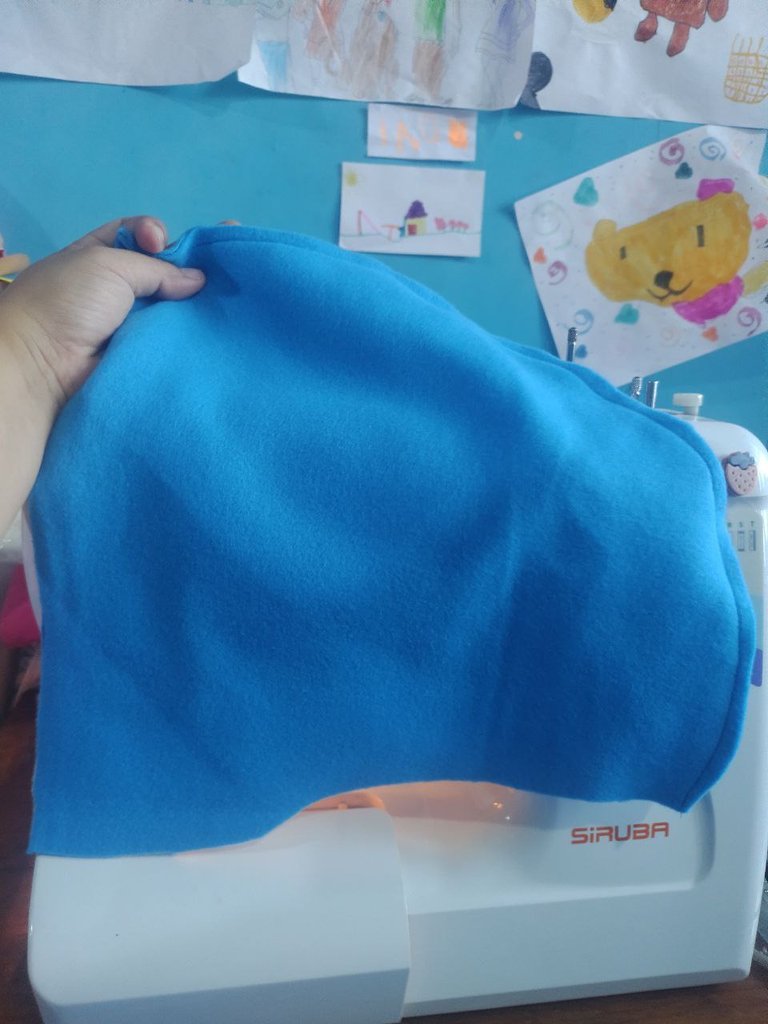
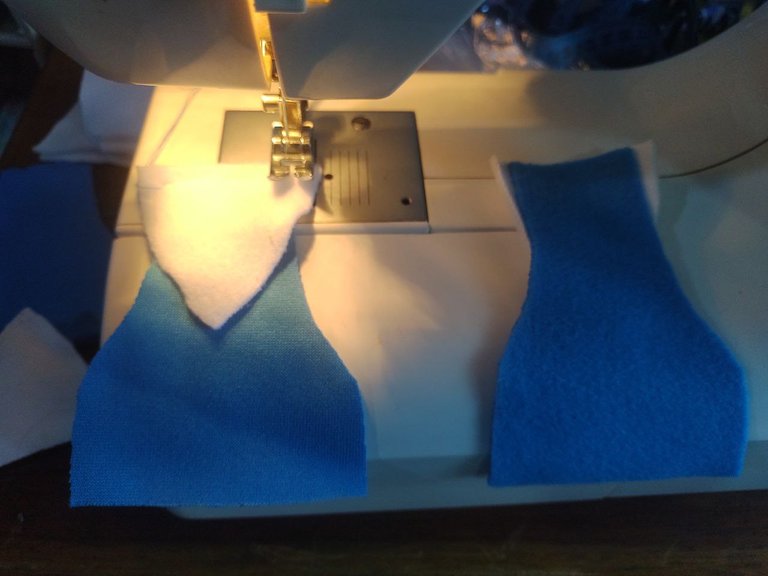
Cortamos todas las piezas que necesitaremos, un delantero y un trasero, las mangas, el liston de puños y orillo inferior, capucha en dos piezas, los cuernos, los dientes. Cada pieza será cortada en sus colores correspondientes.
We cut all the pieces we will need, a front and a back, the sleeves, the cuffs and bottom edge, the hood in two pieces, the horns, the teeth. Each piece will be cut in its corresponding colors.
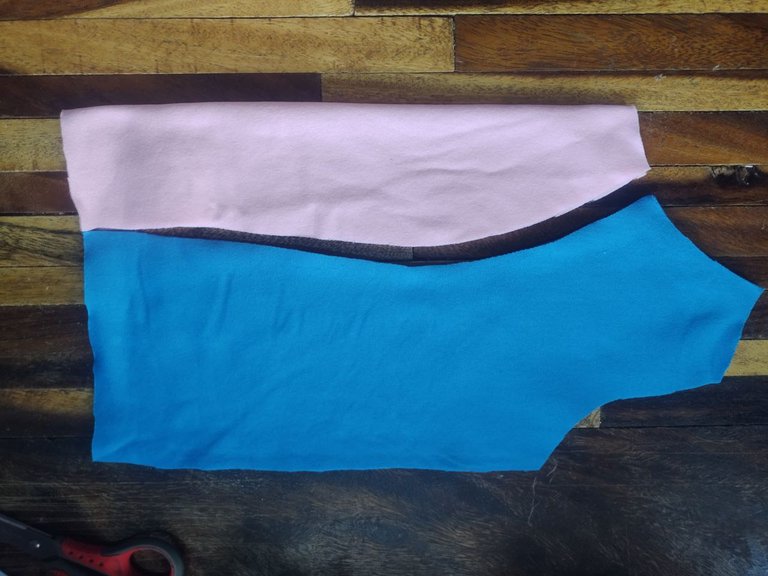
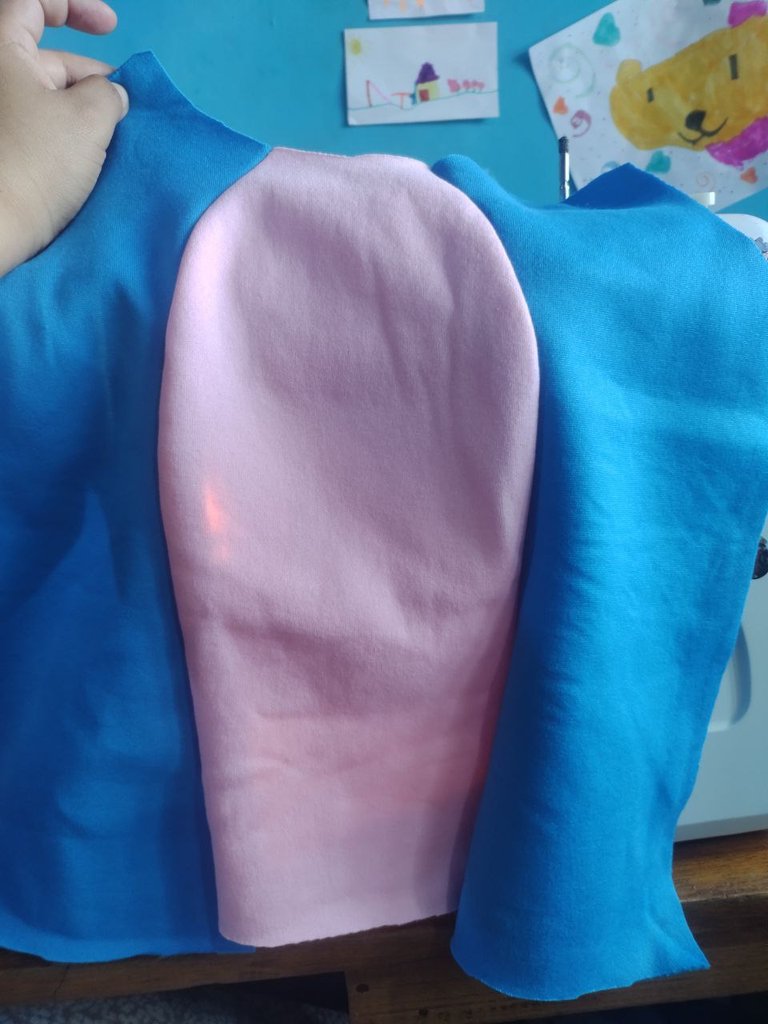
Empezaremos con el armado, donde unimos la parte del pecho. Las piezas azules con la rosada del pecho.
We will start with the assembly, where we join the chest part. The blue pieces with the pink chest piece.
Cosemos la parte superior de cada hombro, enfrentando derechos.
We sew the top of each shoulder, facing right sides.
Con un alfiler, sujetamos las mangas, haciendo coincidir los centros y unimos a la sisa.
Using a pin, we secure the sleeves, matching the centers and joining them to the armhole.
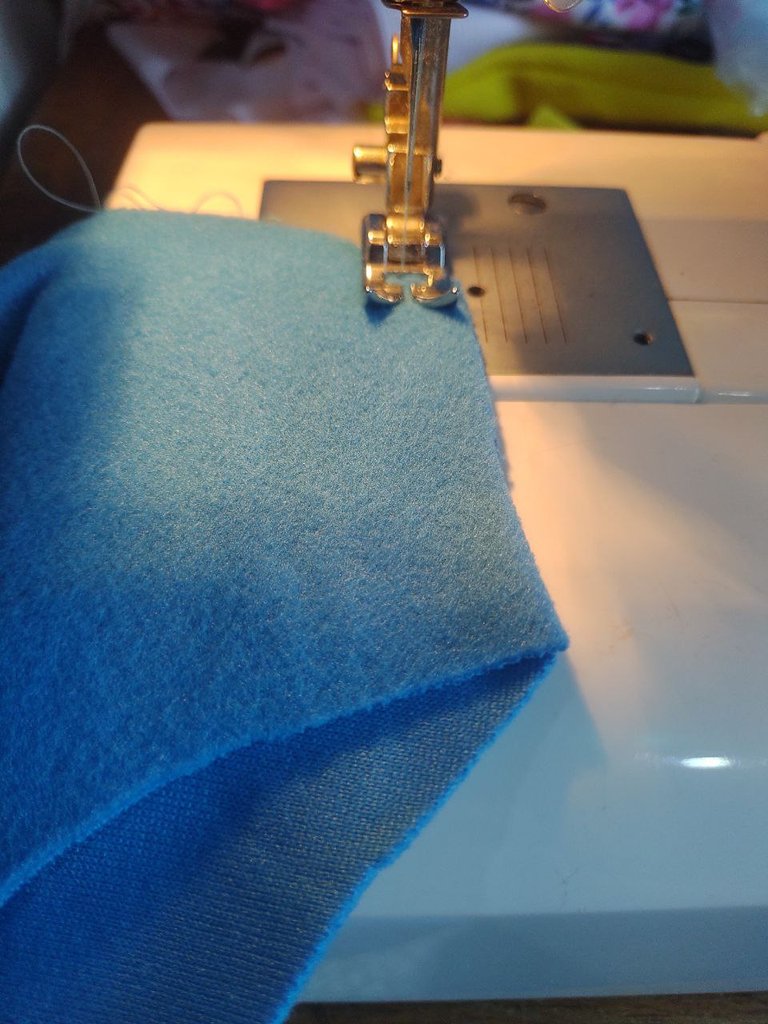
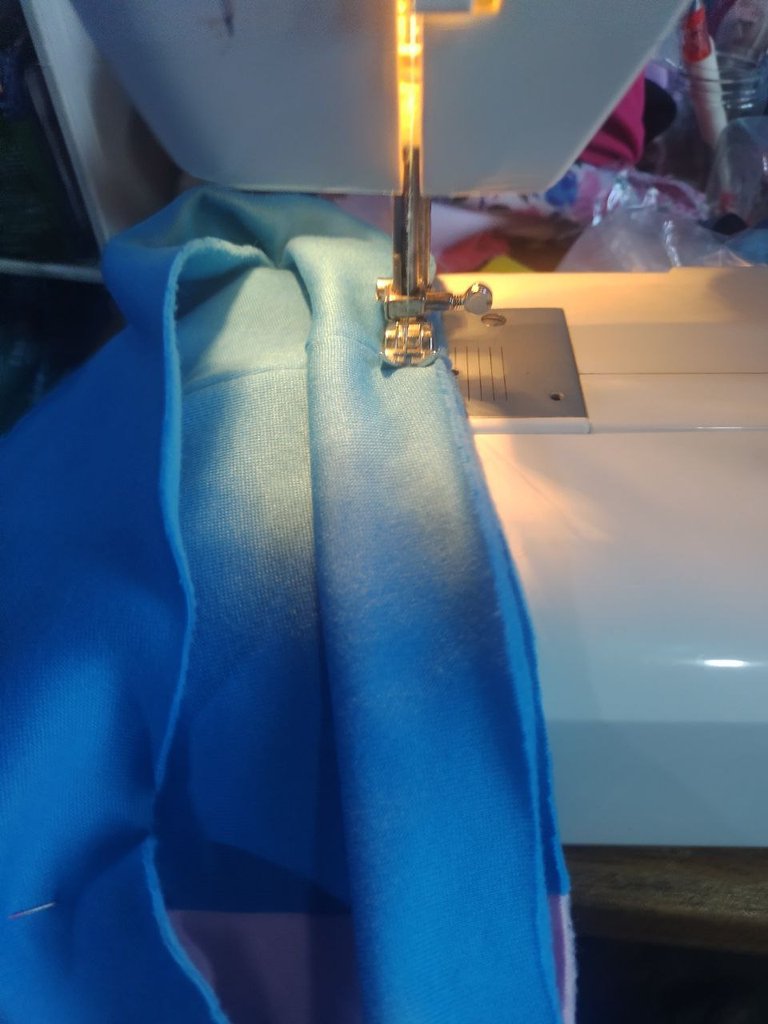
Cosemos ambos costados, desde el puño hasta el orillo inferior de la polera.
We sew both sides, from the cuff to the bottom edge of the shirt.
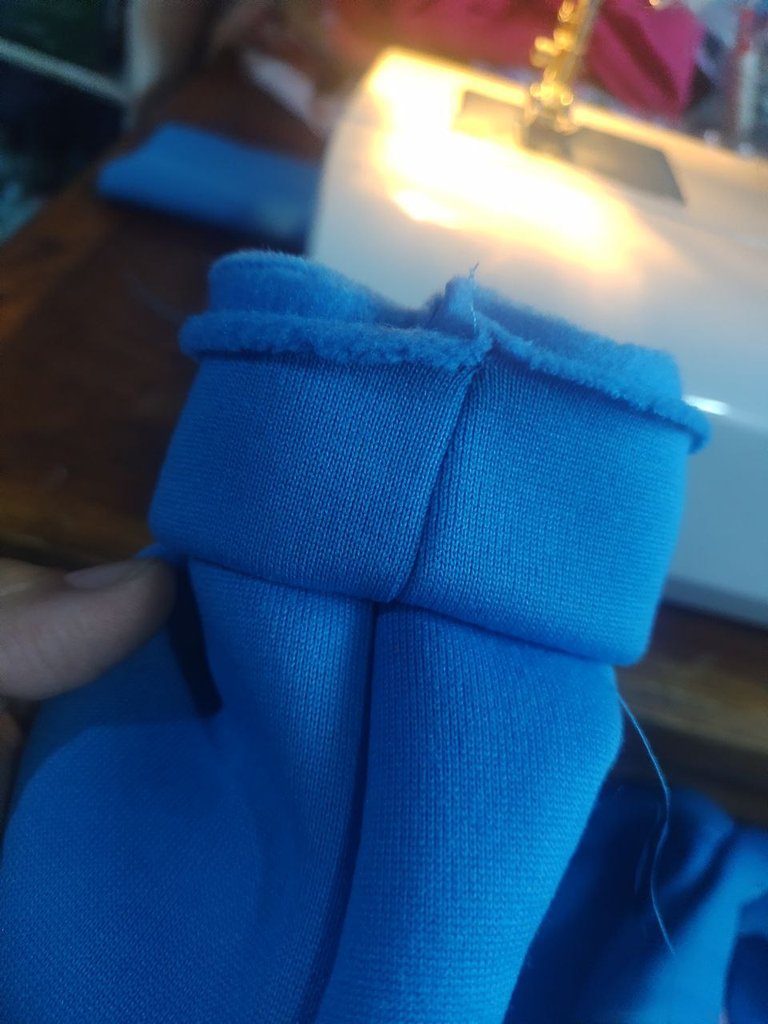
Medimos el contorno de los puños y del orillo central. Cortaremos el listón basandonos en estas medidas y le restaremos 5 cm a cada una. Cosemos por los extremos cada listón, marcamos el centro y luego lo cosemos a dichas partes. Es decir, orillo bajo central y puños, tiraremos un poco de el para que le dé forma y no sea recta.
We measure the circumference of the cuffs and the central selvedge. We will cut the ribbon based on these measurements and subtract 5 cm from each one. We sew each ribbon along the ends, mark the center and then sew it to these parts. That is, the central lower selvedge and cuffs, we will pull it a little to give it shape and not make it straight.
 |  |
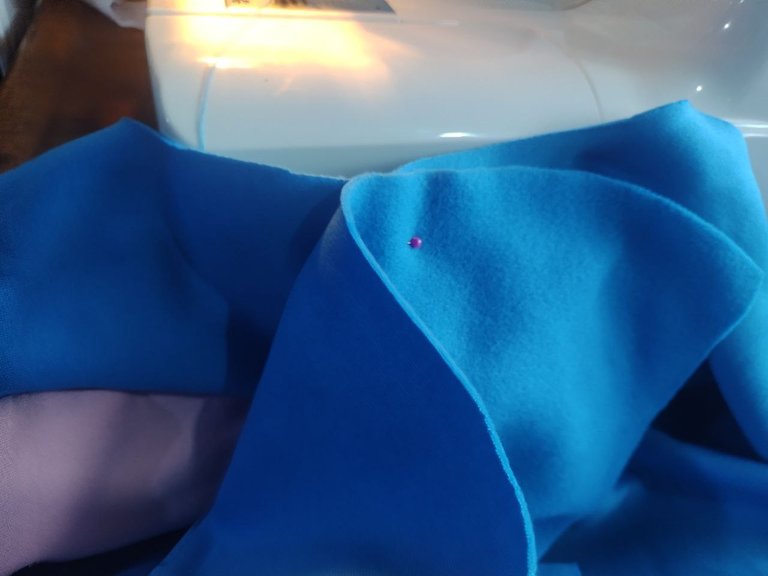
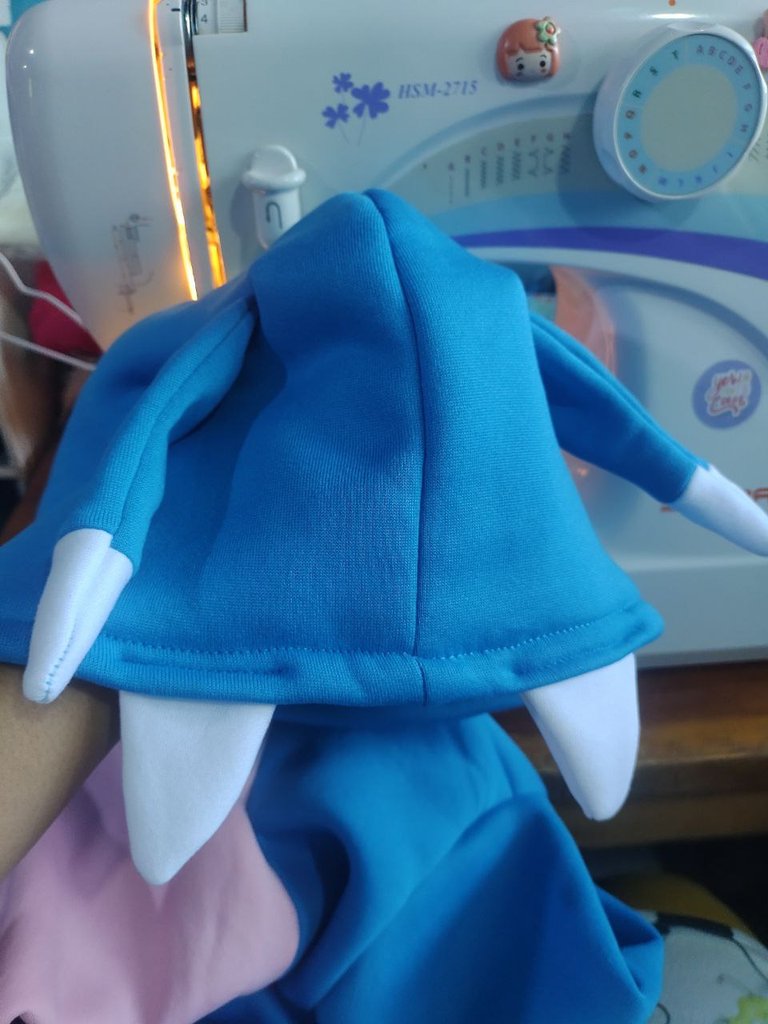
Enfrentamos los derechos de la capucha, cosemos la parte curva y en la parte delantera haremos un orillo. Centramos la pieza de la capucha con el centro trasero de la polera y cosemos.
We face the right sides of the hood, sew the curved part and make a selvedge on the front. We center the hood piece with the back center of the t-shirt and sew.
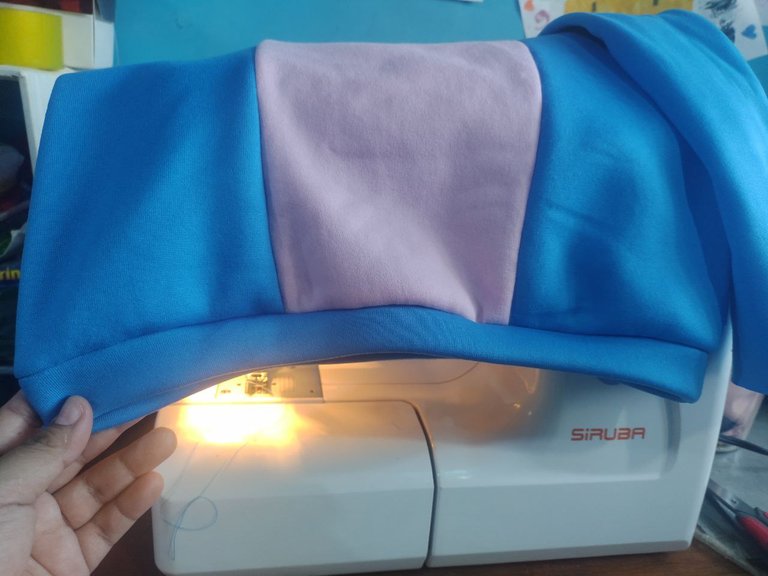
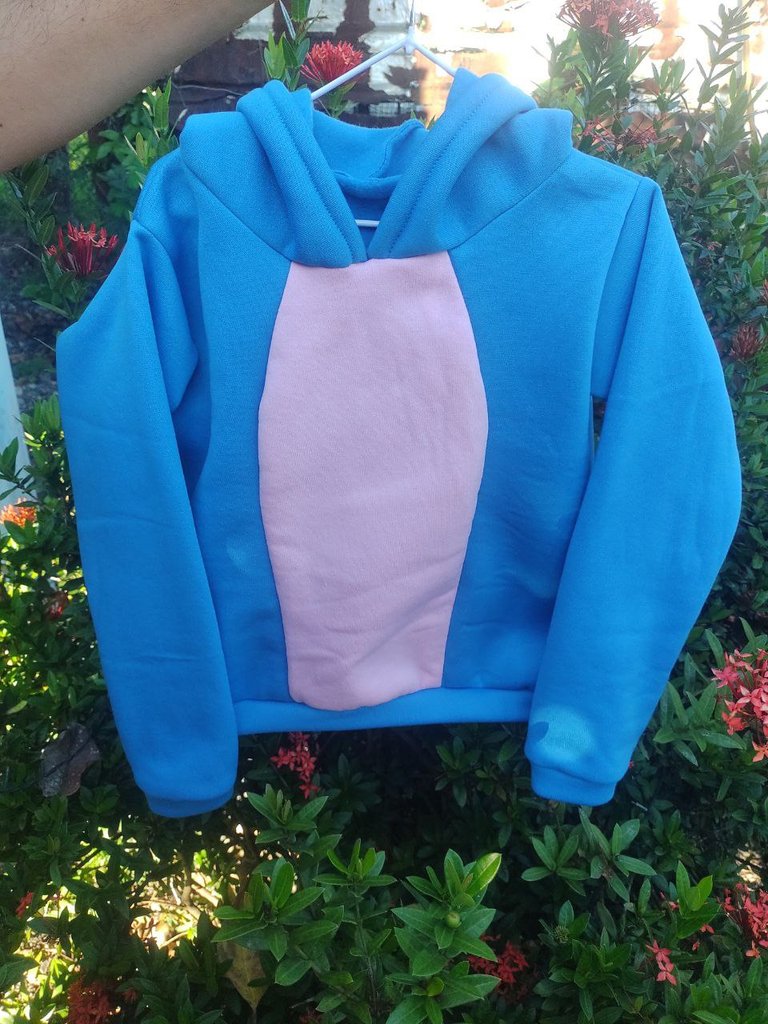
Así nos quedaría la polera básica
This is how the basic t-shirt would look like
 |  |
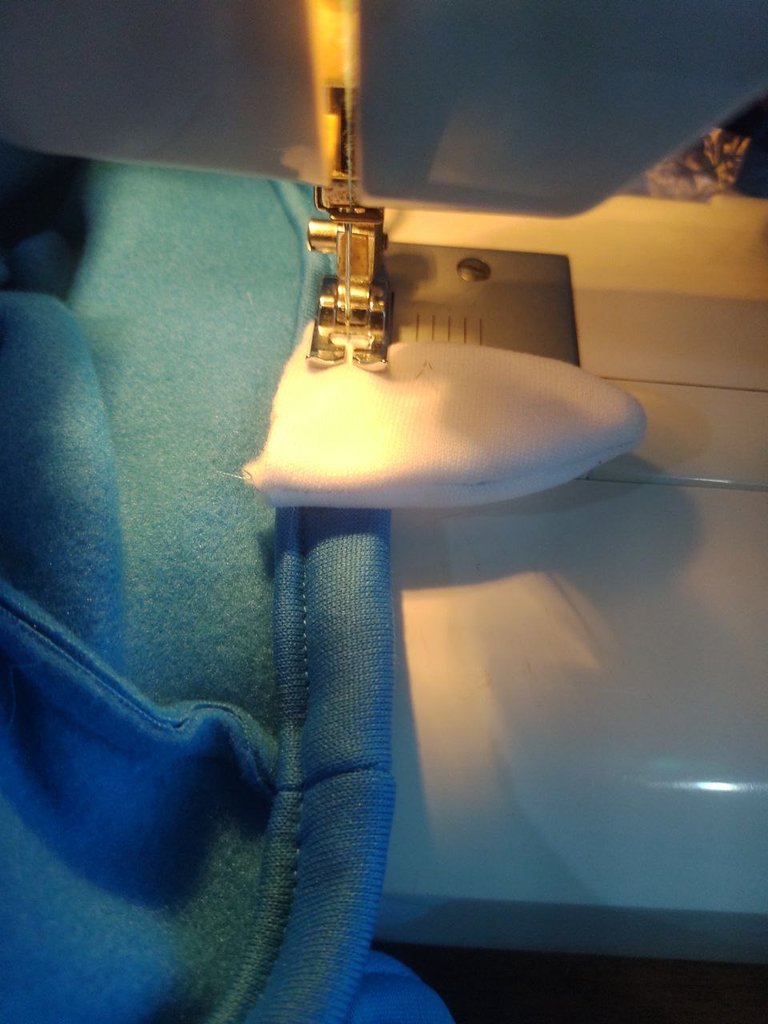
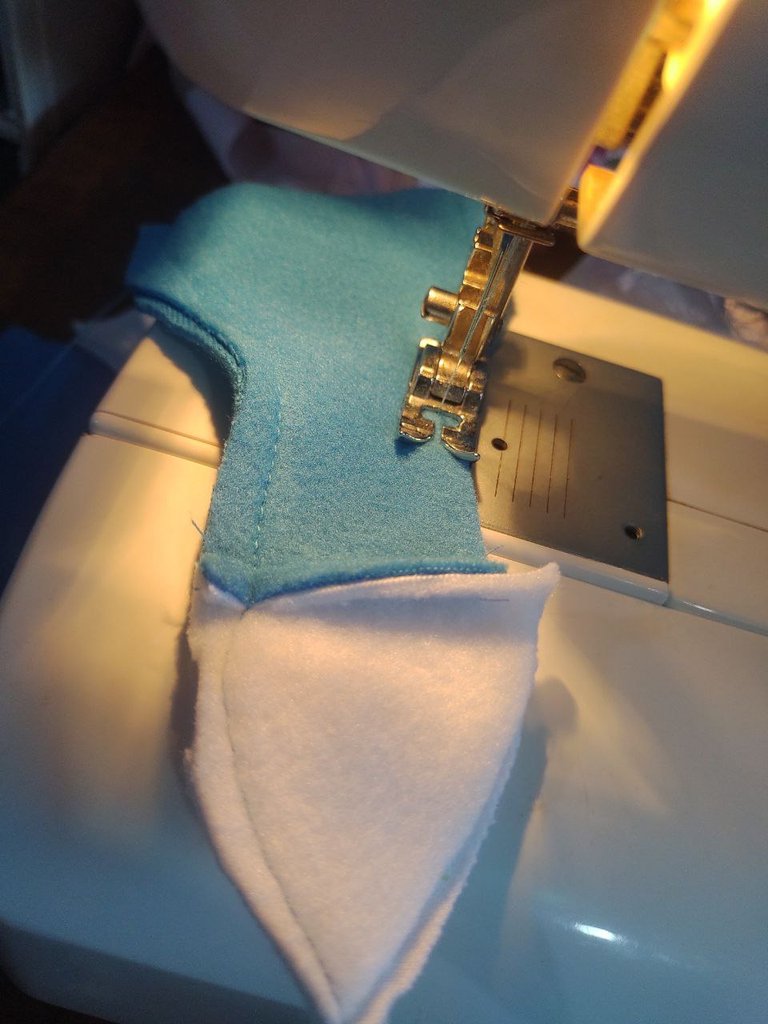
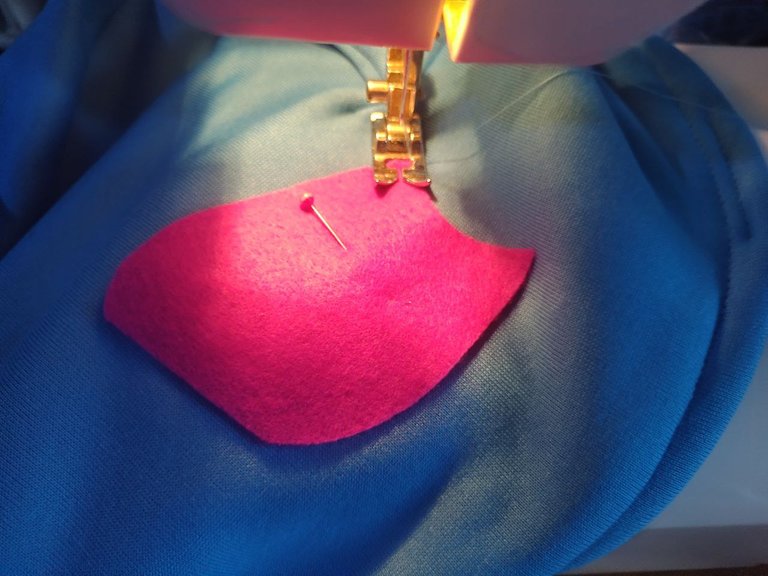
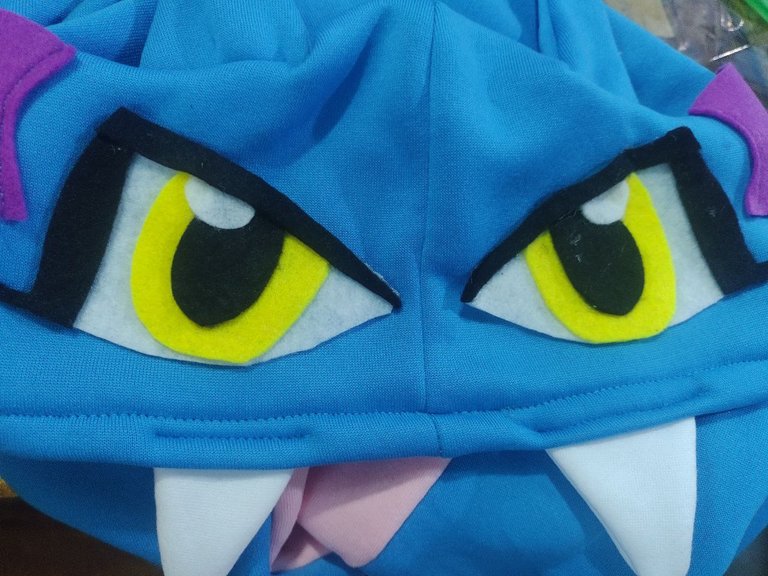
Para la personalización cosemos las piezas, ubicamos donde irán y cortamos para insertar. Cosemos en la parte base.
For customization, we sew the pieces, locate where they will go and cut to insert. We sew on the base part.
Dientes/ Teeth
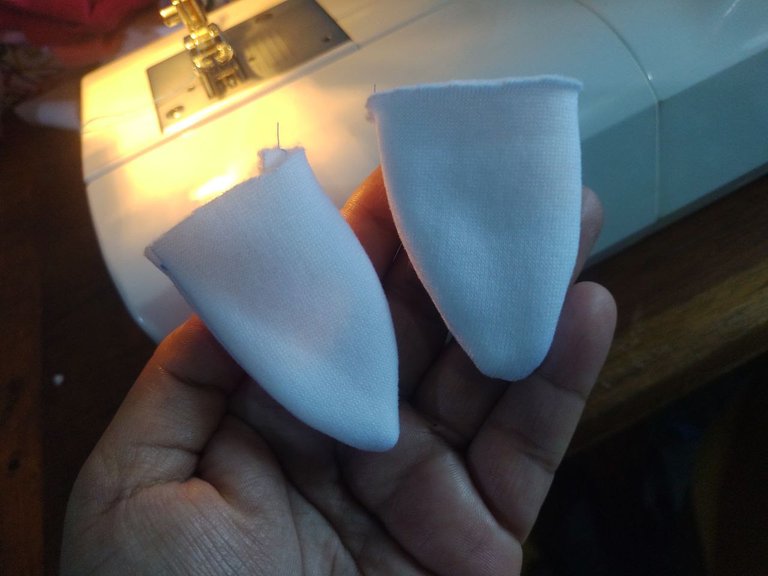
Cuernos/ Horns
Aletas/ Fins
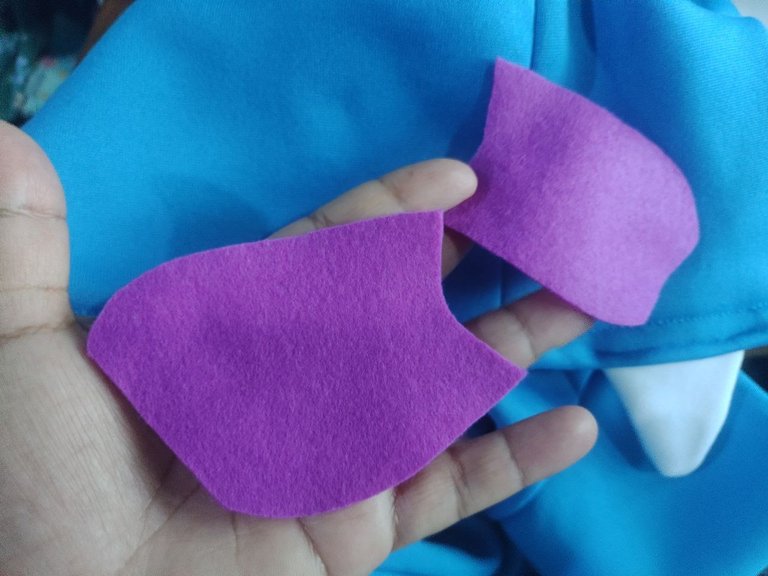
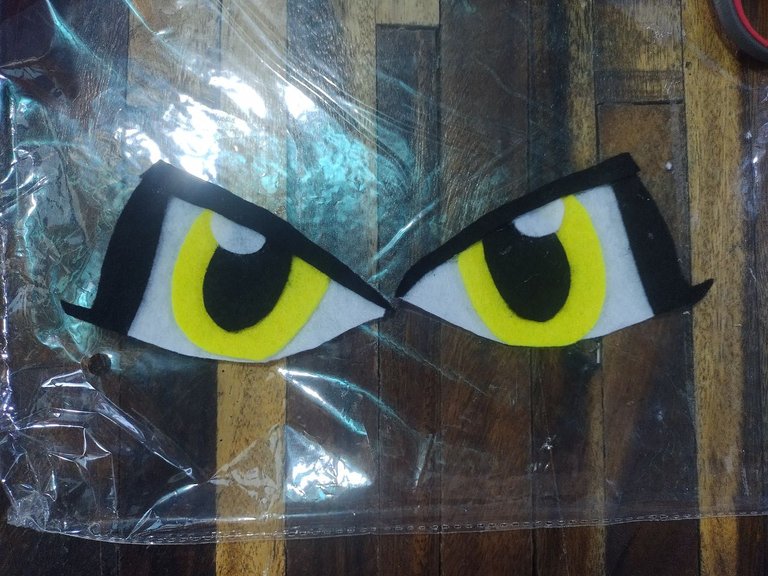
Ojos/ Eyes
Cortamos cada pieza en su respectivo color. Podemos unir con silicon extra fuerte o con costura
We cut each piece in its respective color. We can join with extra strong silicone or with sewing.
✂️✂️✂️✂️✂️
Resultado / Result :
✂️✂️✂️✂️✂️
¡Y hasta aquí el proyecto del día! Espero les haya gustado tanto como a mí.
Si tienes alguna duda o sugerencia, no dudes en dejar un comentario. Las fotos que he colocado a lo largo del texto, las he tomado desde mi móvil Infinix. Los diseños son hechos por mi amiga Carmen, agradecida profundamente.
¡Hasta la próxima!, tengan todos una bendecida noche cargada de salud, paz y amor.
And that's it for the day's project! I hope you liked it as much as I did.
If you have any questions or suggestions, don't hesitate to leave a comment. The photos that I have placed throughout the text were taken from my Infinix mobile. The designs are made by my friend Carmen, deeply grateful.
Until next time! Everyone have a blessed night full of health, peace and love.