Happy day to all the creatives of Hive Diy, when we are very close to saying goodbye to a year of many experiences and learning, and we are preparing to welcome another with faith and hope that the next one will be much better in all aspects and that our wishes and purposes are fulfilled, there is nothing more beautiful than for this date to give a beautiful gift, made by ourselves, for those people who are part of our abundance and invite them to receive the great year 2023 with joy. Next I will tell you how I made a beautiful little box for sweets, using a can and recycling some Christmas decorative elements that we no longer use at home, for the New Year.

MATERIALS
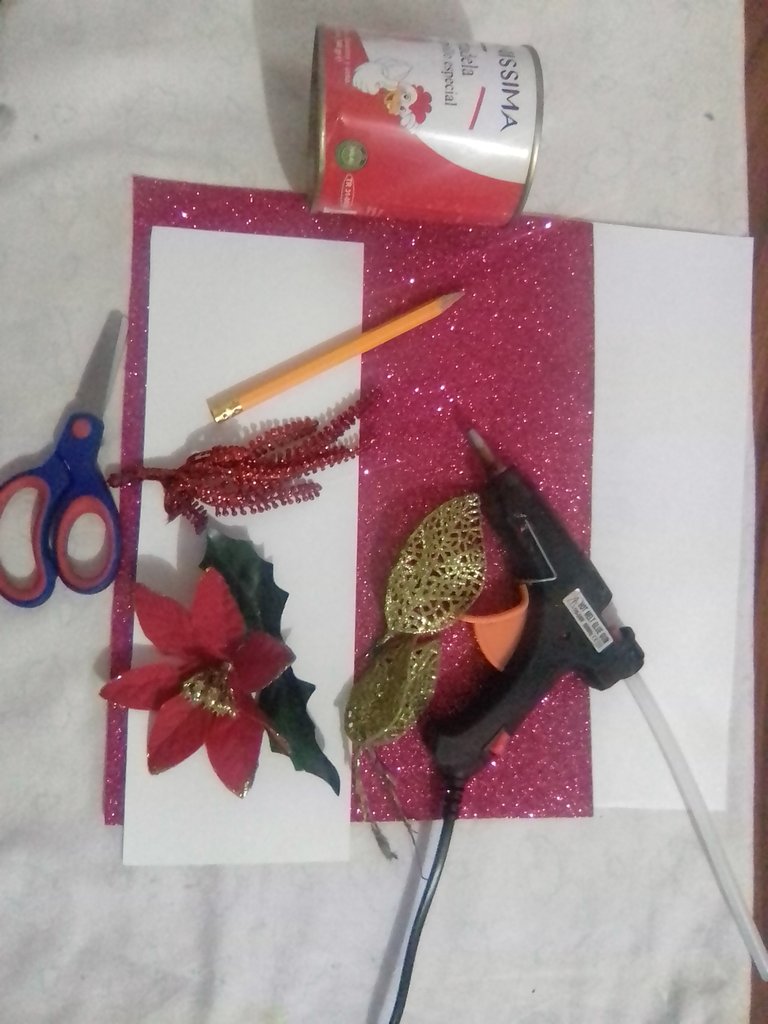
✓ White cardboard
✓ Scissors, pencil and ruler
✓ Gun and glue stick
✓ Fuchsia frosted foami.
✓ Light green fabric
✓ Can of sausages
✓ Recycling flowers, leaves and ornaments
STEP BY STEP
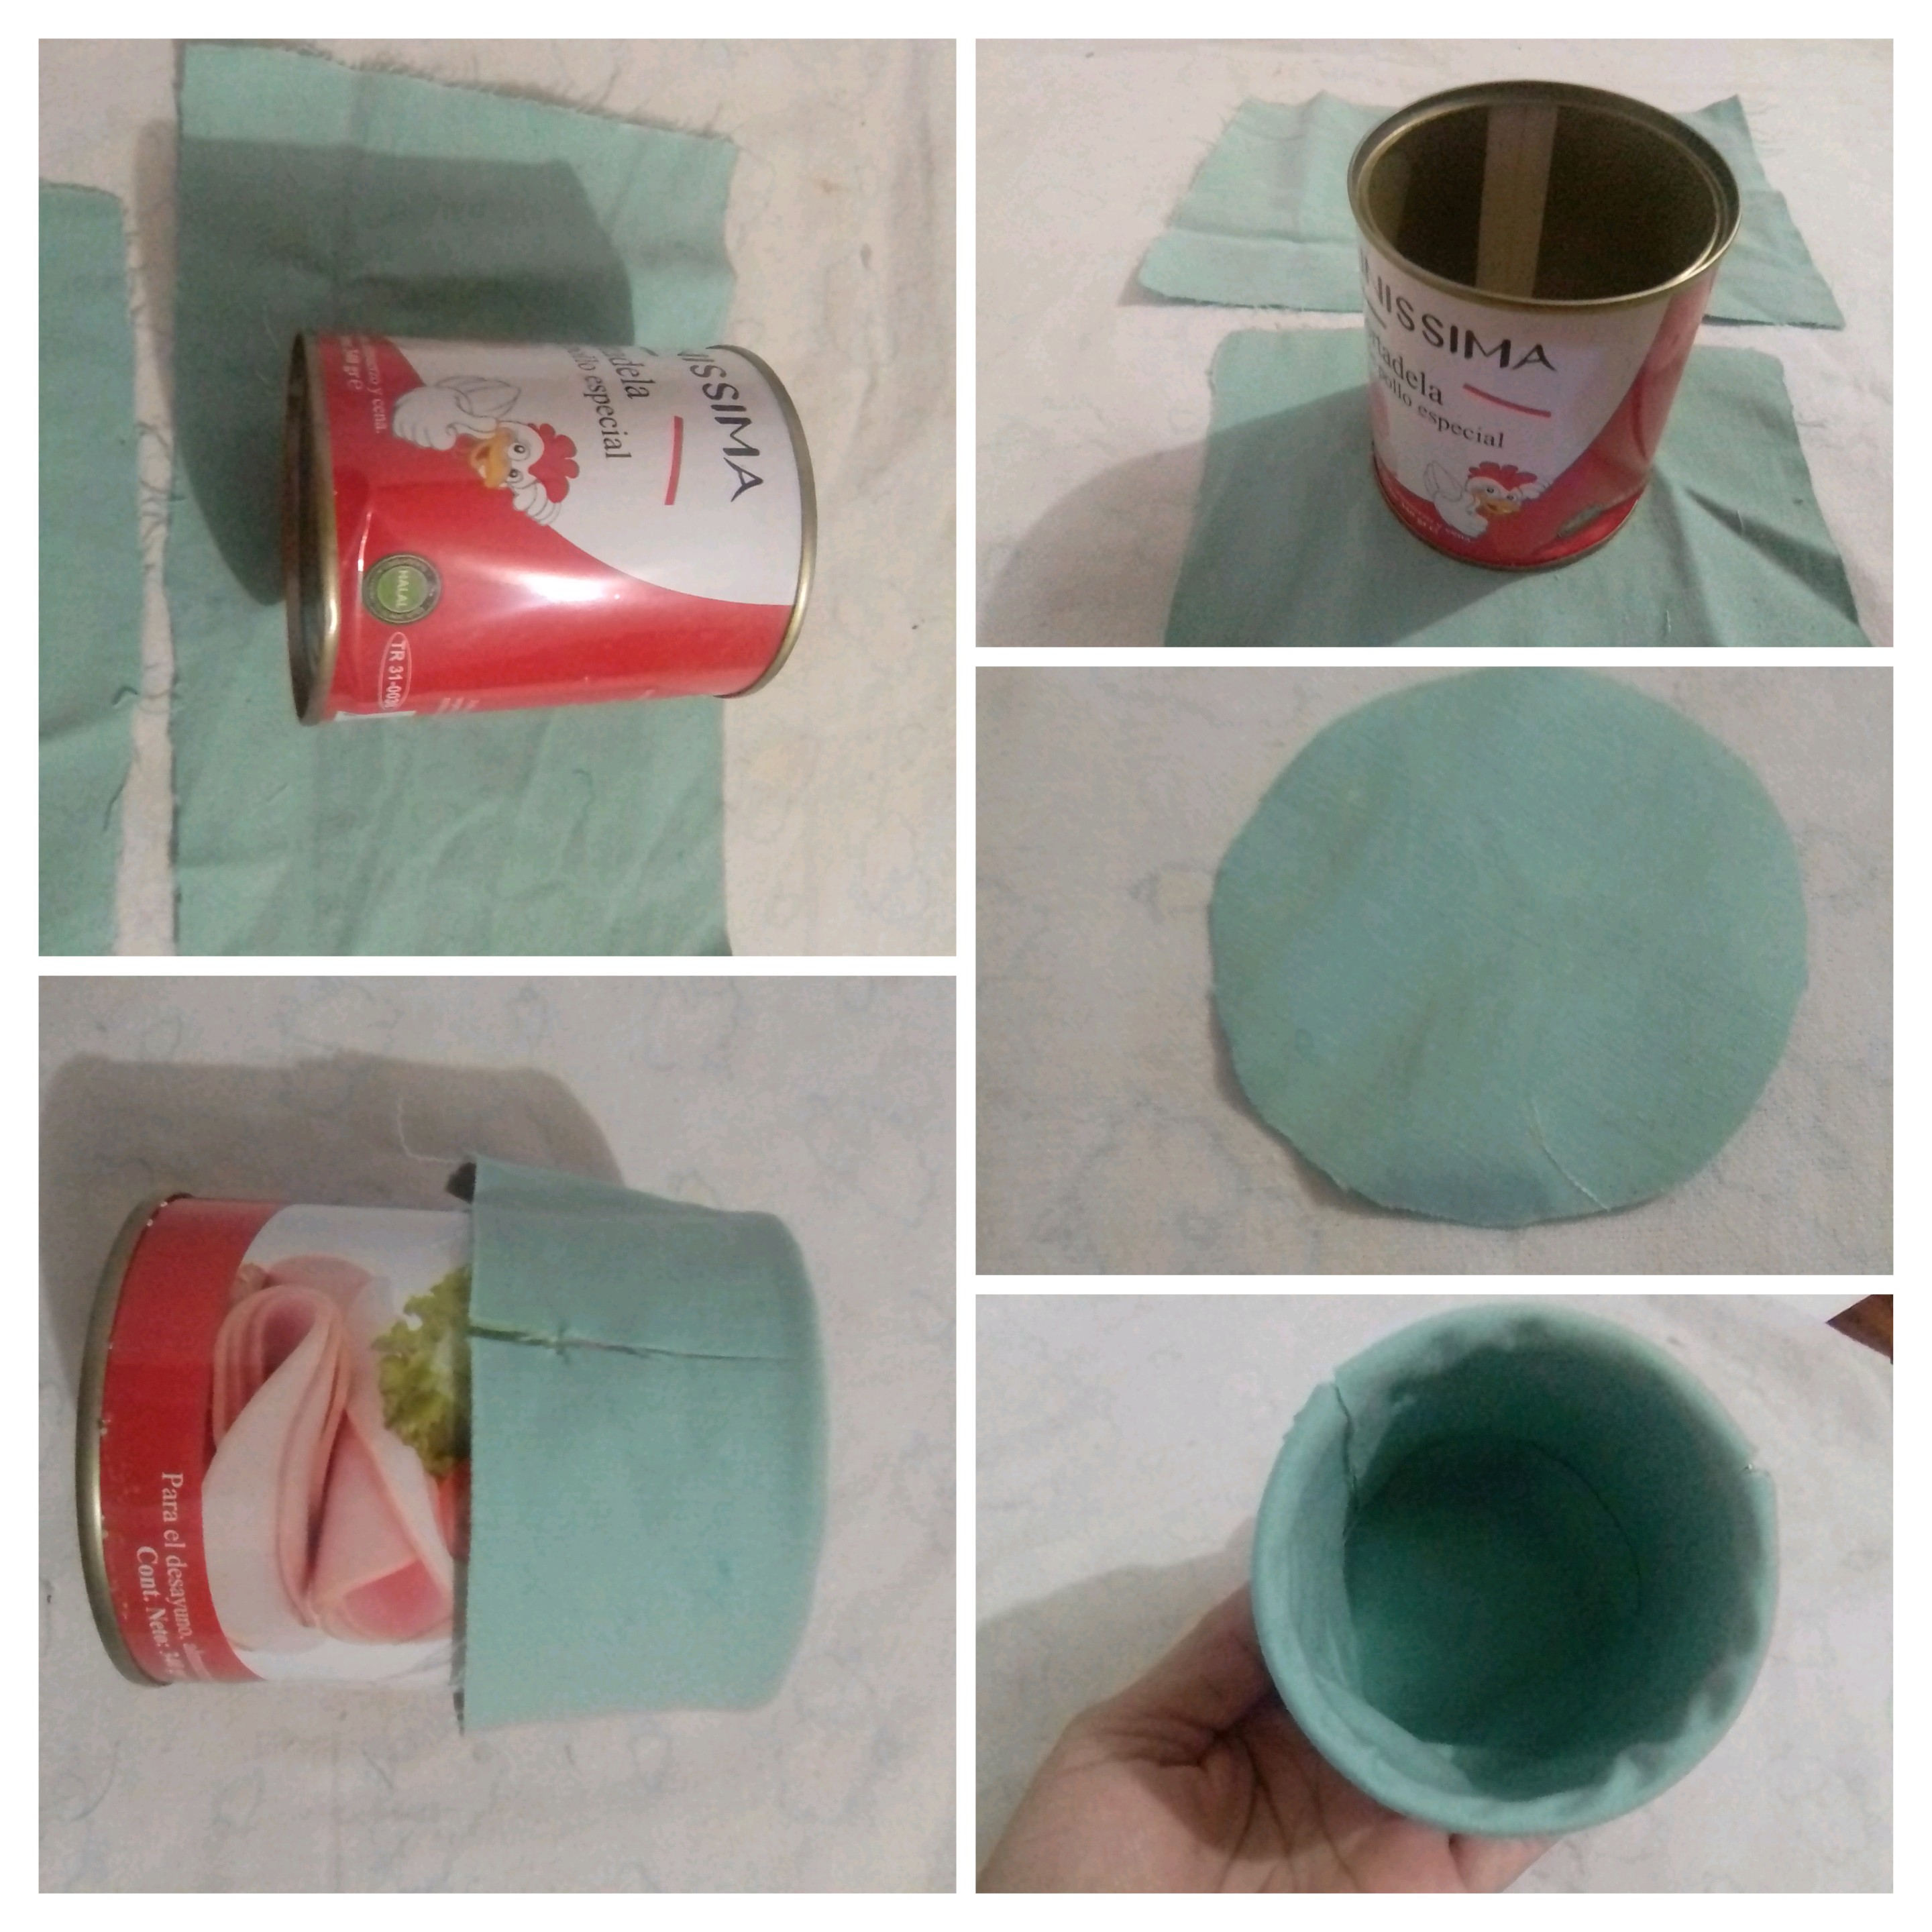
For this cute little box of gifts or sweets, with a New Year theme, the first thing I am going to do is line the inside of the can, for this I use light green fabric, cut the piece and also take the measurement of the bottom and cut it out. . Glue with hot silicone and in the upper part make several cuts to facilitate the folding out and fix with glue, also glue the circle of fabric on the bottom of the can.
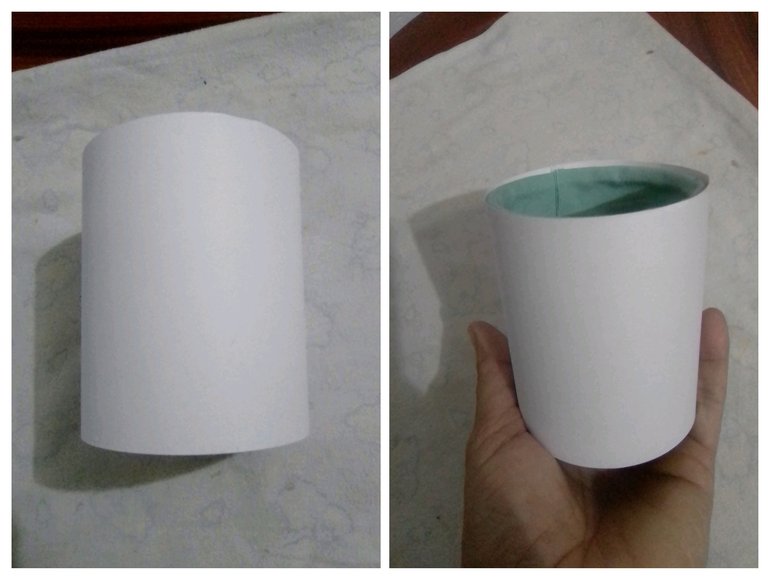
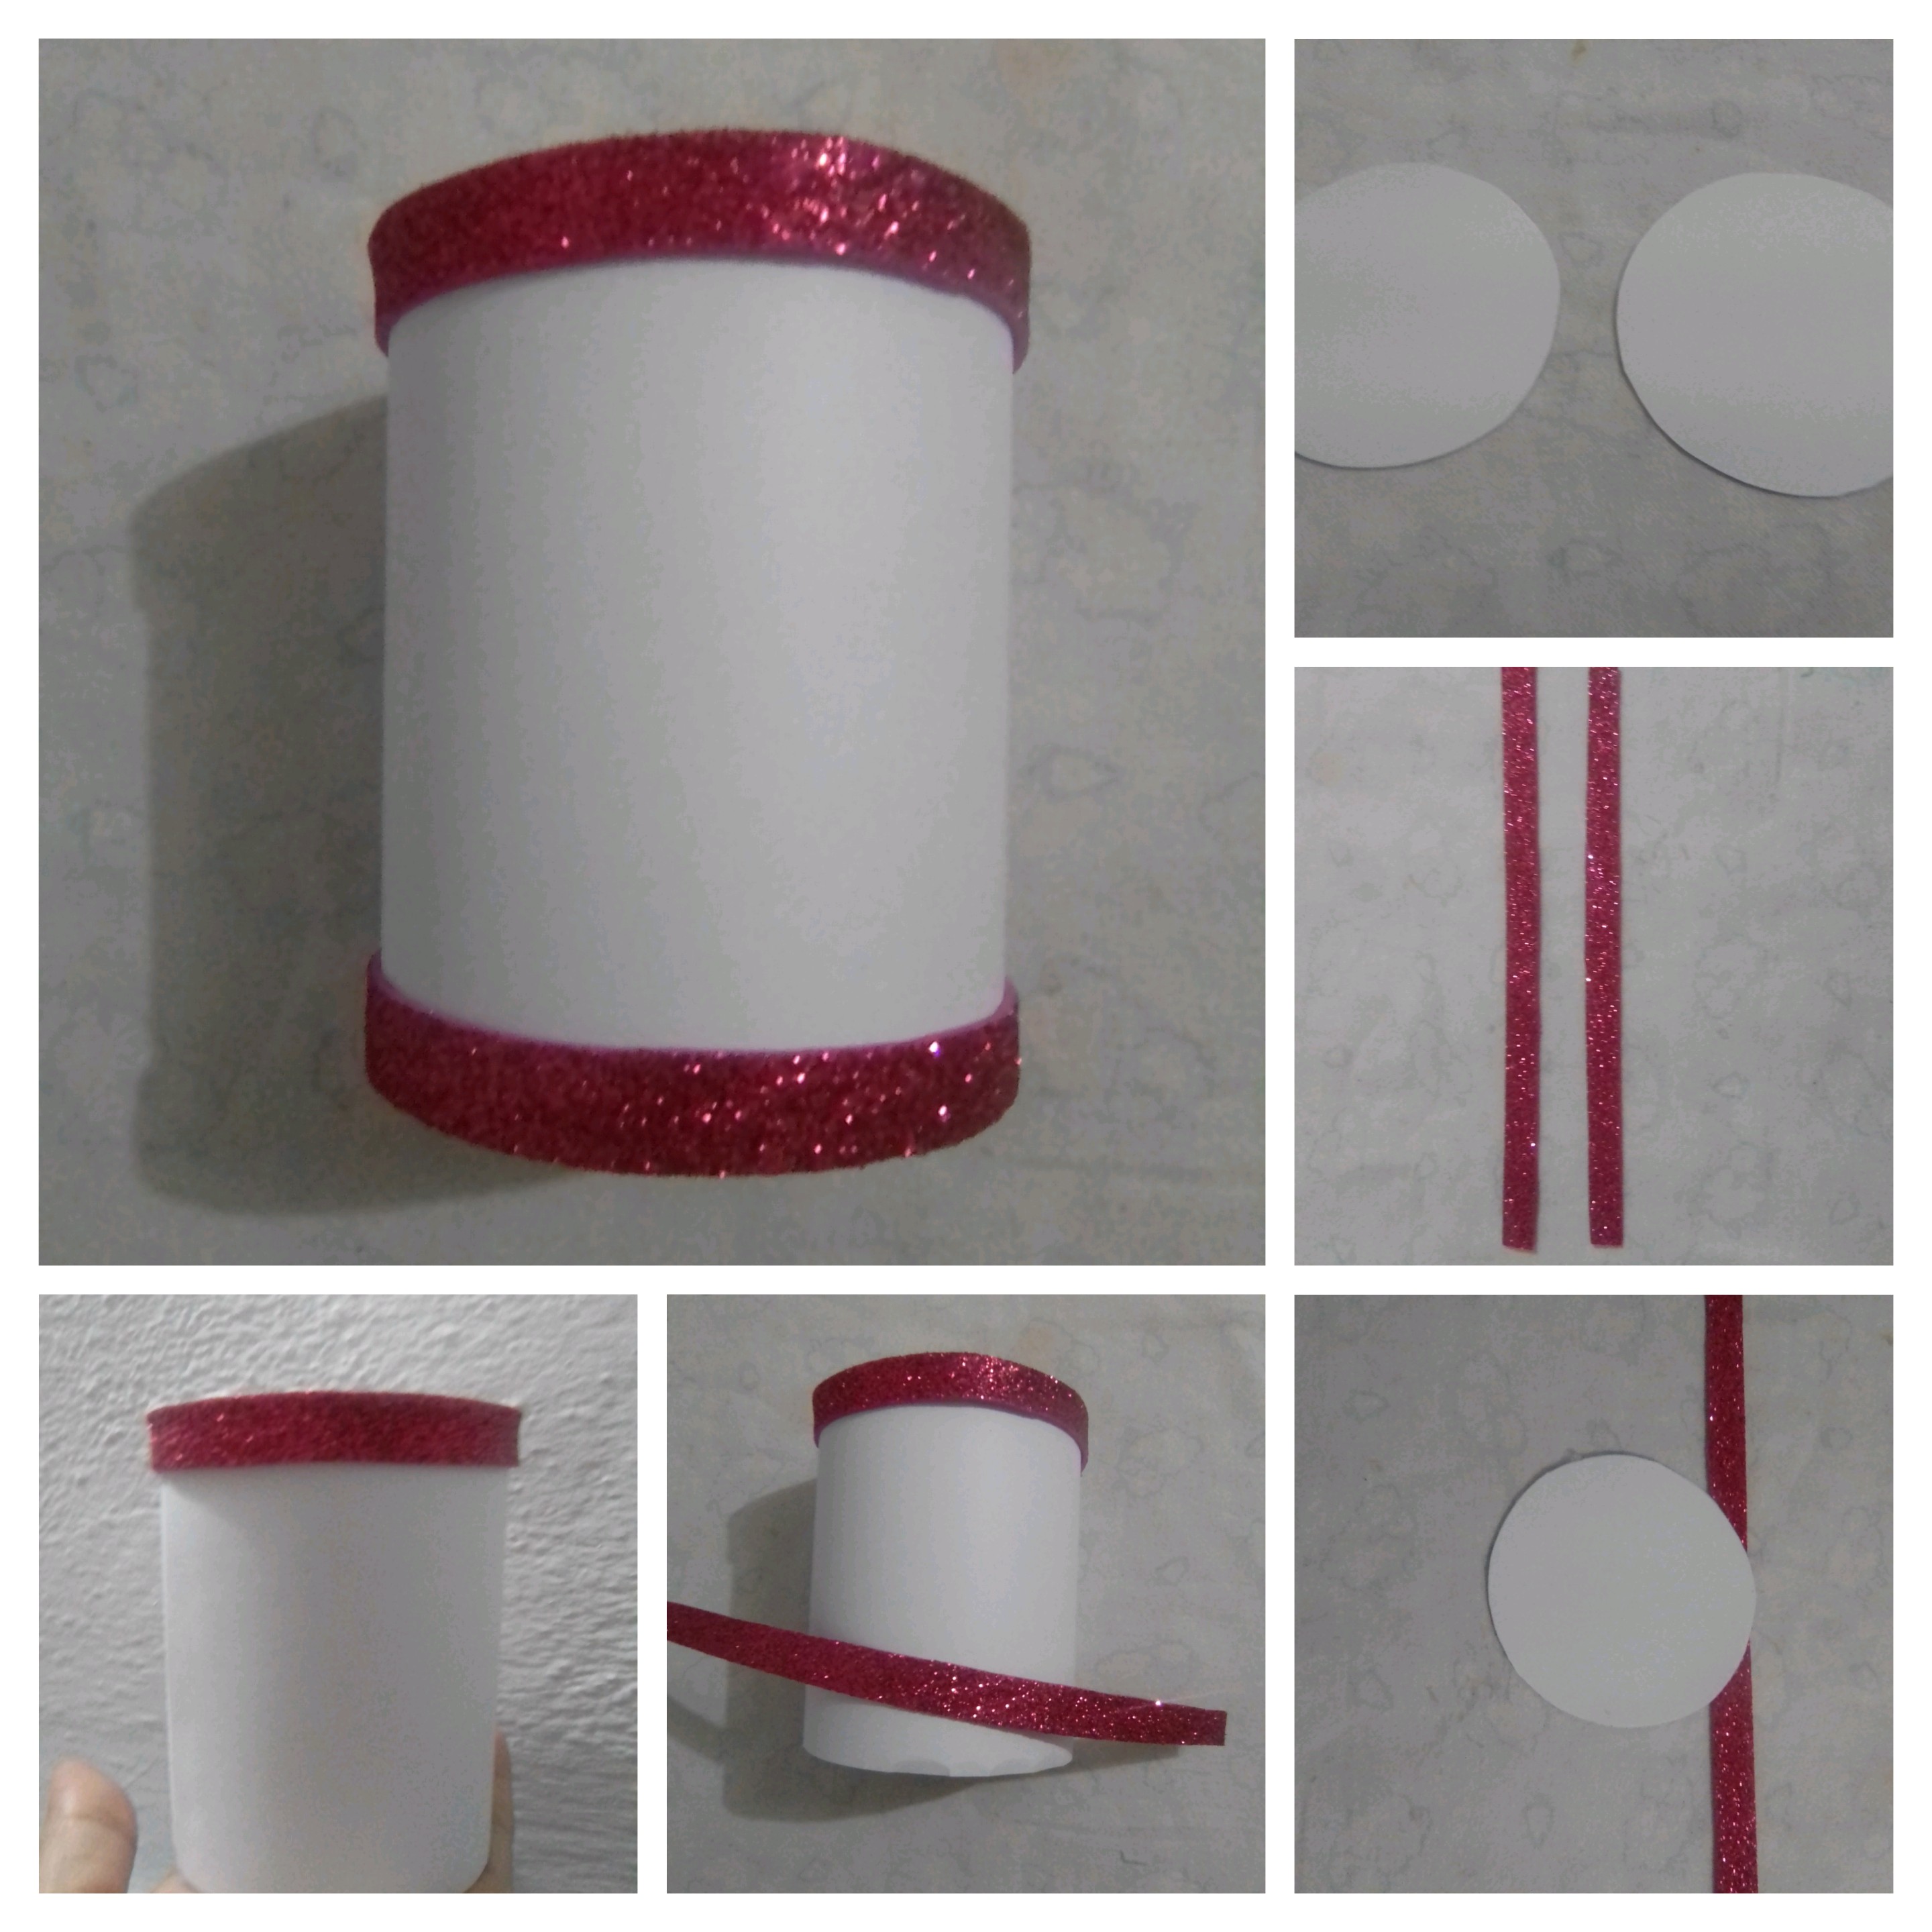
The next step is to cover the outside of the can, which I did with white cardboard, I used this color so that the Christmas colors can stand out. Cut the piece of cardboard and hot glue it to the bottom of the top.
To complete the box, make the lid with white cardboard, take the measurement and take out two circles that I fix with glue, I made it of double cardboard for greater resistance. Then cut two 1 centimeter strips of fuchsia foam, glue one strip around the cardboard to form the lid and the other strip I used on the base of my gift box.
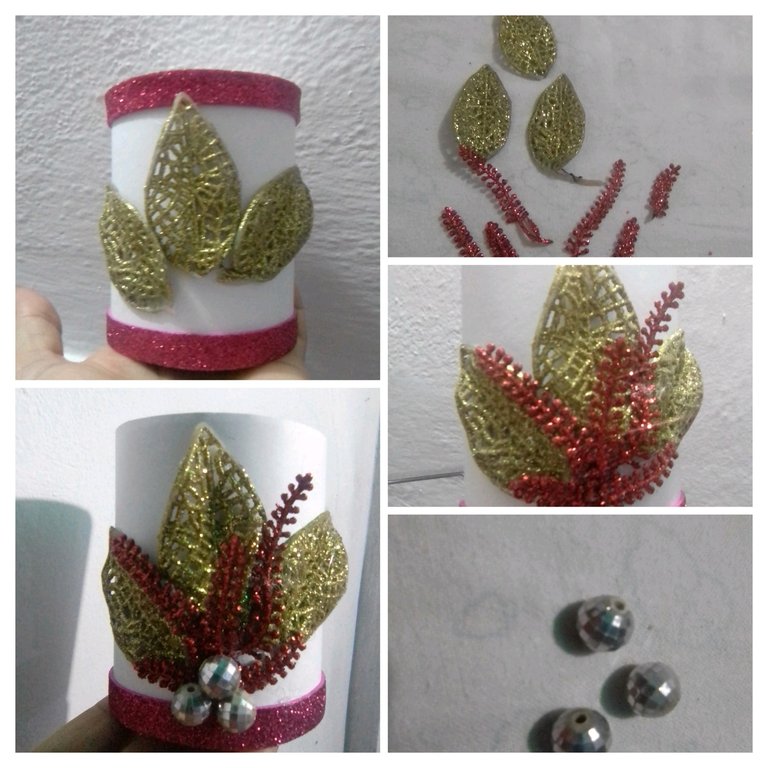
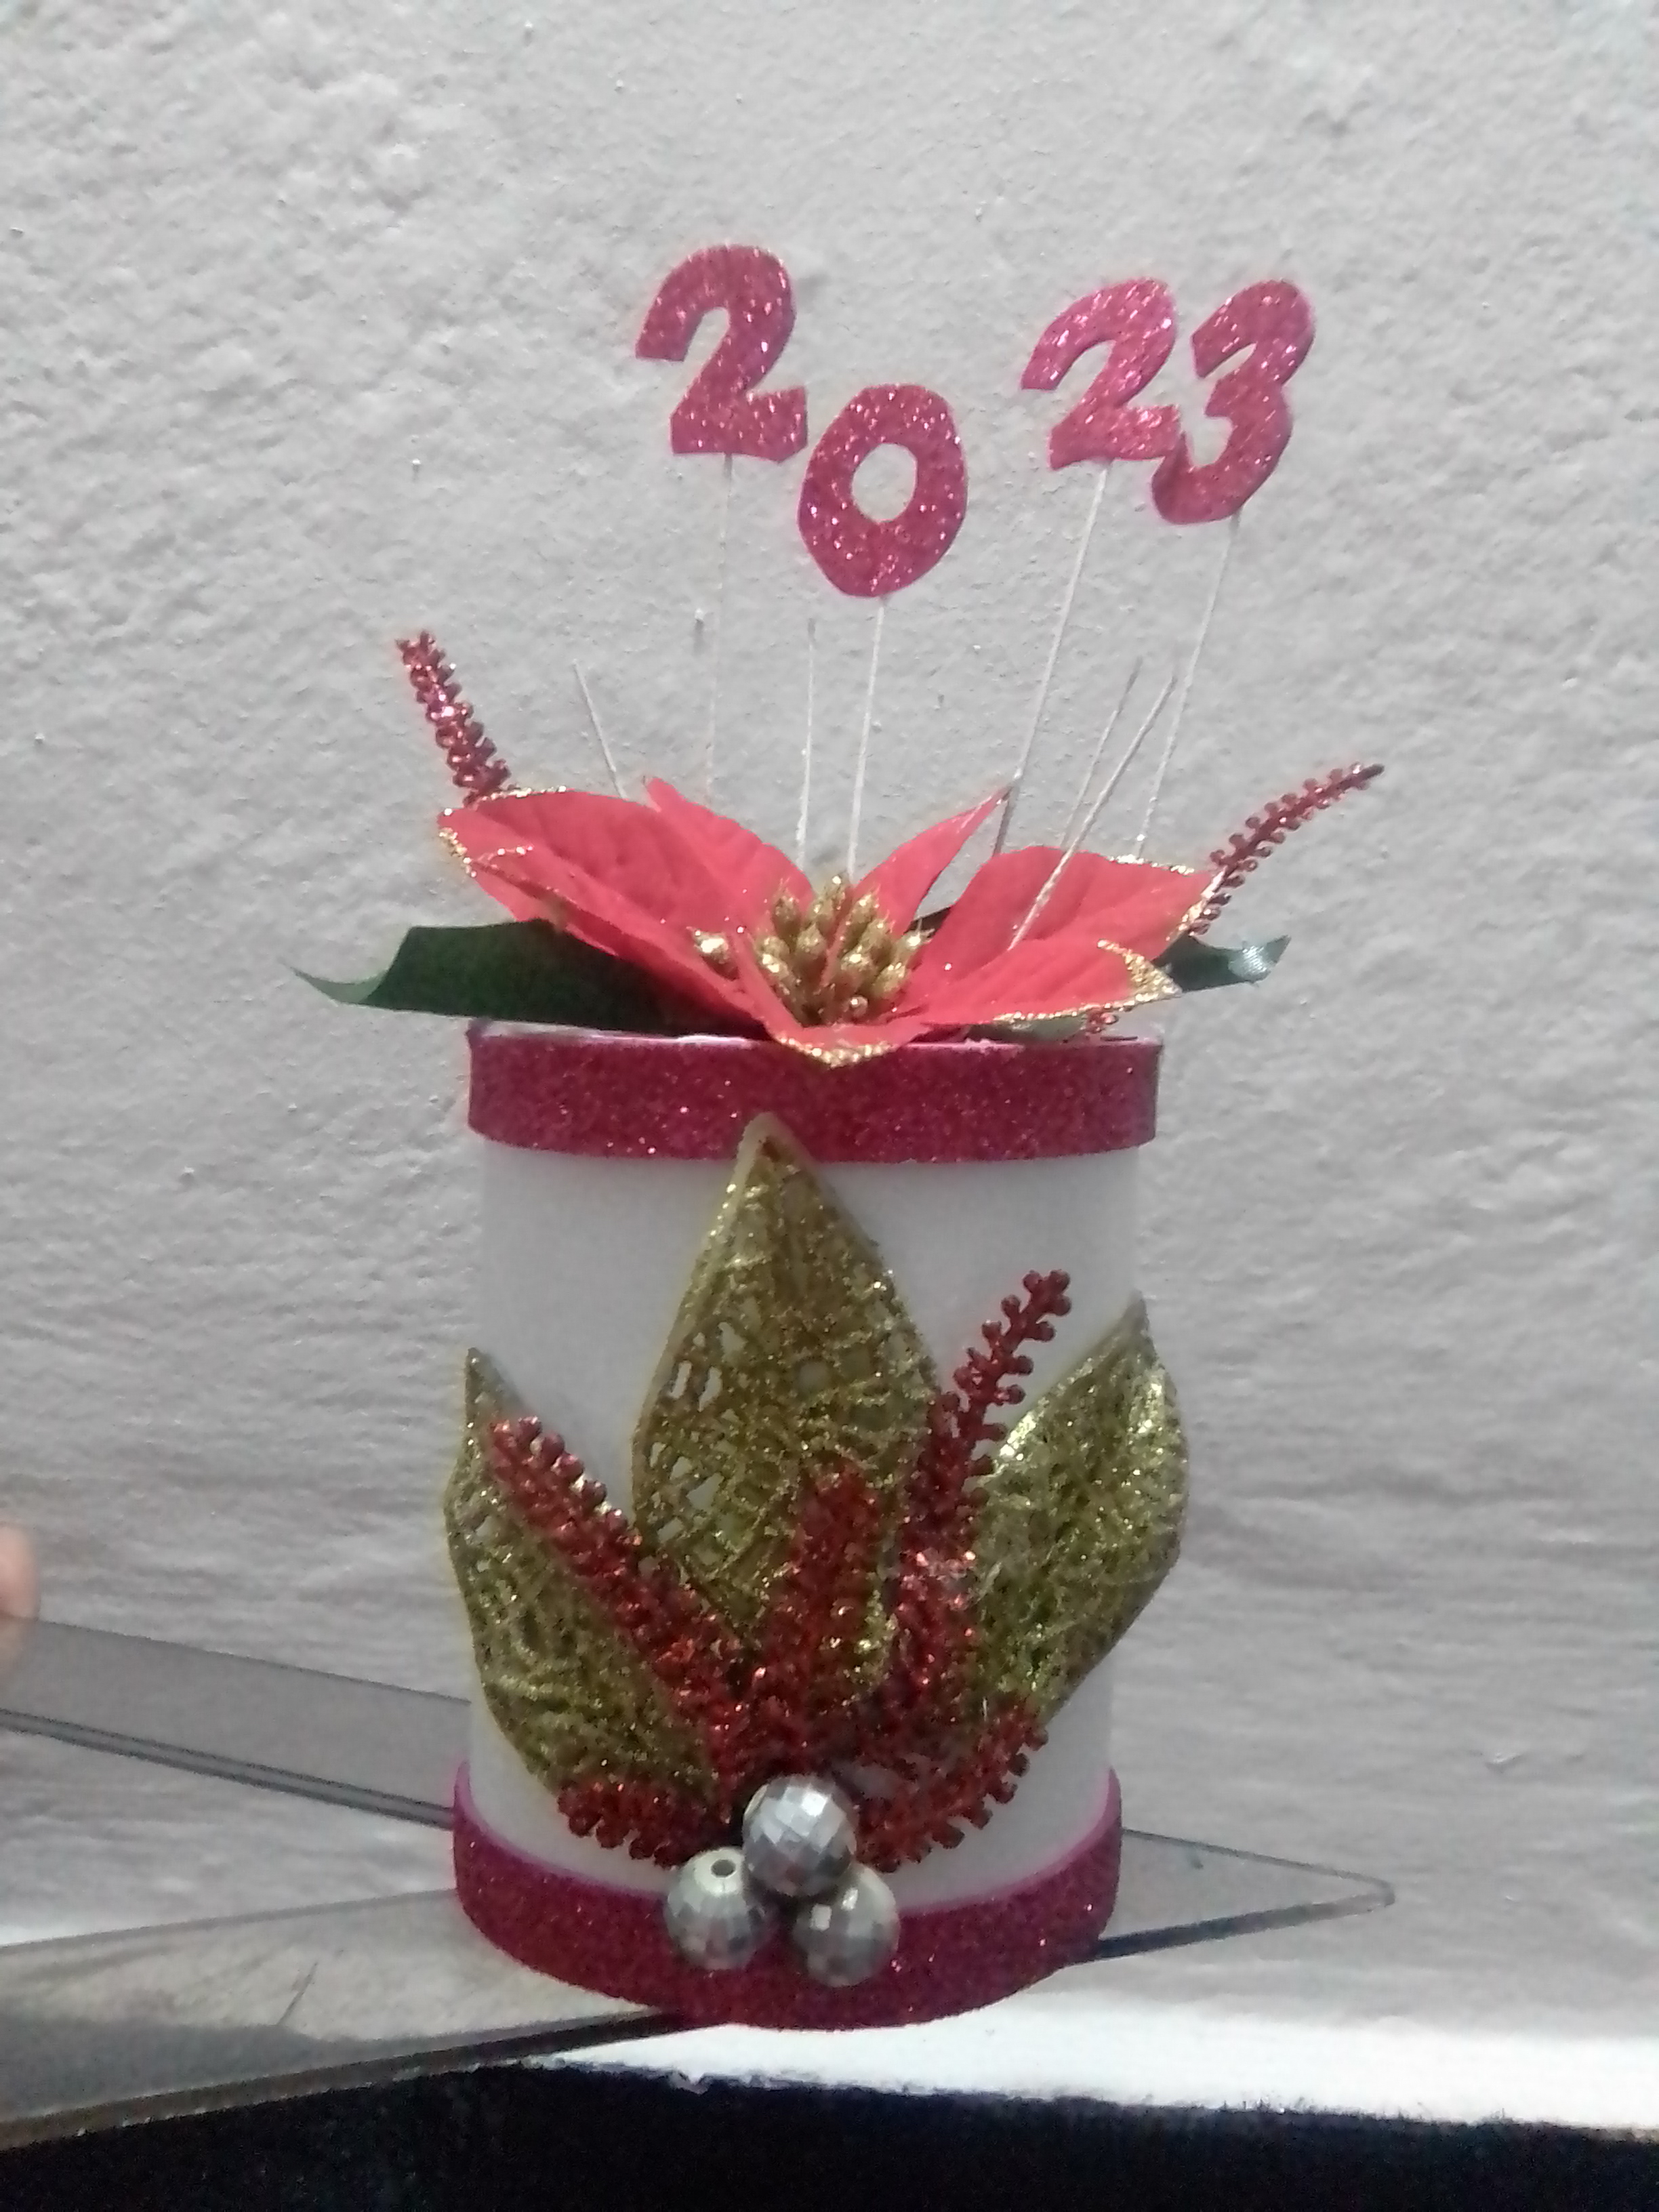
With the elements ready, I begin to decorate my box, place three golden colored plastic sheets, harmoniously place some red spikes, crowning the center of the bouquet with three silver pearls.
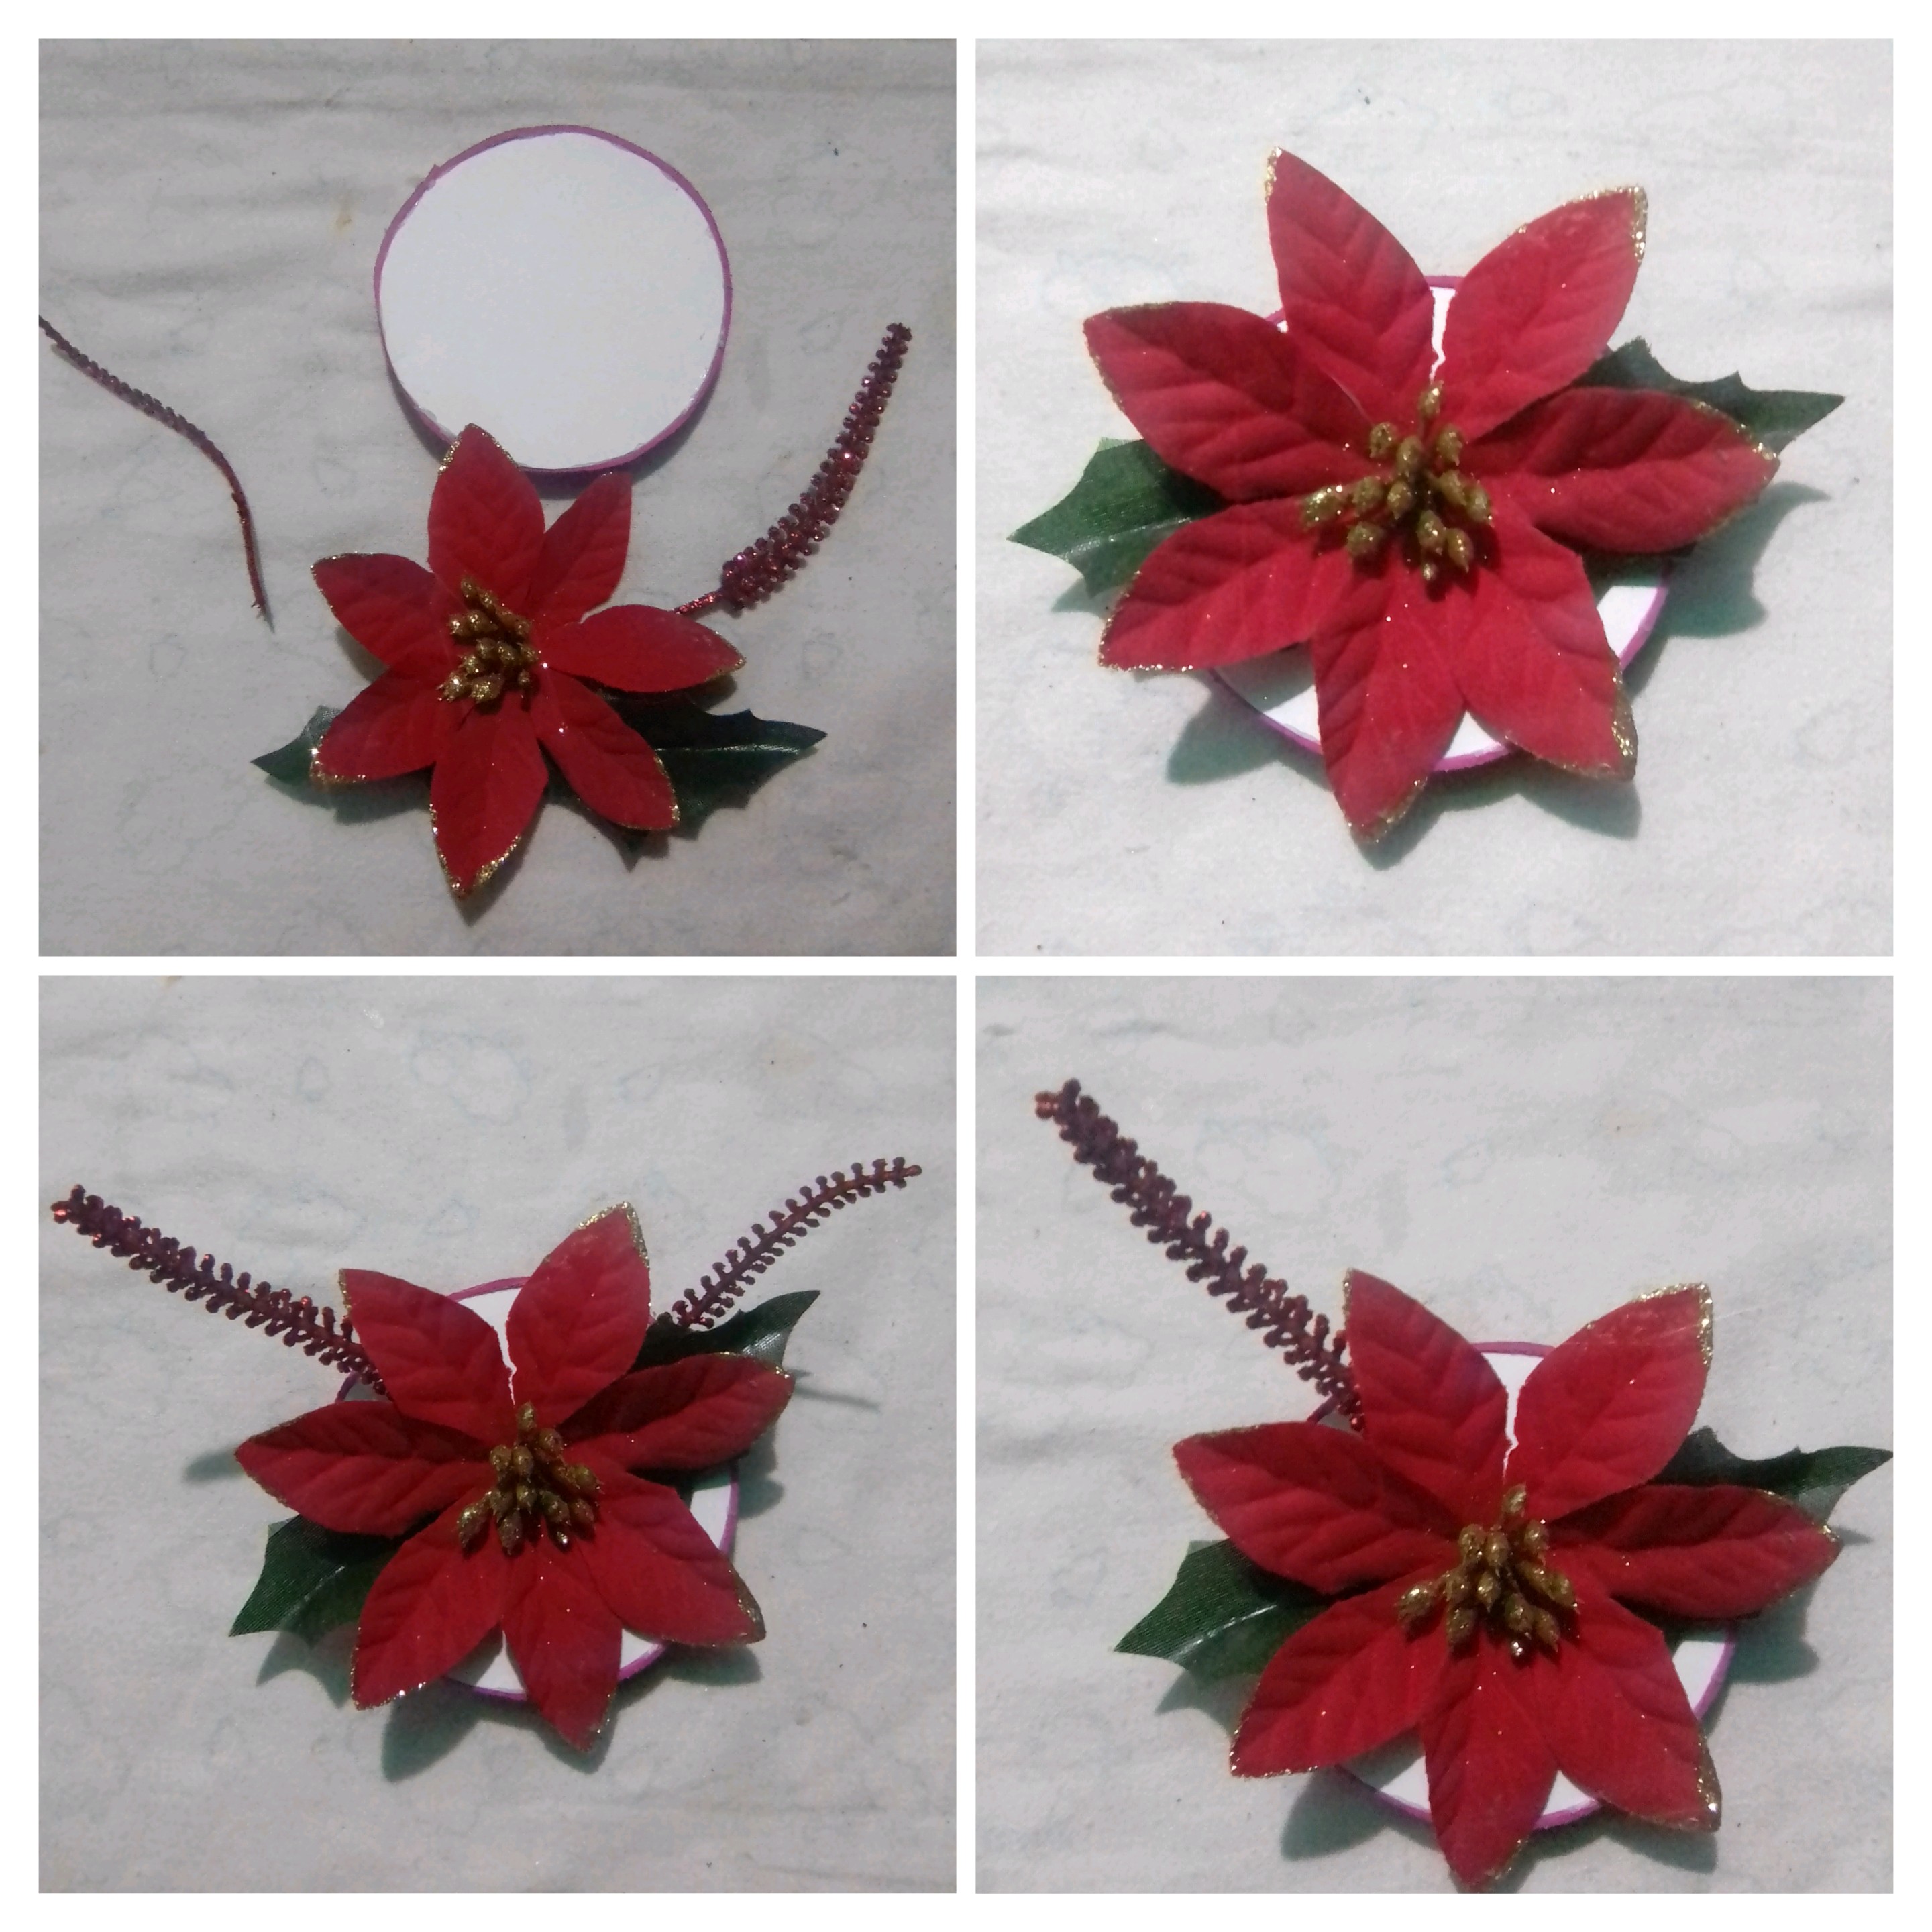
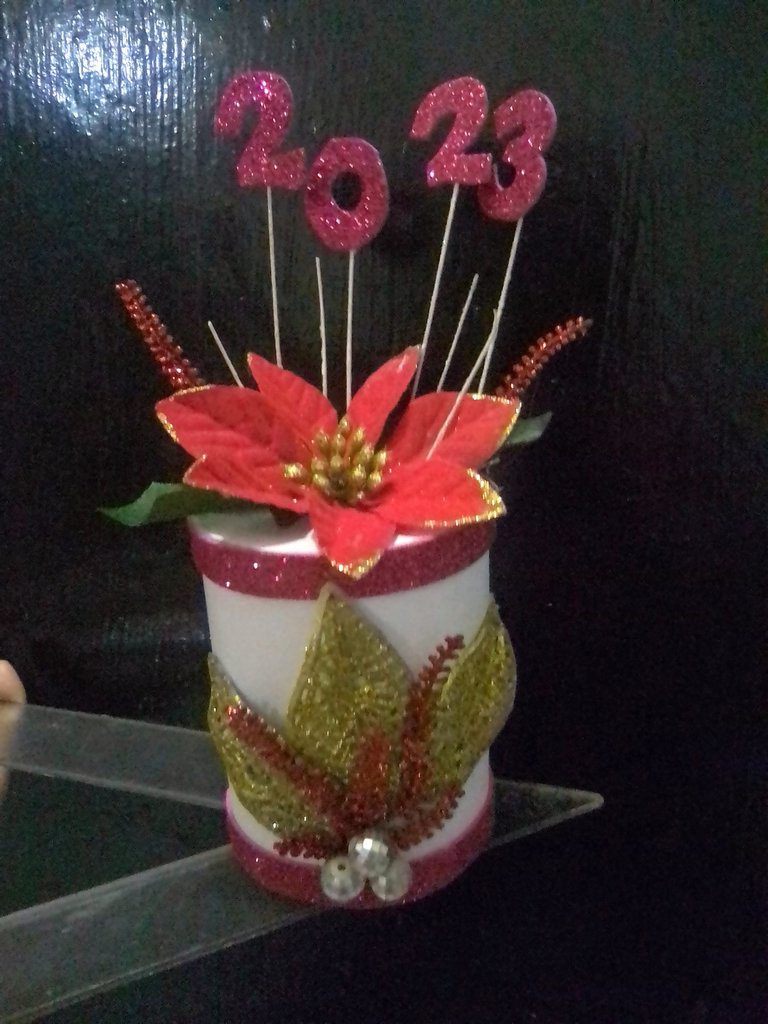
To decorate the lid, I selected some elements that were going to be discarded and I preferred to give them their second chance here, it is a part of Christmas flowers, some frosty red spikes. Assemble the flower, place the spikes on the sides and you have a gift box look.
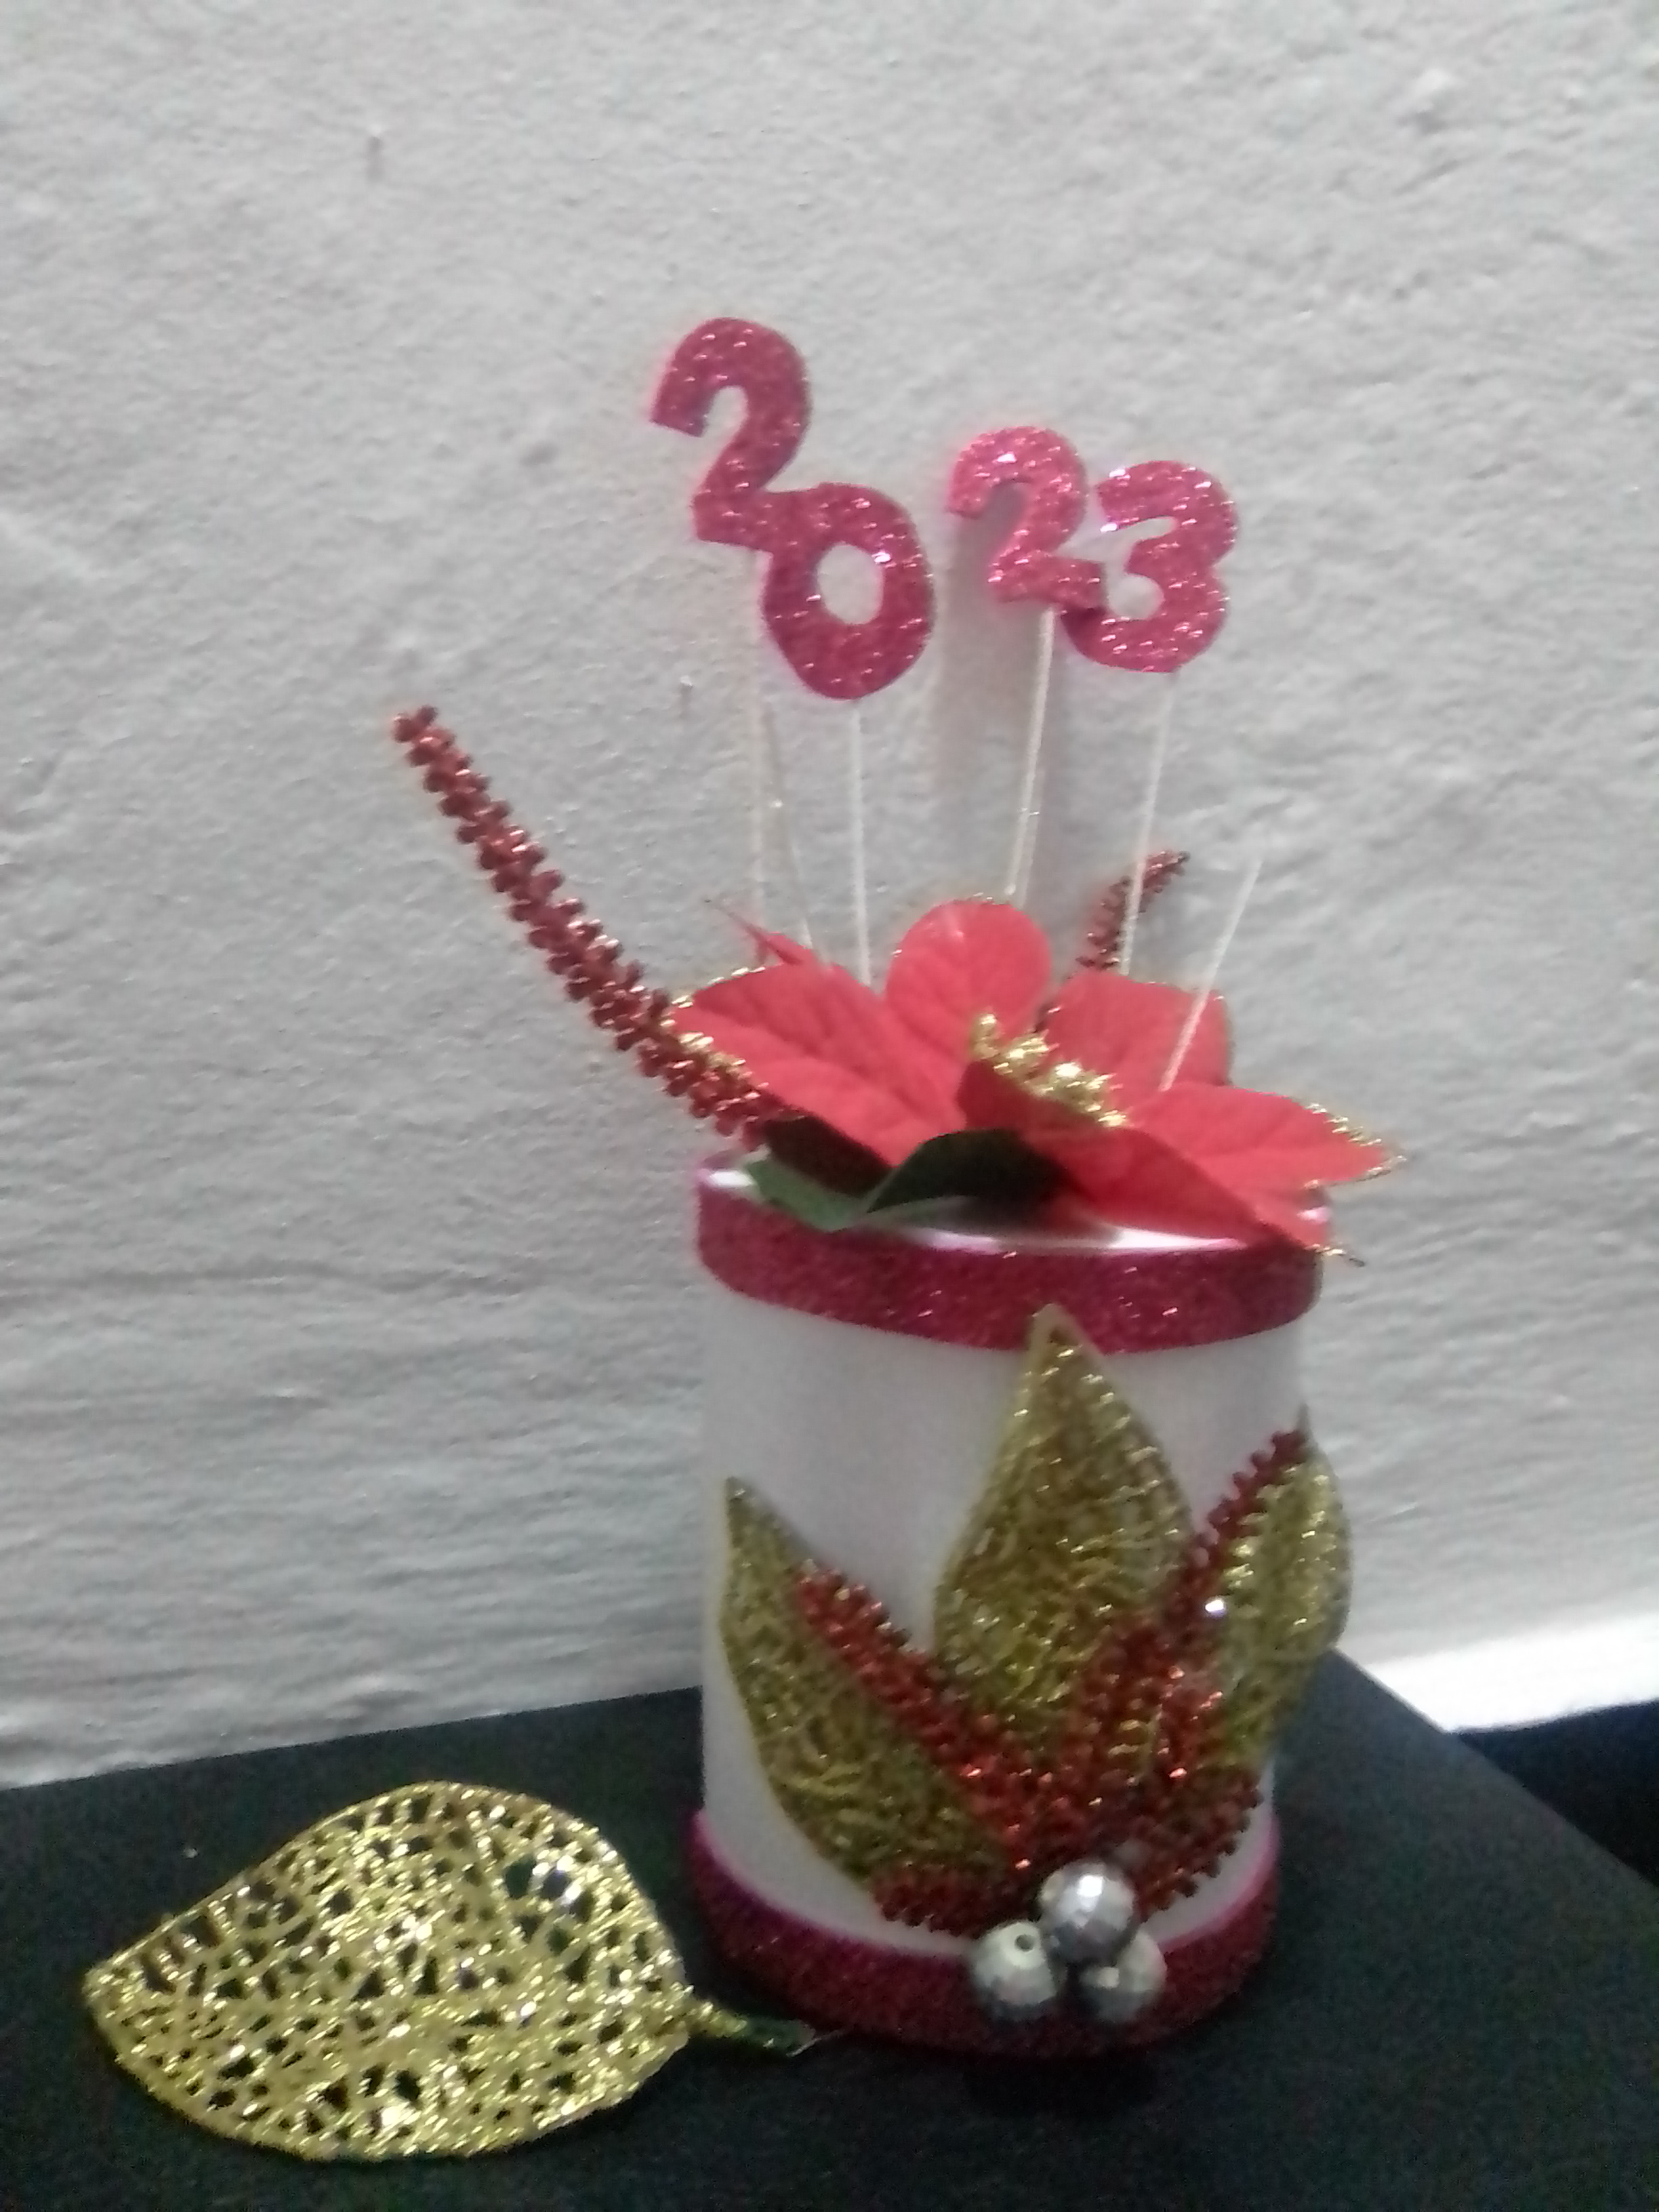
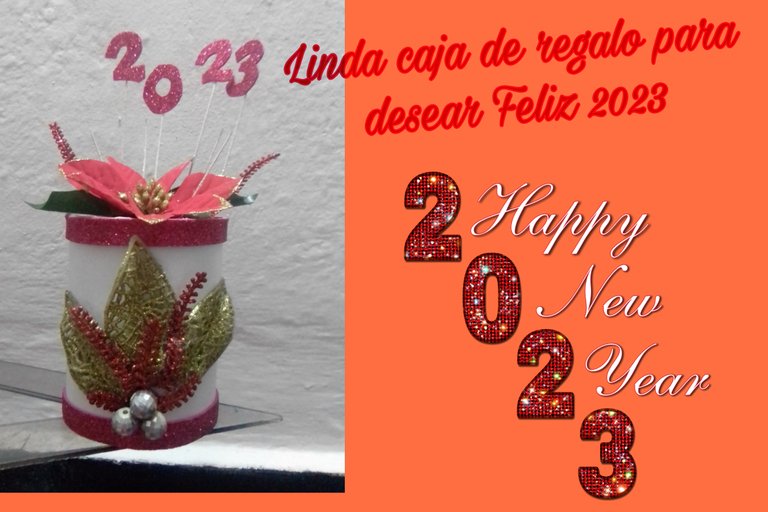
Finally, I made the molds for the numbers of the year 2023, I transferred them to the frosty fuchsia foami, select some wires covered in frosty white and glue the numbers there, to later place them on the decorated lid. And that's how this cute little box for New Year-themed gifts culminates.

Hoping that this craft is to your liking, and wishing everyone a happy and blessed year 2023. Happy New Year.
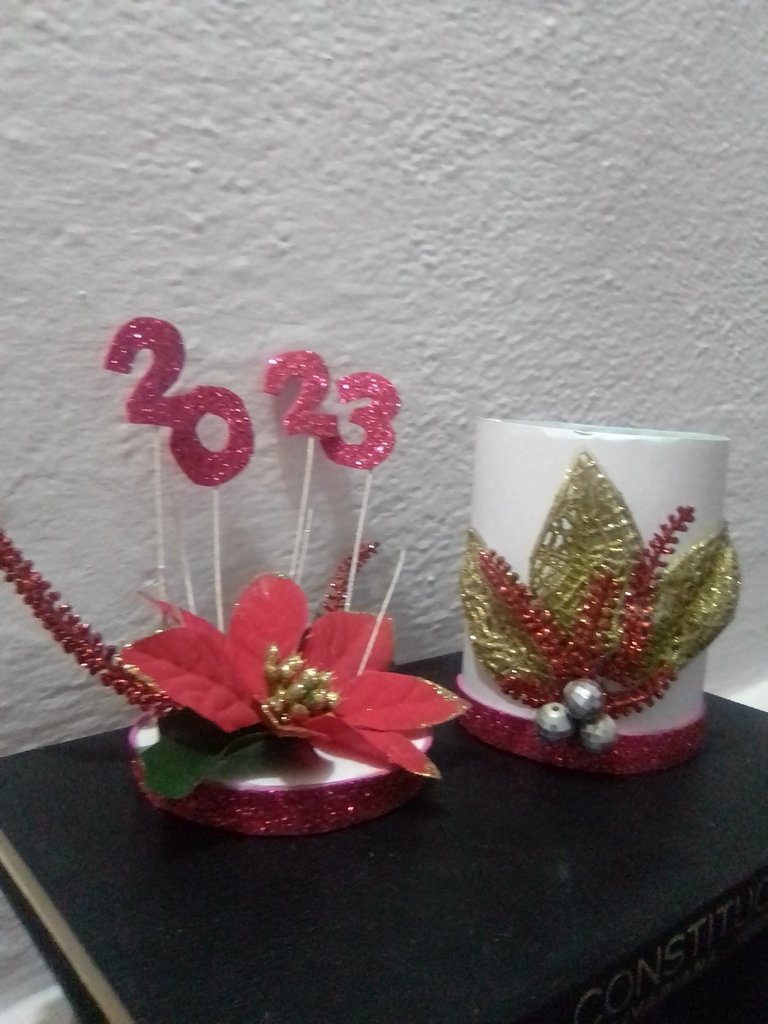
RESULT
The photos are my property, taken exclusively in this project.
The collages of the procedure were made with the tool of my Blue C6 and the main one in Canva
The separators and the banners were edited by me in Canva
The translation was made with
DeepL Translator

Feliz día para todos los creativos de Hive Diy, ya cuando estamos muy cerca de despedir un año de muchas experiencias y aprendizajes, y nos disponemos a dar la bienvenida a otro con fe y esperanzas de que el próximo sea en todos los aspectos mucho mejor y que nuestros deseos y propósitos sean cumplidos, no hay nada más bonito que para esta fecha dar un lindo obsequio, hecho por nosotros mismos, para aquellas personas que son parte de nuestra abundancia y que les invite a recibir con alegría el gran año 2023. A continuación les contaré cómo realice una hermosa cajita para dulces , usando una lata y reciclando algunos elementos decorativos navideños que ya no usamos en casa, con el motivo de año nuevo.
MATERIALES
✓ Cartulina blanco
✓ Tijera, lápiz y regla
✓ Pistola y barra de silicona
✓ Foami escarchado fucsia.
✓ Tela verde claro
✓ Lata de embutidos
✓ Flores, hojas y ornamentos de reciclaje
PASO A PASO
Para esta linda cajita de regalos o dulces, con temática de año nuevo, lo primero que voy a realizar es forrar la lata por dentro, para ello utilice tela de color verde claro, corte la pieza y también tome la medida del fondo y la recorte. Pegue con silicón caliente y en la parte superior realice varios cortes para facilitar el doblez hacia fuera y fije con pegamento, igualmente pegue el círculo de tela en el fondo de la lata.
El siguiente paso es cubrir la lata por la parte exterior, lo cual hice con cartulina de color blanco, use este color para que los colores navideños puedan resaltar. Corte la pieza de cartulina y pegué con silicón caliente al raz de la parte superior.
Para completar la caja, elabore la tapa con cartulina blanco, tome la medida y saque dos círculos que fije con pegamento, la hice de cartulina doble para una mayor resistencia. Luego corte dos tiras de foami fucsia de 1 centímetro, pegue una tira al rededor del cartón para formar la tapa y la otra tira la use en la base de mi caja de regalos.
Con los elementos listos, comienzo a decorar mi caja, coloque tres hojas plásticas de color dorado, de manera armoniosa ubique unas espigas rojas, coronando el centro del ramo con tres perlas plateadas.
Para decorar la tapa, seleccione algunos elementos que se iban a desechar y preferí darles acá su segunda oportunidad, se trata de una parte de flores de navidad, algunas espigas rojas escarchadas. Ensamble la flor, coloque a los lados las espigas y ya tiene aspecto de caja de regalo.
Para finalizar, realice los moldes de los números del año 2023 , los transferí al foami fucsia escarchado, seleccione unos alambres cubiertos de un blanco escarchado y pegue los números allí, para luego colocarlos sobre la tapa decorada. Y así culmine este linda cajita para regalos con temática de año nuevo.
Esperando que esta manualidad sea de su agrado, y deseando para todos un venturoso y bendecido año 2023. Feliz año nuevo.
RESULTADO
Las fotos son de mi propiedad tomadas exclusivamente en este proyecto.
Los collages del procedimiento los hice con la herramienta de mi Blue C6 y el principal en Canva
Lo separadores y el banners fueron editados por mi en Canva
La traducción fue realizada con
DeepL Traductor