

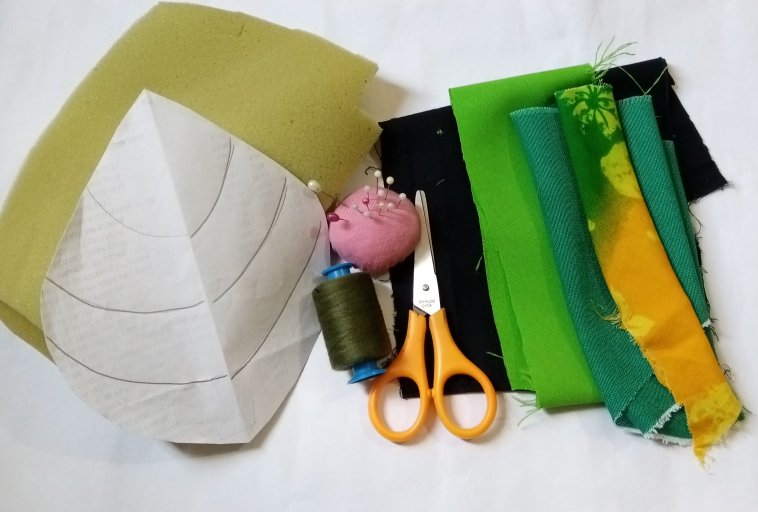
Materials
✓ Fabric scraps: two-tone green, dark blue, and patterned green.
✓ Fill.
✓ Thread
✓ Scissor
✓ Sewing machine.
✓ Tape measure.
Step by Step
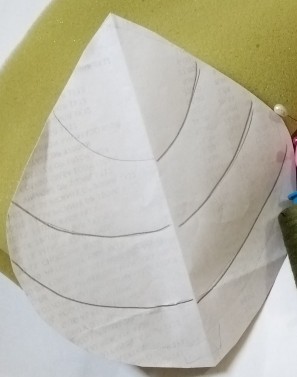
For this project, I had an idea for a few days, and when I found the scraps of fabric I imagined some pretty leaves, so I made the design of a pointed leaf, whose measurements are 17 centimeters high x 15 centimeters wide, in its part more bulky.
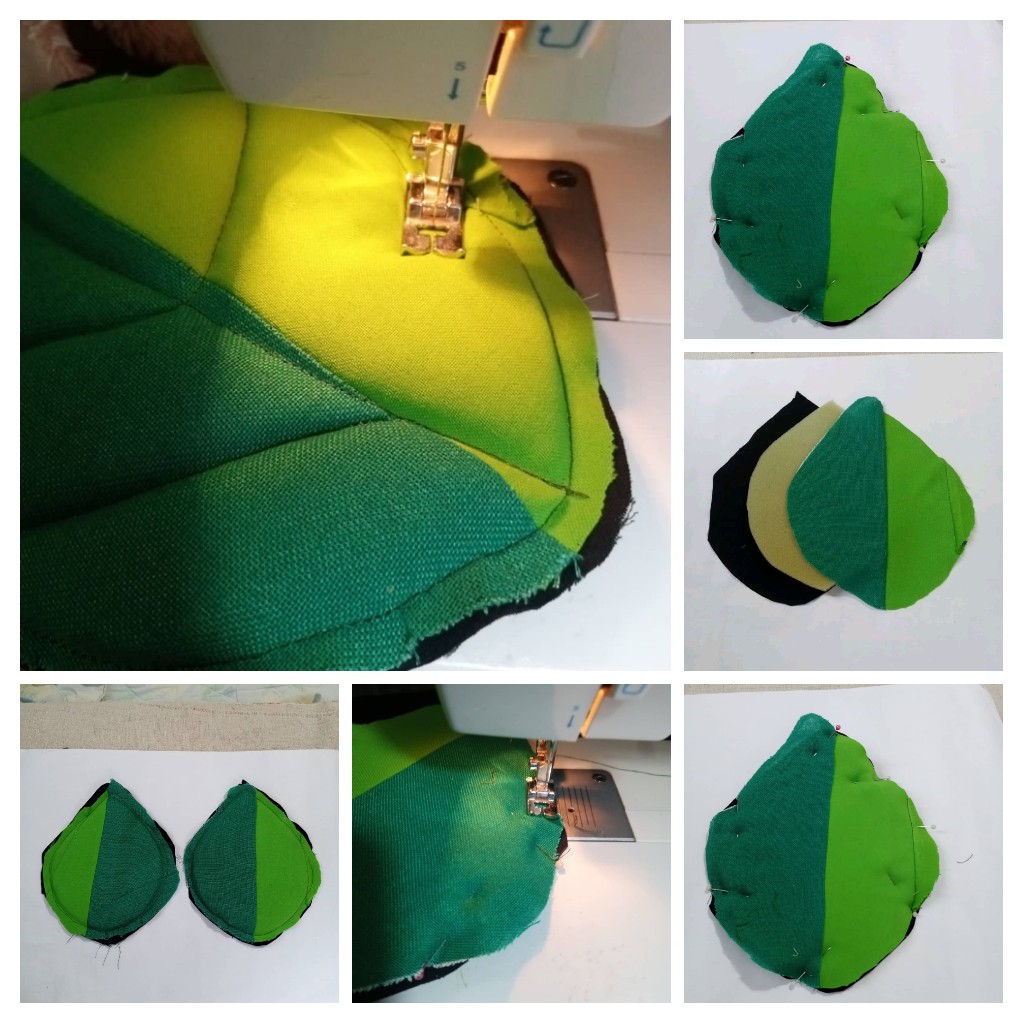
Next, sew two pieces of fabric in green colors of different shades, to form the necessary piece for the leaf. Then I transfer the leaf design to the piece of green fabric and to the piece of dark blue fabric, leaving the extra centimeter of seam and then I transfer the shape of the leaf to the rubber filler, the latter just the right size for the design.
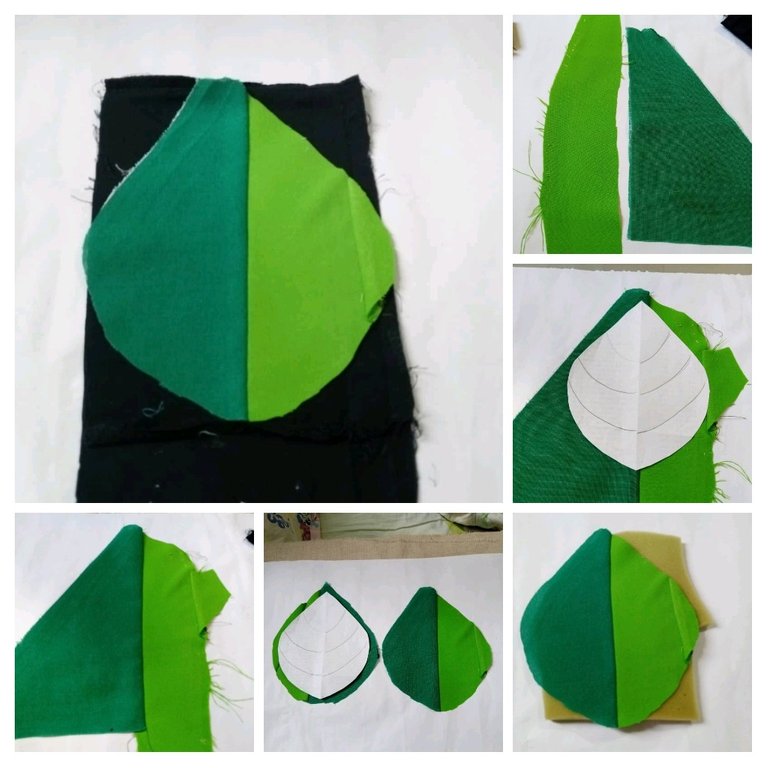
The next step was to place the fabric shapes, first the dark blue shape, then the filling and lastly the green color shape, fasten with the pins and then machine sew. Having my shape ready and padded, all that remains is to pass the inner seam to shape the veins of the leaves.
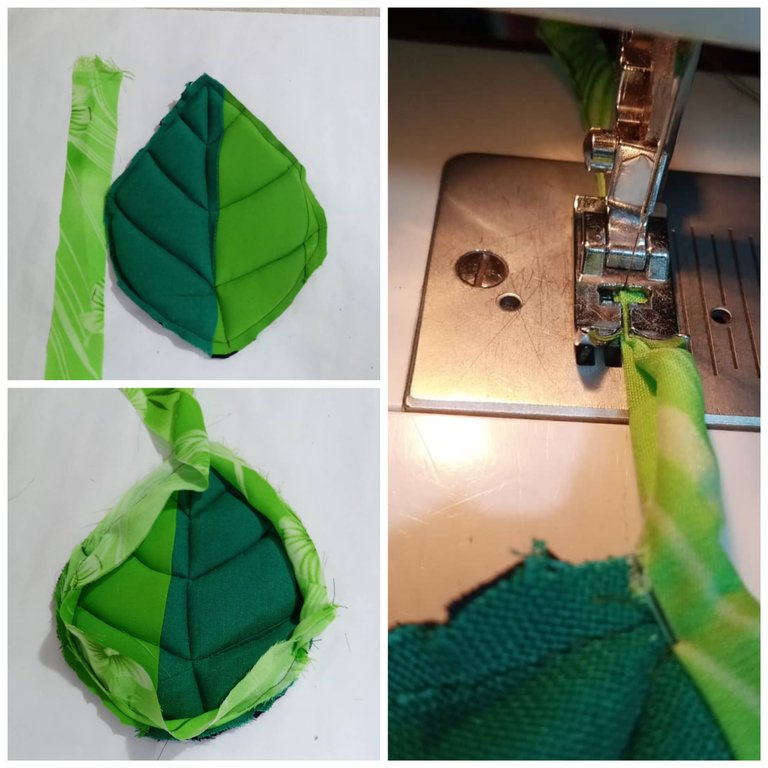
To continue, cut a strip of patterned green 2 centimeters wide, for the bias and decoration of my pot holders. I was sewing, starting from the tip of the leaf, from one side to the other end, and from that same bias I made the hanging loop, using 6 centimeters of bias, and finished by sewing the other side and so I have ready a cute homemade pot grabber game.
I hope that this mini tutorial is to your liking and usefulness and that you are encouraged to do it at home.
Result
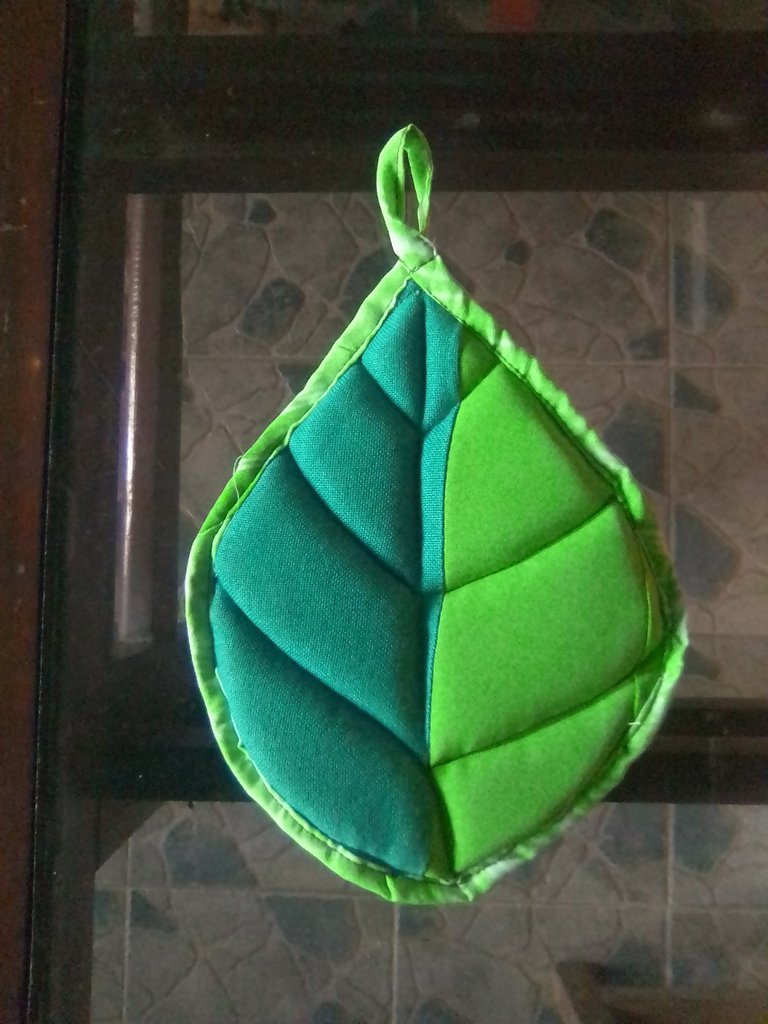
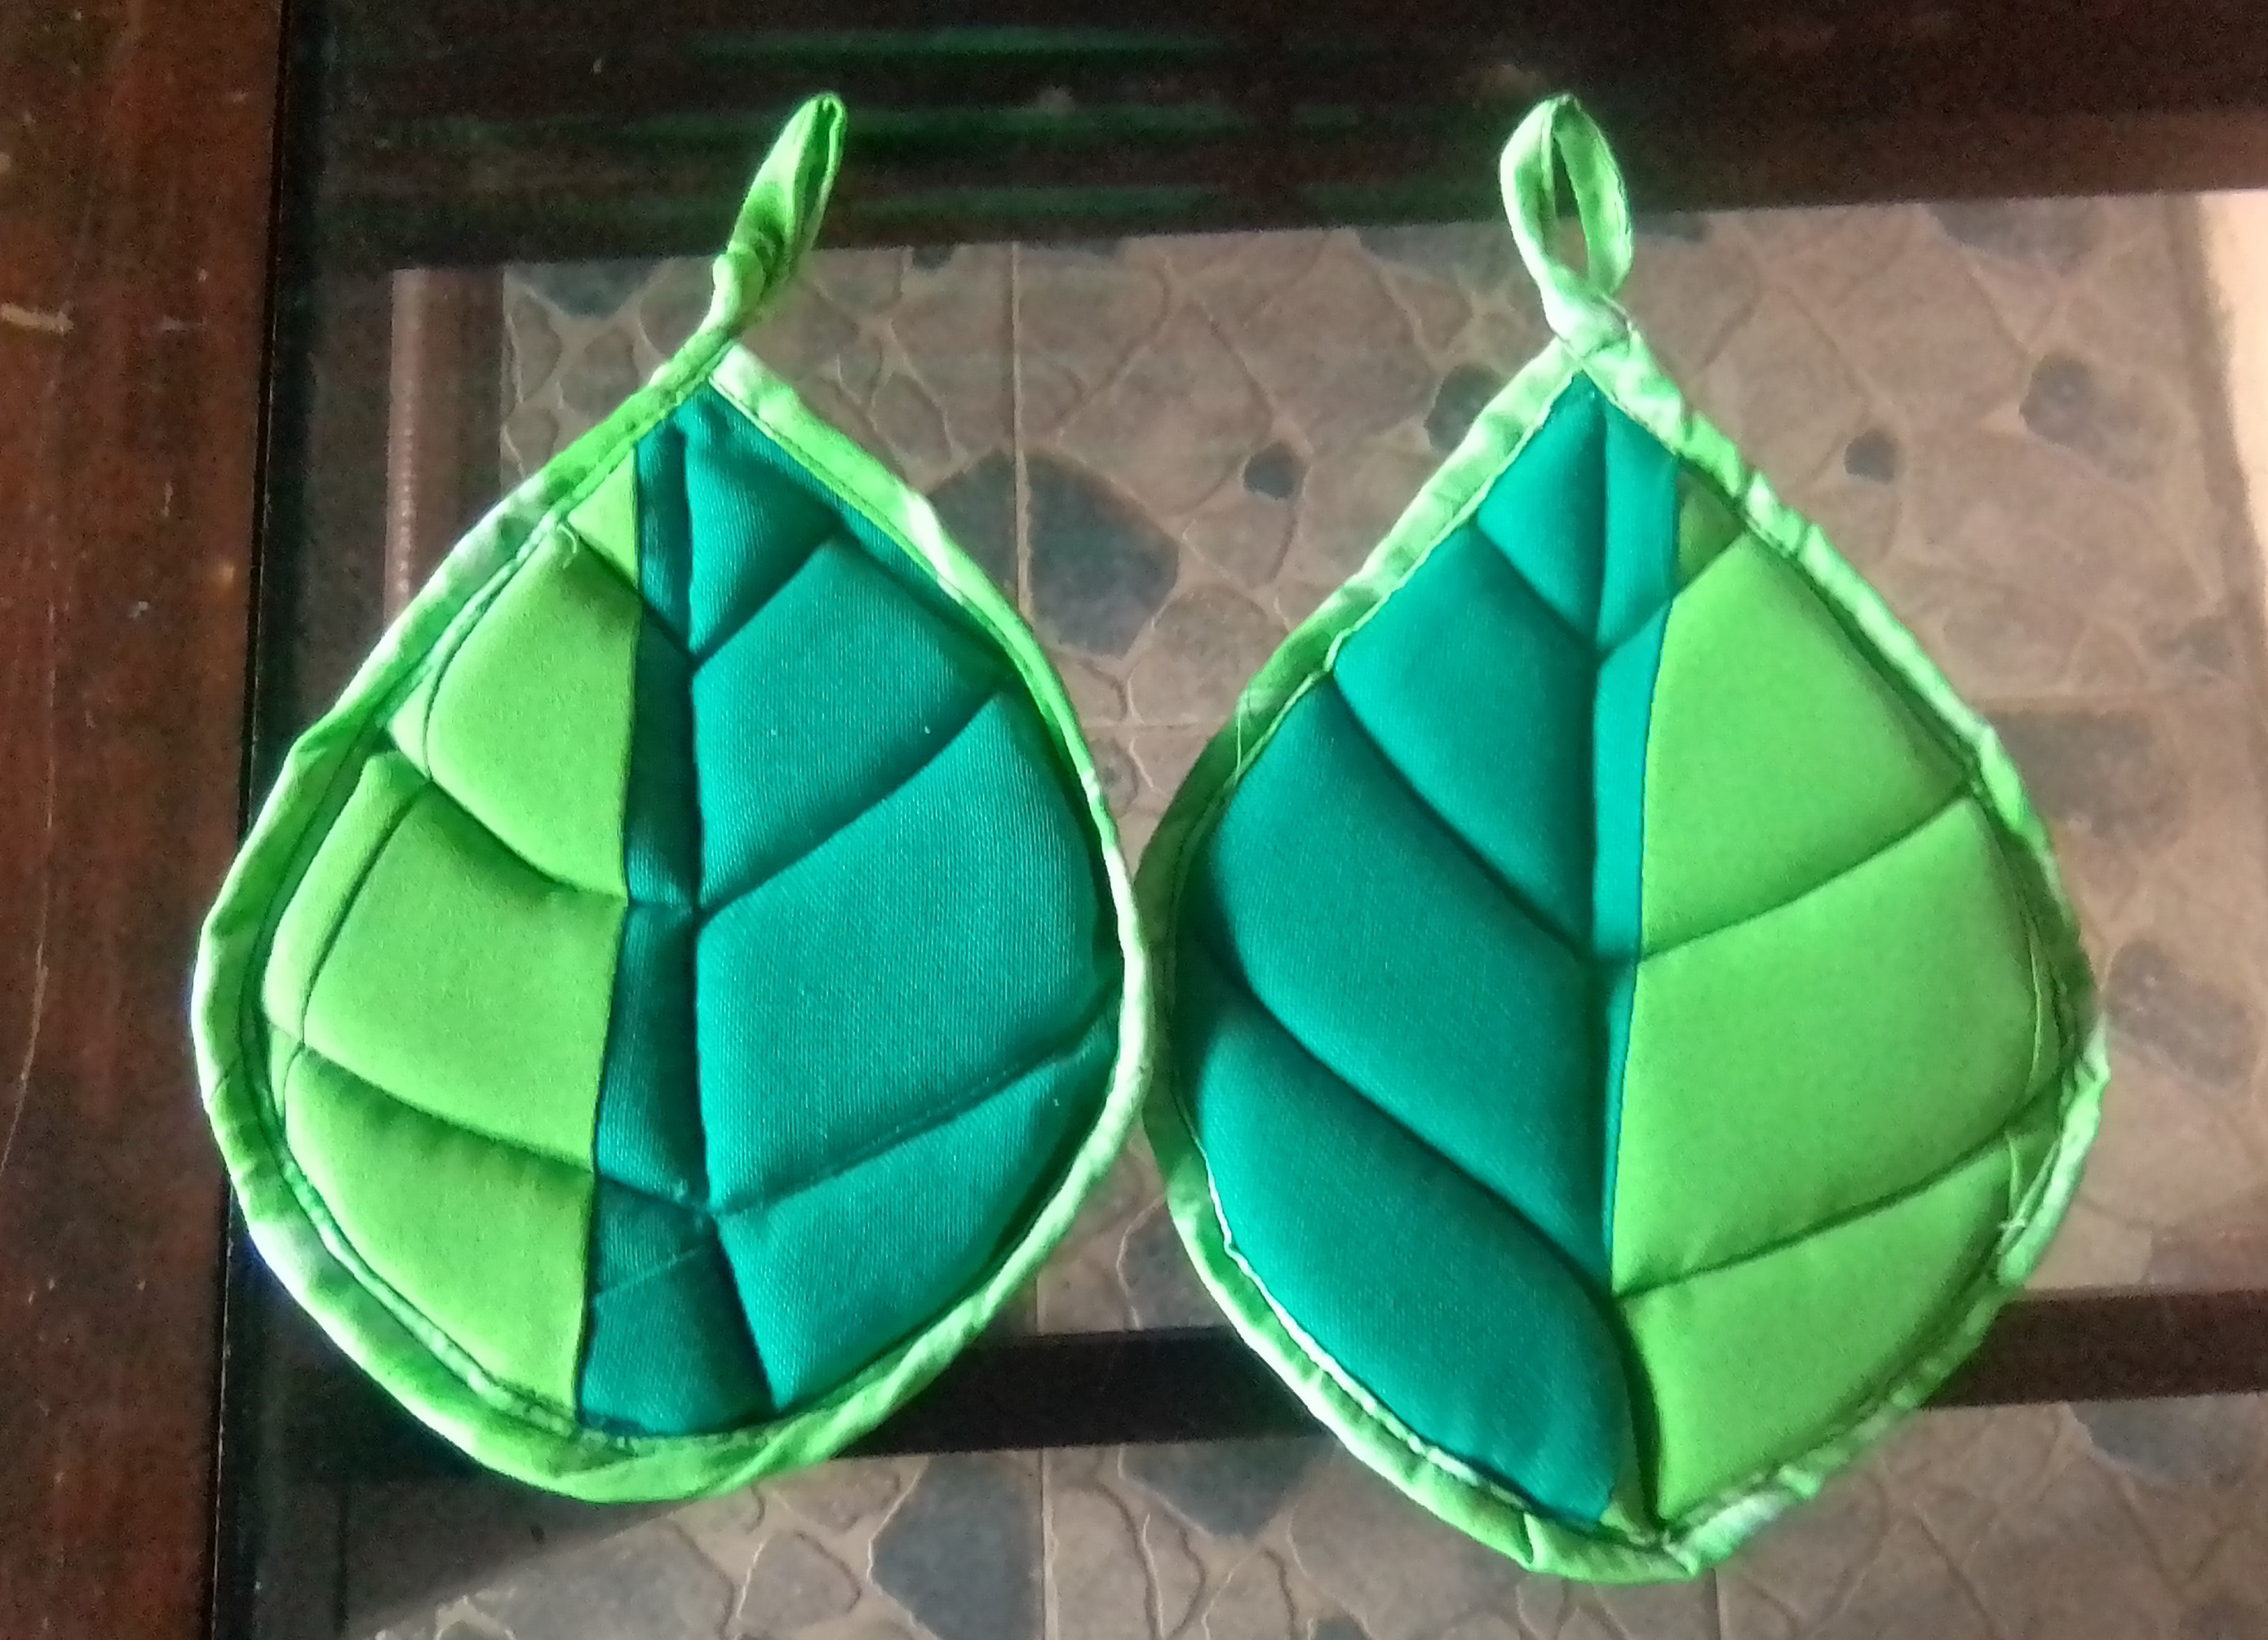
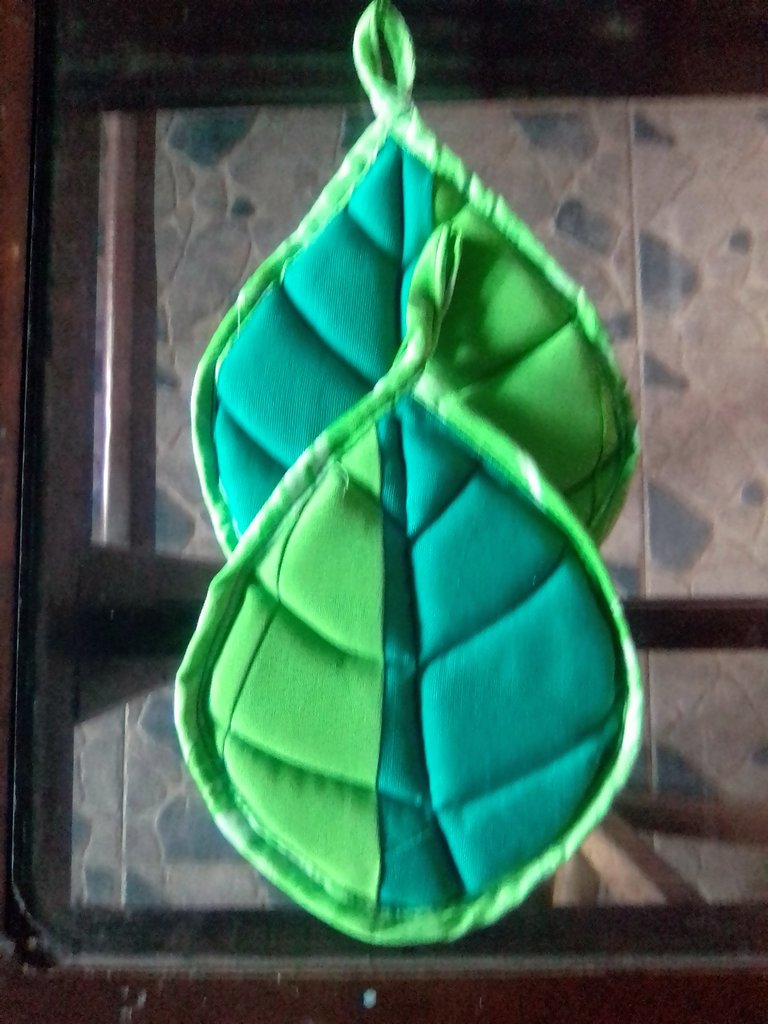

The photos are my property taken exclusively in this project.
The collages of the procedure were made with the tool of my Blue C6 and the main one in Canva
The dividers and the banners were edited by me in Canva
The translation was made with the Google translator



Materiales
✓ Retazos de telas: verde en dos tonos, azul oscuro y verde estampado.
✓ Relleno.
✓ Hilo
✓ Tijera
✓ Máquina de coser.
✓ Cinta métrica.

Paso a paso
Para este proyecto, tenía una idea desde hace algunos días, y al encontrar los retazos de telas me imaginé unas lindas hojas, entonces realice el diseño de una hoja puntiaguda, cuyas medidas son 17 centímetros de alto x 15 centímetros de ancho, en su parte más abultada.

A continuación, cosi dos retazos de tela en colores verdes de distintos tonos, para formar la pieza necesaria para la hoja. Seguidamente transfiero el diseño de la hoja, a la pieza de tela verde y al retazo de tela azul oscuro, dejando el centímetro adicional de costura y luego transfiero la forma de la hoja a la goma de relleno, está última del tamaño justo del diseño.

El siguiente paso fue colocar las formas de telas, primero la forma en azul oscuro, luego el relleno y de último la forma de colores verdes, sujete con los alfileres para después coser a máquina. Al tener ya mi forma lista y acolchada solo queda pasar la costura interior para dar la forma a las venas de las hojas.

Para continuar, corte una tira de verde estampado de 2 centímetros de ancho, para el sesgo y decoración de mis agarra ollas. Fui cosiendo, comenzando desde la punta de la hoja, de un lado hasta llegar a la otra punta, y de ese mismo sesgo realice el asa de colgar, usando para ello 6 centímetros de sesgo, y finalizó cosiendo el otro lado y así tengo listo un lindo juego de agarra ollas hecho en casa.

Espero que, este mini tutorial sea de su agrado y utilidad y que se animen de realizar en sus casas.
Resultado


Las fotos son de mi propiedad tomadas exclusivamente en este proyecto.
Los collages del procedimiento los hice con la herramienta de mi Blue C6 y el principal en Canva
Lo separadores y el banners fueron editados por mi en Canva
La traducción fue realizada con el traductor de Google
