¡Saludos 👋 Queridos 💞 Amigos de #HiveDiy😘! // Greetings 👋 Dear 💞 Friends of #HiveDiy😘!
Hola mis queridos amigos de esta maravillosa comunidad, después de estar ausente por algunos problemas personales hoy vengo muy animada en enseñarles cómo hacer unos Zarcillos en Forma de limón 🍋 en fieltro que de seguro les va a encantar!.
Hello my dear friends of this wonderful community, after being absent for some personal problems today I come very encouraged to show you how to make some lemon tendrils 🍋 in felt that I'm sure you will love!
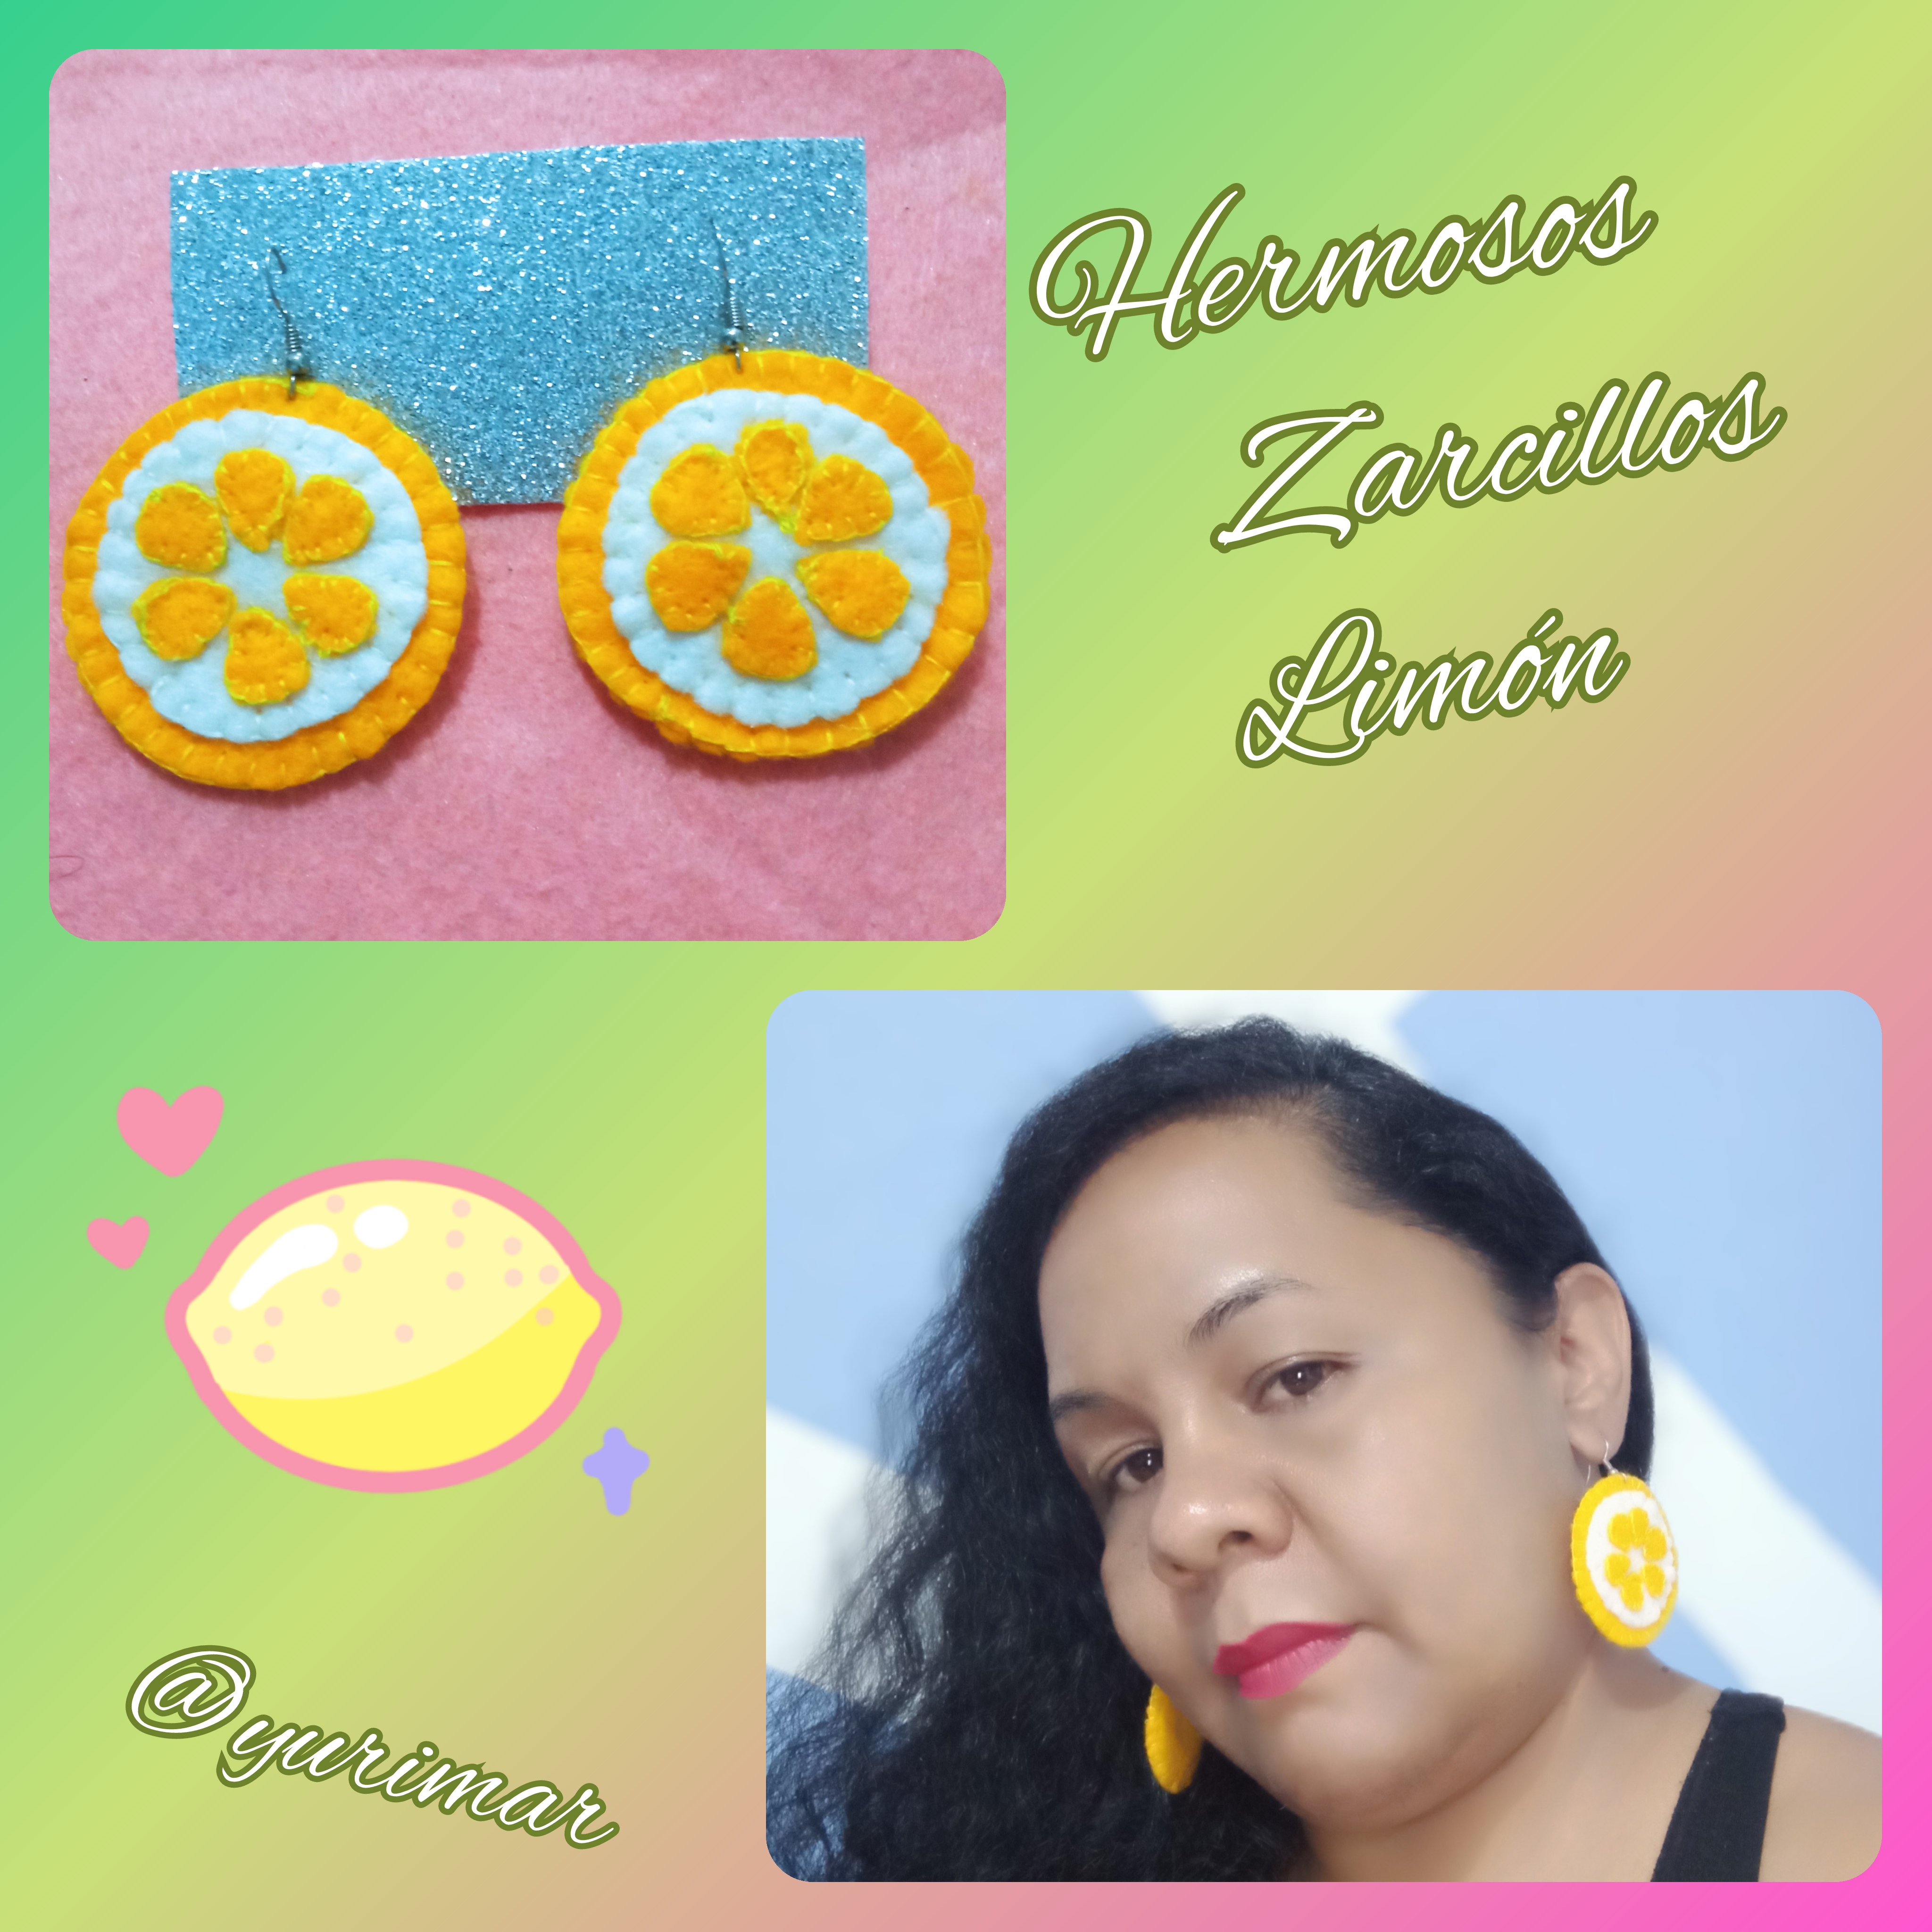
Les cuento que el fieltro es un material que se trabaja con facilidad, además que le da un toque especial a cada pieza haciéndola muy delicada, para la elaboración de estos Zarcillos de limón 🍋 solo hay que tener un poco de paciencia ya que se debe coser a mano.
I tell you that felt is a material that is easily worked, plus it gives a special touch to each piece making it very delicate, for the elaboration of these lemon tendrils 🍋 you just have to have a little patience as it must be sewn by hand.
Antes de comenzar les voy a detallar los materiales que deben usar, si desean usar fieltro verde en vez amarillo para la parte de afuera del limón 🍋 lo pueden hacer.
Before we start I will detail the materials you should use, if you want to use green felt instead of yellow for the outside of the lemon 🍋 you can do it.
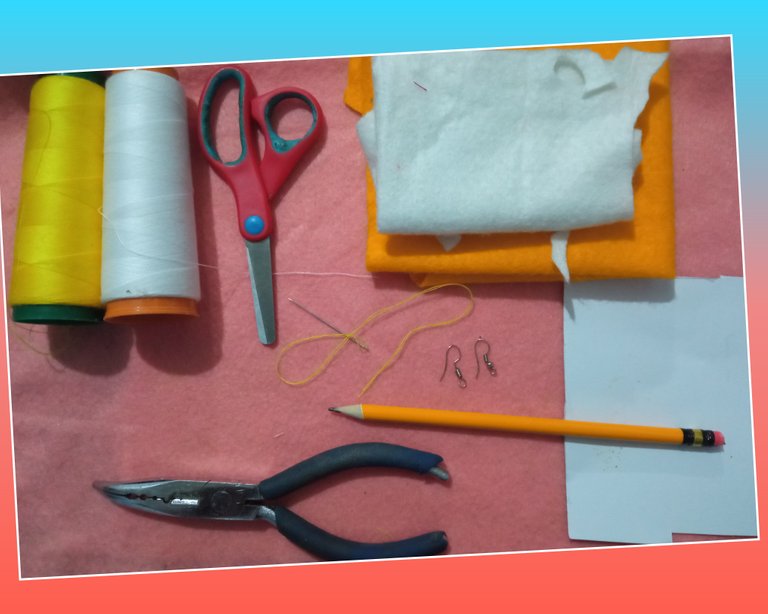
🍋 Materiales:🍋
- Fieltro de color amarillo.
- Fieltro de color blanco.
- Hilos de color amarillo y blanco.
- Aguja de coser.
- Dos ganchos para Zarcillos.
- Cartulina. (Para hacer el patrón)
- Lápiz.
- Compás.
- Tijera.
- Pinza.
🍋 Materials:🍋
- Yellow felt.
- Felt of white color.
- Threads of yellow and white color.
- Sewing needle.
- Two hooks for tendrils.
- Cardboard (to make the pattern).
- Pencil.
- Compass.
- Scissors.
- Tweezers.
🍋 Elaboración:🍋 // 🍋 Elaboration:🍋
Paso 1:
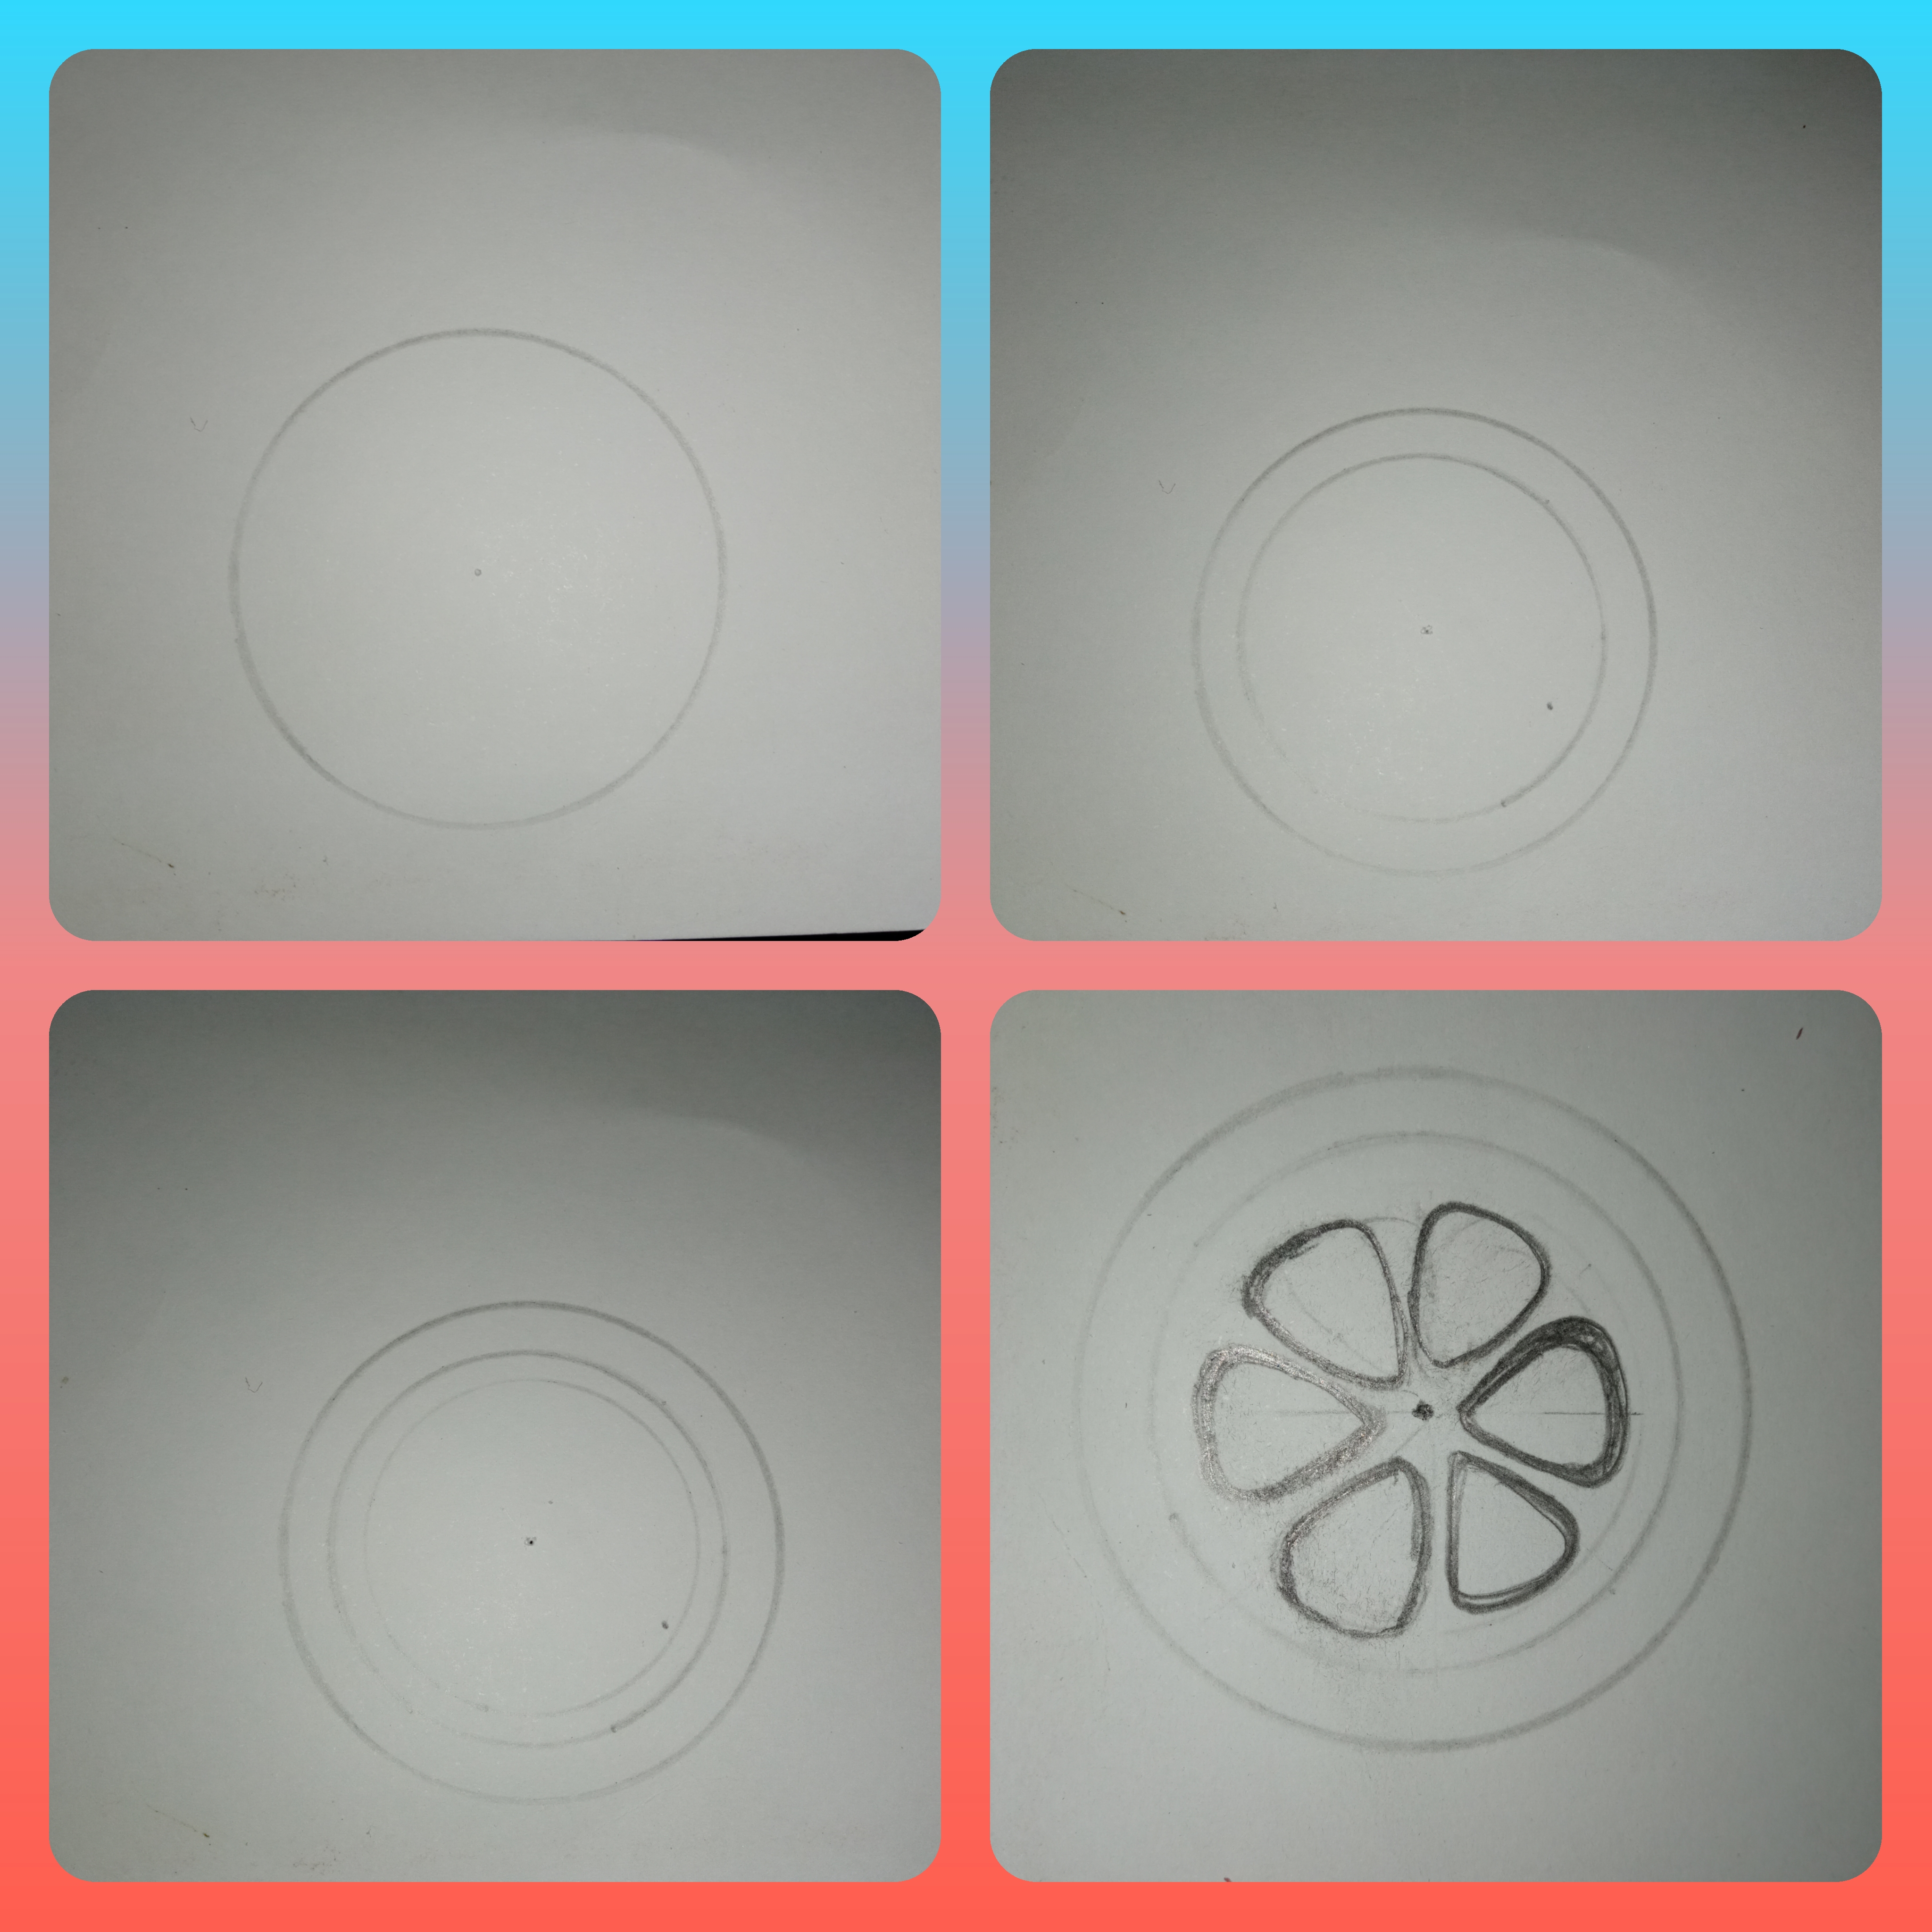
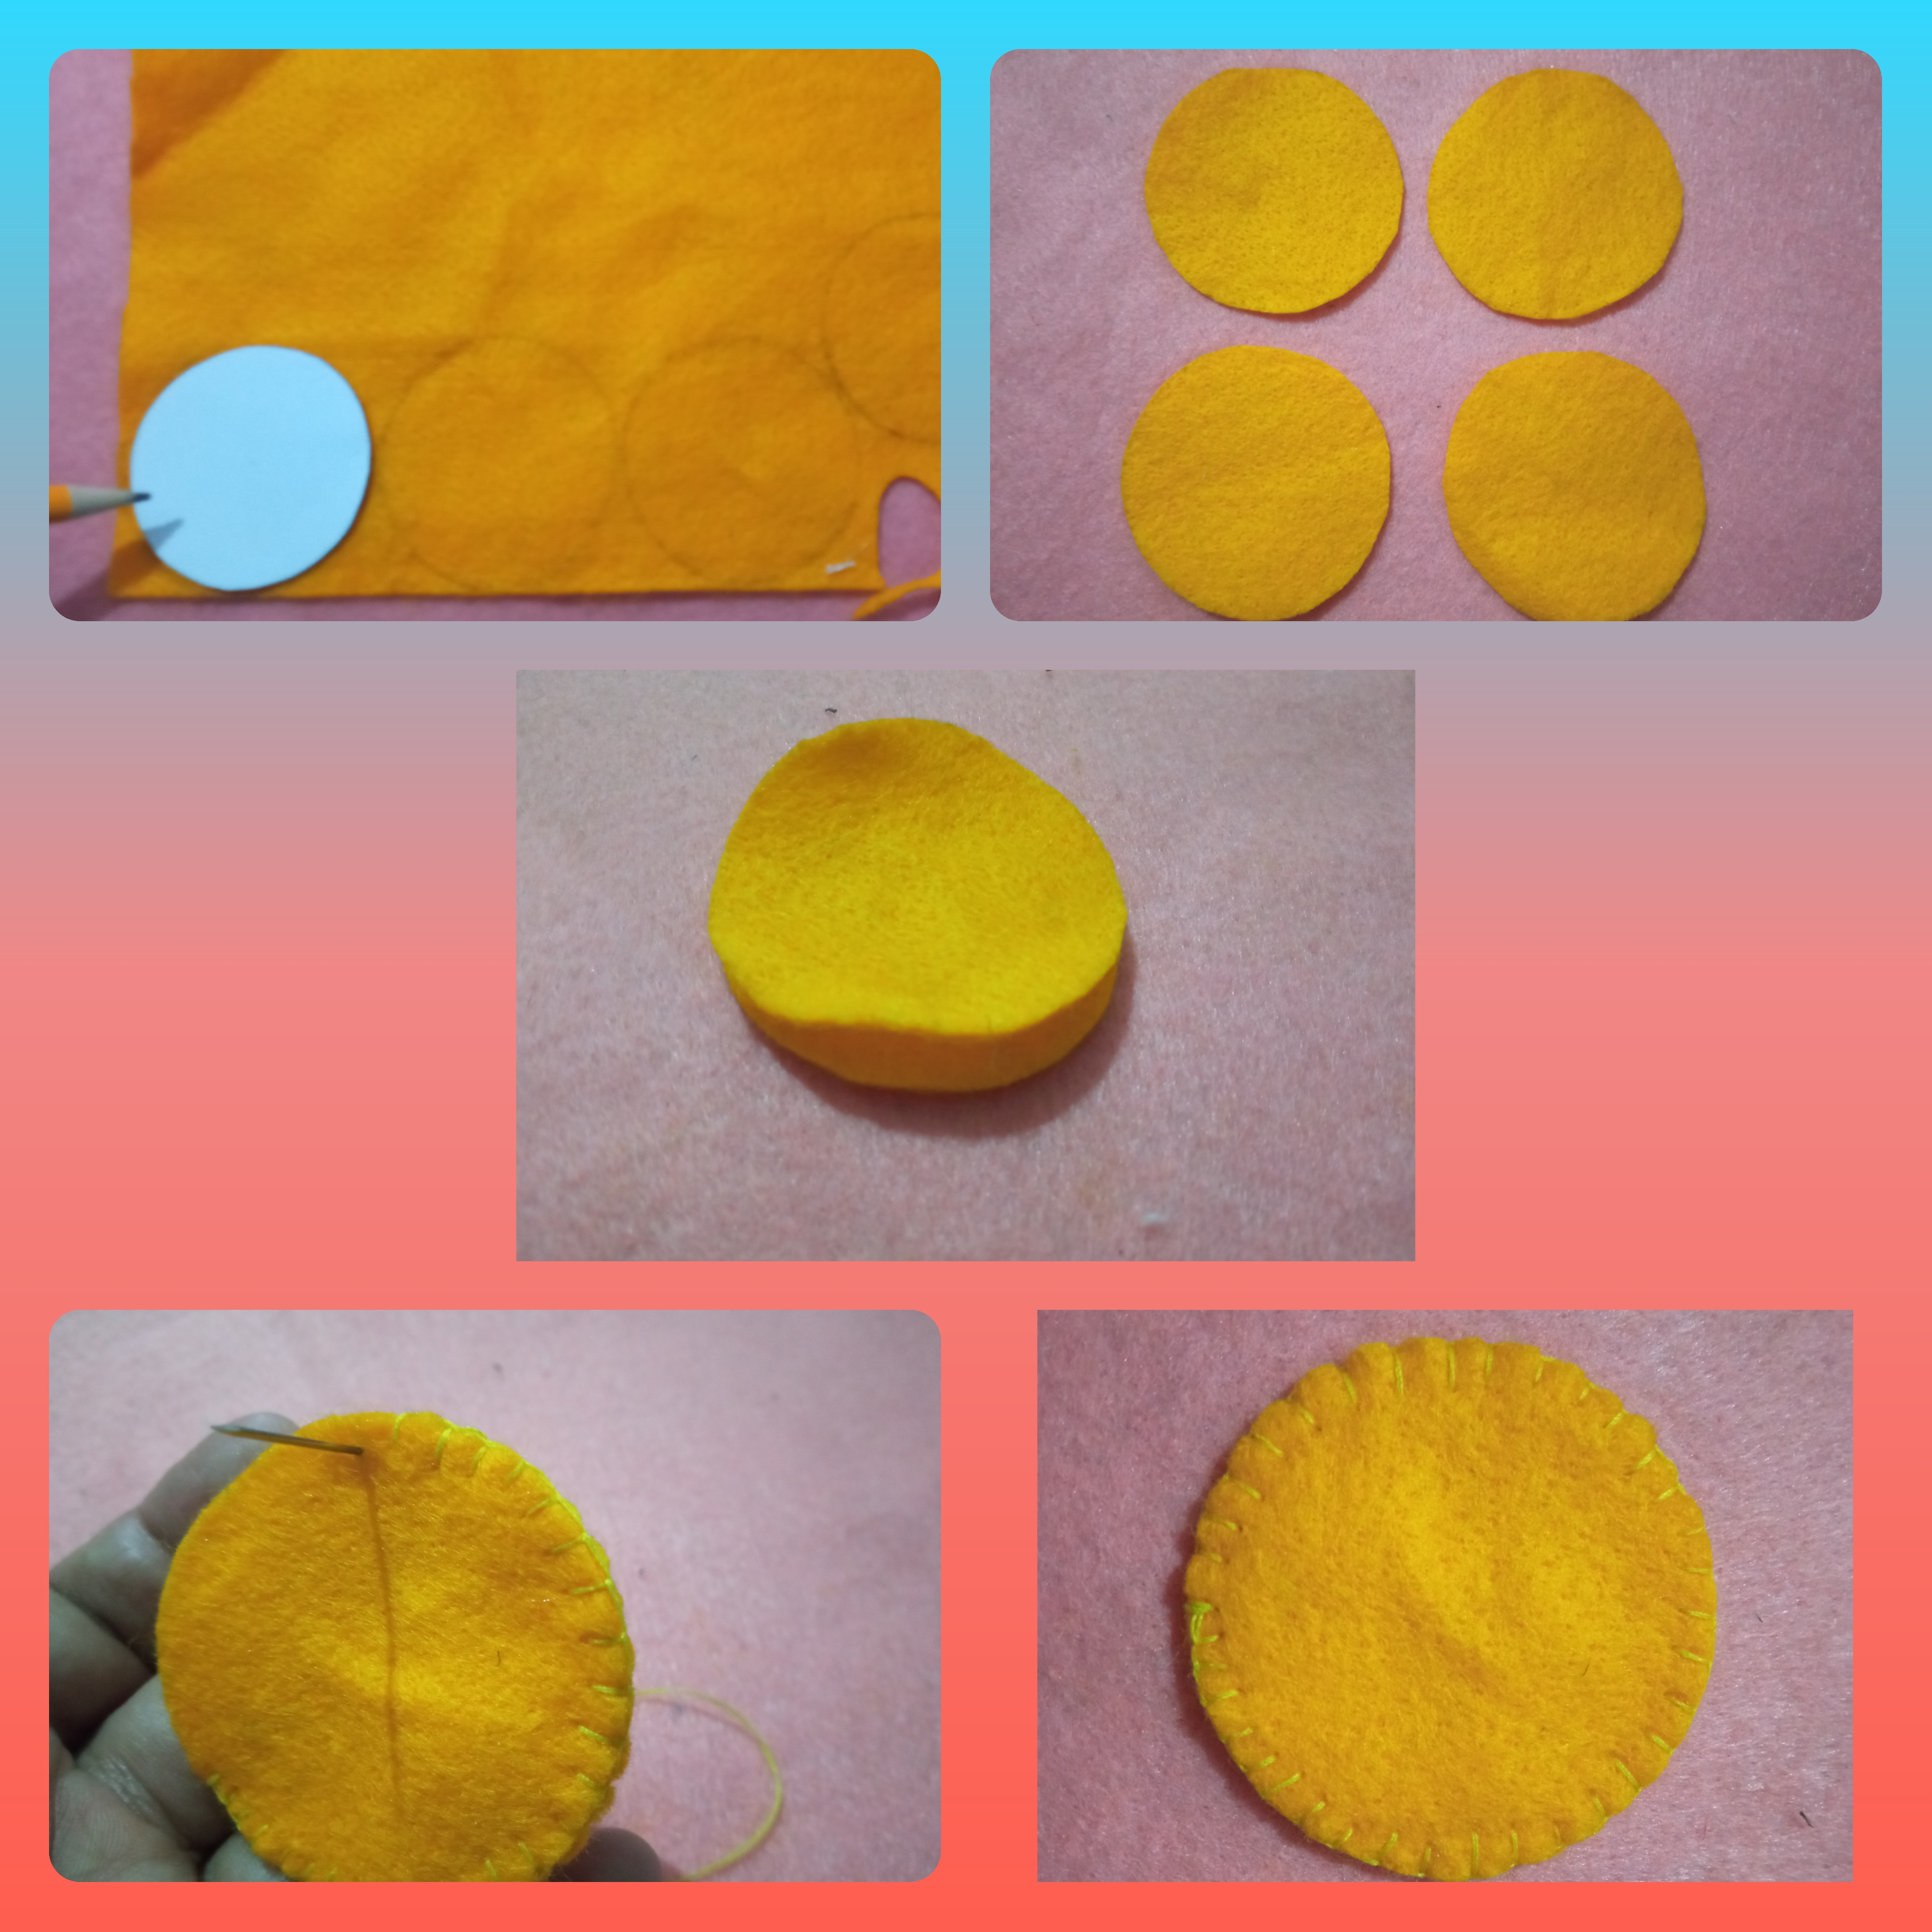
Para comenzar tomamos el compás y hacemos un círculo del tamaño que deseen el Zarcillo, luego reducimos un poco el compás y hacemos otro círculo dentro del círculo anterior, ya listo volvemos a reducir el compás y hacemos otro círculo como ven en la imagen dentro de este tercer círculo vamos a dibujar las semillas del limón 🍋.
Step 1:
To begin we take the compass and make a circle the size you want the Zarcillo, then we reduce the compass a little and make another circle inside the previous circle, and ready we reduce the compass again and make another circle as you see in the image inside this third circle we will draw the seeds of the lemon 🍋.
Paso 2:
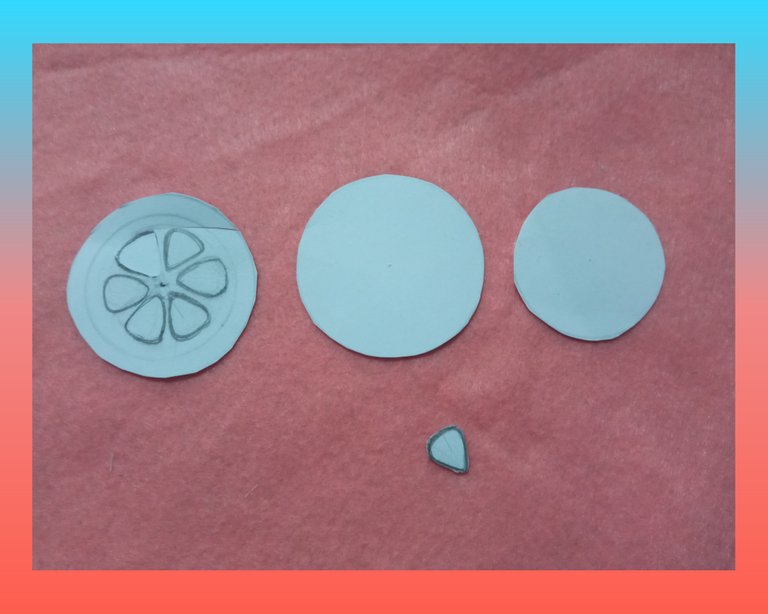
Ya mi limón 🍋 dibujado saco el patrón en cartulina teniendo dos círculos y una semilla la cual me va a servir para sacar las 6 semillas en fieltro.
Step 2:
Once my lemon 🍋 is drawn I draw the pattern on cardboard having two circles and a seed which will serve me to draw the 6 seeds on felt.
Paso 3:
Tomo el circulo más grande y lo marco 4 veces en el fieltro amarillo luego lo corto, tomo dos círculos y los uno luego con hilo amarillo lo coso en punto ojal por todo el alrededor, repito el proceso para obtener dos círculos cosidos.
Step 3:
I take the largest circle and mark it 4 times on the yellow felt then I cut it, take two circles and join them together then with yellow thread I sew it in buttonhole stitch all around, I repeat the process to obtain two sewn circles.
Paso 4:
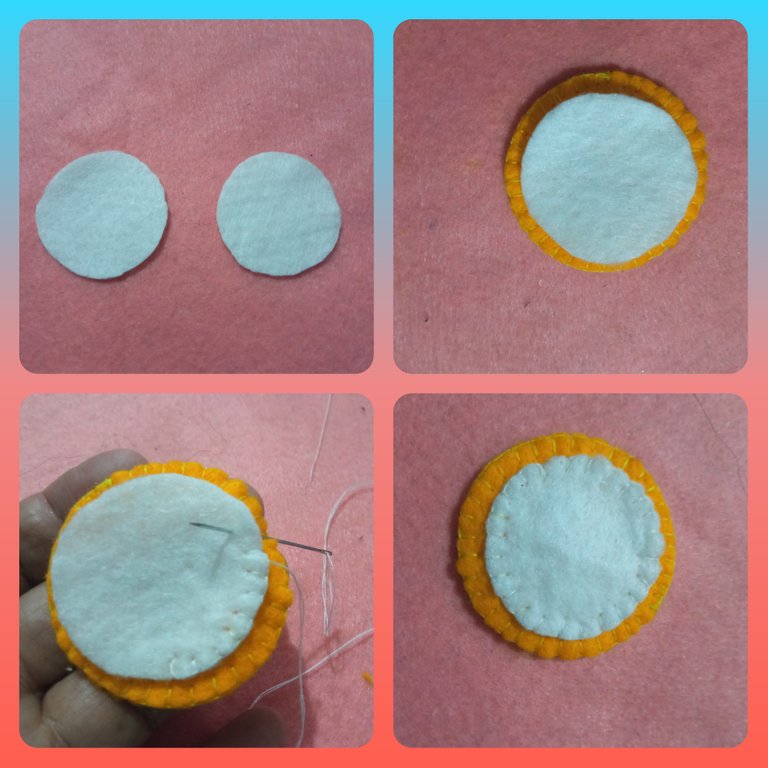
Tomo el circulo más pequeño y corto dos en fieltro blanco, luego tomo mi círculo amarillo ya cosido y colo encima el circulo blanco cosemos con hilo blanco por todo el alrededor en punto ojal como les muestro en la imagen.
Step 4:
I take the smallest circle and cut two of them in white felt, then I take my yellow circle already sewn and place it on top of the white circle and sew with white thread all around in buttonhole stitch as shown in the image.
Paso 5:
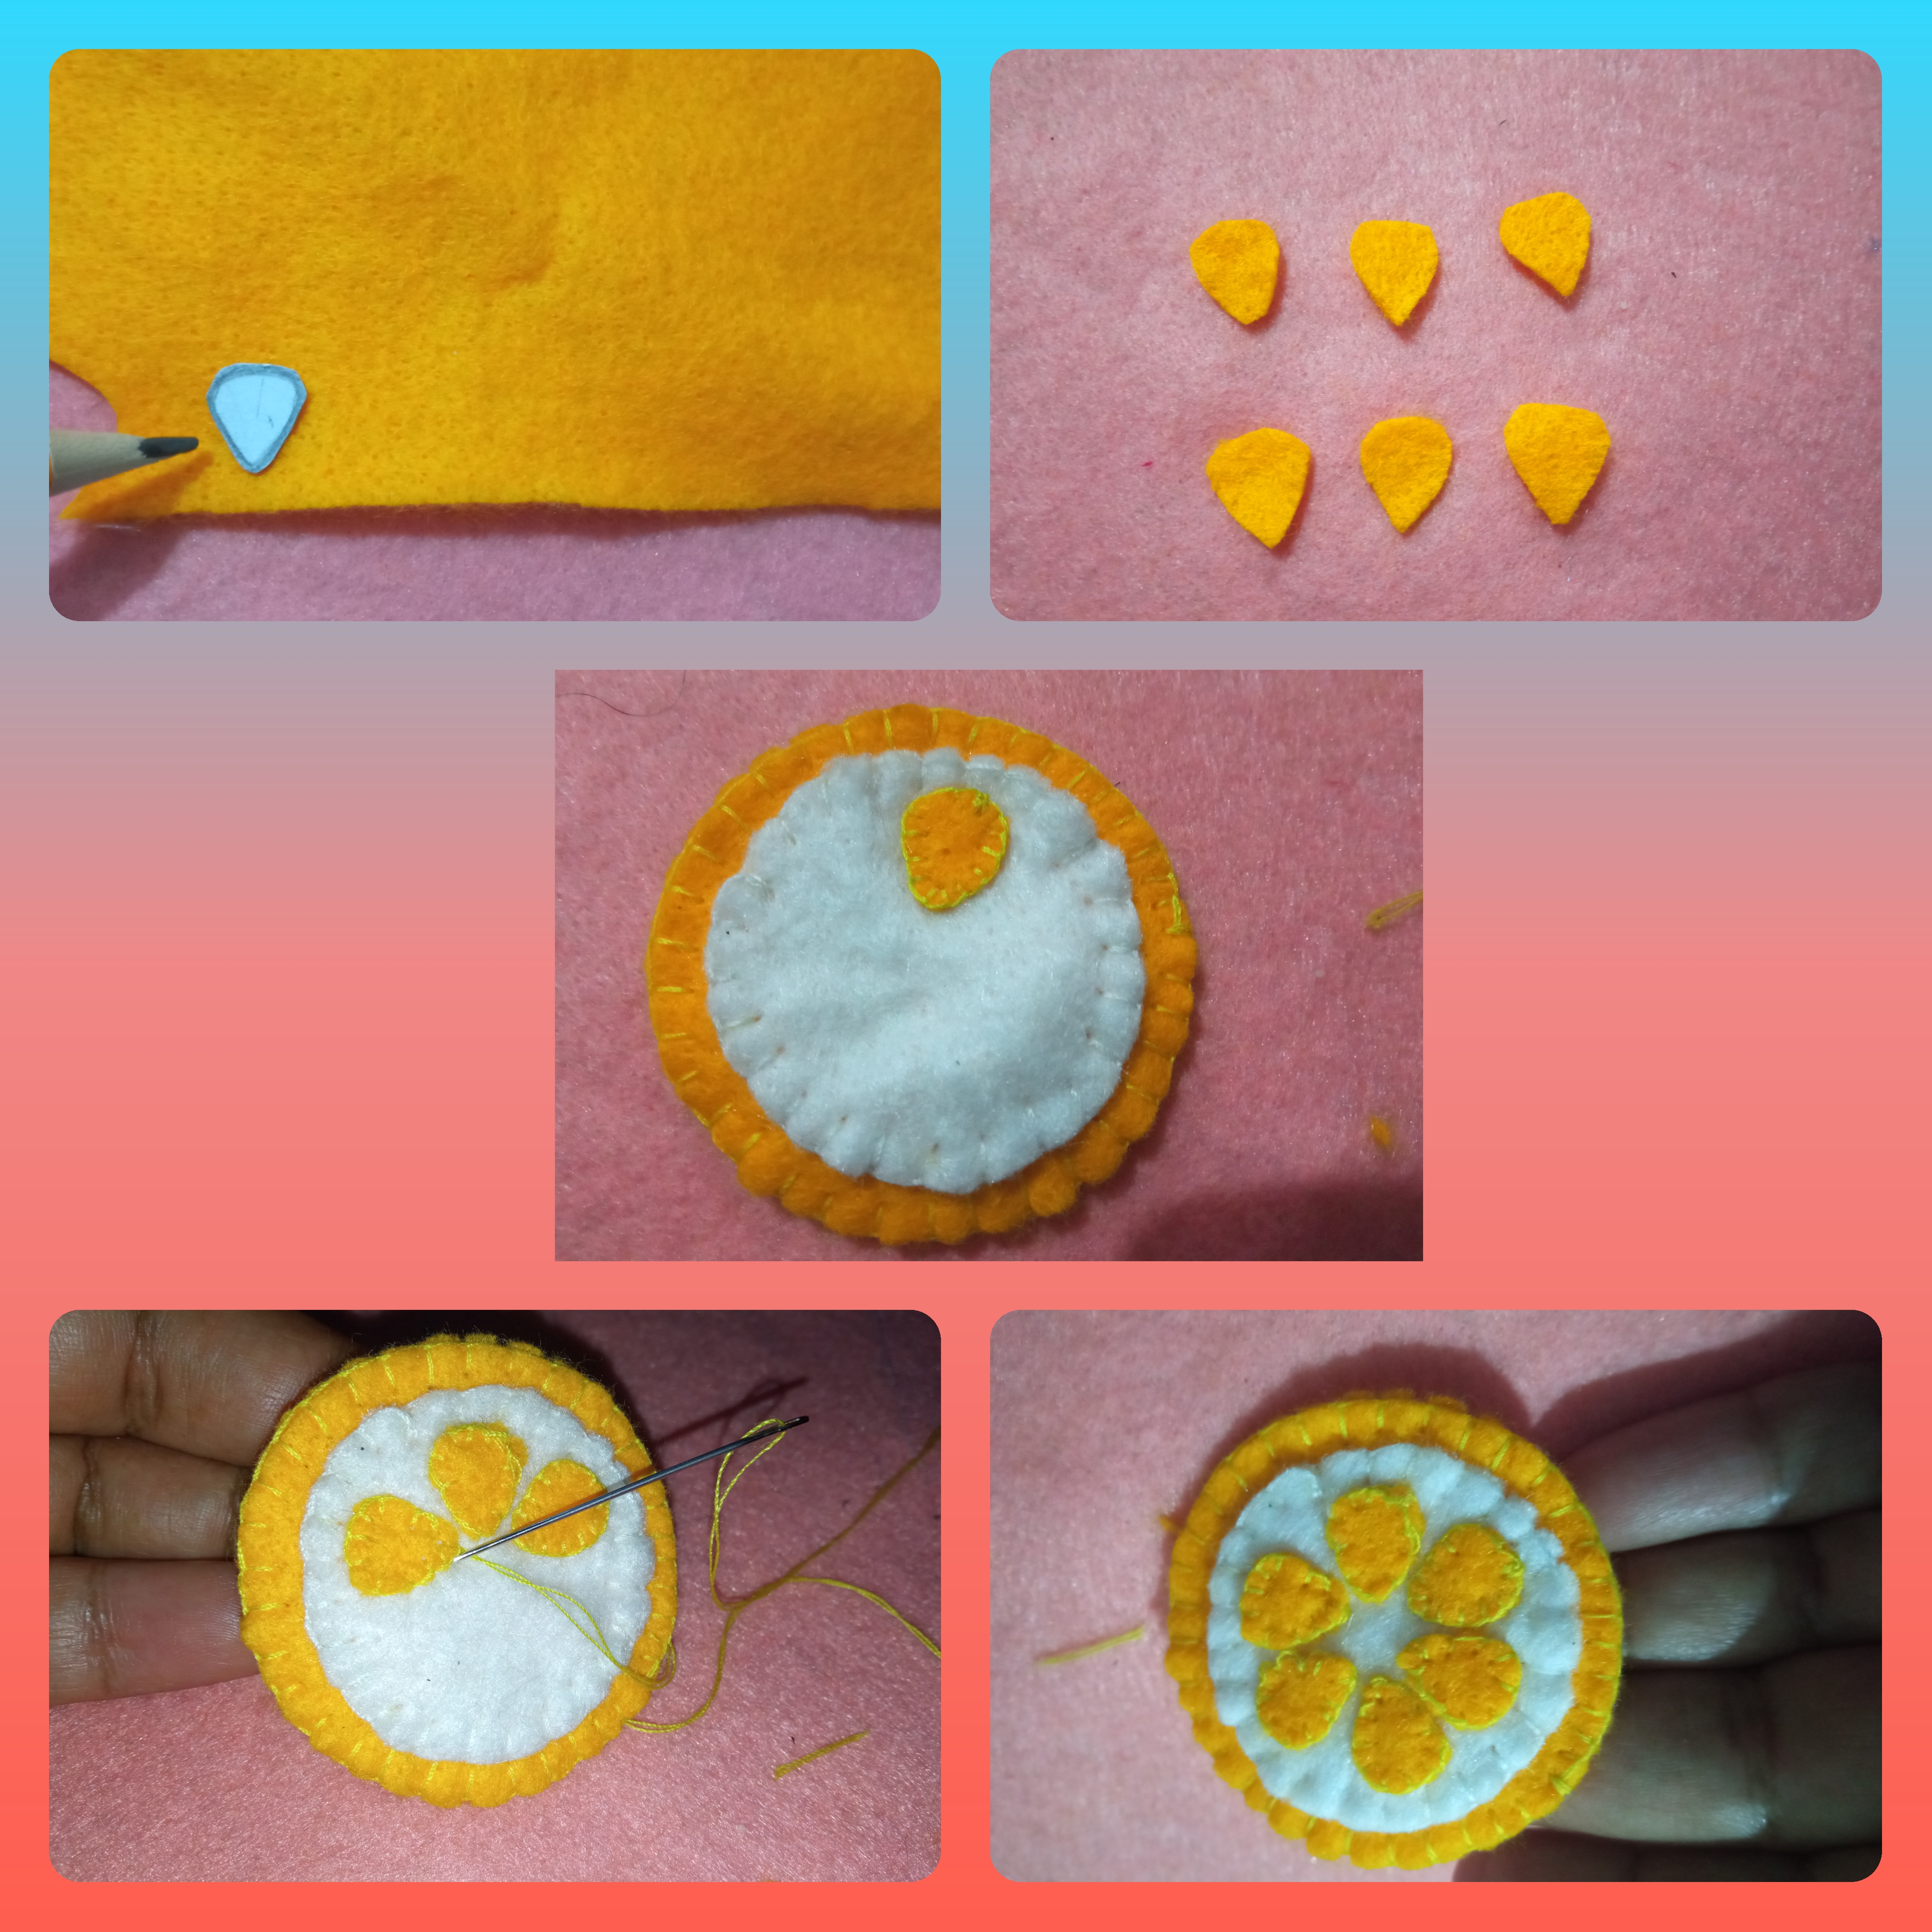
Ahora vamos a cortar 6 semillas con ayuda del patrón, luego las voy cociendo con hilo blanco en puto ojal cada una encima del círculo blanco de manera que entren las 6 semillas como ven en la imagen.
Step 5:
Now we are going to cut 6 seeds with the help of the pattern, then I am going to sew them with white thread in a small buttonhole each one over the white circle so that the 6 seeds fit as you can see in the image.
Paso 6:
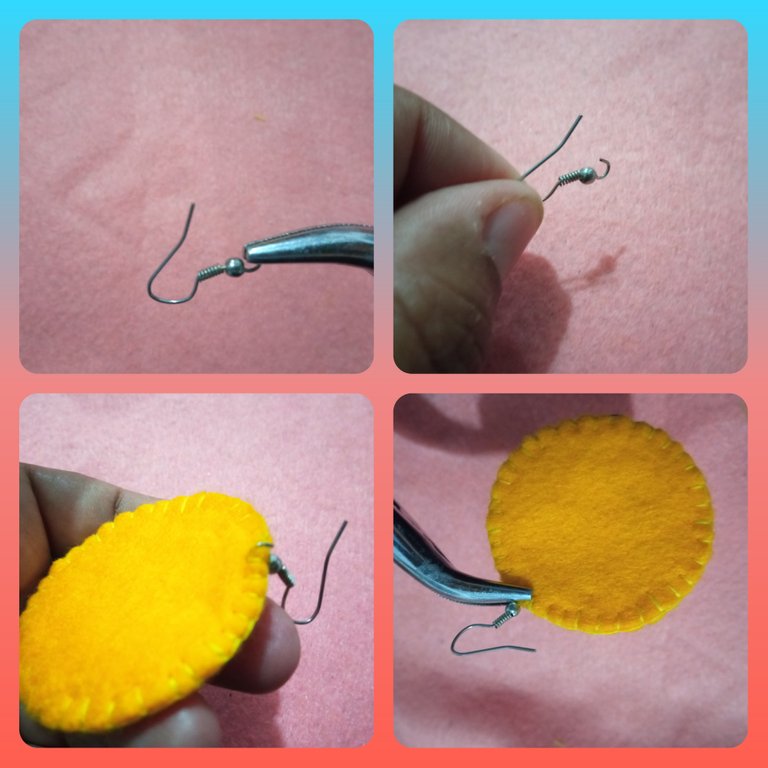
Para finalizar tomo el gancho para Zarcillos y lo abro un poco con la ayuda de la pinza luego lo engancho en el limón 🍋 y luego cierro para que no se salga.
Step 6:
Finally, I take the tendril hook and open it a little with the help of the tweezers, then I hook it on the lemon 🍋 and then I close it so that it does not come out.
¡Ya están Terminandos mis Zarcillos de Limón 🍋! // My Lemon Sars are finished 🍋!
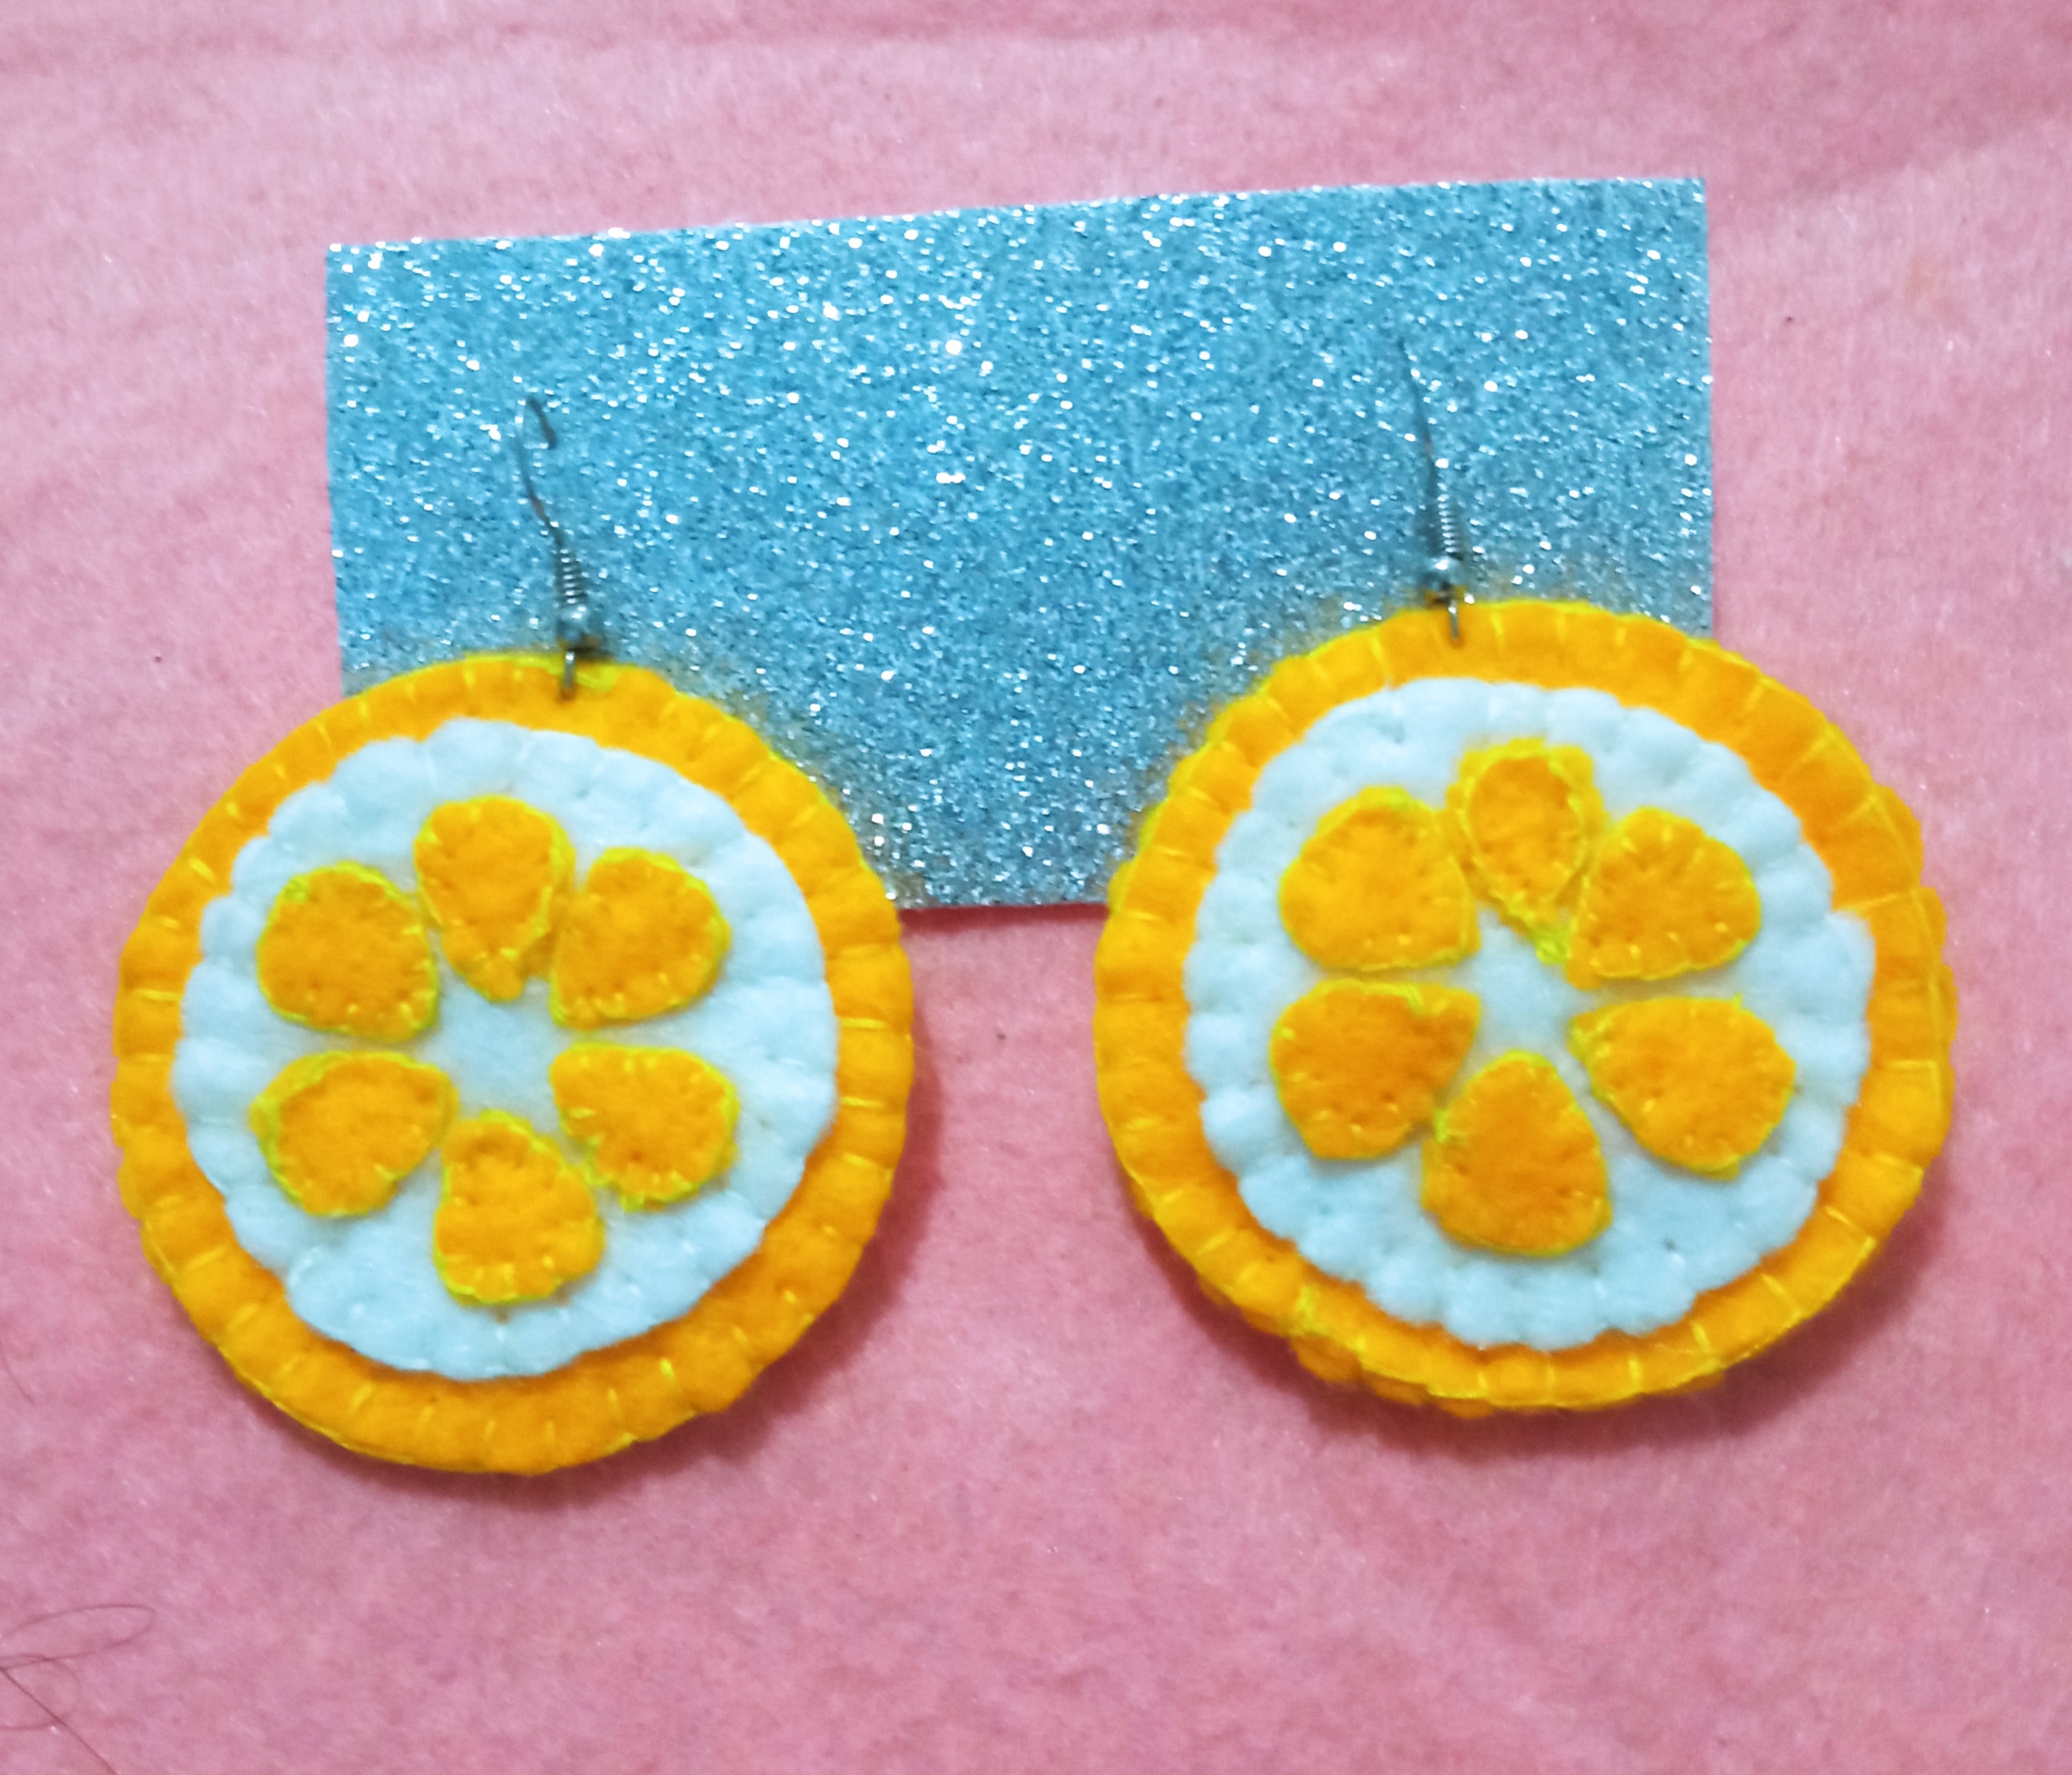


Hasta aquí llego este tutorial espero les hayan gustado, como ven estos Zarcillos quedaron muy hermosos 😍 a mi en lo personal me gustó muchísimo jejejeje! Así que pronto los estaré usando 😁.
So far this tutorial I hope you liked it, as you can see these tendrils were very beautiful 😍 I personally liked it very much hehehehehe! So soon I will be using them 😁.
Como siempre agradecida con esta maravillosa comunidad que me ha apoyado mucho en mis trabajos manuales al igual que los usuarios que hacen vida aquí y que no dudan en dejarte un lindo ❤️ comentario que me hace muy feliz.
As always grateful to this wonderful community that has supported me a lot in my manual works as well as the users who make life here and who do not hesitate to leave you a nice ❤️ comment that makes me very happy.
¡Gracias 😁 por Visitar mi Blog!
Thank you 😁 for Visiting my Blog!
Todas las Fotografías fueron tomadas con mi teléfono Redmi 9. Imagen editada en Polish. / All pictures were taken with my Redmi 9 phone. Image edited in Polish.
Traducción realizada con la versión gratuita del traductor / Translación performed with the free version of the translator www.deepl.com/translator


