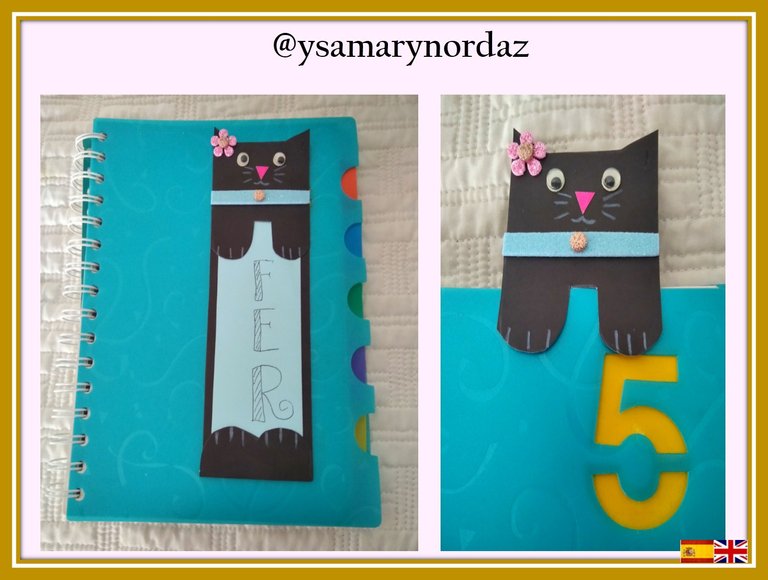
Hola amigos de esta gran comunidad de #Hivediy. Hoy quiero compartir con ustedes un paso a paso muy sencillo de realizar, especial para las niñas: Marcapáginas de Gatita. La mayoría de los marcapáginas o separadores como también se les llama, tienen forma rectangular, aunque existen hoy en día otras opciones para realizarlos, esto con la intensión de que los niños se diviertan con sus diseños. Ellos son de gran utilidad ya que, como su nombre lo indica su función principal es marcar o señalar como recordatorio las páginas donde quedamos en una lectura o apunte importante. No es igual tener un marcapáginas en blanco, que uno con un diseño original y personalizado. Este marcapáginas que realizaré el día de hoy se lo regalaré a mi sobrina Fernanda quien es amante de la lectura y de los gatos. A continuación, les presento el siguiente paso a paso el cual espero les guste. ¡Vamos a comenzar!
Hello friends of this great community of #Hivediy. Today I want to share with you a very simple step by step to make, especially for girls: Kitty Bookmarks. Most of the bookmarks or separators as they are also called, have a rectangular shape, although today there are other options to make them, this with the intention that children have fun with their designs. They are very useful since, as their name indicates, their main function is to mark or point out as a reminder the pages where we stay in an important reading or note. It is not the same to have a blank bookmark as one with an original and personalized design. I will give this bookmark that I will make today to my niece Fernanda who is a lover of reading and cats. Next, I present the next step by step which I hope you like. Let's get started!
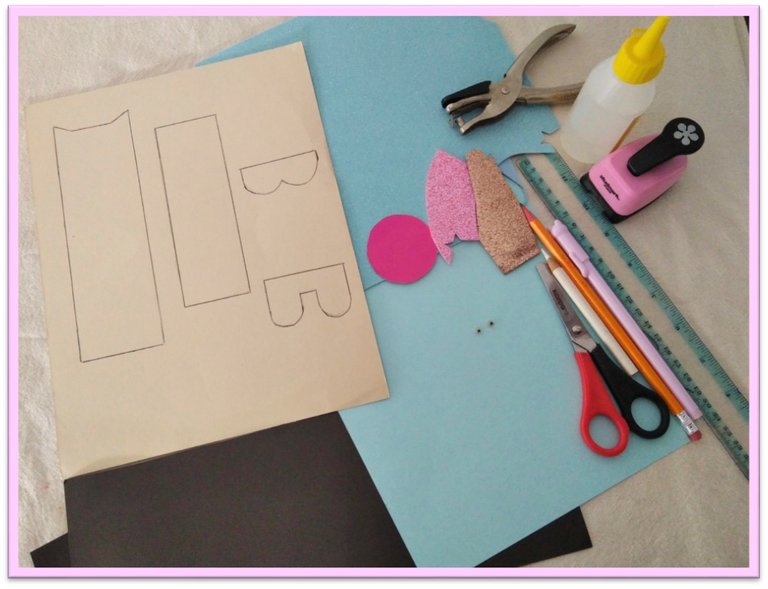
Materiales:
•Plantilla
•Cartulina de colores: azul claro, negro y fucsia
•Foami escarchado de colores: azul claro, rosado y bronce
•Lápiz
•Color blanco
•Tijera
•Marcador punta fina de color negro
•Regla
•Pegamento
•Perforadora de papel
•Perforadora de flor
•Ojos saltones
Materials:
•Template
•Colored cardboard: light blue, black and fuchsia
•Colored frosted foami: light blue, pink and bronze
•Pencil
•White color
•Scissors
•Black fine point marker
•Rule
•Glue
•Paper hole punch
•flower punch
•Googly eyes
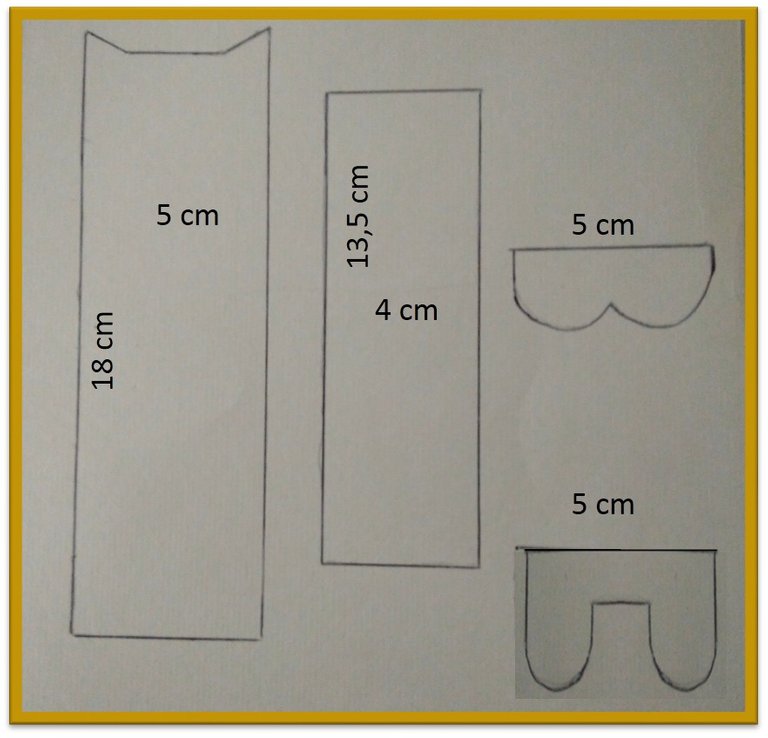
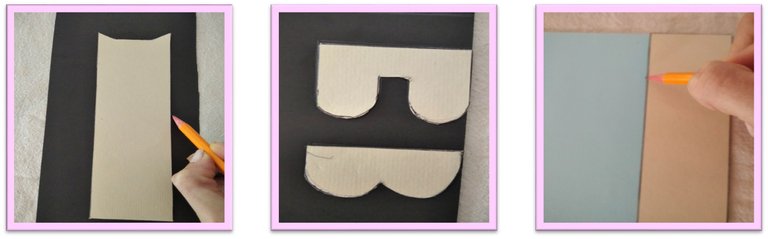
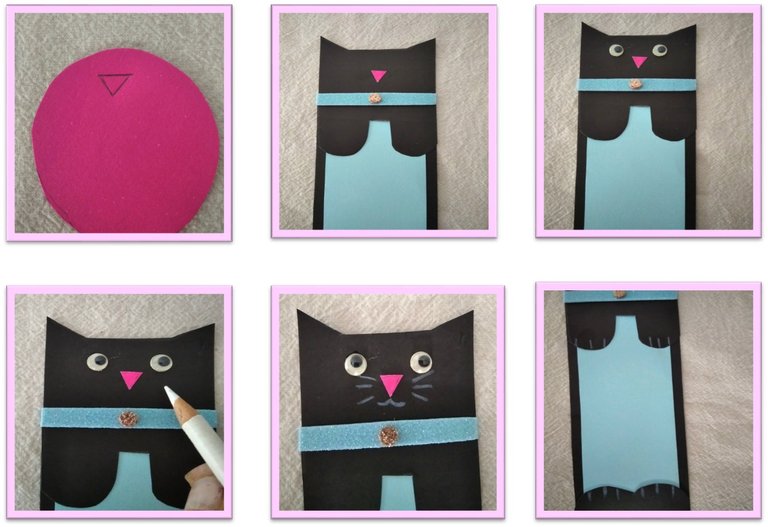
Paso 1
Recorta las piezas de la plantilla (cuerpo, barriga y patas).
Step 1
Cut out the template pieces (body, belly and legs).
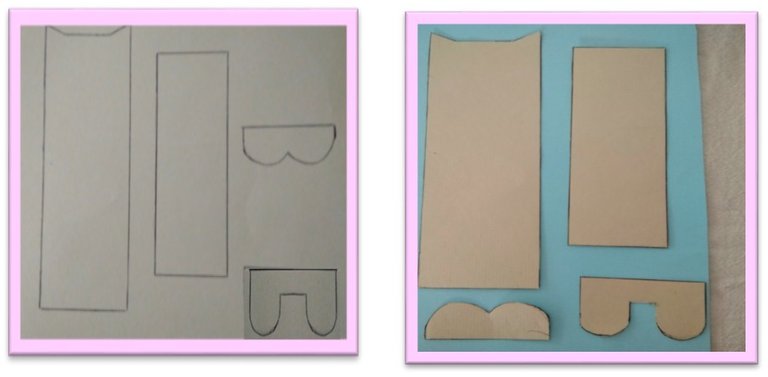
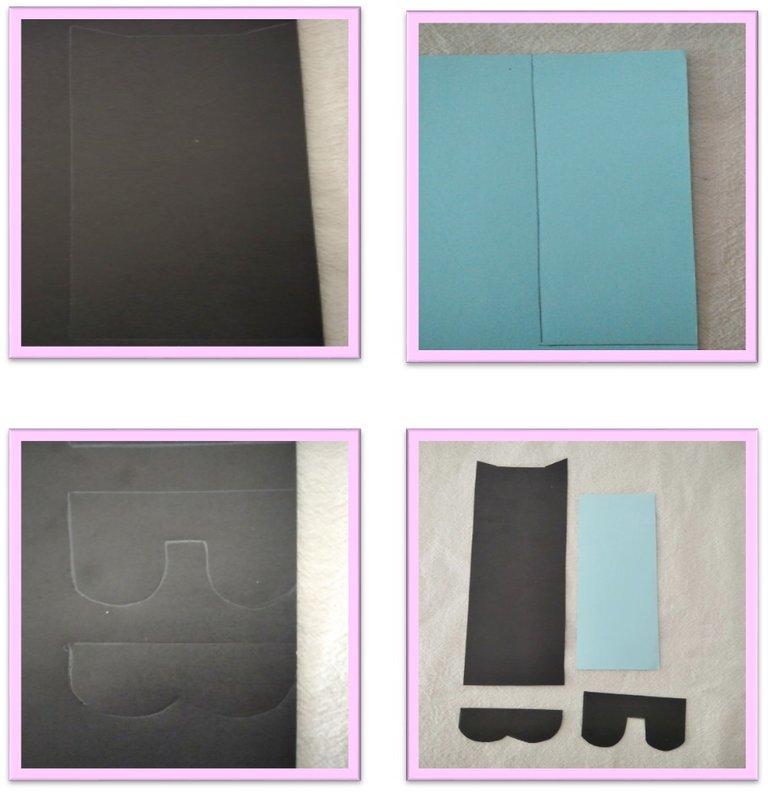
Paso 2
Traza las piezas (cuerpo y patas) sobre la cartulina de color negro. Luego, traza la pieza (barriga) sobre la cartulina de color azul claro. Seguidamente recórtalas.
Step 2
Trace the pieces (body and legs) on the black cardboard. Then, trace the piece (belly) onto the light blue cardstock. Then cut them out.
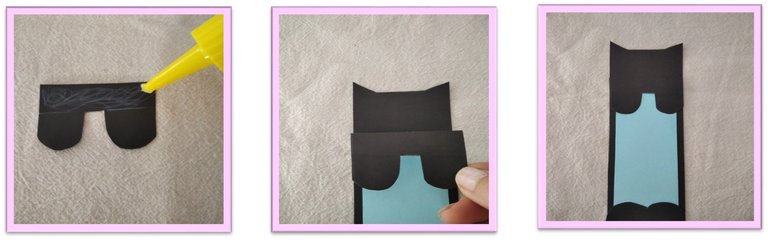
Paso 3
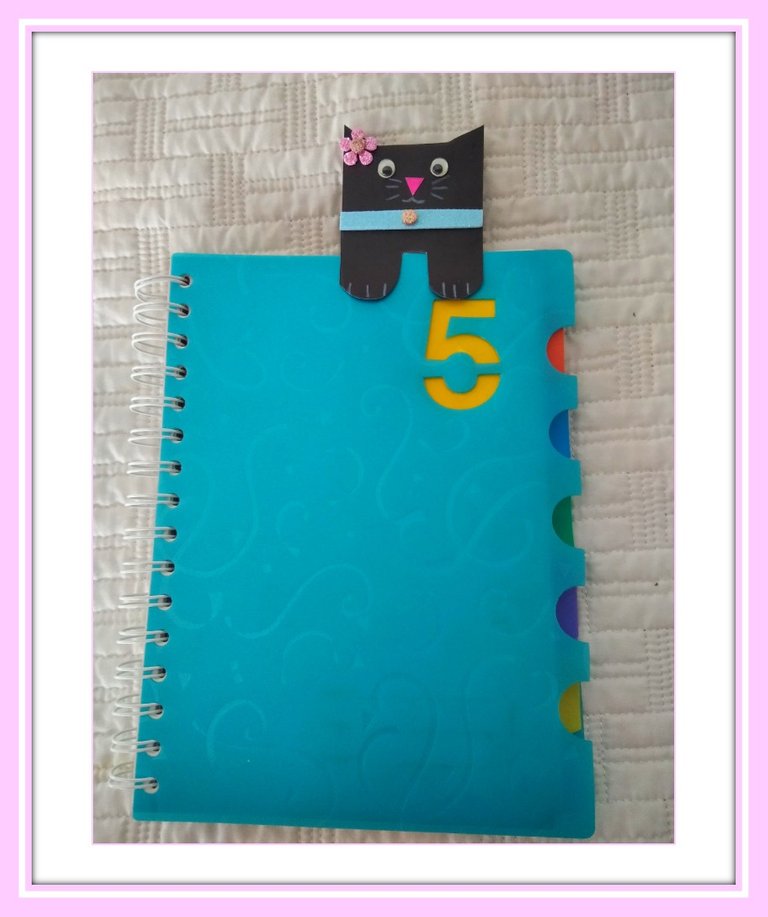
Pega la barriga sobre el cuerpo. Posteriormente, pega las patas cortas en la parte inferior. Luego, para pegar las patas largas en la parte superior, coloca pegamento solo en la parte marcada de color blanco como se indica en la imagen, ya que estas sostendrán las páginas.
Step 3
Glue the belly onto the body. Then glue the short legs to the bottom. Then, to glue the long legs to the top, glue only to the part marked white as indicated in the image, as these will hold the pages.

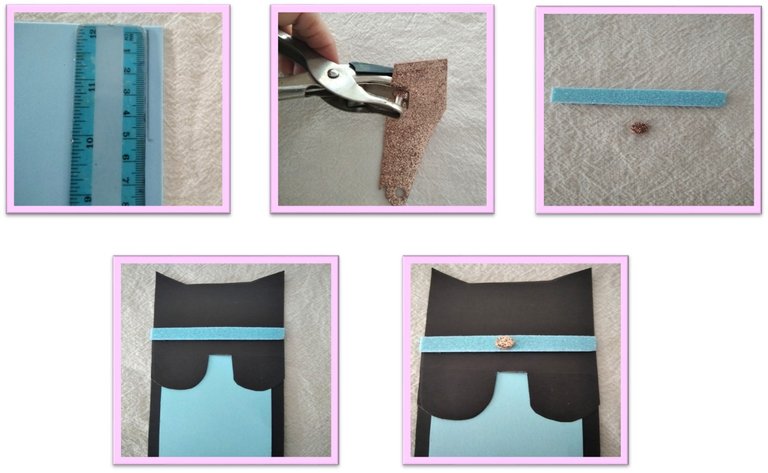
Paso 4
Para realizar el collar de la gatita, traza con una regla una tira delgada de 5cm sobre el foami escarchado de color azul. Luego, coloca la perforadora sobre el foami escarchado de color bronce y extrae un círculo. Ahora, pega el círculo en el centro de la tira. Seguidamente, pégala en la parte superior de la barriga.
Step 4
To make the kitten's necklace, trace a thin 5cm strip on the blue frosted foam with a ruler. Then, place the hole punch on the bronze-colored frosted foam and extract a circle. Now glue the circle in the center of the strip. Next, stick it on the upper part of the belly.
Paso 5
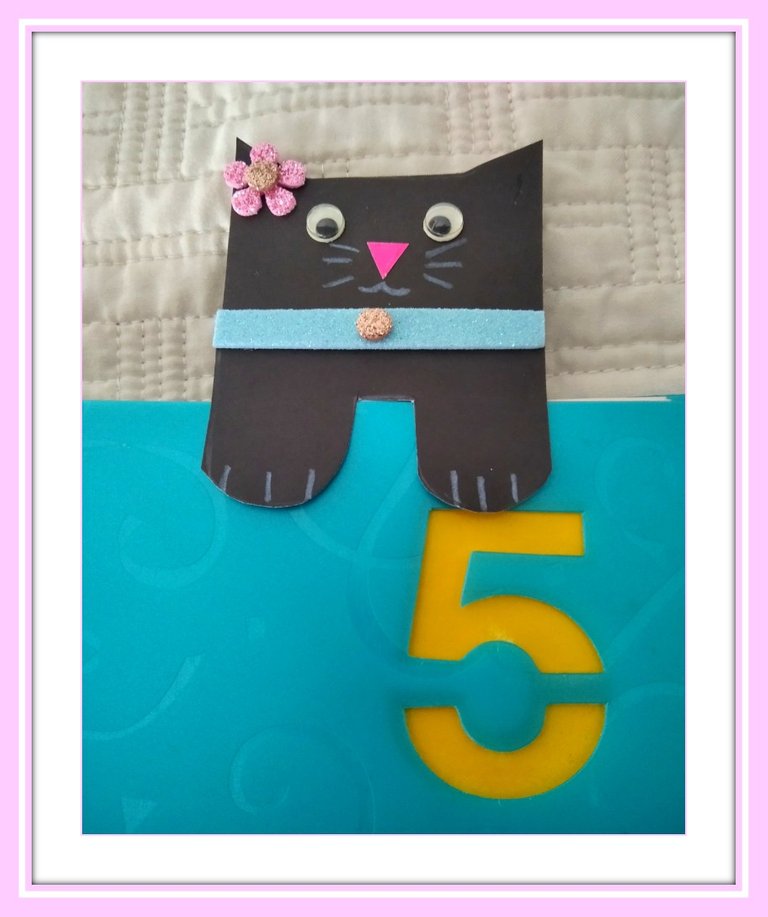
Para realizar la nariz, corta un pequeño triángulo de cartulina de color fucsia y pégalo en el centro de la cara de la gatita. Seguidamente, pega los ojos y, por último, dibuja la boca, los bigotes y garras con el color blanco.
Step 5
To make the nose, cut a small triangle of fuchsia cardboard and glue it in the center of the kitten's face. Next, glue the googly eyes and, finally, draw the mouth, whiskers and claws with white.
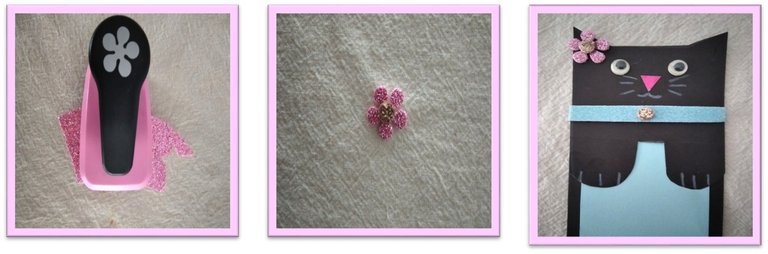
Paso 6
Coloca la perforadora de flor sobre el foami escarchado de color rosado y extrae una flor luego, pégale en el centro un círculo de foami escarchado de color bronce. Ahora, pega la flor en la oreja de la gatita como se indica en la imagen.
Step 6
Place the flower punch on the pink frosted foam and extract a flower, then glue a circle of bronze frosted foam in the center. Now, stick the flower on the kitten's ear as indicated in the image.
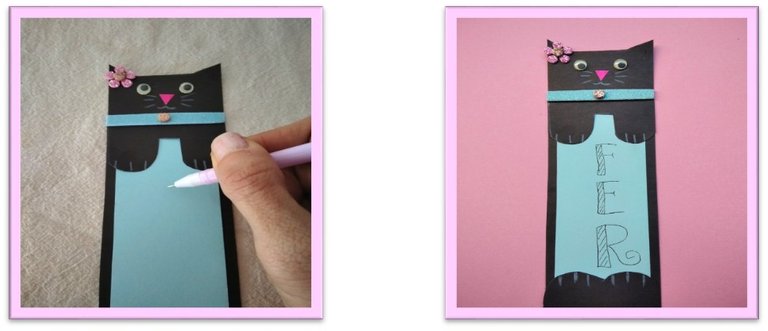
Paso 7
Para personalizar el marcapáginas, escribe con un marcador punta fina sobre la barriga de la gatita la palabra o nombre que desees. Yo he escrito Fer como cariñosamente llamamos a mi sobrina Fernanda.
Step 7
To personalize the bookmark, write the word or name of your choice on the kitten's tummy with a fine-tipped marker. I have written Fer as we affectionately call my niece Fernanda.
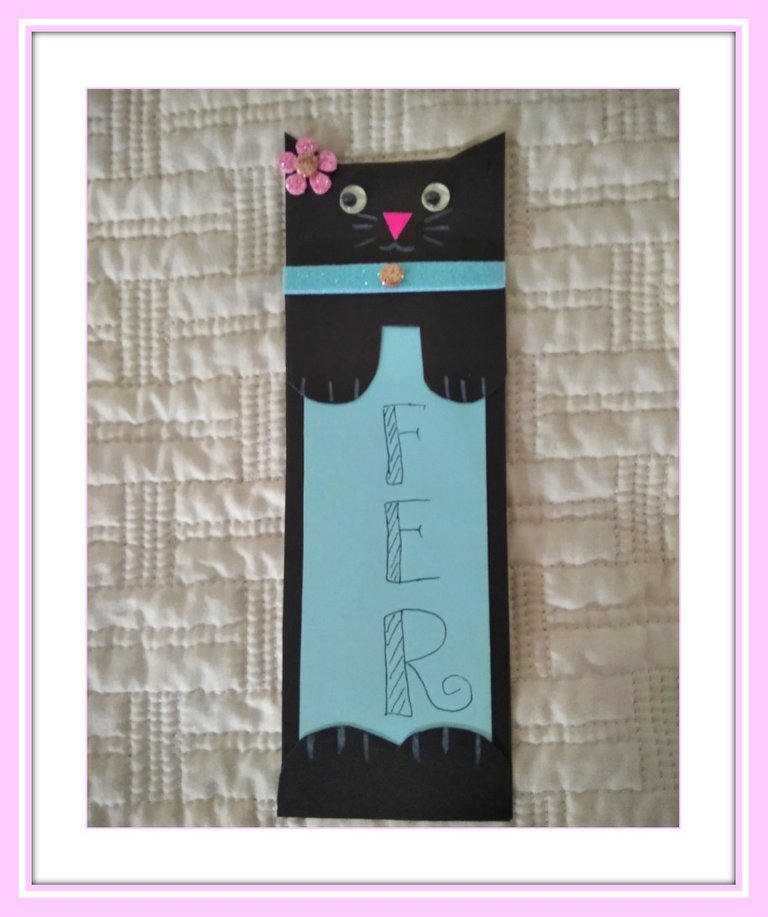
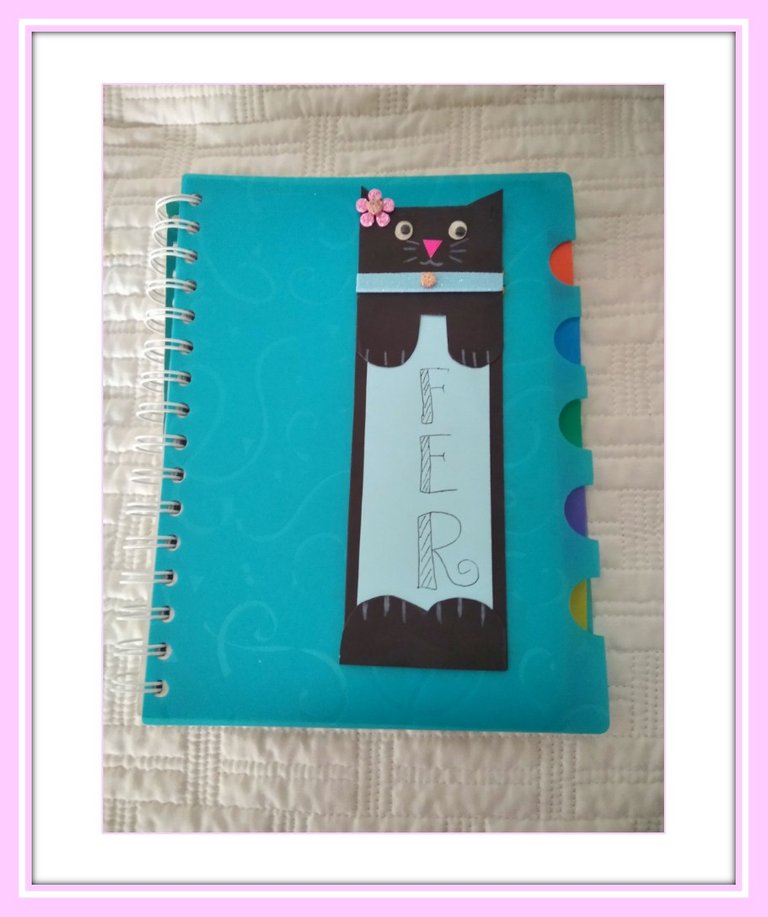

El marcapáginas está terminado y ha quedado muy lindo, considero que este tipo de manualidades gusta mucho a los niños. De igual forma, son ideales para un regalo debido a que son originales y puedes personalizarlos. También los mismos se pueden elabora con pocos materiales, en mi caso utilicé algunos retazos que habían quedado de otros trabajos. Igualmente, tienes la opción de utilizar diferentes colores y personalizarlos a tu gusto. Espero se animen a elaborar este lindo proyecto de manualidad. ¡Hasta una próxima oportunidad!
The bookmark is finished and it has been very nice, I think that this type of crafts is very popular with children. In the same way, they are ideal for a gift because they are original and you can personalize them. They can also be made with few materials; in my case I used some scraps that had been left over from other jobs. Likewise, you have the option of using different colors and customizing them to your liking. I hope you are encouraged to make this cute craft project. See you soon!
Las fotografías fueron tomadas por mi con mi teléfono celular Redmi Note 8.
The photos were taken by myself with my Redmi Note 8 cell phone.