
¡Hola Feliz Día para Todos! deseo de corazón que se encuentren de maravilla y con la creatividad activa 😊✂️ Hoy estoy por aquí para compartir con ustedes un nuevo tutorial y este es sobre unos títeres navideños 🎅🏼🦌 que me tocó elaborar de forma improvisada para que mis niños los llevarán al Colegio para una presentación... Cuando ellos me comentaron lo que les habían pedido en el Colegio, realmente me puse las manos en la cabeza 😅😅 porque no sabía ¿que hacer? entonces pensé un poquito e improvise con una figuras de Santa Claus, Rodolfo en Reno en foami y unas paletas... 😁 Te cuento cómo realice los títeres:
MATERIALES
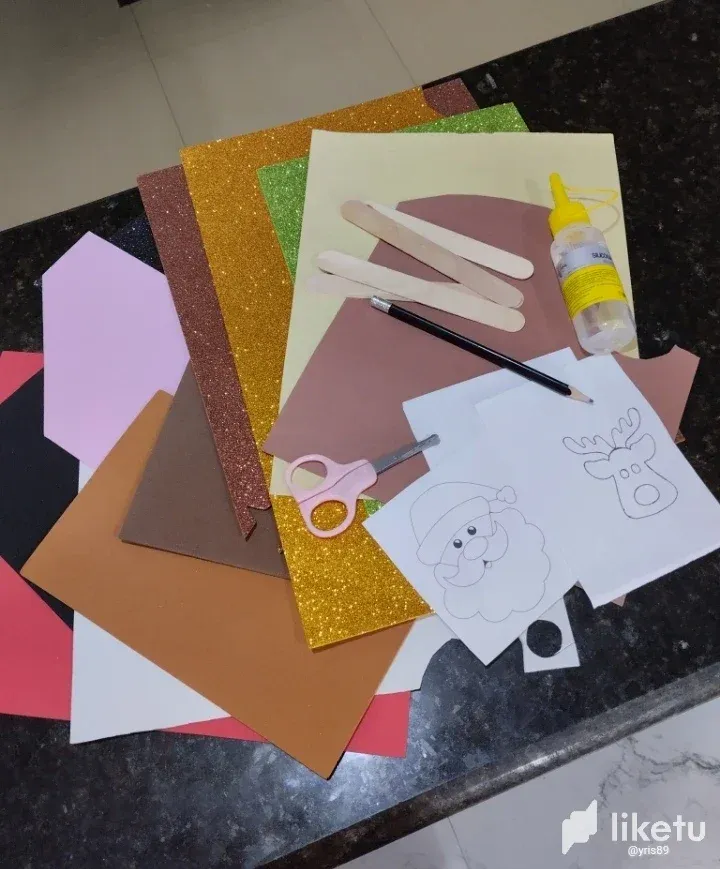
📌 Foami en diferentes colores alusivos a las figuras.
📌 Cartulina escolar color piel.
📌 Moldes de Santa y Reno
📌 Silicón Frío
📌 Lápiz Papel y Tijeras.
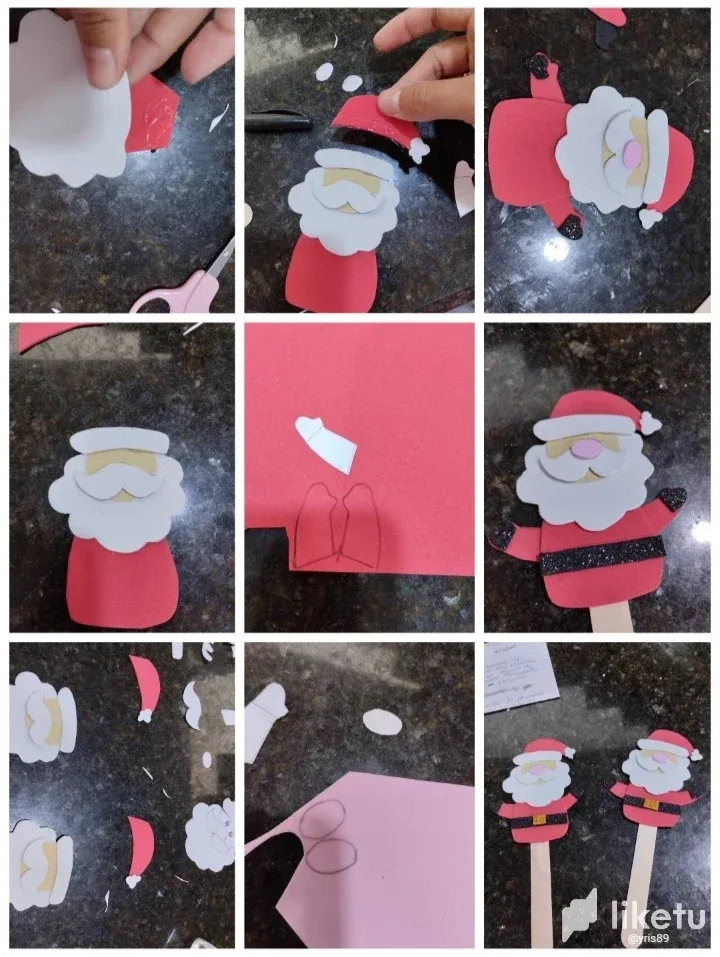
PASO A PASO
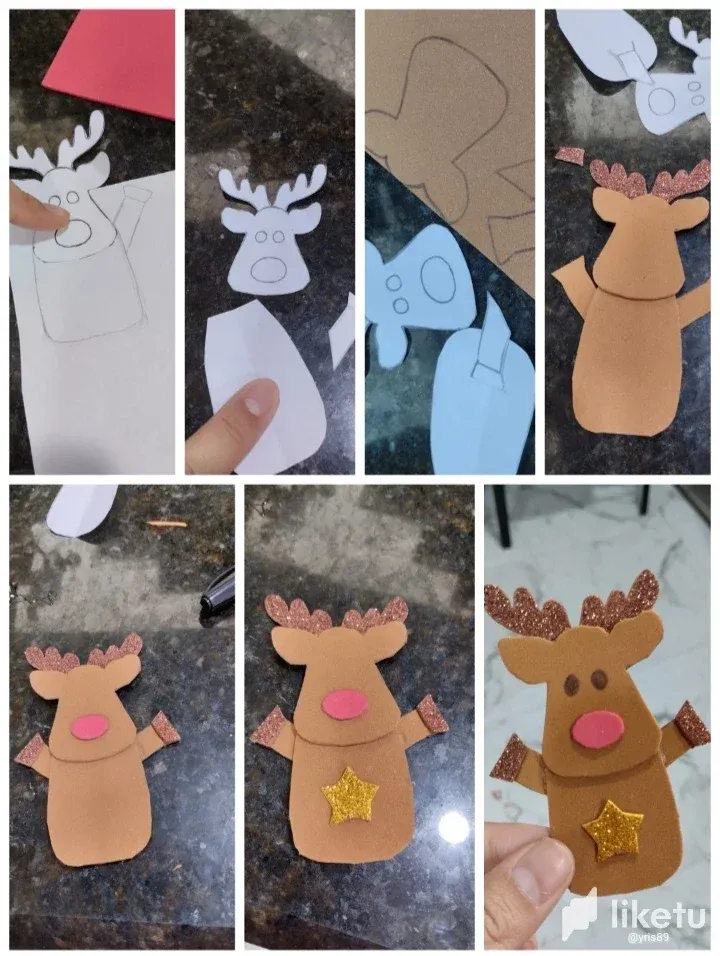
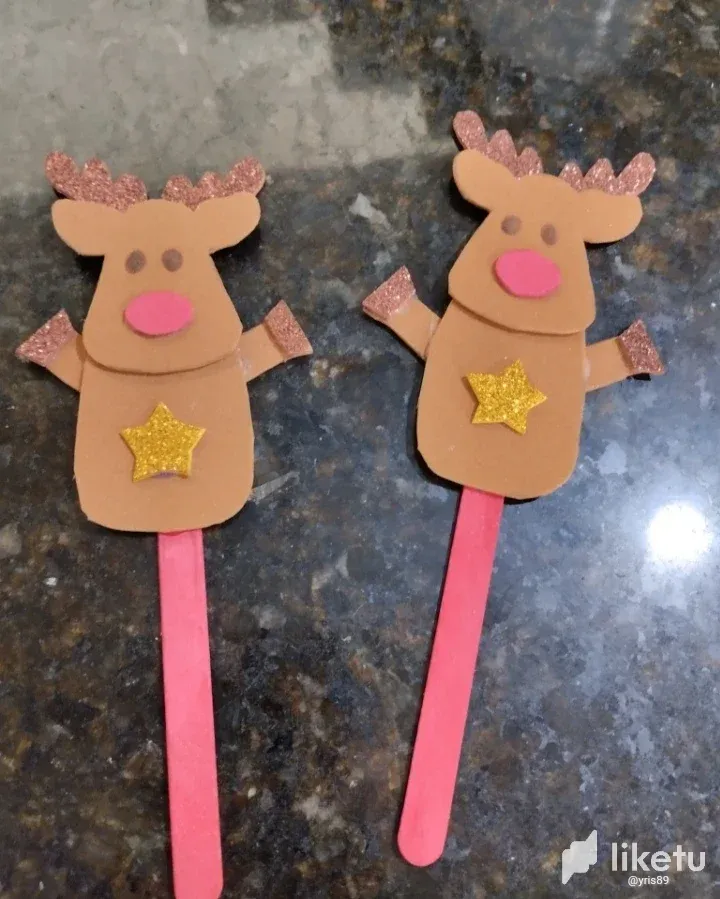
Primero elabore a Rodolfo el reno...
Lo que hice fue recortar los moldes (esto ya los tenía) pero si no también lo puedes calquear o elaborarlo tú mismo. como solo tenía el molde de la cara, elabore el molde del cuerpo y los brazos. luego lo marqué en el foami (usé foami marrón claro oscuro, escarchado y rojo) todas sus partes por separado cabeza astas cuerpo patas y recorte. Una vez ya tenía todo listo lo armé y pegué, he hice los ojitos con un lapicero negro. Le agregué un detallito de una estrella dorada.. Cómo lo muestro en las imágenes
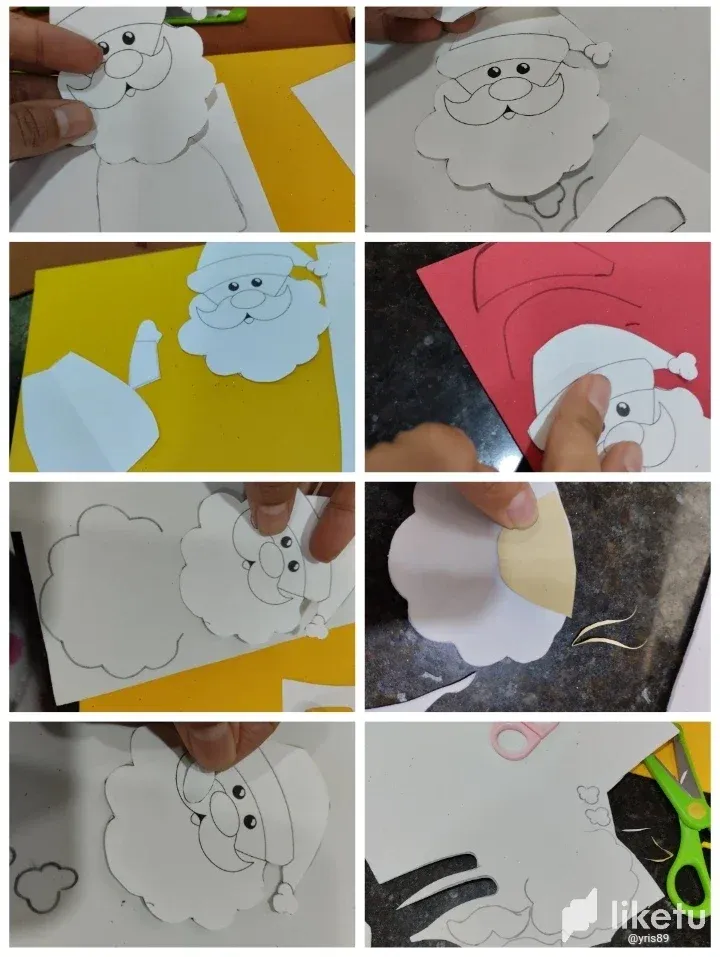
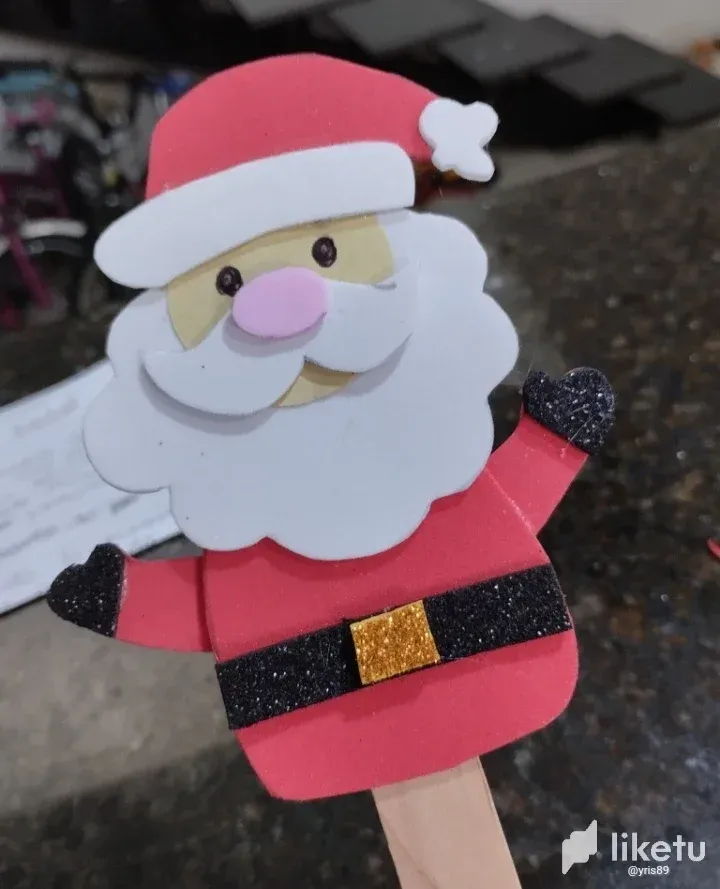
Elaborando a Santa Claus
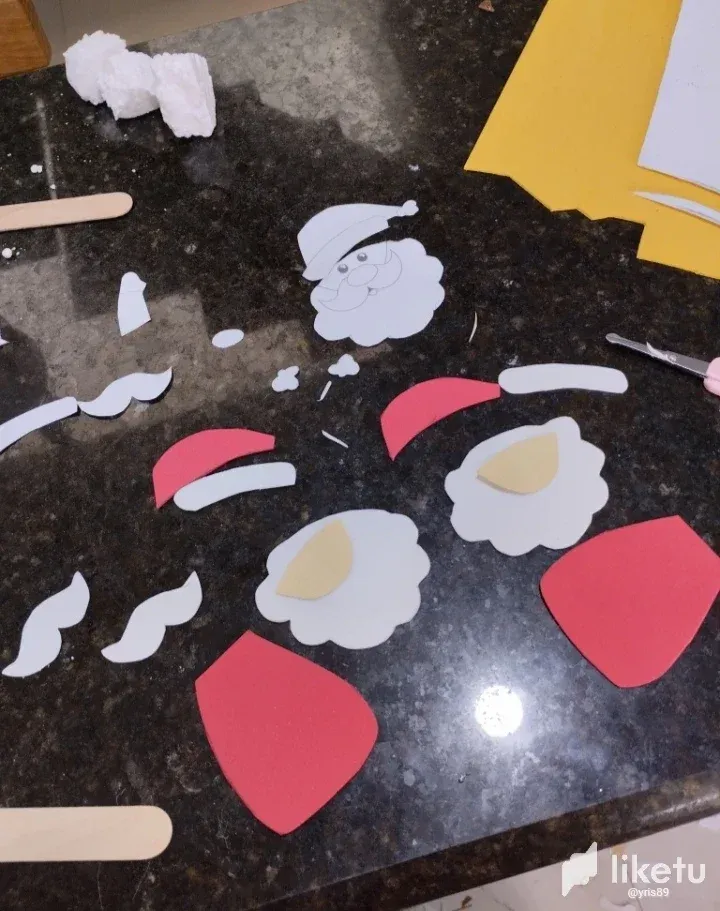
Con Santa también tenía el molde de la carita, así que me dispuse a crear el cuerpo y los brazos, con Santa sí tuve que recortar la parte del sombrero a parte; calquear la nariz y el bigote para poder sacar bien las partes de la cara. Con estas partes listas marqué en los foami que encontré más parecidos a los colores originales de Santa Claus y empecé a recortar todo con mucho cuidado. Con las partes listas organicé las piezas y fui pegando poco a poco, al finalizar me di cuenta que me faltaban los detalles del guante y cinturón de Santa así que a pulso recorte de un pedazo de foami negro y dorado escarchado unos miniguantes, cinturones y ebilla...😅 Listo todos los pegué en las paletas 😁 como lo muestro en la imagen..
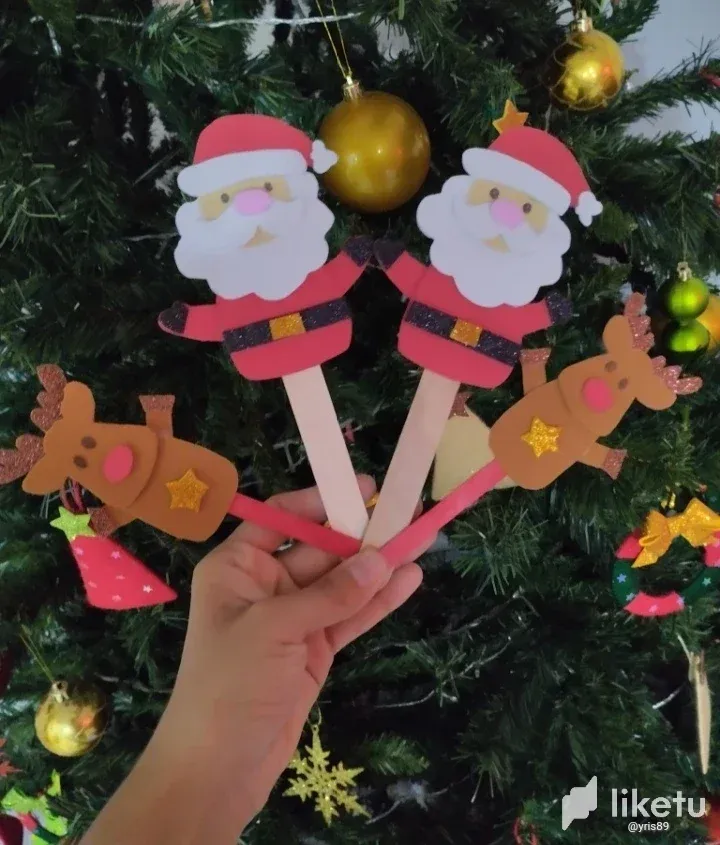
Así quedaron listos estos pequeños títeres, fue rápido y fácil, como les comenté al principio me tocó improvisar para resolver... Esto lo solicitaron del Colegio de un día para el otro 😅 utilice los materiales que tenía en casa..
Feliz Día para todos 🥳
Gracias por Leerme ❤️
Portada editada con Canva
Fotografía tomadas con mi teléfono Redmi 10
Traductor DeepL
ENGLISH VERSION 🔄🎅🏼
Hello Happy Holidays to all of you! I wish you all a wonderful and creative day 😊✂️ Today I'm here to share with you a new tutorial and this is about some Christmas puppets 🎅🏼🦌 that I had to make on the spur of the moment for my kids to take to school for a presentation.... When they told me what they had been asked at school, I really put my hands on my head 😅😅 because I didn't know what to do, so I thought a little bit and improvised with a Santa Claus and Rudolph the Reindeer figures in foami and some popsicles... 😁 I'll tell you how I made the puppets:
MATERIALS.
📌 Foami in different colors allusive to the figures.
📌 Skin color school cardboard.
📌 Santa and Reindeer molds.
📌 Cold Silicone.
📌 Pencil Paper and Scissors.
STEP BY STEP
First I made Rudolph the reindeer...
What I did was to cut out the molds (I already had them) but if not you can also trace or make it yourself. as I only had the mold of the face, I made the mold of the body and arms. then I marked in the foami (I used light brown, dark brown, frosted and red foami) all its parts separately head antlers body legs and cut. Once I had everything ready, I assembled it and glued it, and made the eyes with a black pen. I added a little detail of a golden star. As shown in the pictures
Making Santa Claus
With Santa I also had the mold of the face, so I started to create the body and the arms, with Santa I had to cut out the part of the hat separately; tracing the nose and the mustache to be able to get the parts of the face well. With these parts ready I marked on the foami that I found more similar to the original colors of Santa Claus and I started to cut out everything very carefully. With the parts ready I organized the pieces and glued them little by little, at the end I realized that I was missing the details of the glove and Santa's belt so I cut from a piece of black and gold frosted foami some miniiguantes, belts and buckle...😅 I glued them all on the palettes 😁 as I show in the picture....
So these little puppets were ready, it was quick and easy, as I told you at the beginning I had to improvise to solve.... This was requested by the school from one day to the next 😅 I used the materials I had at home...
Happy Day to all 🥳
Thanks for Reading Me ❤️
Cover edited with Canva
Photographs taken with my Redmi 10 phone
Translator DeepL
For the best experience view this post on Liketu