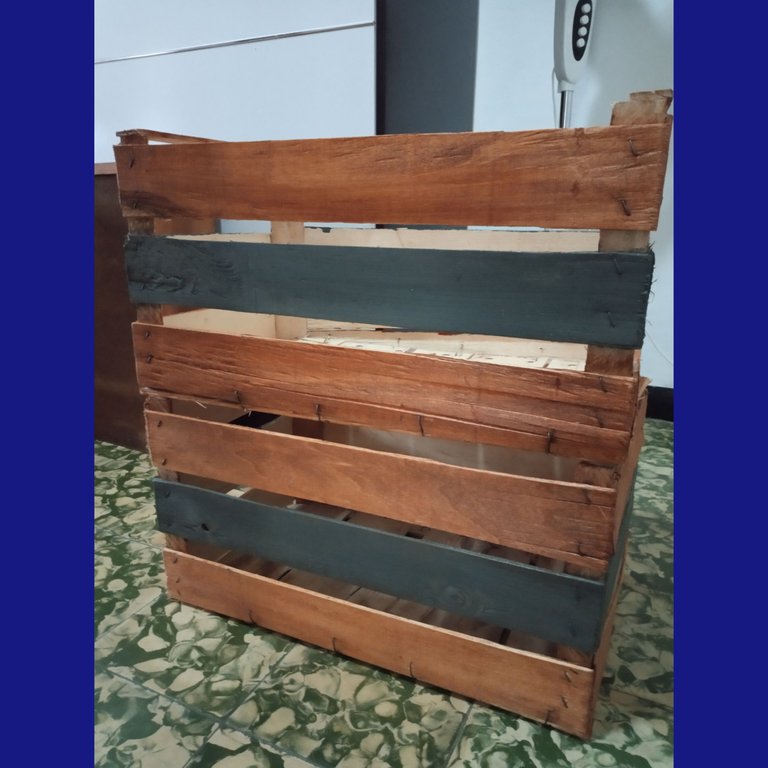
Reciclando ando....si amigos, esta semana les voy a mostrar lo que he realizado con las cosas que hemos encontrado en contenedores y que están por ser reutilizadas. En esta oportunidad son unos cajones de madera que iba a votar mi vecina en los cuales vienen la arena para sus gatitos y yo los agarré para hacer una bibliotequita. Utilicé los mismos materiales que había comprado para la mejora de un gavetero que les mostraré luego en otro post; pero si les soy sincera, la parte que quedó de color madera creo que en algún momento la voy a pintar de blanco ...jejejjee...pero por el momento les muestro mi invento!!!
I'm recycling... yes friends, this week I'm going to show you what I've done with the things we've found in containers and that are about to be reused. This time they are some wooden boxes that my neighbor was going to vote in, in which the litter for her kittens comes, and I took them to make a little library. I used the same materials that I had bought to improve a chest of drawers that I will show you later in another post; but if I'm honest, I think that at some point I'm going to paint the wood-colored part white...hehehehee...but for now I'll show you my invention!!!
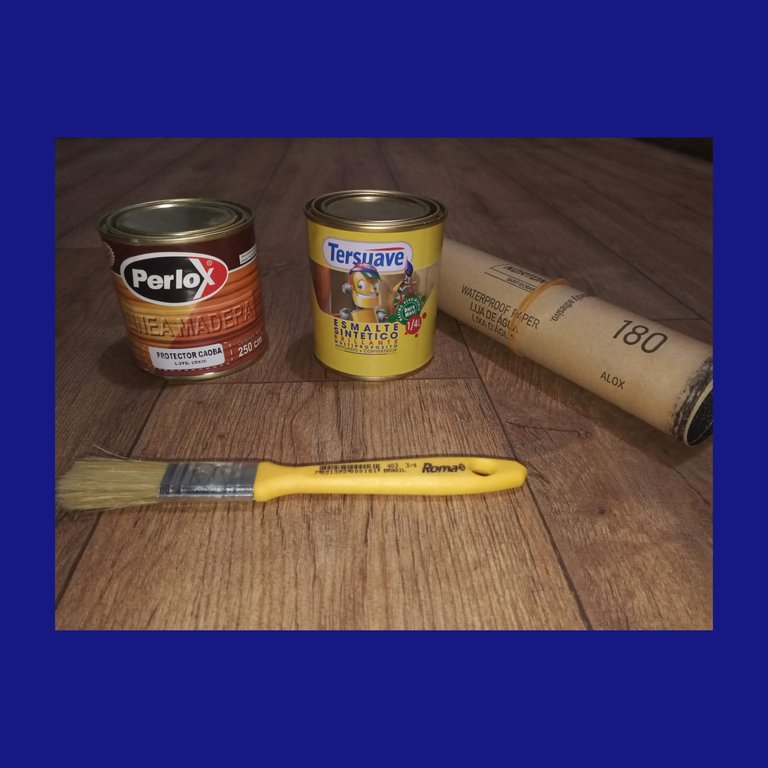
Materiales:
- Lija #180
- Brocha/pincel
- Talco
- Pintura Gris esmalte sintético (brillante)
- Solvente (Para limpiar la brocha)
- Protector de madera color caoba
**Materials:
- Sandpaper #180
- Brush/brush
- Talcum powder
- Gray synthetic enamel paint (glossy)
- Solvent (To clean the brush)
- Mahogany wood protector
**
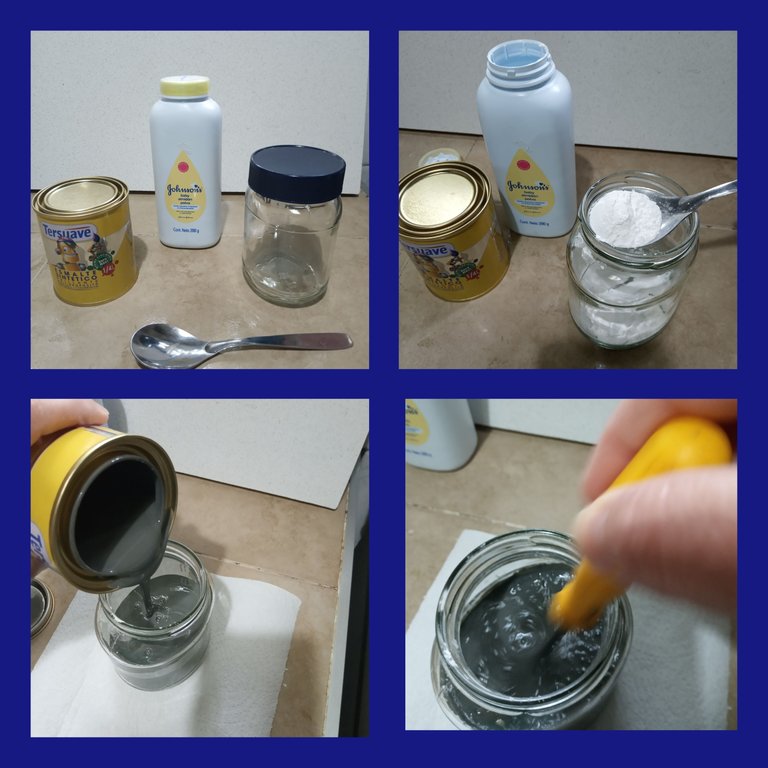
Paso 1:
Como no tenía pintura gris mate, coloqué 4 cucharadas de talco en un frasco, luego agregué el cuarto de litro de pintura y revolví muy bien e hice una prueba en un pedazo de madera, el talco le quitó el brillo, pero quedó un poco satinado.
Step 1:
Since I didn't have matte gray paint, I put 4 tablespoons of talcum powder in a jar, then I added the quarter liter of paint and stirred very well and did a test on a piece of wood, the talcum powder took away the shine, but it was a bit satiny .
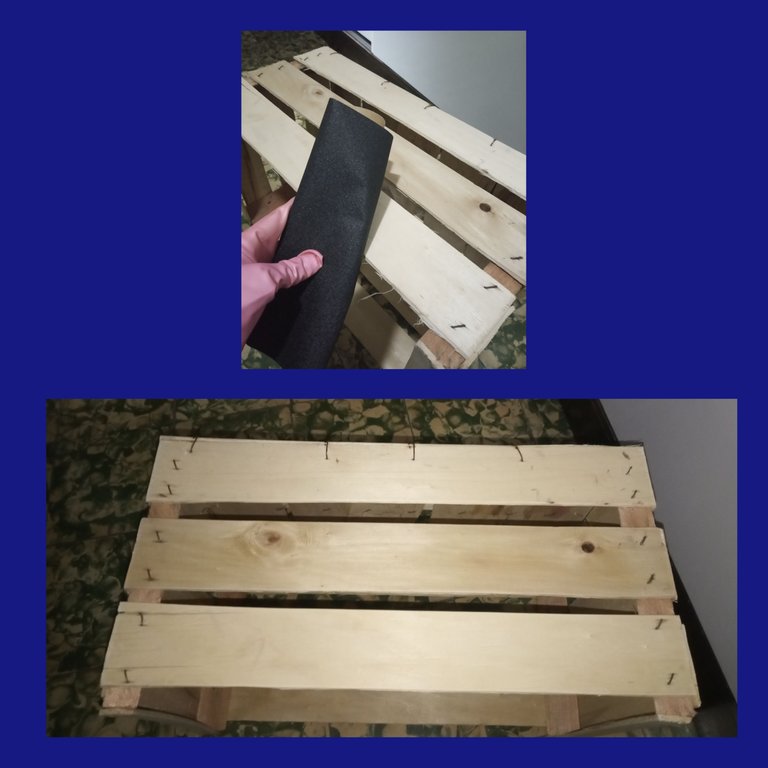
Paso 2:
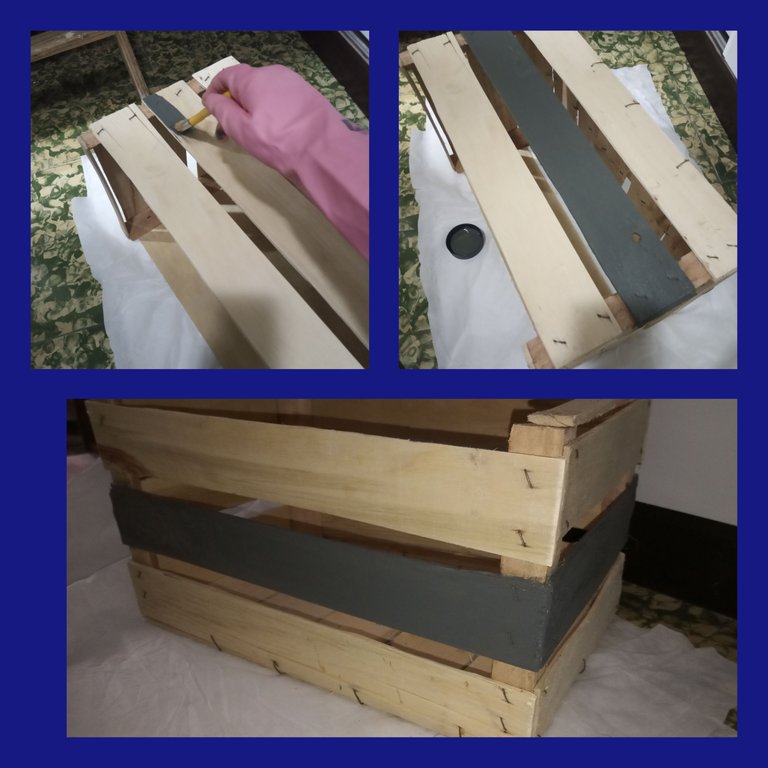
Con un guante tomé la lija, fuí lijando la parte externa y todos los bordes quitando las astillas dejandolo lo mas liso que se pueda.
Step 2:
With a glove I took the sandpaper, I sanded the external part and all the edges removing the splinters leaving it as smooth as possible.
Paso 3:
Con la brocha/pincel fuí colocando la pintura gris la franja del medio siempre en el sentido de las vetas de la madera.
Step 3:
With the brush / brush I was placing the gray paint the middle strip always in the direction of the wood grain.
Paso 4:
Despues de limpiar la brocha con el solvente (Thiner), procedí a colocar con la brocha ya limpia en la franja superior y luego la inferior el protector para madera, tambien en el sentido de las vetas.
Step 4:
After cleaning the brush with the solvent (Thiner), I proceeded to place the wood protector on the upper stripe and then on the lower stripe with the already clean brush, also in the direction of the grain.
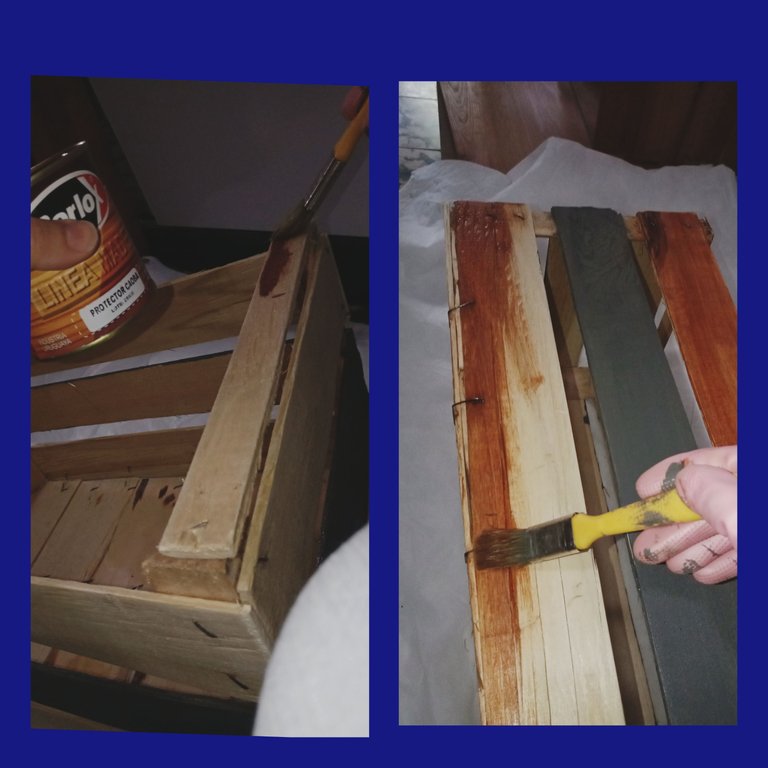
Paso 5:
Esperé más de dos horas para que estuviese seco al tacto, solo pinté los laterales externos.
**Step 5:
I waited more than two hours for it to be dry to the touch, I only painted the external sides.
**
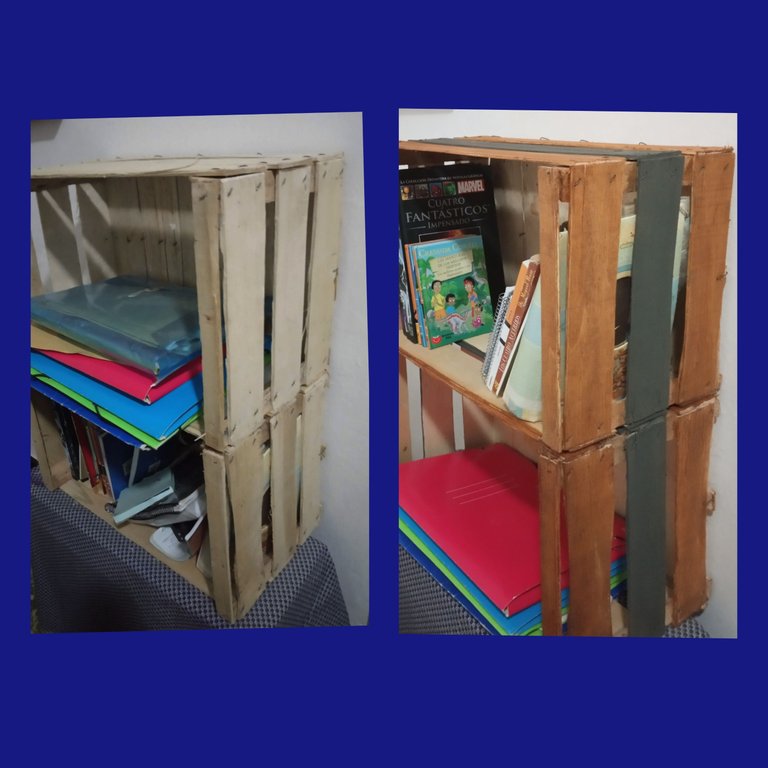
Así quedaron, los cajones en sí están hechos de una forma muy ordinaria, pero poniendo un poco de creatividad se puede lograr algo utilitario. (Luego les paso las fotos cuando los ponga blancos jjjejjejeje)
Espero les sirva el truco que aprendí de como poner una pintura brillante en mate!
Saludos y hasta el proximo reciclaje!!
Chau chauuu!
**This is how they turned out, the drawers themselves are made in a very ordinary way, but with a little creativity you can achieve something utilitarian. (Then I'll pass you the photos when I put them white jjjejjejeje)
I hope the trick I learned on how to put a glossy paint on a matte will serve you!
Greetings and until the next recycling!
Bye bye!**
Imágenes propiedad del autor

