Greetings Hive Diy community!
Giving a rose is more than a nice gesture; It is a symbol of love, respect and gratitude
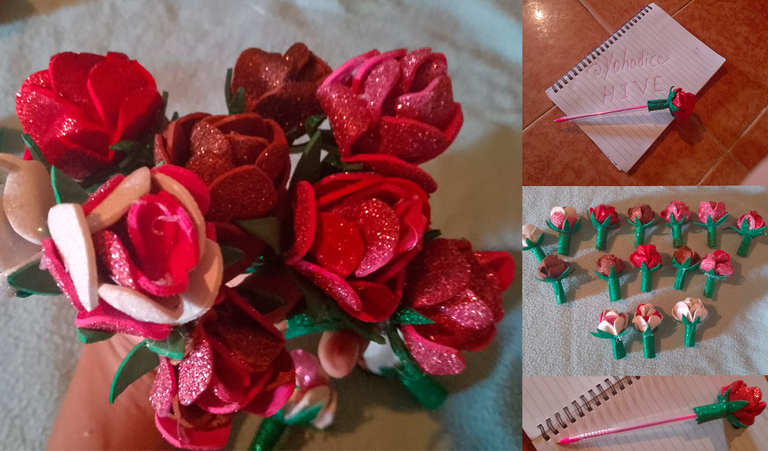
Inspired by this idea, I dared to create some pink foam pencil holders, made in red, white, pink and brown. I also put colors together, to make some as nuanced and they turned out very pretty.
In my experience, working with foami has not been an easy task. Among multiple daily responsibilities, finding time to create these delicate flowers was a challenge. However, every petal cut and every detail glued was an act of love towards the women who will receive these pencil holders.
The roses, made with care and attention, are created to share this knowledge with all of you where I explain, step by step, what the creation process was like and show people who still don't know how we can make our own roses and see them made in your own hands the beauty that arises from artisanal dedication.
So get ready to enter the world of foami crafts, together, we will learn to transform these sheets into roses full of meaning. I hope you like it and dare to create these beautiful details

Materiales a utilizar

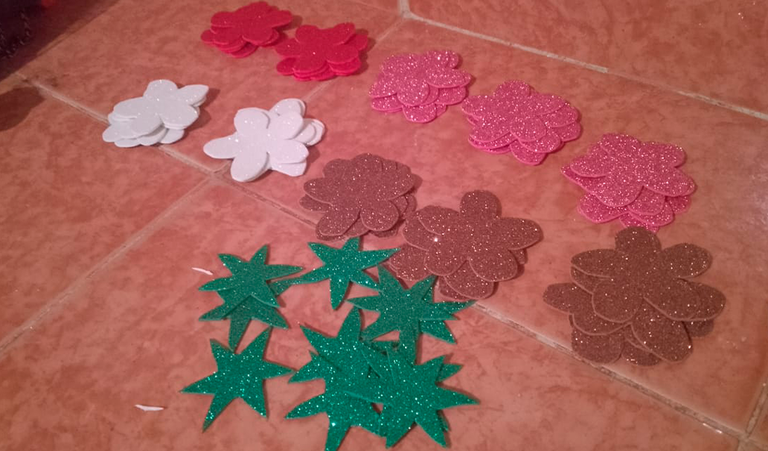
Before specifying what materials I used, I want to tell you that I didn't have some things and I had a little difficulty, like at that time not having my silicone gun, a more comfortable iron to work with, but I still managed it. Now like that, below is the list of materials I used, many of which are in the image but others I had to improvise to make the pencil holders.
Below is the list of materials I used, many of which are in the image but others I had to improvise to make the pencil holders..
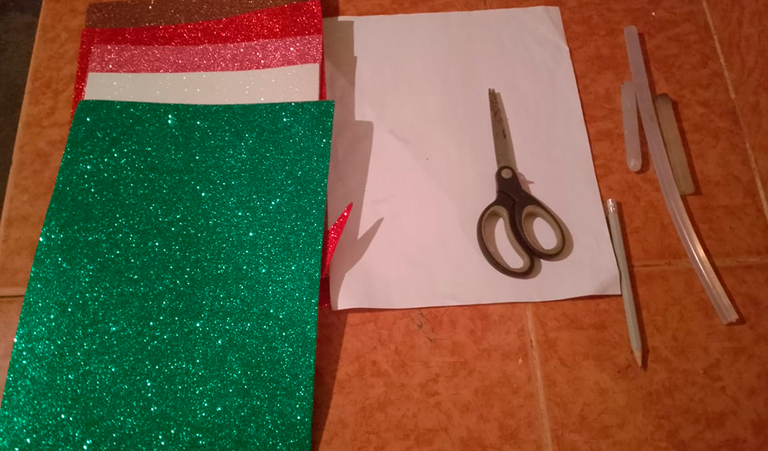
Green, red, pink, white, brown frosty foam
Scissors
Silicone
Candle
tinderbox
white paper
Pencil
Iron
Now we show you step by step
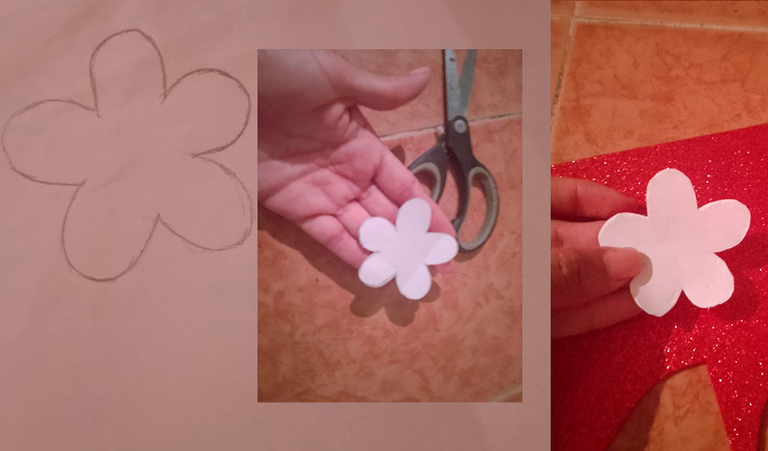
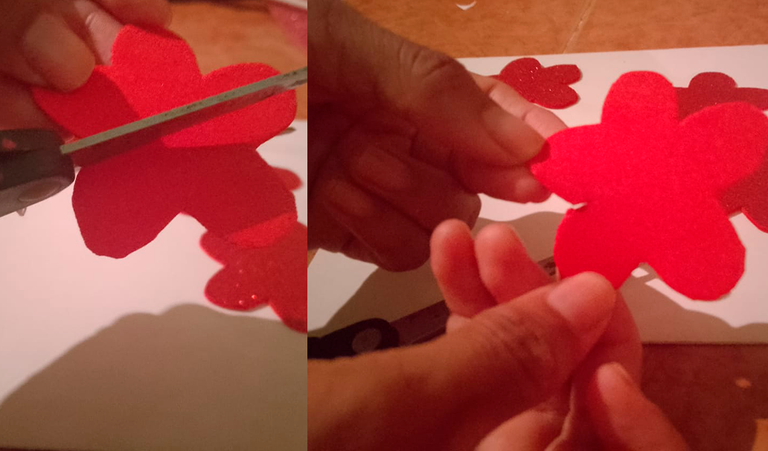
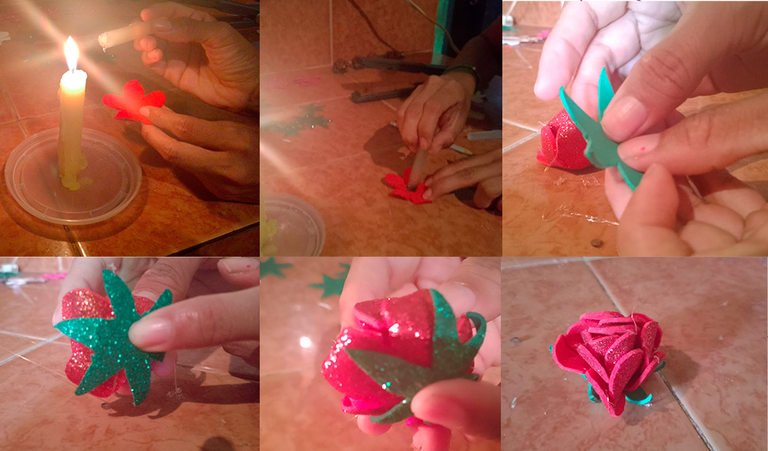
Step 1: On white paper I marked with a pencil a flower with five petals, approximately 3 cm in general, I cut it out to remove the mold and thus remove the petals of the different colors.
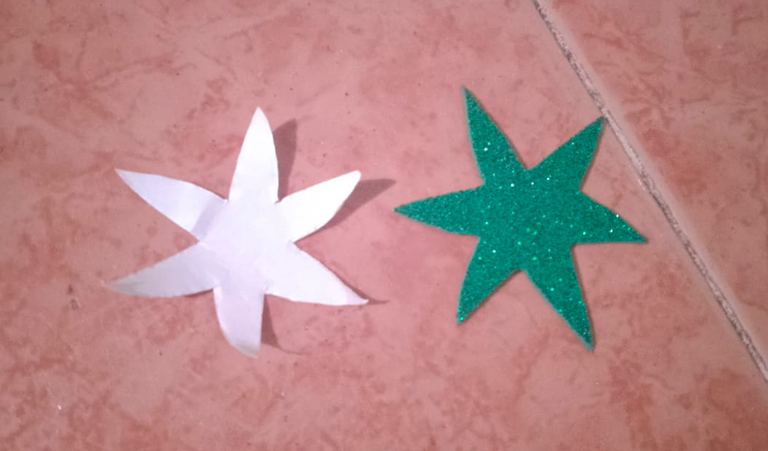
Step 2:In the same way, I marked on a blank piece of paper the sepal that is at the base of the rose and the little green leaves that help protect it and I cut them out of the green foam.
Observation: Before moving on to the third step to assemble the roses, I want to show you how all the cut petals and sepals turned out.
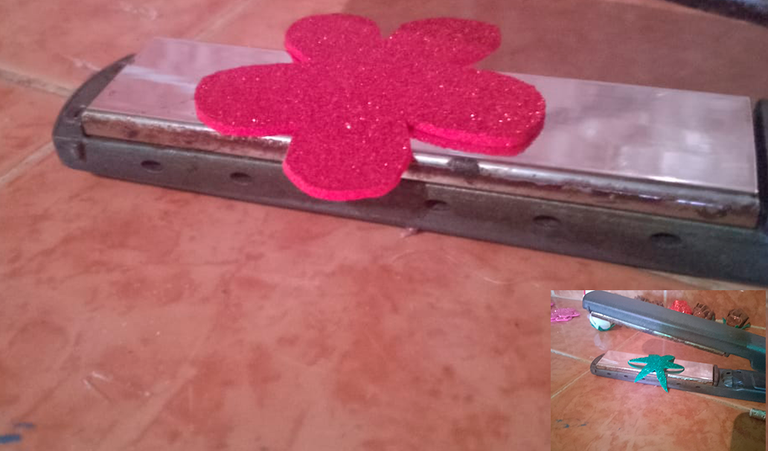
Step 3:On a hot iron, I placed them on one of the flowers and seal them so that they become a little soft and you can shape them more easily.
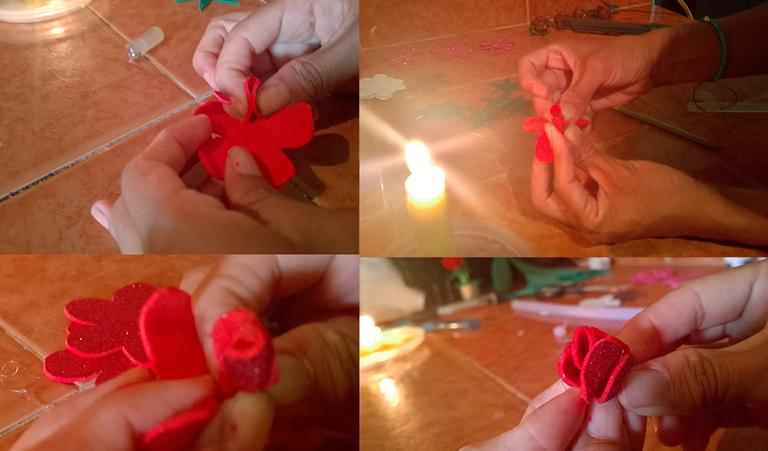
Step 4:Tomamos tres capas de pétalos y n la que va en la parte de arriba, vamos a cortar por un ladito para que se nos haga más fácil hacer el centro de la rosa.
Step 5:In this step, with the help of silicone, we begin to form and glue the first part of the rose, which is the first layer of petals that goes inside, as we see in the image.
Step 6:AAt this point we continue placing two more layers of petals to finish forming the rose and finally glue the sepal.
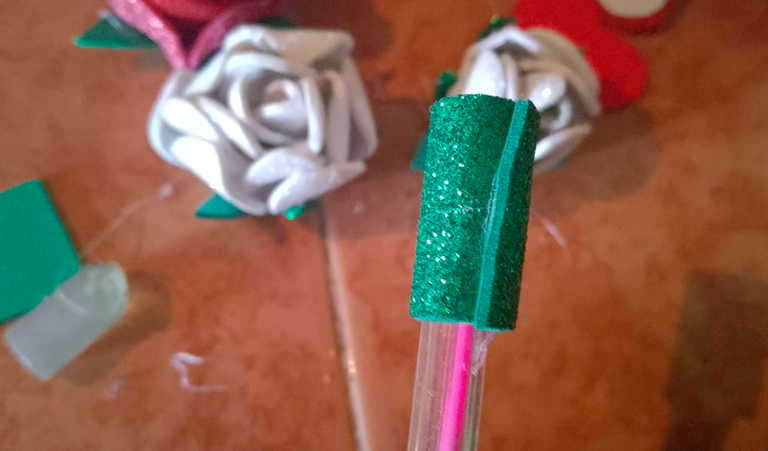
Step 7:To finish we have to place the pencil holder and to do this we cut a 1cm wide foam tape and when we have it, we take the tape, we turn the pencil over and at the end of the turn we cut and glue it with silicone, like this This way we are left with the small form to place the pencil of our choice.
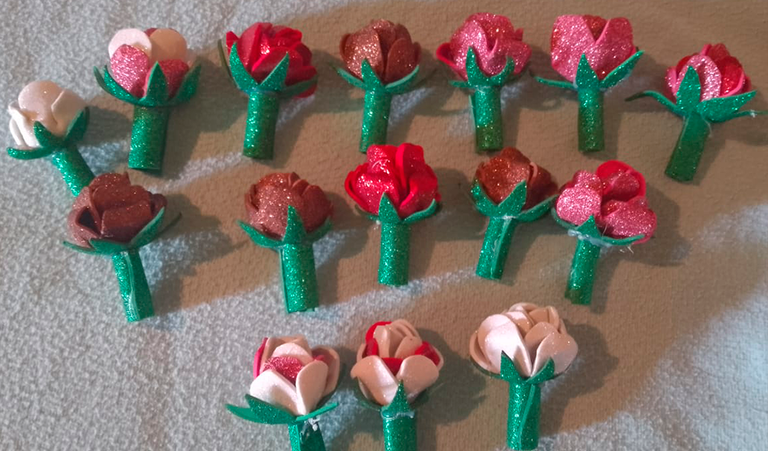
Well Hive, here is the summary of the step by step of the creation of these pencil holders, it was difficult for me to make them because I did not have all the materials and the silicone got tangled, but I managed to make them to give them to a group of women to whom I wanted to give a detail.
In the end, giving a rose is more than a gift: it is a silent hug that says “I value you” and “I appreciate you.”
💖Until next time Hivers!💖

[ESP]
¡Saludos comunidad Hive Diy!
Regalar una rosa es más que un gesto bonito; es un símbolo de amor, respeto y gratitud.
Inspirada por esta idea, me atreví a crear unos portalápices rosas de foami, elaborados en colores rojo, blanco, rosado y marrón. Igualmente junté colores, para hacer algunas como matizadas y quedaron bien bonitas.
En mi experiencia, trabajar con foami no ha sido tarea fácil. Entre las múltiples responsabilidades diarias, encontrar tiempo para crear estas delicadas flores fue un desafío. Sin embargo, cada pétalo cortado y cada detalle pegado fue un acto de amor hacia las mujeres que recibirán estos portalápices.
Las rosas, hechas con esmero y cuidado, son creadas para compartir este conocimiento con todos ustedes donde explico, paso a paso, como fue el proceso de creación y mostrarles a las personas que aún no saben cómo podemos hacer nuestras propias rosas y ver hecha en tus propias manos la belleza que surge de la dedicación artesanal.
Así que prepárense para entrar en el mundo de las manualidades con foami, juntas, aprenderemos a transformar estas láminas en rosas llenas de significado. Espero que te guste y te atrevas a crear estos hermosos detalles.
Materiales a utilizar
Antes de especificar cuáles son los materiales que usé, quiero contarles que no contaba con algunas cosas y tenía un poco de dificultad, como en ese momento no contar con mi pistolita de silicón, una plancha más cómoda para trabajar, pero aun así lo logré.
A continuación, la lista de materiales que usé, que muchos están en la imagen pero que otros tuve que improvisar para lograr hacer los portalápices.
Foami escarchado verde, rojo, rosado, blanco, marrón
Tijera
Silicona
Vela
Yesquero
Papel blanco
Lápiz
Plancha
Ahora te enseñamos el paso a paso
Paso 1: En un papel blanco marqué con un lápiz una flor de cinco pétalos de aproximadamente de 3 cm general, la recorté para sacar el molden y así sacar los pétalos de los distintos colores.
Paso 2:De igual manera marqué en un papel en blanco el sépalo que está en la base de la rosa y son las hojitas verdes que ayudan a protegerla y las recorté en el foami verde.
Observación: Antes de pasar al tercer paso para armas las rosas quiero mostrarle como me quedaron todos los pétalos y los sépalos recortados.
Paso 3:En una plancha caliente, las fui colocando casa uno de las flores y sépalo para que ellas se pongas un poco blanditas y las pueda moldeas con más facilidad.
Paso 4:Tomamos tres capas de pétalos y n la que va en la parte de arriba, vamos a cortar por un ladito para que se nos haga más fácil hacer el centro de la rosa.
Paso 5:En este paso con la ayuda del silicón comenzamos a formar y pegar la primera parte de la rosa, que es la primera capa de pétalos que va dentro, como la vemos en la imagen.
Paso 6:Al llegar este punto seguimos colocando dos capas más de pétalos par terminar de formar la rosa y al final pegar el sépalo.
Paso 7:Para finalizar tenemos que colocarle el sujetador del lápiz y para ello cortamos una cinta de foami de 1cm de ancho y cuando ya la tenemos, tomamos la cinta le damos la vuelta al lápiz y al final de la vuelta cortamos y pegamos con silicona, de esta manera nos queda la formita para colocar el lápiz de nuestra preferencia.
Bien Hive, aquí el resumen del paso a paso de la creación de estos portalápices, me costó hacerlos porque no tenía todos los materiales y el silicón se me enredaba, pero los logré hacer para regalarlos a un grupo de mujeres a quienes quería darle un detalle
Al final, regalar una rosa es más que un obsequio: es un abrazo silencioso que dice “te valoro” y “te aprecio”.
💖¡Hasta una próxima oportunidad Hivers!💖


