Saludos queridos amigos creativos!
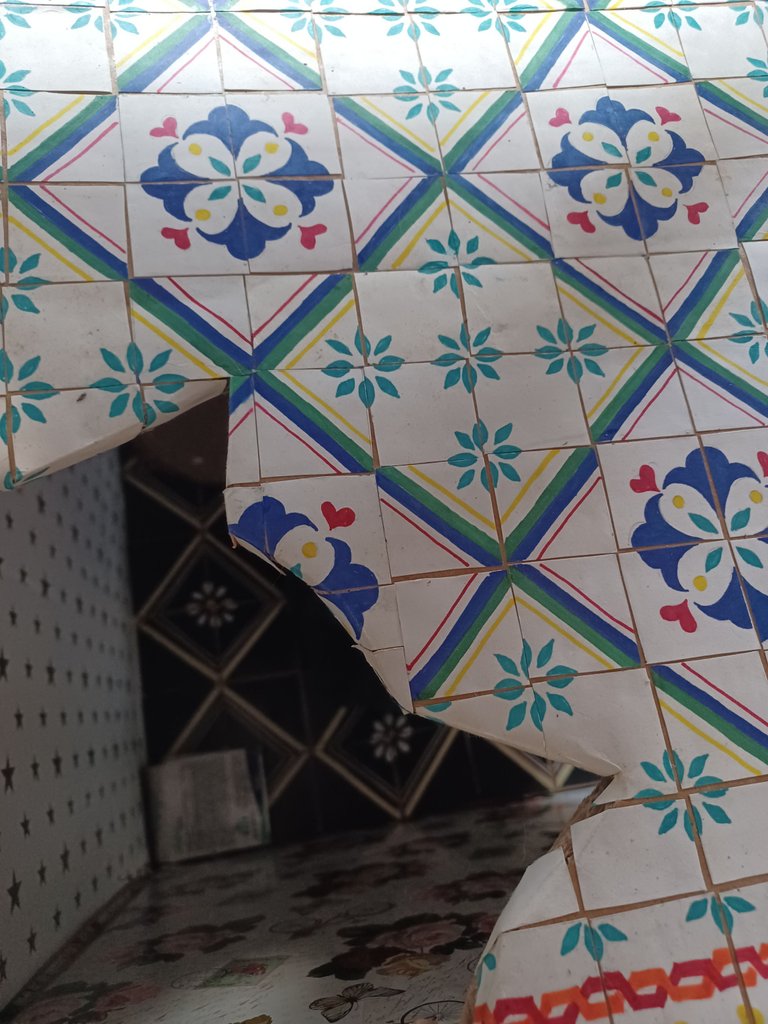
El día de hoy quiero mostrarles cual fue mi proceso de creación para ñas baldosas de la casa de Julian, en un post anterior mostré como hacer las baldosas de la entrada, estas constaban todas con el mismo diseño, pero esta vez la zona era más amplia y necesitada un diseño que se adaptará y no me tomará tanto tiempo, quería crear algo geométrico, pero y floral e incluir el diseño de las baldosas de la entrada.
Greetings dear creative friends!
Today I want to show you what was my creation process for the tiles of Julian's house, in a previous post I showed you how to make the entrance tiles, these were all with the same design, but this time the area was wider and I needed a design that will adapt and will not take me so much time, I wanted to create something geometric, but and floral and include the design of the tiles of the entrance.
Mi idea principal y que termine llevando a cabo fue la de crear patrones más grandes, es decir que abarcaran más recuadros de 3×3cm así fue que decidí encuadrar el diseño floral en un rombo para lo cual agrupe los patrones repetitivos cada 4 baldosas es decir cada 12 centímetro.
Esta vez, a diferencia de la primera oportunidad use cartulina blanca y dibuje todos los patrones previo a cortar cada uno de los cuadritos, en el centro se ubicaría el elemento floral constituido por 4 recuadros, y en el borde el rombo para el cual use marcadores azules, verde, rojo y amarillo; remate las baldosas con algunos pétalos en color turquesa.
My main idea, which I ended up carrying out, was to create larger patterns, that is to say that they would cover more 3×3cm squares, so I decided to frame the floral design in a rhombus for which I grouped the repetitive patterns every 4 tiles, that is to say every 12 centimeters.
This time, unlike the first time I used white cardboard and drew all the patterns before cutting each of the squares, in the center would be located the floral element consisting of 4 squares, and on the edge the rhombus for which I used blue, green, red and yellow markers; I finished the tiles with some turquoise petals.
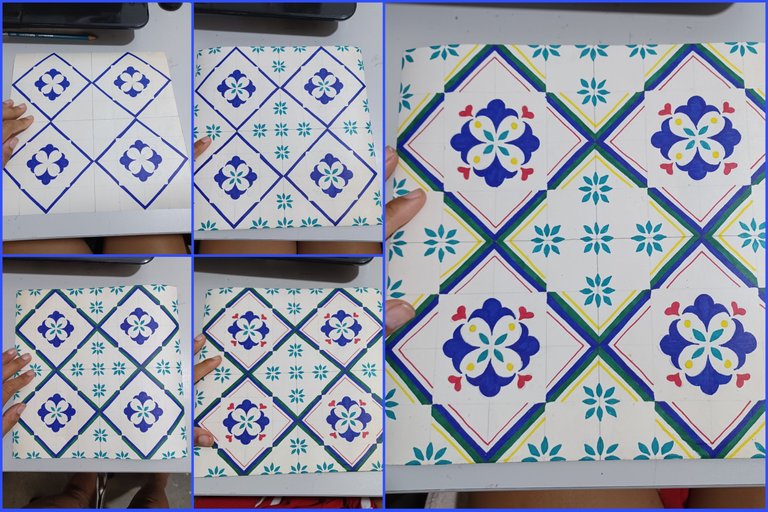
Proceso color por color, me encantó mucho y aunque repetitivo fue muy relajante.
Color by color process, I really loved it and although repetitive it was very relaxing.
Quise crear algo diferente para los bordes de la terraza así que diseñe unas líneas que se entrecruzan como una especie de cordón para el cual use marcadores rojo y naranja, remate igualmente con pétalos y puntos.
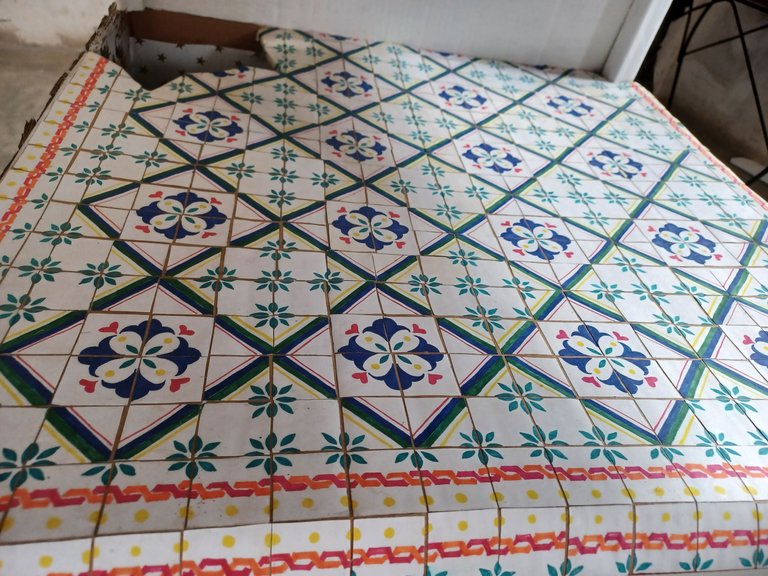
Luego de hacer el diseño era hora de recortar cada uno de los cuadritos y pegar nuevamente en el mismo orden en su lugar, me encanta como de a poco el suelo fue tomando el diseño de mosaico creando los rombos con flores en su interior, y aunque fue un proceso largo fue muy gratificante.
I wanted to create something different for the edges of the terrace so I designed some lines that crisscross like a kind of cord for which I used red and orange markers, I finished off with petals and dots.
After making the design it was time to cut out each of the squares and glue them back in the same order in place, I love how little by little the floor was taking the mosaic design creating the rhombuses with flowers inside, and although it was a long process it was very rewarding.
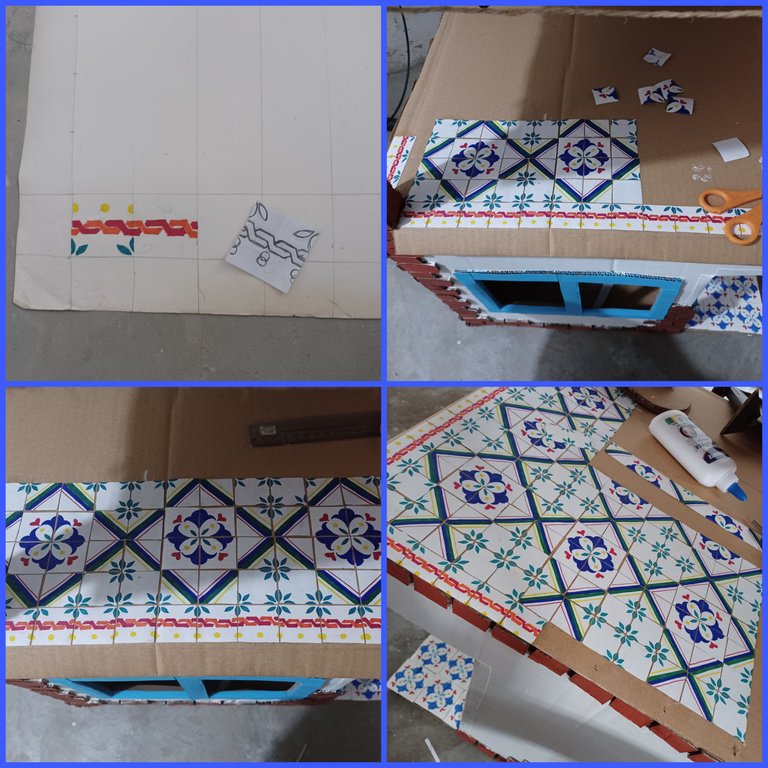
Me sentí como toda una trabajadora de la construcción pegando cada uno de los cuadritos y ahora valoro mucho más su trabajo y comprenderé cuando una baldosa no cuadre con el diseño, y aunque he sido muy cuidadosa y atenta puede que me haya equivocado más de una vez jajaaj!
I felt like a construction worker gluing each of the squares and now I value their work much more and I will understand when a tile does not match the design, and although I have been very careful and attentive I may have been wrong more than once hahaajaj!
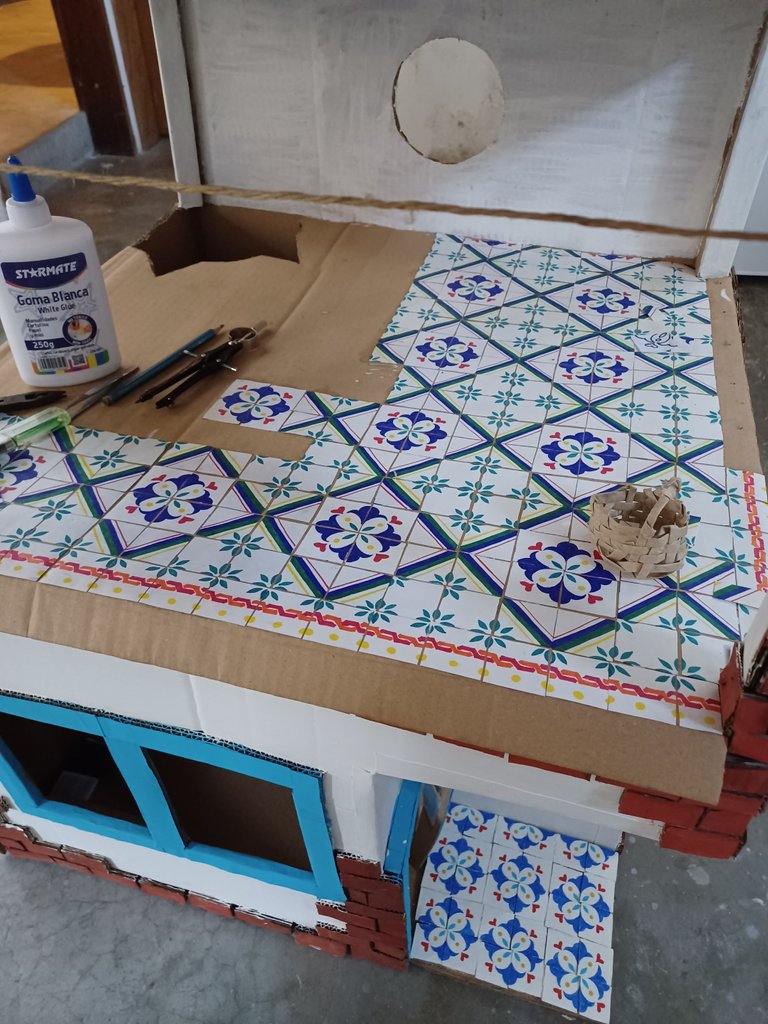
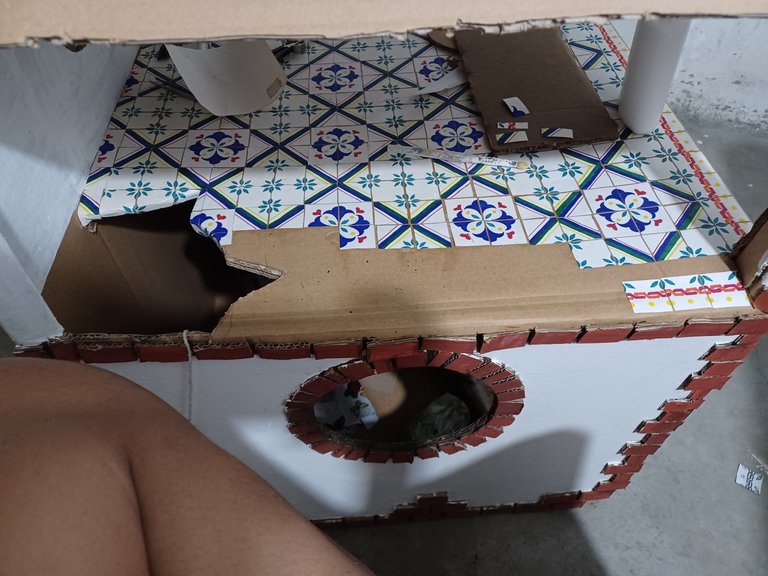
Acá estoy pegando los últimos cuadritos de piso de la terraza, me tomo poco más de tres días hacer todos y pegarlos a la casita superando mis cálculos previos, pensé que sería mucho más rápido, me parece una idea excelente para cubrir cualquier superficie el hacerlo por pequeñas facilita que todo quede más prolijo, pero se debe ser paciente.
Here I am gluing the last squares of the terrace floor, it took me a little more than three days to make all of them and glue them to the house, surpassing my previous calculations, I thought it would be much faster, I think it is an excellent idea to cover any surface, doing it in small pieces makes it easier for everything to be neater, but you must be patient.
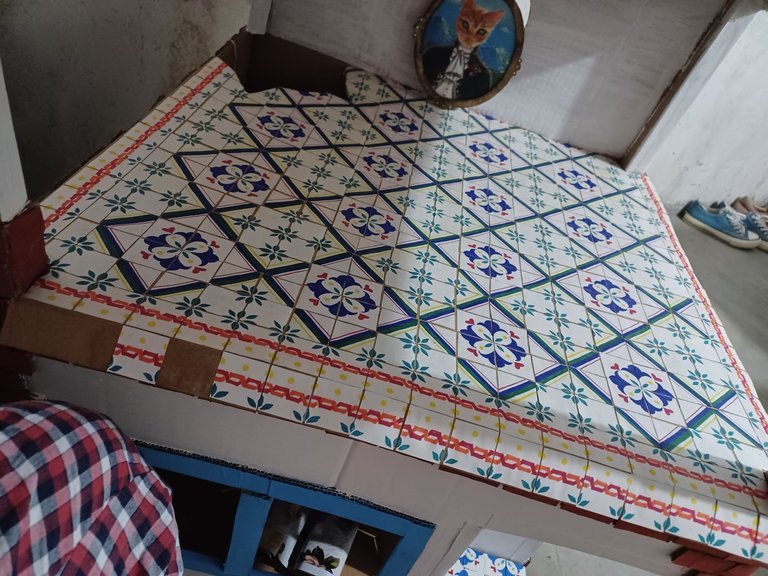
Finalmente este ha sido el resultado final! Espero este post haya sido útil y de su agrado!
Los espero para remodelar el interior de la casa 🥰
Hasta luego!
Finally this has been the final result! I hope this post has been useful and to your liking!
I wait for you to remodel the interior of the house 🥰.
See you soon!
