¡Saludos queridos amigos!
Espero se encuentren muy bien, hoy quiero contarles acerca de un reto que acepte hace algunos días, mi vecina que tiene un hijo en edad escolar y como parte de una de sus tareas lo habían asignado a contruir una maqueta de un instrumento de medición, la vecina me dijo que de favor se lo hiciera basado en uno que encontró en un video de Youtube; yo repliqué el video y aquí parte del proceso para construir esta báscula de mesa.
Greetings dear friends!
I hope you are very well, today I want to tell you about a challenge I accepted a few days ago, my neighbor who has a school-age son and as part of one of his homework had assigned him to build a model of a measuring instrument, the neighbor told me to please do it based on one he found in a Youtube video; I replicated the video and here is part of the process to build this table scale.

Materials
Cardboard boxes.
Silicon
Scissors
Rulers
Compass
Pliers
1 Piece of plastic tubing
1 Popsicle stick
1 piece of thick wire
1 Popsicle stick
2 Plastic bottle caps
Materiales:
Cartón de cajas.
Silicon
Tijeras
Reglas
Compás
Tenazas
1 Trozo de Tubo de plástico
1 Paleta de helado
1 Trozo de Alambre grueso
1 Paleta de helado
2 Tapas de botellas plásticas
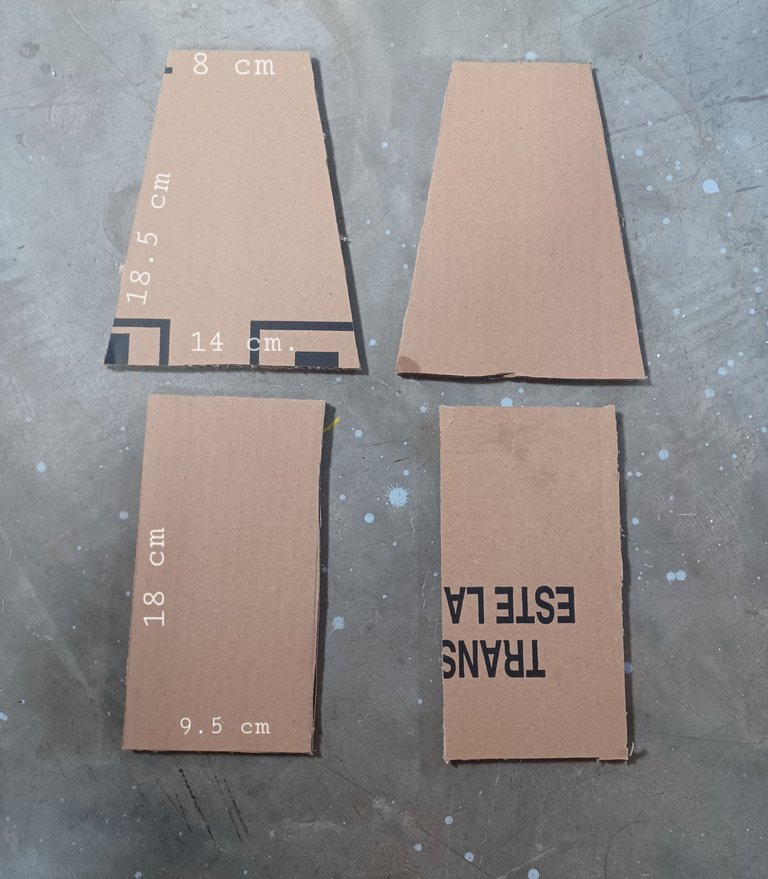
El primer paso para crear esta báscula es recortar los siguientes rectángulos del cartón en primer lugar dos rectángulos de 18.5 el lago inferior de 14cm. y el lado superior de 8cm. tal como se muesta en la siguiente imagen, los segundos rectángulos serán de 9,5x18cm
The first step to create this scale is to cut out the following rectangles from the cardboard, first two 18.5 rectangles, the lower side of 14cm. and the upper side of 8cm. as shown in the following image, the second rectangles will be of 9.5x18cm.
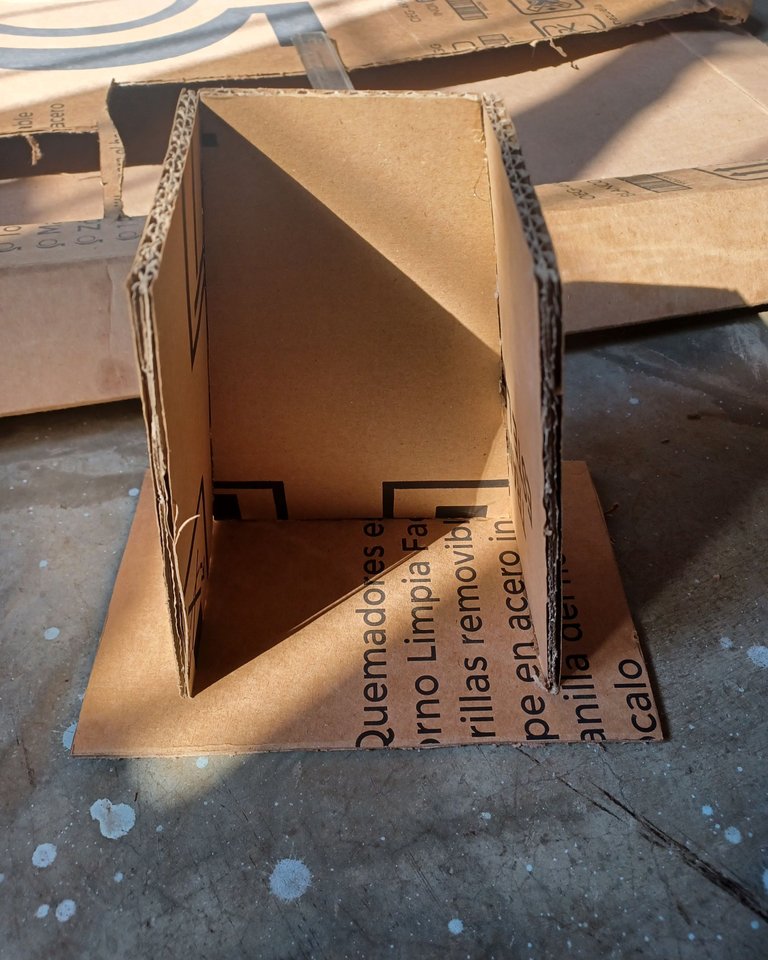
Luego sobre un rectángulo de cartón de 18x20 cm apox. se pegan verticalmente las partes previamente cortadas, colocando las partes mas angostas hacía arriba y colocando frente a frente los partes con las mismas dimensiones, pero sin pegar una de las caras, especificamente una de las más angostas arriba, quedando de la siguiente manera:
Then, on a cardboard rectangle of 18x20 cm apox. vertically glue the previously cut parts, placing the narrower parts upwards and placing the parts with the same dimensions face to face, but without gluing one of the faces, specifically one of the narrower ones upwards, as follows:
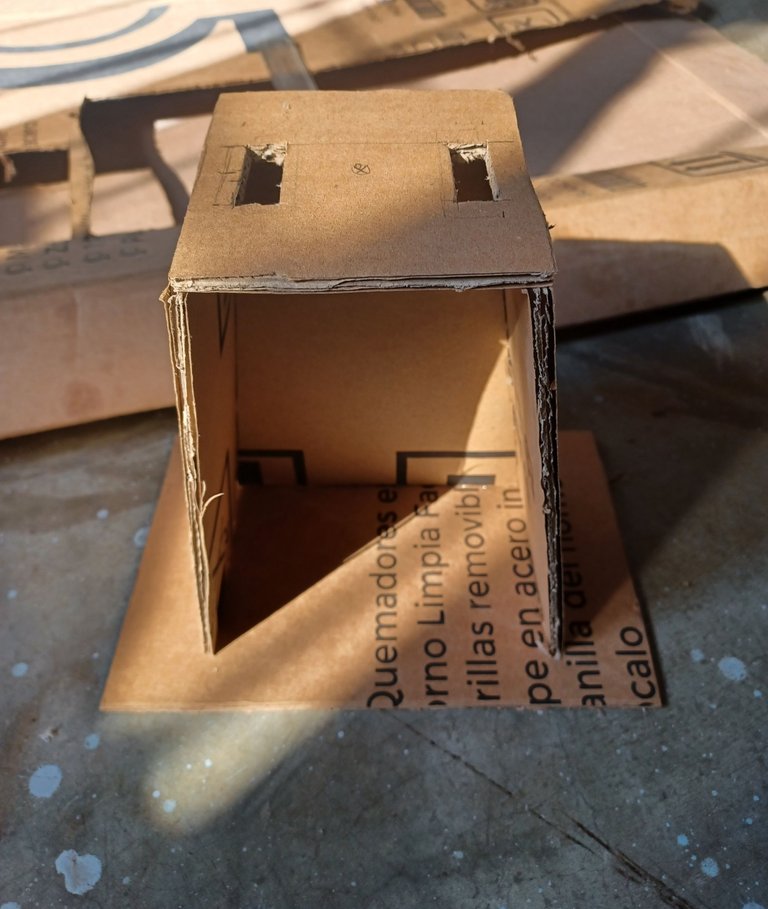
A continuación se recorta un rectángulo de 9x9.5 cm para colocar como tapa en la parte superior; a esta tapa se le recortaran dos ranuras de 1,5 x 3,5 cm y deben quedar orientados hacia el frente tal como se muestra en la siguiente imagen.
Next, a 9x9.5 cm rectangle is cut out to be placed as a lid on the upper part; two 1.5 x 3.5 cm slots will be cut out of this lid and they should be facing the front as shown in the following image.
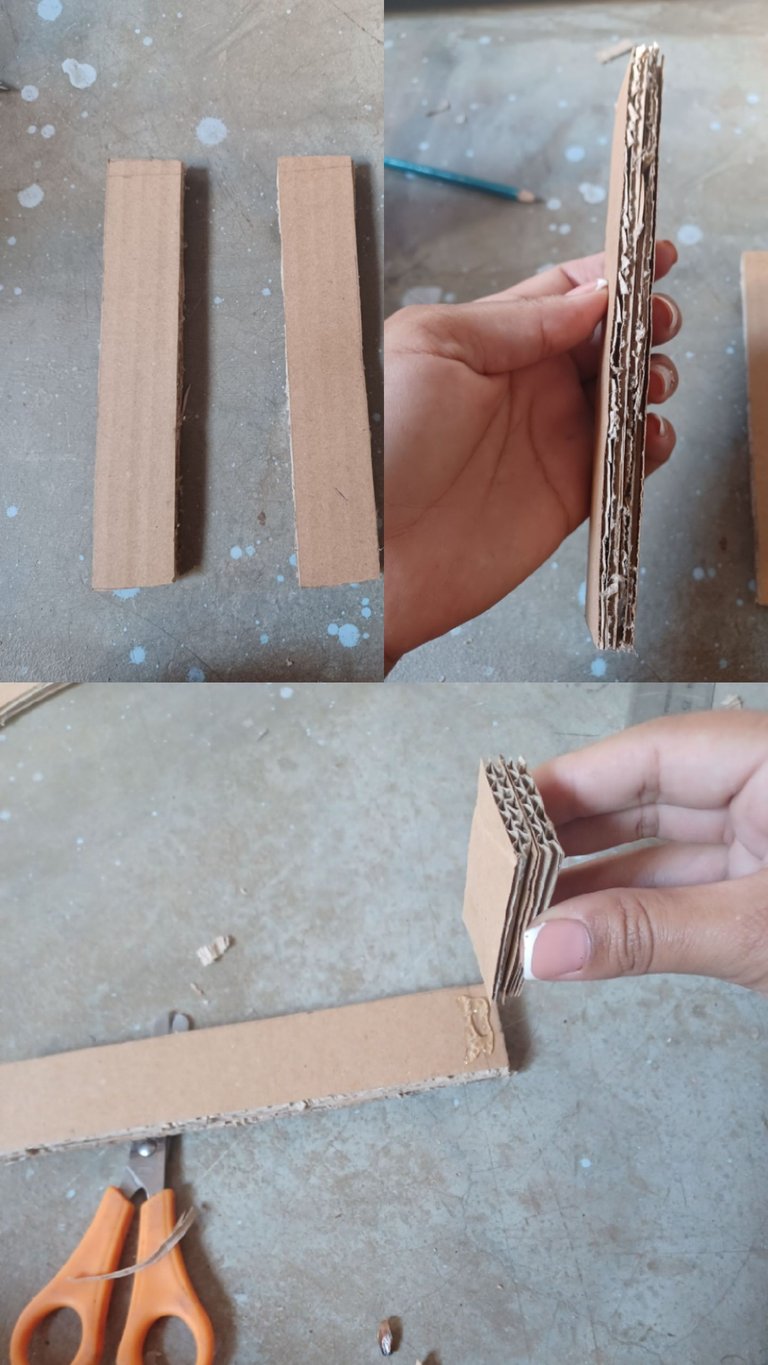
Luego se recortan más rectángulo de cartón esta vez de 3x17 cm cada uno, hay que recortar en total 4 trozos y se van a pegar dos juntos, para crear dos varitas de cartón, seguidamente se recorta un trozo de cartón de 4x3 cm y se pega perpendicularmente a una de las puntas de los cartones previamente preparados y en la otra punta de pega el otro pedazo.
Then cut out more cardboard rectangles, this time of 3x17 cm each, cut out a total of 4 pieces and glue two together to create two cardboard sticks, then cut out a 4x3 cm piece of cardboard and glue it perpendicularly to one of the ends of the previously prepared cardboard and glue the other piece to the other end.
Teniendo esta pieza creada se inserta en las dos ranuras previamente recortadas en la tapa de la báscula, se crea una pieza muy similar a la primera tapa, con la misma separación entre ranuras pero esta vez se colocará en el medio del dispositivo y usando un trozo de cartón se unen los dos trozos de carton nuevamente, pero en la parte interna de la báscula, justo como se muestra en la siguiente imagen.
Having this piece created is inserted into the two slots previously cut in the lid of the scale, a piece very similar to the first lid is created, with the same separation between slots but this time it will be placed in the middle of the device and using a piece of cardboard the two pieces of cardboard are joined again, but in the inner part of the scale, just as shown in the following image.
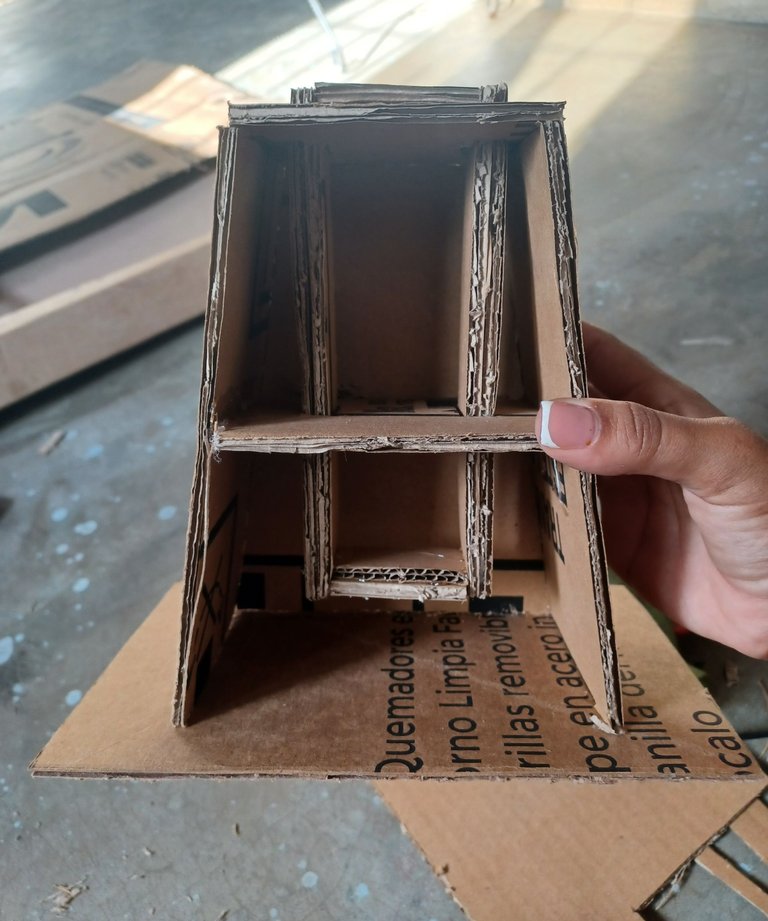
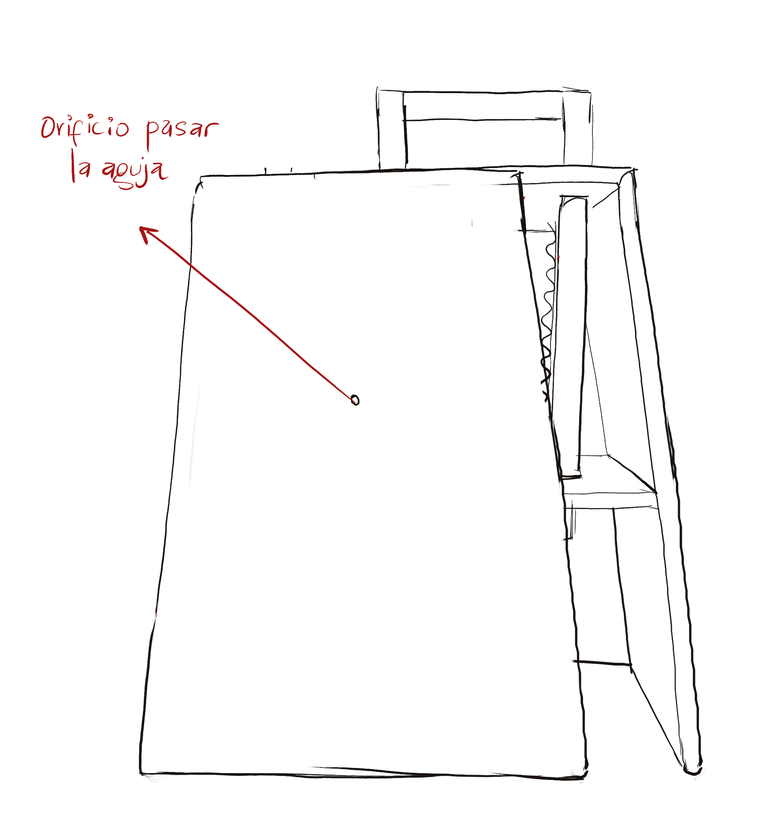
Hecho esto se comprueba si la pieza del centro se desplaza con facilidad, si no es asi, puede que sea necesario abrir un poco más las ranuras, se debe asegurar que esta pieza pueda moverse sin obstrucciones, siendo asi se procede ha colocar una goma para que la pieza siempre quede un poco levantada y baje cuando algún objeto pesado se pose sobre esta base. a partir de este momento dibujaré un poco pues por mi entusiasmo y concentración para hacer funcionar el dispositivo olvide tomar fotos.
Once this is done, check if the center piece moves easily, if not, it may be necessary to open the slots a little more, it must be ensured that this piece can move without obstructions, being so we proceed to place a rubber so that the piece is always a little raised and lowered when a heavy object is placed on this base. from this moment I will draw a little because my enthusiasm and concentration to make the device work I forget to take pictures.
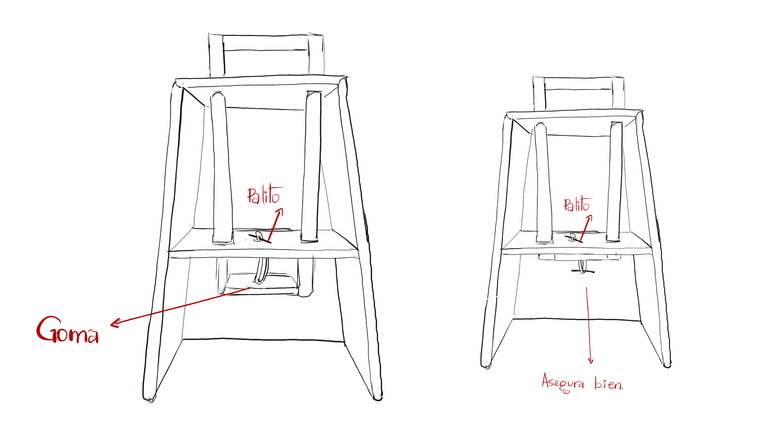
Varias gomas rotas después... cuando logré que la pieza se mantuviera arriba y bajara con el peso, procedí a crear el sistema de engranaje que moverá la aguja de la báscula, esta es la parte mas interesante e ingeniosa de este modelo, usando la parte corrugada del cartón de cajas se pega un lado de esta en la parte interna de la pieza móvil del dispositivo y usando un trozo de tubo de plastico y alambre se contruye la pieza que mostrare a continuación que moverá la aguja que marcará el peso:
Several broken rubber bands later ... when I got the piece to stay up and down with the weight, I proceeded to create the gear system that will move the needle of the scale, this is the most interesting and ingenious part of this model, using the corrugated part of the cardboard boxes glued one side of it on the inside of the moving part of the device and using a piece of plastic pipe and wire is built the piece that I will show below that will move the needle that will mark the weight:
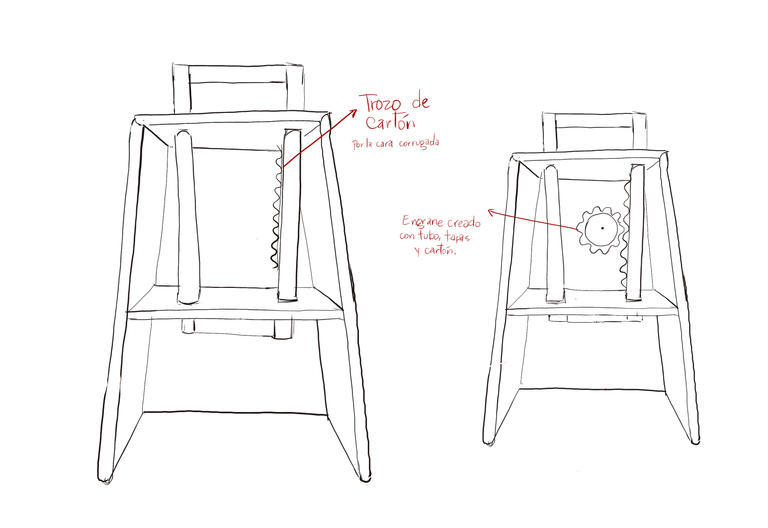
Se usan una, dos o mas capas para hacer que ambas piezas encajen al insertarlas por el medio del dispositivo para mover la aguja del medio que sostendra el puntero que señalara el peso del objeto que se esta pesando.
One, two or more layers are used to make the two pieces fit together by inserting them through the middle of the device to move the needle in the middle that will hold the pointer that will indicate the weight of the object being weighed.
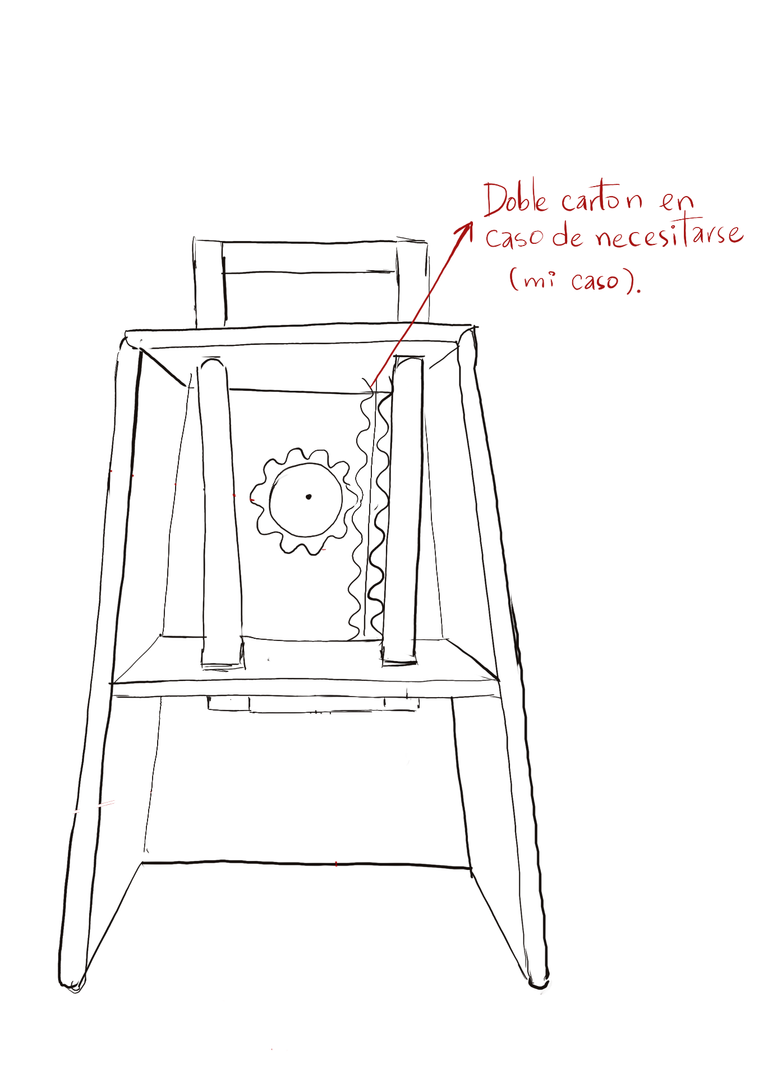
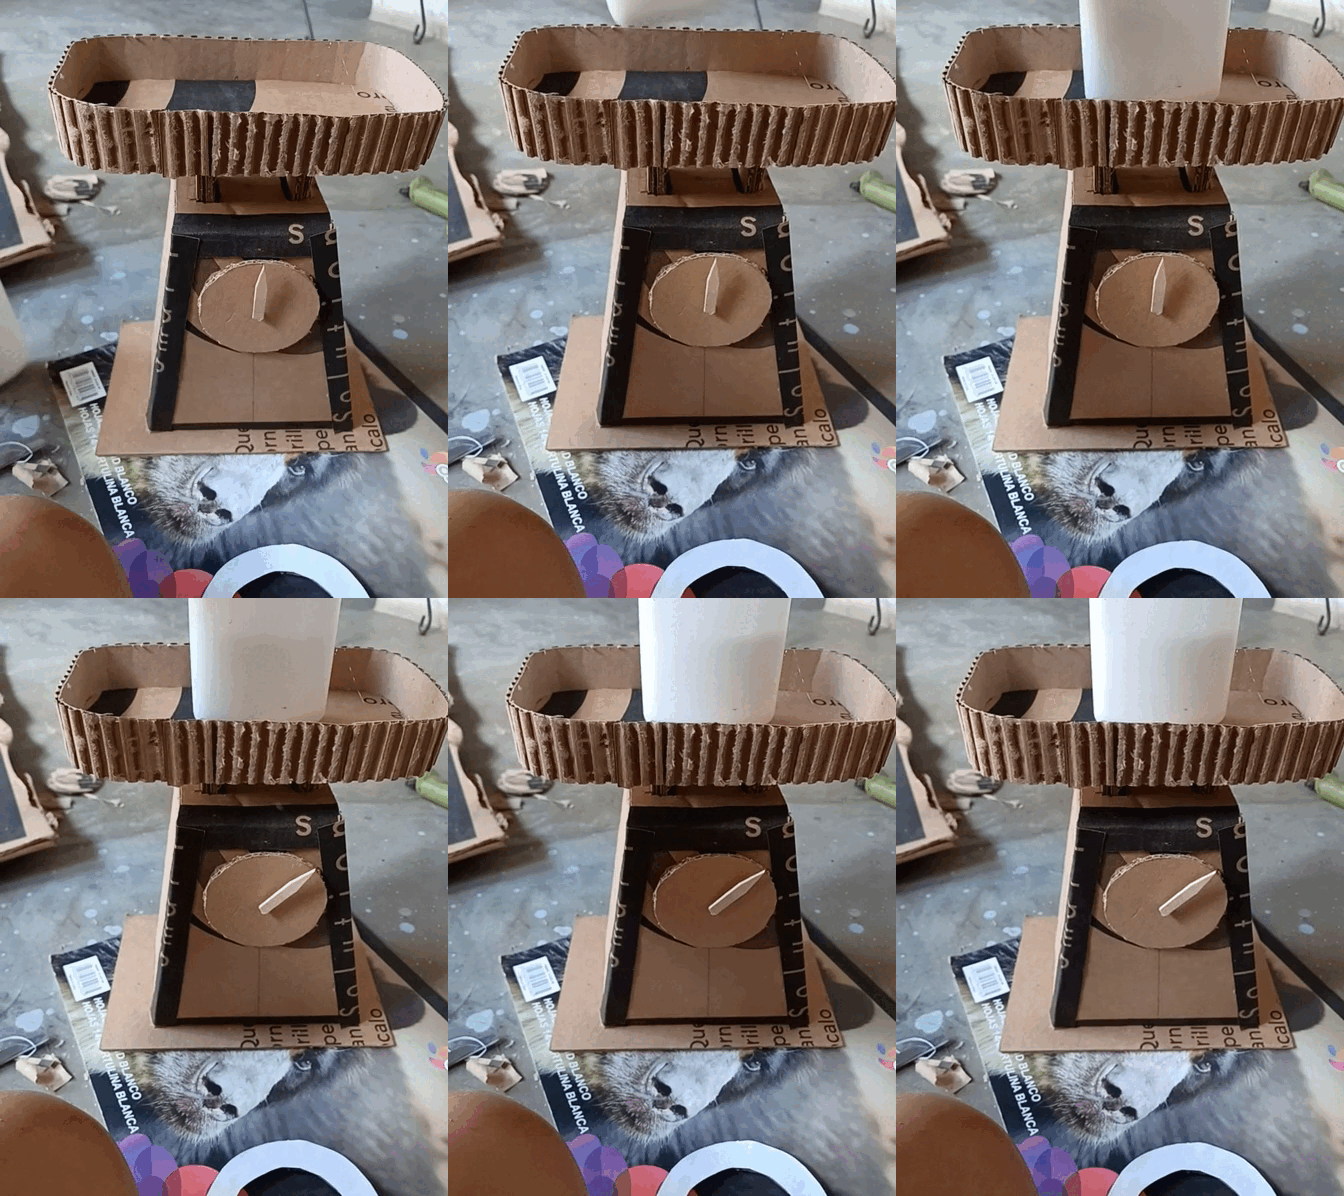
Una vez se contruye todo el mecanismo y se asegura que la aguja se mueve, se asegura la tapa con silicon y se construye el reloj que marcará el peso de cada objeto, que se hace usando una paleta de helado a la que se da forma de puntero.
Once the whole mechanism is built and it is ensured that the needle moves, the lid is secured with silicon and the clock that will mark the weight of each object is built, which is made using a popsicle stick that is shaped like a pointer.
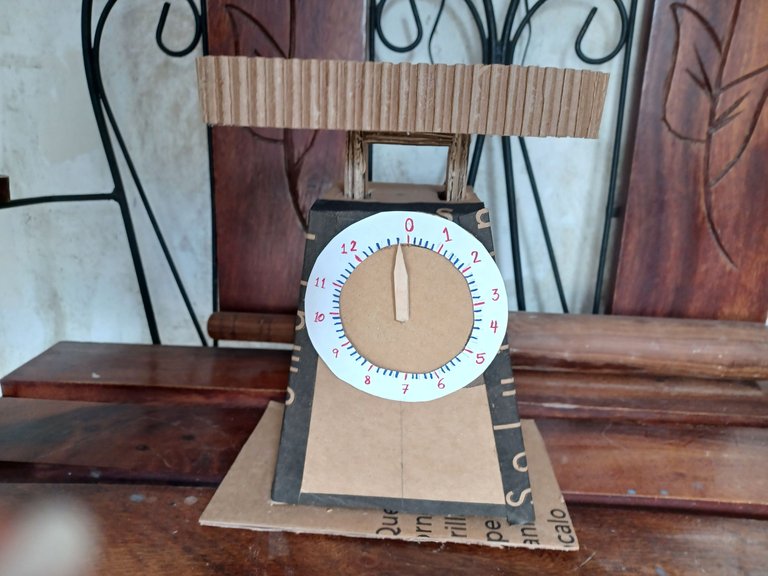
La verdad fue para mi un proyecto interesante y aunque estoy consciente que es una tarea que debía ser realizada por el alumno estoy contenta que me hayan encargado hacer este modelo de báscula, creo que podría replicar el modelo para algún otro proyecto personal y siendo justos cuando asistí al bachillerato yo tampoco realicé este proyecto, mi maqueta era una balanza y no estoy segura si realmente funcionaba jajja. espero que mi explicación y mis dibujitos hayan sido satisfactorios y entendibles.
The truth was for me an interesting project and although I am aware that it is a task that should be done by the student I am happy that I have been commissioned to make this scale model, I think I could replicate the model for some other personal project and being fair when I attended high school I did not do this project either, my model was a scale and I'm not sure if it really worked hahaha. I hope my explanation and my drawings have been satisfactory and understandable.

¡Espero que les haya gustado esta publicación!
¡Muchas gracias por leer, hasta la próxima!
Hoping you liked this post!
Thank you very much for reading, see you next time!


