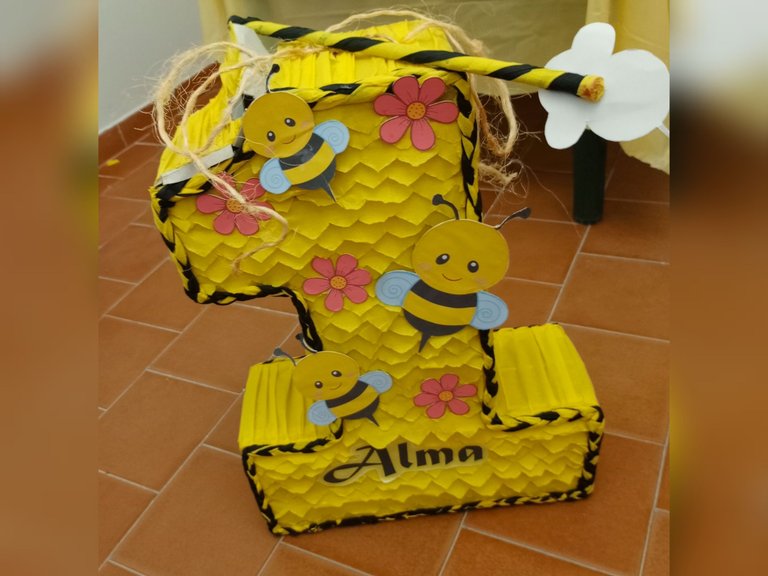
Hola, hola mi gente bella. Hoy les voy a compartir cómo realicé la piñata para festejar el cumpleaños número 1 de mi nieta. Me tomé el tiempo para precisar cada detalle ya que quería que quedara muy hermosa, pues sería un regalo sorpresa.
Mi prima, quien se dedica a la piñatería, me sugirió algunas ideas geniales, las cuales dieron un giro de 180 grados a la forma tradicional, la cual que era grapada y tendía a lastimar los dedos de aquellos que la manipulaban. Con esta técnica le podemos decir adiós a las grapas. El motivo sería de abeja, así que la decoración fue amarillo y negro, haciendo alusión a este pequeño insecto. Usé algunos materiales de reciclaje, a continuación les voy a mostrar el procedimiento.
English VersionHello, hello my beautiful people. Today I am going to share with you how I made the piñata to celebrate my granddaughter's 1st birthday. I took the time to specify every detail because I wanted it to be very beautiful, as it would be a surprise gift.
My cousin, who is a piñata maker, suggested some great ideas, which gave a 180 degree turn to the traditional way, which was stapled and tended to hurt the fingers of those who handled it. With this technique we can say goodbye to staples. The motif would be a bee, so the decoration was yellow and black, alluding to this small insect. I used some recycled materials, here I will show you the procedure.
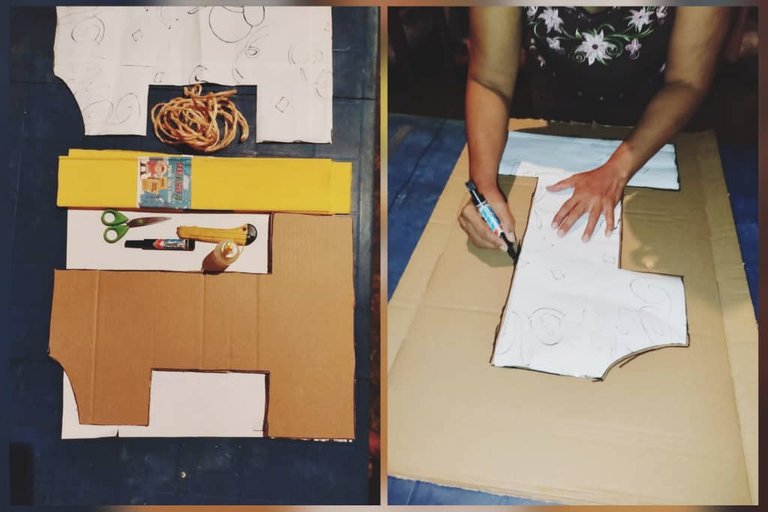
Materiales:
- Cajas de cartón grandes
- Papel bond
- Cabulla
- Lápiz
- Marcador
- Exacto
- Tijera
- Regla
- Papel crepe amarillo y negro
- Silicón frío
- Cinta adhesiva para embalar
- Abejitas y rosas (Imágenes impresas)
Materials:
- Large cardboard boxes
- Bond paper
- Pencil
- Pencil
- Marker
- Exactly
- Scissors
- Ruler
- Yellow and black crepe paper
- Cold silicone
- Adhesive tape for packaging
- Bumblebees and roses (Printed images)
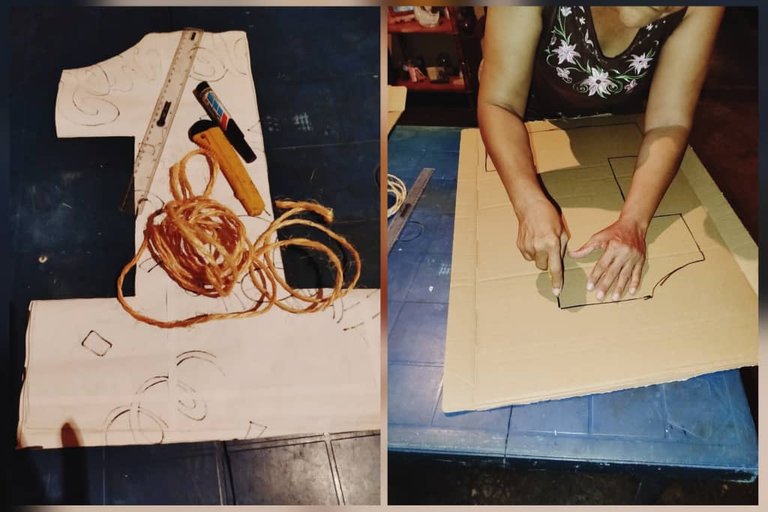
Procedimiento:
En el papel bond marcamos el patrón con las siguientes medidas: 78 cm completa, la base 20 cm x 60 cm. Y recortamos con la tijera.
Después con la ayuda del patrón, marcamos en el cartón y sacamos dos caras iguales.
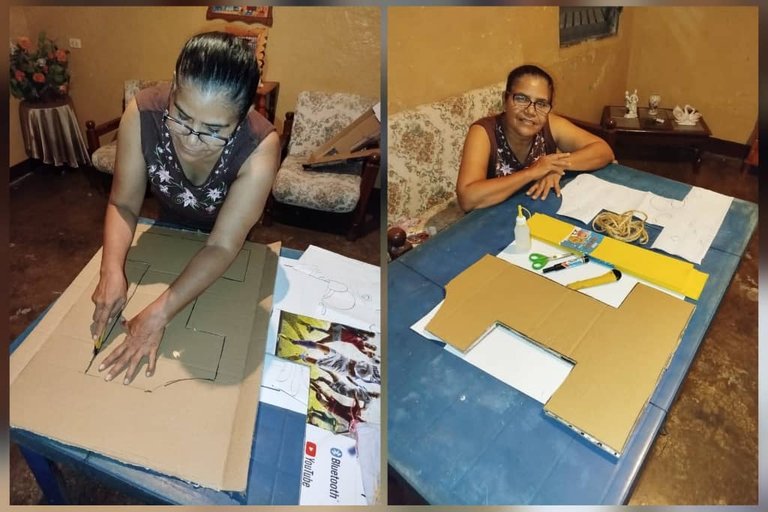
Luego, medimos una tira larga de 25 cm de ancho, la cual enrollamos para moldear y así trabajar más fácil, nos ayudamos con el exacto para cortar.
A la tira de cartón se le hacen unos orificios con una distancia aproximada de diez a quince centímetros desde el principio hasta el final y por todo el contorno le hacemos unas pestañas para asegurar mejor y empezamos a unir.
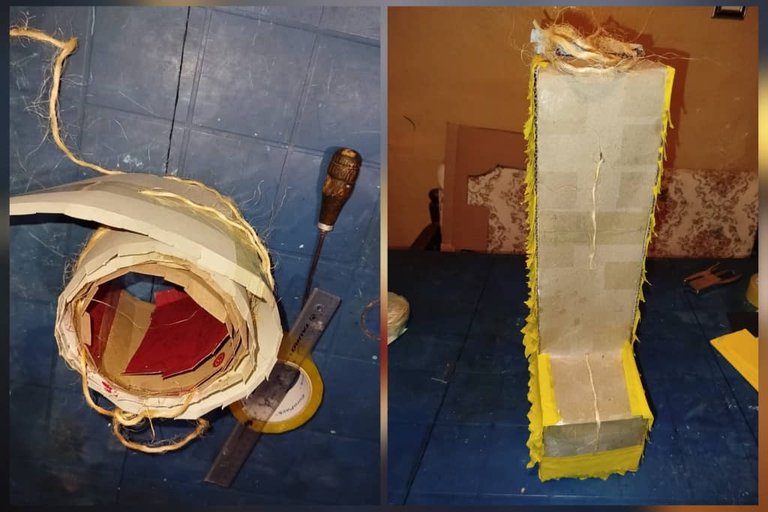
Le colocamos silicón a la tira por las pestañas de un lado y pegamos a una de las caras para empezar a formar el uno y aseguramos con pedazos de tirro como está en las fotos.
Luego por los orificios colocamos la cabuya, dando la vuelta para llegar arriba otra vez y amarrar para sostener la piñata.
Posteriormente, pegamos la otra cara del uno dejando un orificio para llenarla con golosinas y juguetes.
Forramos la piñata con el papel crepé amarillo, lo cortamos en tres partes de cuatro centímetros y en uno de los lados le hacemos figuras para un toque más bonito para las caras. Empezamos a forrar de abajo hacia arriba.
Luego cortamos una franja larga y pegamos poco a poco arruchando para los lados.
Hacemos una trenza con papel crepé negro y amarillo para colocar por todo el contorno de la piñata.
Luego la adornamos con las abejitas y las rosas rosadas.
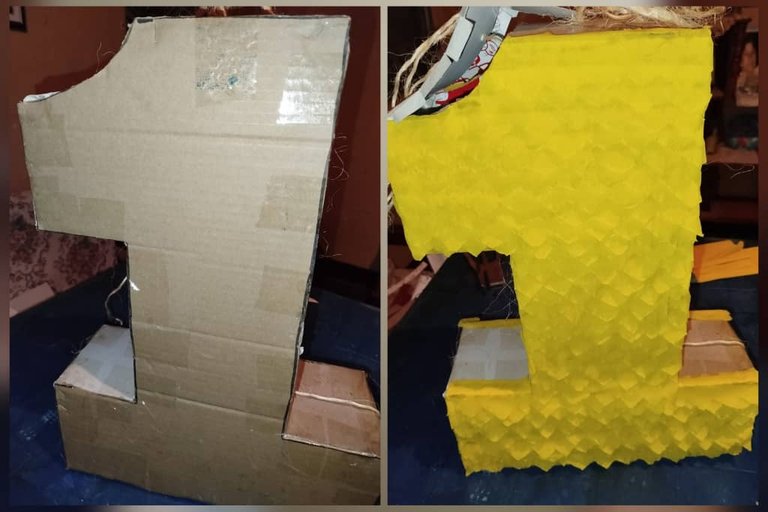
Esta piñata es fácil y rápida. Yo tardé un poquito más por mi problema del brazo.Estoy agradecida con Dios por esta oportunidad que me está dando de hacerle la piñata a mi nieta amada. La pequeña quedó encantada con el resultado, a ella le encanta la canción Abejita chiquitita, así que la decoración era alusiva a ese insecto, en este caso una de sexo femenino tierna y coqueta.
Espero que les haya gustado.
English VersionProcedure:
On the bond paper we mark the pattern with the following measurements: 78 cm complete, the base 20 cm x 60 cm. and cut out with the scissors.
Then with the help of the pattern, we mark on the cardboard and cut out two equal sides.
Then, we measure a long strip of 25 cm wide, which we roll to mold and thus work easier, we help us with the exact to cut.
We make some holes in the cardboard strip with a distance of approximately ten to fifteen centimeters from the beginning to the end and all around the contour we make some tabs to secure it better and we start to join it.
We put silicone on the strip through the tabs on one side and glue it to one of the faces to start forming the one and secure it with pieces of string as shown in the pictures.
Then through the holes we place the cabuya, turning around to reach the top again and tie to hold the piñata.
Afterwards, we glue the other side of the piñata, leaving a hole to fill it with candies and toys.
We line the piñata with the yellow crepe paper, cut it into three four-centimeter parts and on one of the sides we make figures for a nicer touch for the faces. We start lining from the bottom to the top.
Then we cut a long strip and glue it little by little, creasing it on the sides.
We make a braid with black and yellow crepe paper to place all around the piñata.
Then we decorate it with the little bees and pink roses.
This piñata is easy and quick. It took me a little longer because of my arm problem. I am grateful to God for this opportunity He is giving me to make the piñata for my beloved granddaughter. The little one was delighted with the result, she loves the song Abejita chiquitita, so the decoration was allusive to that insect, in this case a tender and flirtatious female.
I hope you liked it.
Fotos propias.
Traducido con DeepL.com
Own photos.
Translated with DeepL.com.


