En este Tutorial o Diy te enseño a hacer una bella Diadema, Cintillo o Corona de Flores, con tela de raso rojo y perlas. Es un accesorio muy Elegante y Chic que es ideal para tener un look muy llamativo.
Este accesorio lo he realizado varias ocasiones para obsequiarlo, y para que mi hija Viviana asista a Eventos como Desfiles de moda, sesiones de fotos o incluso para fiestas.
In this Tutorial or Diy I show you how to make a beautiful Headband, Headband or Flower Crown, with red satin fabric and pearls. It is a very elegant and chic accessory that is ideal for a very striking look.
I have made this accessory several times to give it as a gift, and for my daughter Viviana to attend events such as fashion shows, photo shoots or even for parties.

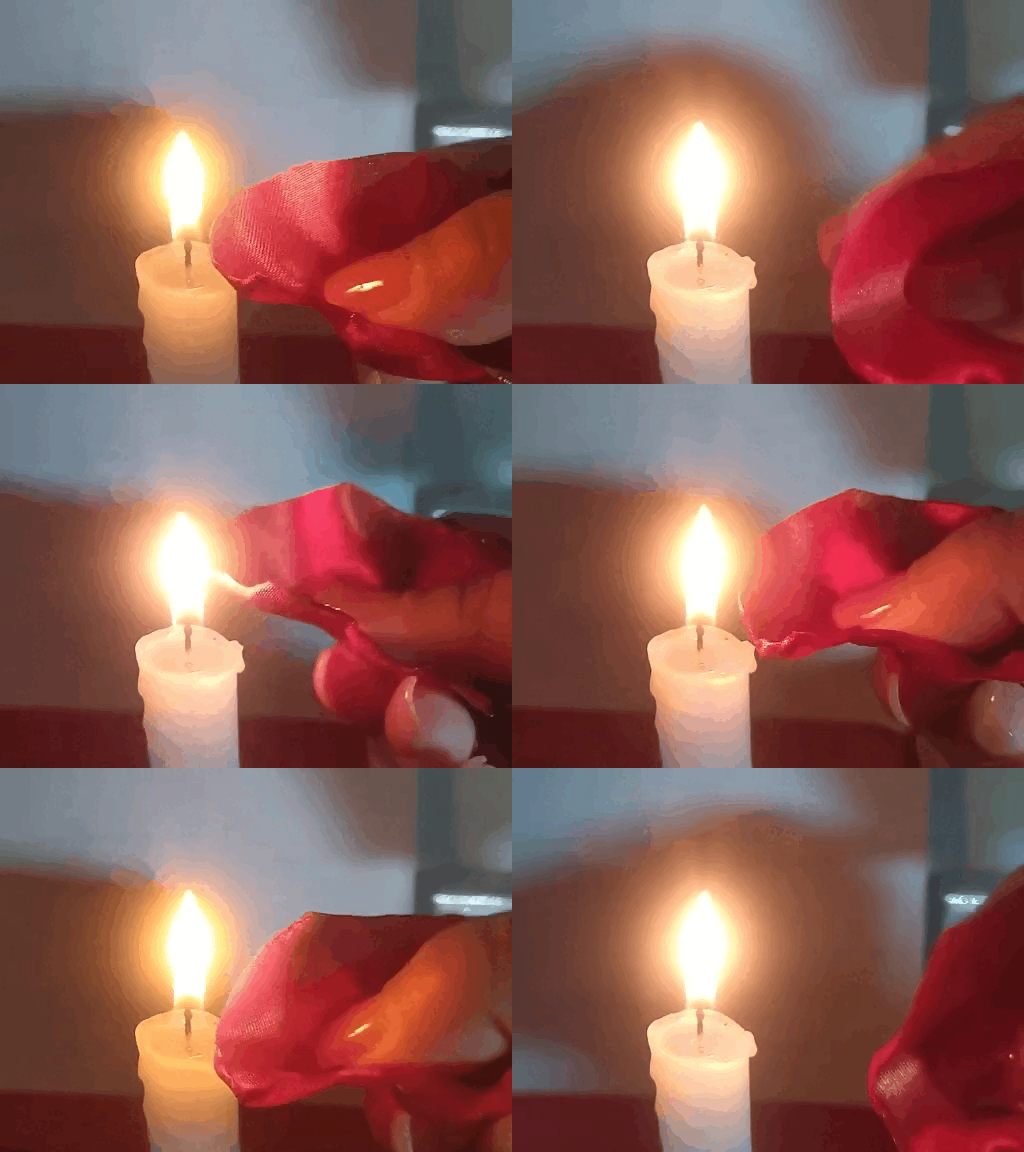
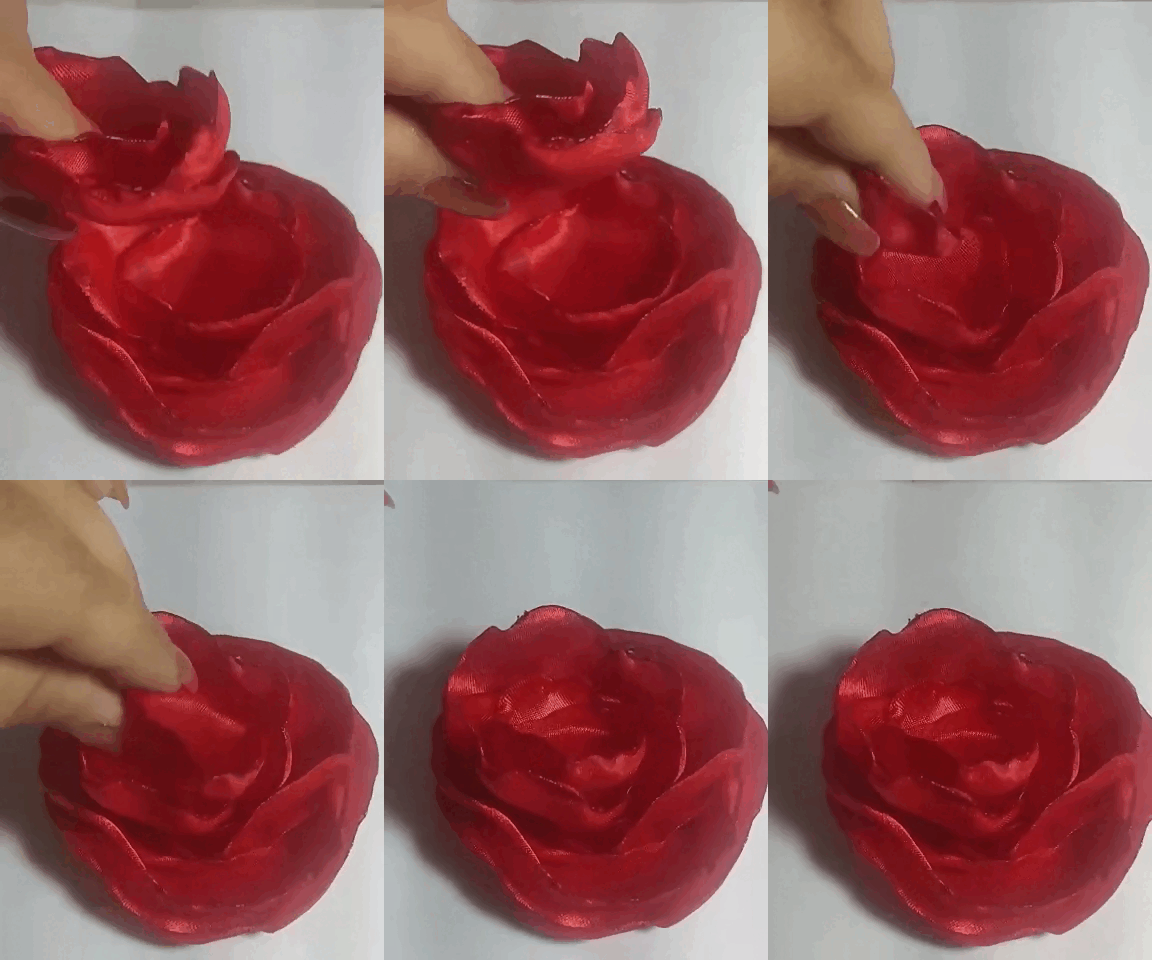
El tutorial tiene el plus de enseñarles como hacer ese efecto de pétalo que tiene la tela, esto se hace con una vela, pero tiene un tip muy importante, el cual aprendí ya que hace años comencé un Curso de Diseño de Moda y nos lo enseñó una profesora de Alta Costura, quien nos dijo que así se hacen muchas flores que son usadas para tocados, prendedores, accesorios como bisutería, etc. Más adelante te muestro como hacerlo sin quemar la tela y logrando las ondas en la tela para dar más movimiento, interés y que no quedé plana la flor.
Para no hacer tan extenso el tutorial, les voy a colocar dos collage de fotos en cada paso, y lo explicaré detalladamente. También les coloco algunos gifs para explicar mejor. Ahora sí, comenzamos:
The tutorial has the bonus of showing you how to make that petal effect that the fabric has, this is done with a candle, but it has a very important tip, which I learned years ago when I started a Fashion Design Course and a teacher of Haute Couture taught it to us, who told us that this is how many flowers that are used for headdresses, pins, accessories such as jewelry, etc. are made. Later I show you how to do it without burning the fabric and achieving the waves in the fabric to give more movement, interest and that the flower is not flat.
In order not to make the tutorial so long, I am going to place two collages of photos in each step, and I will explain it in detail. I also put some gifs to explain better. Now, let's start:

- Tela raso
- Una tira de tela gamuza negra
- Un Cintillo o diadema plástica
- Tijera, vela y pistola de silicón caliente
- 5 Media perlas
- Satin fabric
- One strip of black suede cloth
- A headband or plastic headband
- Scissors, candle and hot silicone gun
- 5 half beads


Primero hice un círculo con papel reciclado, que tiene 10cms de diámetro. Entonces contemplando esa medida recorté cuadros de tela, con los cuales haré los pétalos.
Doblo el círculo de papel que ahora es mi plantilla, adentro coloco un cuadro de tela también doblado, y todo lo vuelvo a doblar, para cortar con la tijera lo que quedará serán círculos, es la forma más fácil de hacerlos. Hice 3 de estos.
First I made a circle with recycled paper, which is 10cms in diameter. Then I cut out squares of fabric, with which I will make the petals.
I fold the paper circle that is now my template, inside I place a fabric square also folded, and fold it all again, to cut with the scissors what will be left will be circles, it is the easiest way to make them. I made 3 of these.


Para lograr otro tamaño más pequeño usé la misma plantilla, solo que le corté un borde para hacer ahora los círculos más pequeños. De esta nueva medida hice 3. Repetí todo este paso para lograr otro tamaño más pequeño con lo que saqué 4 piezas más.
To make another smaller size I used the same template, only I cut an edge to make the circles smaller. From this new size I made 3. I repeated all this step to get another smaller size so I got 4 more pieces.

Ahora les explico cómo hacer los pétalos con una vela. Tomo cada círculo de tela, y con mi mano lo doblo un poco y lo acerco a la llama de la vela, específicamente en la base o parte baja de la llama, ya que ahí es lo que se conoce como la llama fría, que es de un color azulado, con ella al acercar la tela esta se doblará y curvará sin quemarse. Esto lo hago por todo el borde exterior de cada pétalo. Es importante que no se detengan mucho tiempo para que no se queme la tela.
Now I explain how to make the petals with a candle. I take each circle of fabric, and with my hand I fold it a little and I approach it to the flame of the candle, specifically at the base or lower part of the flame, since there is what is known as the cold flame, which is of a bluish color, with it when approaching the fabric it will bend and curve without burning. I do this all around the outer edge of each petal. It is important not to stop too long so as not to burn the fabric.

Este es el resultado de quemar los bordes de cada círculo con la técnica que les describí anteriormente. Fíjense que toman una hermosa forma, ya no están planos.
Los ordeno de mayor a menor, para comenzar a unirlos con el silicón caliente, colocando puntos en los centros hasta terminarlos todos.
This is the result of burning the edges of each circle with the technique I described above. Notice that they take a beautiful shape, they are no longer flat.
I order them from largest to smallest, to start joining them with the hot silicone, placing dots in the centers until they are all finished.


Aquí pueden ver como los pétalo ordenados por tamaño, ya tienen bastante volumen que le aportará mucha belleza al diseño.
Here you can see how the petals, arranged by size, already have enough volume to add a lot of beauty to the design.

Al terminar de pegarlos todos por el centro, procedo a pegar ahora la media perla del mismo modo.
When I finish gluing them all in the center, I proceed to glue the half pearl in the same way.


Todo este proceso lo repito cuatro veces más, para así hacer las cinco flores que necesito para el diseño de la Diadema o Corona de flores.
Ahora corto una tira de la tela gamuza, un poco más pequeña que el cintillo, y con la pistola de silicón caliente la pego al cintillo por el lado de adentro. Esto será una buena base para que las flores estén firmes y no pierdan su estructura.
I repeat this process four more times to make the five flowers I need for the design of the flower crown.
Now I cut a strip of the chamois fabric, a little smaller than the headband, and with the hot silicone gun I glue it to the headband on the inside. This will be a good base so that the flowers are firm and do not lose their structure.


Ahora proceso a pegar todas las flores al cintillo, comienzo por la del medio y sigo pegando dos de cada lado. También entre cada flor coloco un poco de silicón caliente para que no queden espacios abiertos entre ellas y queden bien pegadas al cintillo y la tira de gamuza.
Now I glue all the flowers to the headband, I start with the middle one and continue gluing two on each side. I also place a little hot silicone between each flower so that there are no open spaces between them and they are well glued to the headband and the chamois strip.


Así luce por dentro la diadema, pueden apreciar que se ve muy prolijo todo y muy unidas todas las flores, con un acabado de calidad.
This is how the inside of the headband looks like, you can see that everything looks very neat and all the flowers are very well joined, with a quality finish.

Deseo que les haya gustado este Tutorial, y que se animen a realizar lindas flores que tienen muchas posibilidades de uso, para lucirnos o destacar un look, aportándole mucho chic y elegancia.
Los invito cordialmente a mi próxima publicación...
I hope you liked this Tutorial, and that you are encouraged to make beautiful flowers that have many possibilities of use, to show off or highlight a look, bringing a lot of chic and elegance.
I cordially invite you to my next publication...
---------- ❤️❤️❤️❤️ ----------
I took the photos with my Redmi Note 8 phone
Apps I used:
Canva for the Cover
Inshot for the Collage
I used Google Translate
My social networks:
Discord: YennysYaneth#0189
Twitter: @yennysferm
Instagram: @yennysyaneth
---------- ❤️❤️❤️❤️ ----------
Las fotos las tomé con mi teléfono Redmi Note 8
Apps que utilicé:
Canva para la Portada
Inshot para los Collage
Utilicé el Traductor Google
Mi redes sociales:
Discord: YennysYaneth#0189
Twitter: @yennysferm
Instagram: @yennysyaneth


