I already needed to make a sewing DIY, I really love sewing, having the materials and being able to turn them into beautiful pieces, it is very rewarding.
Today I bring you a skirt that surely many of you know, because it is the principle of the school skirt of boards, where we do not need a pattern but rather make calculations based on the waist contour and what we want in the design, such as the number of boards , the width of the same, the length of the skirt, the width of the waistband or waistband of the skirt, and of course as the protagonist the gender or fabric that we are going to use, which together with the details and quality that we provide, We will make it no longer a simple school skirt.
! [SPANISH VERSION] Ya necesitaba realizar un Diy de costura, realmente amo la costura tener los materiales y poder convertirlo en bellas piezas, es muy gratificante.
El día de hoy les traigo una falda que seguramente muchas conocen, porque es el principio de la falda escolar de tablas, donde no necesitamos patrón sino realizar cálculos basándonos en el contorno de cintura y lo que queremos en el diseño, como la cantidad de tablas, el ancho de las mismas, el largo de la falda, el ancho de la pretina o cinturilla de la falda, y por supuesto como protagonista el género o tela que vamos a utilizar, que junto con los detalles y la calidad que le aportemos, haremos que ya no sea una simple falda escolar.
As an amateur seamstress I have never been afraid of numbers or patterns, in fact I really like the area of industrial pattern making and also haute couture pattern making, I have a knack for that. I would have really liked to have studied that at a professional level, but it wasn't my turn and I have only studied it through the internet and small express courses that I have taken eventually.
But what I have learned from what I have learned is that habit of turning the garments inside out, seeing how they look on the inside, if the seams match, if the patterns match when we use prints, if the hem is good, if it is clean of threads. , etc. As I tell you, inside me lies a definitive seamstress.
! [SPANISH VERSION] Como costurera aficionada nunca le he tenido miedo a los números, ni a los patrones, de hecho me gusta mucho el área del patronaje industrial y también el patronaje de alta costura, tengo habilidad para eso. Me hubiese gustado mucho haber estudiado eso a nivel profesional, pero no me tocó y solo lo he estudiado a través de internet y pequeños cursos express que he tomado eventualmente.
Pero lo que si me quedó de lo que he aprendido es esa costumbre de voltear las prendas, ver cómo se ven por dentro, si coinciden las costuras, si coinciden los patrones cuando usamos estampados, si el ruedo está bien, si está limpia de hilos, etc. como les digo, dentro de mi yace una costurera definitivamente.

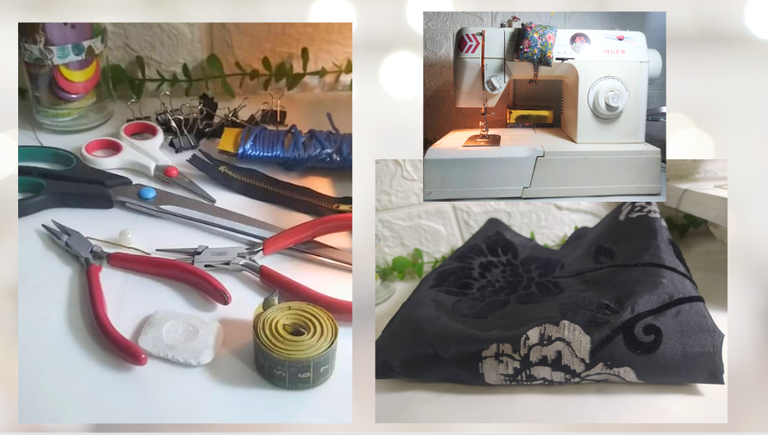
- Fabric
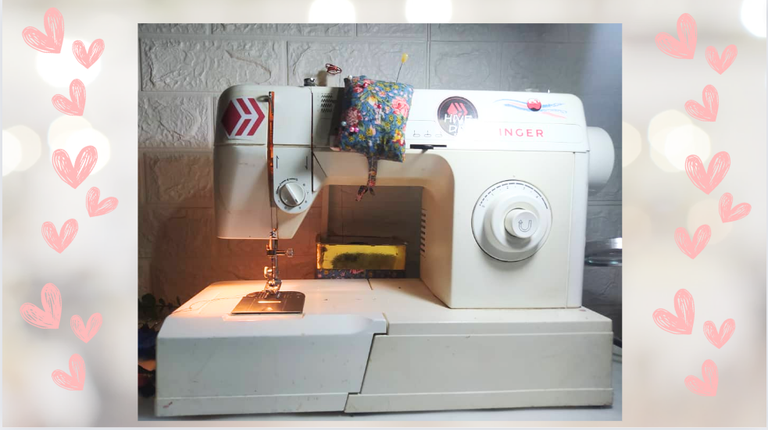
- Sewing machine
- Scissors
- Snap clips
- Closure, needle and thread
- Tape measure and tailor's chalk
- Jewelry tweezers, acrylic pearl and thick wire
- Mouse tail cord or other
- Tela
- Máquina de coser
- Tijeras
- Clips de presión
- Cierre, aguja e hilo
- Cinta métrica y tiza de sastre
- Pinzas de bisutería, perla acrílica y alambre grueso
- Cordón rabo de ratón u otro

As I mentioned above, this is the same school pleated skirt, when we change the fabric for a more luxurious fabric, a party fabric and add quality and details, we turn it into another piece completely.
Thus each one raises it to where one wants.
! [SPANISH VERSION] Como te mencioné arriba, esta es la mismísima falda escolar de tablas, cuando cambiamos la tela por una tela de más lujo, una tela de fiesta y agregamos calidad y detalles, la convertimos en otra pieza por completo.
Así cada una la eleva hasta donde una quiera.

For my friend's daughter, her waist circumference is 70 cm.
1- I have already determined that I want the skirt with 10 pleats or boards, so I divide 70 / 10 = 7 That is, each board will be 7 cm wide.
2- What goes inside the planks will be the same measurement two more times, so 7 cm x 3 = 21 cm That is, each fold or plank will really need 21 cm, since we count what the plank measures, plus what is folded from side to side inside it.
3- 21 cm of each plank for the number of planks that are 10, that is, 210 cm for the entire skirt going around completely.
4- I add 4 cm for the seam allowances on the back, where the closure will go. So, ultimately it will be 214 cm
The length of the skirt will be whatever the model wants, but you subtract 5 cm so that it is in the waistband and not in the skirt itself.
Now yes, I cut the fabric with these measurements and we start making.
! [SPANISH VERSION] Para la hija de mi amiga, su contorno de cintura es de 70 cms.
1- Ya determiné que quiero la falda con 10 pliegues o tablas, entonces divido 70 / 10 = 7 Es decir que cada tablón va a tener 7 cms de ancho.
2- Lo que va dentro de los tablones será la misma medida dos veces más, entonces 7 cms x 3 = 21 cms Es decir, que cada pliegue o tablón realmente va a necesitar 21 cms, ya que contamos lo que mide el tablón, más lo que va doblado de lado y lado por dentro del mismo.
3- 21 cms de cada tablón por la cantidad de tablones que son 10, Es decir 210 cms para toda la falda dando la vuelta completa.
4- Sumo 4 cms para los márgenes de costura de la parte posterior, donde irá el cierre. Entonces, en definitiva serán 214 cms
El largo de la falda será lo que quiera la modelo, pero le restas 5 cms para que los tenga la pretina y no la propia falda.
Ahora si, corto la tela con estas medidas y comenzamos a confeccionar.

Starting at the front center, I mark the middle with a picket and center the first 7 cm plank. Then, he continued marking with chalk every 7 cm. I use the marks on the sides so that they meet "kiss" in the center of the central plank. I attach a snap clips to hold. Look at the gifs, it looks very easy.
I go to the side and repeat, I use two marks so that they meet "at the kiss" on the central plank, the one between both marks, and secured with a pressure clip; and I continue until I finish that side, then I do the same from the center of the skirt to the other side until I finish
I like to attach clips at the bottom of the hem to iron everything, then I remove the clips from the hem, leaving just the top ones. The Skirt will end up like you see below:
! [SPANISH VERSION]
Empezando en el centro delantero, marco la mitad con un piquete y centro el primero tablón de 7 cms. Luego, sigo marcando con la tiza cada 7 cms. Uso las marcas de los lados para que se encuentren "al beso" en el centro de tablón central. Coloco un clips de presión para sostener. Fíjate en los gifs se ve muy fácil.
Voy al lado y repito, uso dos marcas para que se encuentren "al beso" en el tablón central, el que está entre ambas marcas, y sujeto con clip de presión; y sigo hasta terminar ese lado, luego hago lo mismo desde el centro de la falda hacia el otro lado hasta terminar
Me gusta fijar clips abajo en el ruedo para planchar todo, luego retiro los clips del ruedo, dejo solo los de arriba. La Falda terminará como la ves a continuación:
Now if we are going to make the first seam of the skirt, which will be at the top, straight seam, I will remove the clips one by one. Until the entire top edge is finished.
! [SPANISH VERSION]
Ahora si vamos a realizar la primera costura de la falda, que será en la parte superior, costura recta, voy retirando los clips uno a uno. Hasta terminar todo el borde superior.
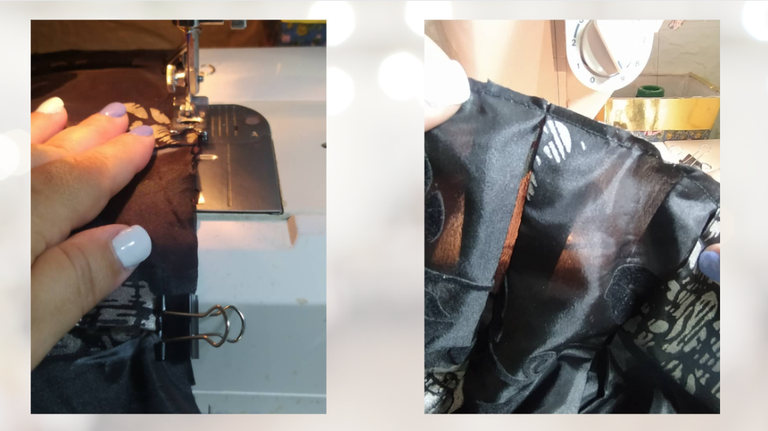
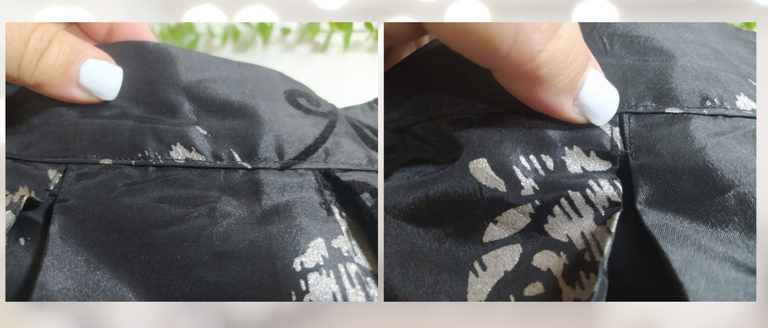
😍😍 A quality detail is that each fold above, where "the kiss" is, a seam is made as indicated below, it is a rectangle that will be formed approximately 2 cm. and with this the planks or folds will have a nice shape from above, guaranteeing that you will always have them well formed.
! [SPANISH VERSION]
😍😍 Un detalle de calidad es que a cada pliegue arriba, donde está "el beso" se le realice una costura como indico a continuación, es un rectángulo que quedará formado de 2 cms aprox. y con esto los tablones o pliegues tendrán una bonita forma desde arriba, garantizando que siempre los tendrás bien formados.
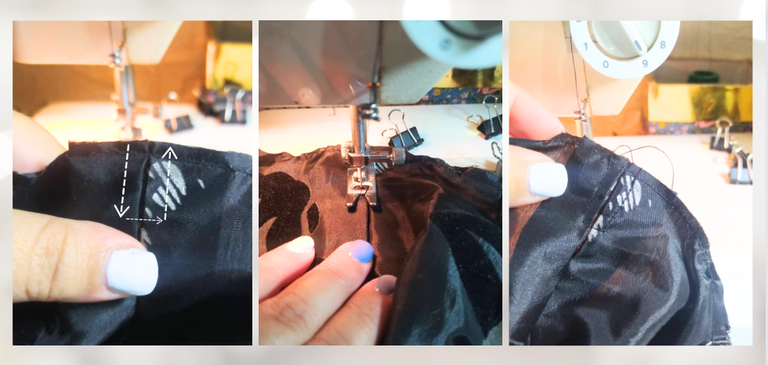
I assure you that the step detailed above will greatly enhance the beautiful shape of the pleats or pleats of this skirt. So I recommend that you spend a few more minutes on your sewing, and give it this detail.
! [SPANISH VERSION]
Te aseguro que el paso detallado anteriormente va a favorecer mucho la bella forma de las tablas o pliegues de esta falda. Así que te recomiendo que le dediques unos minutos más a tu costura, y regálale este detalle.
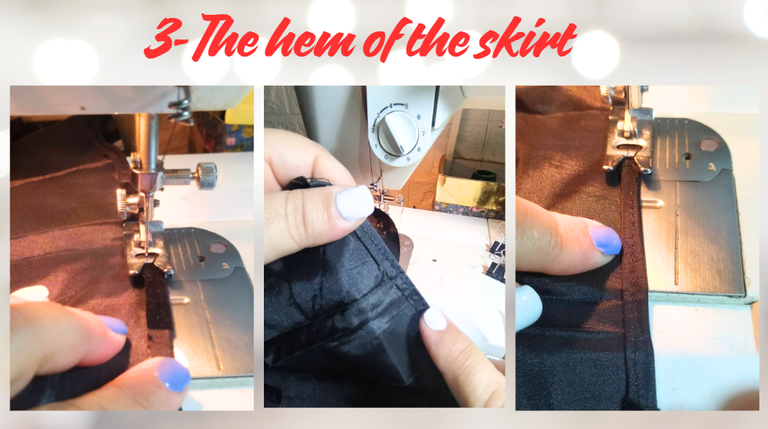
3- We sew the hem of the skirt, with a small fold and straight seam. Then, I make a small fold over the previous one again and sew again.
This finish is really neat and not this skirt will look good on the outside and certainly on the inside as well.
! [SPANISH VERSION]
3- Cosemos el ruedo de la falda, con un pequeño doblez y costura recta. Luego, vuelvo a realizar un pequeño doblez sobre el anterior y coso nuevamente.
Este acabado es realmente prolijo y no esta falda se verá bien por fuera y sin duda alguna por dentro también.
4- The waistband of the skirt will be the length of the waist contour plus 4 cm for seam allowance. In width we wanted to complete the length of the skirt, which we had said was 5 cm, but we multiplied it by 2 to have it double (internal and external part) plus 4 cm also of seam allowance.
We make the folds that you see in the gifs, we iron to have everything well marked, we sew the ends with a straight seam, opening the seam allowances.
! [SPANISH VERSION]
4- La pretina o cinturilla de la falda va a tener de largo el contorno de cintura más 4 cms para márgen de costura. De ancho lo que queríamos para completar el largo de la falda que habíamos dicho que eran 5 cms, pero lo multiplicamos por 2 para tenerla doble (parte interna y externa) más 4 cms igualmente de margen de costura.
Hacemos los doblez que se ven en los gifs, planchamos para tener todo bien marcado, cosemos los extremos con costura recta abriendo los márgenes de costura.
Then, we turn it over, removing the tip well, and place the folds back in place.
This waistband is well formed, with the measurements we need and is beautiful.
On the back of the skirt, we place the zipper and close. And now we can assemble our waistband.
! [SPANISH VERSION]
Luego, volteamos sacando bien la punta, y colocamos los doblez nuevamente en su lugar.
Esta pretina está bien formada, con las medidas que necesitamos y está hermosa.
En la parte posterior de la falda, colocamos el cierre y cerramos. Y ahora si podemos montar nuestra pretina o cinturilla.
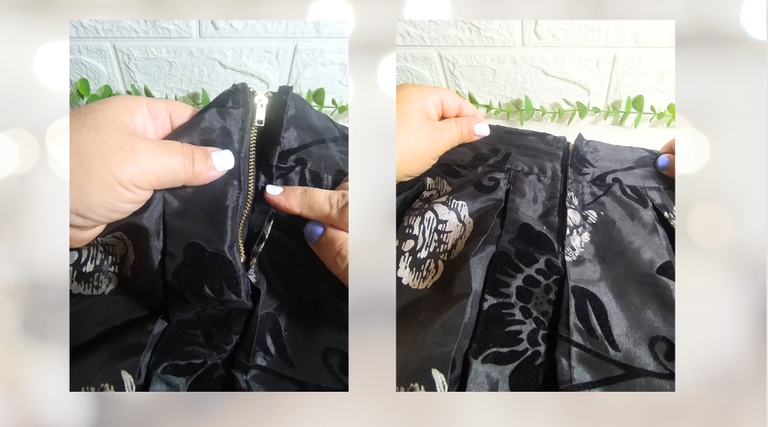
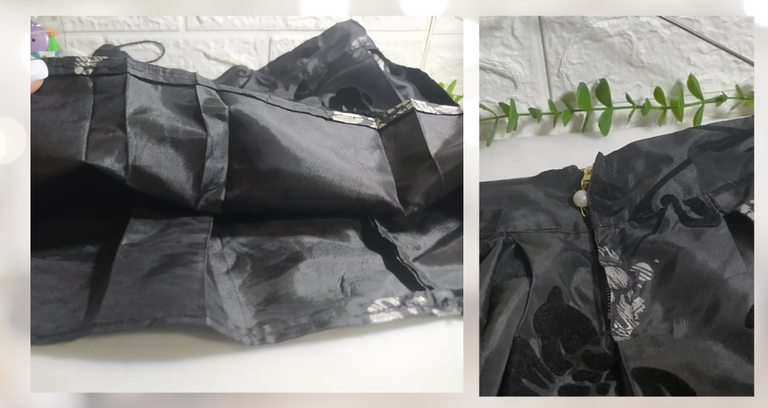
😍😍 The closure that I placed is black with the metallic parts in gold, and it has a system that when you lower the slider or slider and press it, it remains blocked and does not go down. It is a very appropriate insurance to have security in the integrity of our garments.
! [SPANISH VERSION]
😍😍 El cierre que coloqué es negro con las partes metálicas en dorados, y tiene un sistema que al bajar el slider o corredera y presionarla, este queda bloqueado y no se baja. Es un seguro muy oportuno para tener seguridad en la integridad de nuestras prendas.

😍😍 Taking advantage of the fact that the slider of the closure, and the teeth are gold, I wanted to add another detail in gold with jewelry wire, since I had a small piece of thick wire.
I formed some loops or rings, inserted an acrylic bead and attached to the slider. It's a great little detail, it combines everything perfectly, even the pearl looks great with the print on the skirt.
! [SPANISH VERSION]
😍😍 Aprovechando que el slider o corredera del cierre, y los dientes son dorados, quise añadir otro detalle en dorado con alambre de bisutería, ya que tenía un pequeño trozo de alambre grueso.
Formé unas vueltas o aros, inserté una perla acrílica y sujeté al slider. Es un pequeño y gran detalle, combina perfecto todo, incluso la perla queda muy bien con el estampado de la falda.
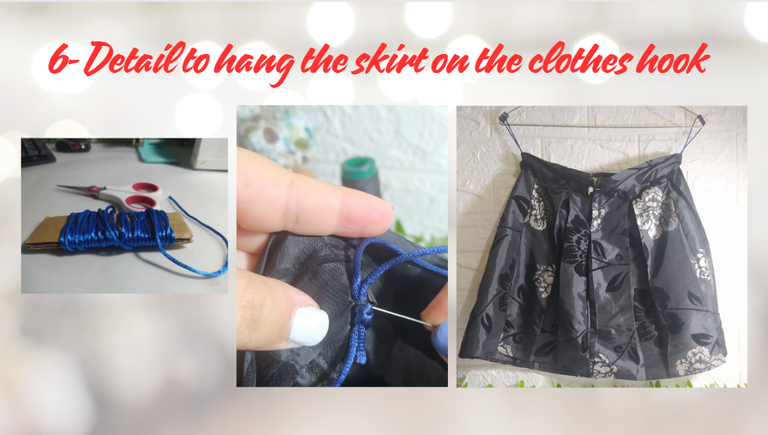
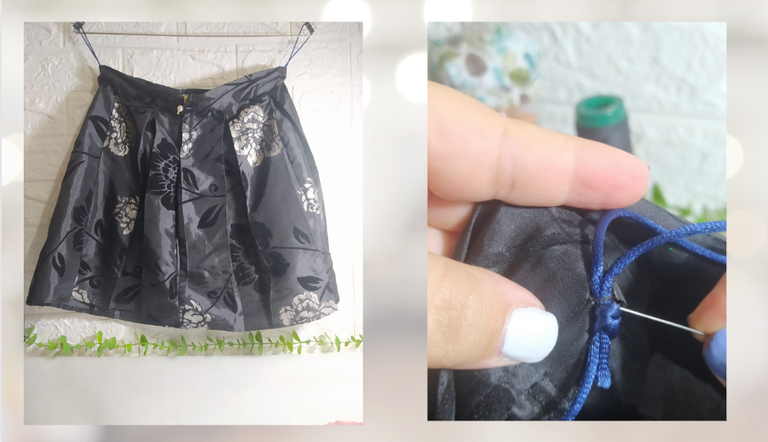
6- Detail to hang the skirt on the clothes hook
😍😍 Continuing with the details to raise the quality of the garment that I am making today, I used some strips of cord called mouse tail, and made some well-knotted hoops, which I sewed by hand on the sides of the skirt, with this you can Hang on the hooks in the closet and will not have to be stored by folding it.
So, the skirt can be ironed and ready for the next occasion. I love this detail and I tell you that when the skirts don't come with them, I sew them myself because I like to be able to have them hanging, well ironed and visually organized in the closet.
Well, I leave you some photos remembering the quality details that I added today:
! [SPANISH VERSION]
6- Detalle para colgar la falda en el gancho de ropa
😍😍 Continuando con los detalles para elevar la calidad de la prenda que estoy confeccionando hoy, ocupé unas tiras de cordón llamado rabo de ratón, e hice unos aros bien anudados, que cosí a mano en los laterales de la falda, con esto se podrá colgar en los ganchos en el closet y no tendrá que guardarse doblándola.
De manera que, la falda se puede planchar y dejarla lista para la siguiente ocasión. Este detalle me encanta y les cuento que cuando las faldas no las traen, yo misma se las coso porque me gusta poder tenerlas colgadas, bien planchadas y organizadas visualmente en el closet.
Bueno, te dejo unas fotos recordando los detalles de calidad que agregué hoy:
Sometimes we hear that skirts can be made in half an hour, easily without much work. But, these details make the difference, this is not a school skirt with pleats or pleats, perhaps the principle is the same, however the type of fabric we use, the finishes, the coincidences that nothing is left over or missing, the accessories or details that we add turn it into an evening skirt.
! [SPANISH VERSION]
A veces escuchamos que se hacen unas faldas en media hora, fácilmente sin mucho trabajo. Pero, estos detalles hacen la diferencia, esto no es una falda escolar de tablas o pliegues, tal vez el principio es el mismo, sin embargo el tipo de tela que usamos, las terminaciones, las coincidencias que no sobre ni falte nada, los accesorios o detalles que agregamos la convierten en una falda de noche.
With the same steps, but leaving it long, it is a perfect gala skirt. The only thing left to do was combine it with a good top, some accessories, high shoes and styling and it was achieved, we can all do it.
! [SPANISH VERSION]
Con los mismos pasos, pero dejándola larga es una falda de gala perfectamente. Ya solo quedaría combinarla con un buen top, unos accesorios, zapatos altos y estilismo y se logró, todas podemos hacerlo.


I took the photos with my phone Redmi Note 8
Apps I used:
Canva Pro for Cover, Collage and Banners
I used Deepl Translator
My social networks:
Discord: YennysYaneth#0189
Twitter: @yennysferm
Instagram: @yennysyaneth
Las fotos las tomé con mi teléfono Redmi Note 8
Apps que utilicé:
Canva Pro para la Portada, Collage y Banners
Utilicé el Traductor Deepl
Mi redes sociales:
Discord: YennysYaneth#0189
Twitter: @yennysferm
Instagram: @yennysyaneth
