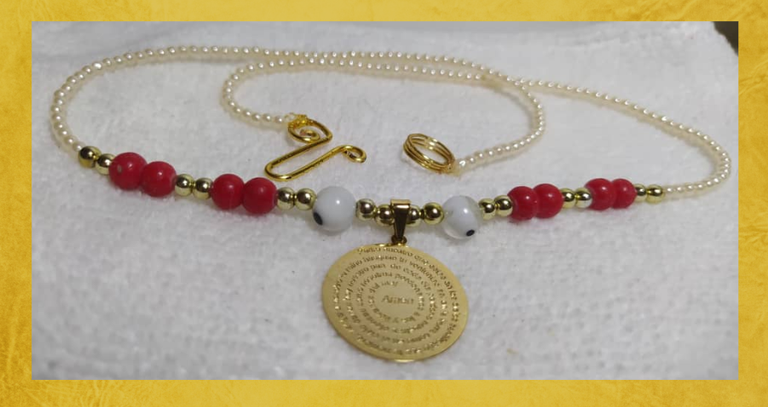
Hace unos meses compré este hermoso dije que me pareció muy interesante, porque tiene toda la oración del "Padre Nuestro" girando en círculo hasta terminar en la palabra "Amén". Quería comprar dos para mis hijas, pero lamentablemente solo había uno.
Sin embargo, hace tiempo materiales para bisutería, he trabajado con los materiales que tenía guardado desde hace mucho tiempo cuando si dedicaba más recursos a realizar cursos con el objetivo de aprender y distraerme. Entonces, hoy pensé mucho en la confección de este collar y quiero presentarles mi proceso.
! [ENGLIS VERSION ] A few months ago I bought this beautiful pendant that I found very interesting, because it has the entire prayer of the "Our Father" going around in a circle until it ends with the word "Amen." I wanted to buy two for my daughters, but unfortunately there was only one.
However, some time ago I was working with materials for jewelry making, and I had the materials I had saved for a long time when I was devoting more resources to taking courses with the aim of learning and having fun. So, today I thought a lot about making this necklace and I want to show you my process.
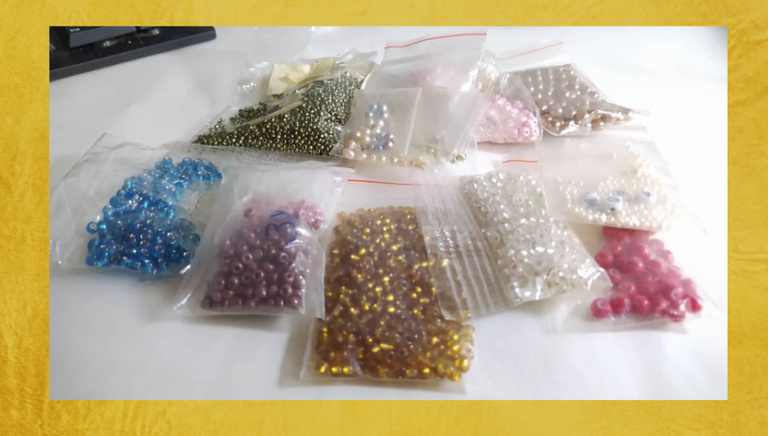
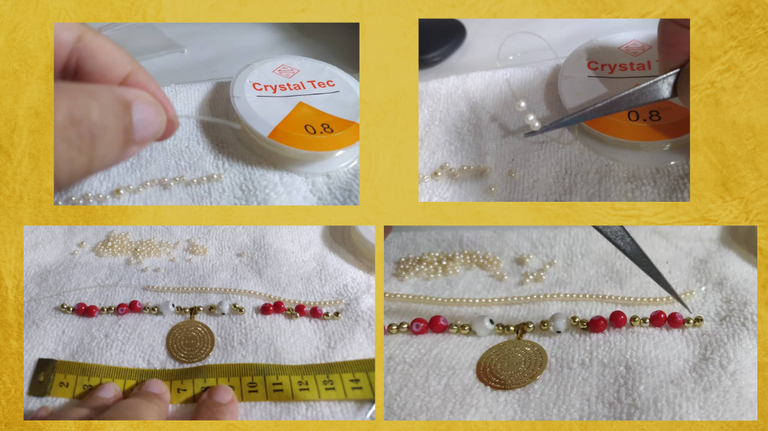
Estas son algunas de las mostacillas y piedras que tengo, y que dispuse para ver y ver durante un rato, para pensar en un diseño. Decidí trabajar con esas rojas, balines dorados y unas tipo perlitas muy pequeñas.
Con el proyecto de hoy se me terminaron los balines dorados, pero este material si pienso que debo reponer, porque con balines dorados de varios tamaños, perlitas blancas y algunas otras formas en color dorado también, puedo actualizar y sacarle provecho a los materiales que tengo guardado y que han pasado de moda, para poder crear piezas hermosas.
! [ENGLISH VERSION] These are some of the beads and stones that I have, and that I laid out to look at for a while, to think of a design. I decided to work with the red ones, golden beads and some very small pearl-like ones.
With today's project I ran out of golden beads, but I do think I should replace this material, because with golden beads of various sizes, white beads and some other shapes in golden color as well, I can update and take advantage of the materials that I have stored and that have gone out of fashion, to be able to create beautiful pieces.
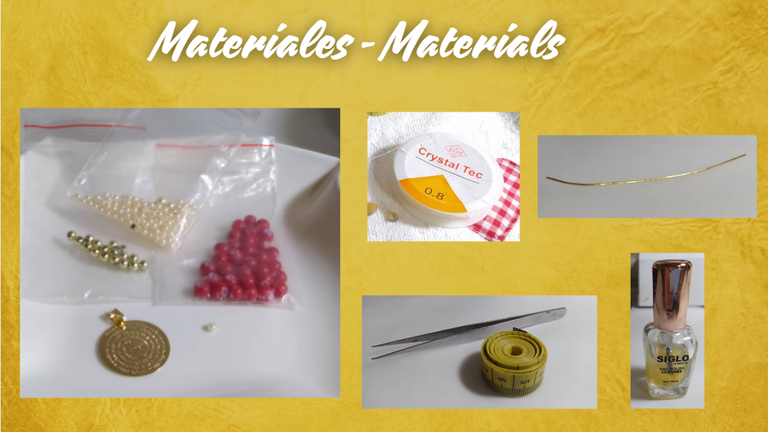
- Perlitas pequeñas
- Cuentas o abalorios de color rojo
- Cuentas de ojo turco
- Balines dorados
- Dije
- Nylon elástico
- Alambre dorado
- Cinta métrica
- Piza de bisutería (opcional)
- Brillo de uñas (opcional)
- Small pearls
- Red beads or charms
- Turkish eye beads
- Gold-colored pellets
- Pendant
- Elastic nylon
- Gold wire
- Measuring tape
- Jewelry pin (optional)
- Nail polish (optional)

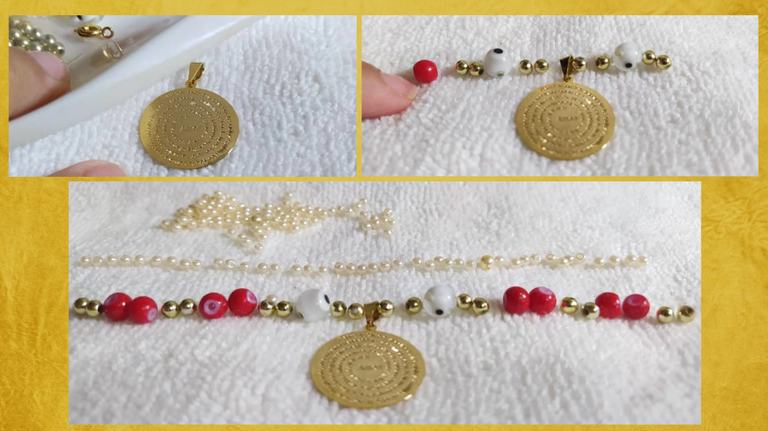
Lo primero que hice fue pensar el diseño del collar, y fui creando un patrón central, colocando el dije en el centro y repitiendo hacia cada lado una serie que me parecía bonita y en forma simétrica. En mi diseño pensé en completar el largo del collar con perlitas blancas y pequeñas hacia cada lado. El largo del collar debe medir 48, 49 o 50 cms en total.
Cabe destacar que trabajé en mi escritorio y sobre una pequeña toalla blanca, para garantizar que todo permanezca en su lugar y no saltara nada.
! [ENGLISH VERSION] The first thing I did was think about the design of the necklace, and I created a central pattern, placing the pendant in the center and repeating on each side a series that I thought was pretty and symmetrical. In my design I thought of completing the length of the necklace with small white pearls on each side. The length of the necklace should measure 48, 49 or 50 cms in total.
It is worth noting that I worked at my desk and on a small white towel, to ensure that everything would stay in place and nothing would jump out.
Tomé el nylon elástico por su extremo libre y NO corté el otro extremo, eso lo haré al final para tener más comodidad. Con la pinza comienzo a introducir las perlitas que serían el extremo derecho del diseño y que como ven miden como 14 cms. Luego, comienzo a introducir las piezas del diseño central igualmente desde la derecha.
! [ENGLISH VERSION] I took the elastic nylon by its free end and did NOT cut the other end, I will do that at the end for more comfort. With the tweezers I begin to insert the beads that will be the right end of the design and that as you can see measure about 14 cms. Then, I begin to insert the pieces of the central design also from the right.
Así es como va el proceso hasta ahora. Fíjense lo importante de tener el diseño ya concebido en la toalla, así se me facilita mucho ir introduciendo cada material sin el temor de equivocarme.
Ahora continúo con las perlitas que serían del extremo izquierdo.
! [ENGLISH VERSION] This is how the process is going so far. Note how important it is to have the design already conceived on the towel, this makes it much easier for me to introduce each material without fear of making a mistake.
Now I continue with the beads that would be on the far left.
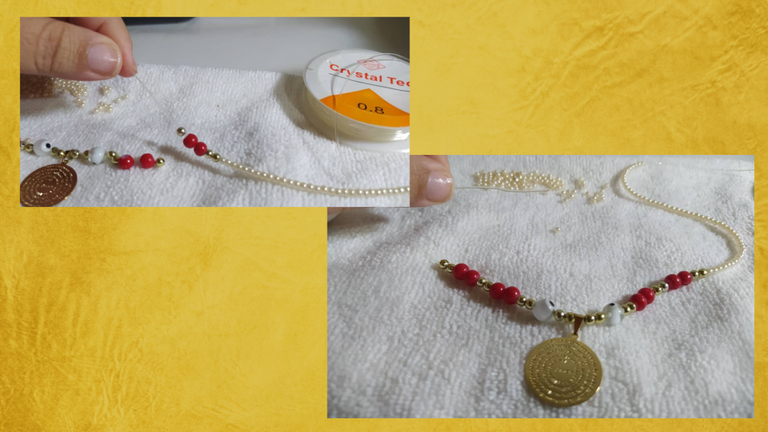
Mi pieza central y cada extremo lo iba considerando en 14 cms cada uno, porque cuando lo planteo en la toalla está disperso y cuando lo introduzco en el nylon es que se reduce las distancias y al final si va a quedar de la medida que quiero.
De todas maneras, si te puedes ir fijando con la cinta métrica de estas medidas.
! [ENGLISH VERSION] I was considering my central piece and each end to be 14 cm each, because when I plan it on the towel it is scattered and when I put it in the nylon the distances are reduced and in the end it will be the size I want.
In any case, you can check these measurements with the measuring tape.

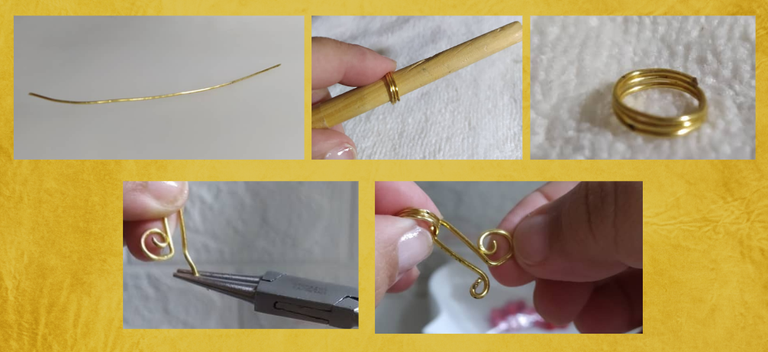
Ahora vienen las piezas del cierre, que sigo trabajando con mis preferidas que son las que realizo yo misma con alambre dorado de bisutería.
Tomé un trozo de 12 cms aproximadamente y lo enrosqué en algo redondo como un lápiz, un bolígrafo, etc. yo lo hice en un palito de madera, y al terminar quedó este hermoso aro de 3 vueltas con el que tengo la tranquilidad de que no se va a abrir.
La otra pieza ya se las he mostrado en otras oportunidades, pero se trata de una forma libre o una "U" con puntas o extremos de diferentes tamaños enroscados.
! [ENGLISH VERSION] Now come the clasp pieces, which I continue working with my favorites, which are the ones I make myself with gold jewelry wire.
I took a piece of approximately 12 cm and twisted it around something round like a pencil, a pen, etc. I did it on a wooden stick, and when I finished I got this beautiful 3-turn ring with which I have the peace of mind that it will not open.
I have already shown you the other piece on other occasions, but it is a free form or a "U" with tips or ends of different sizes twisted together.
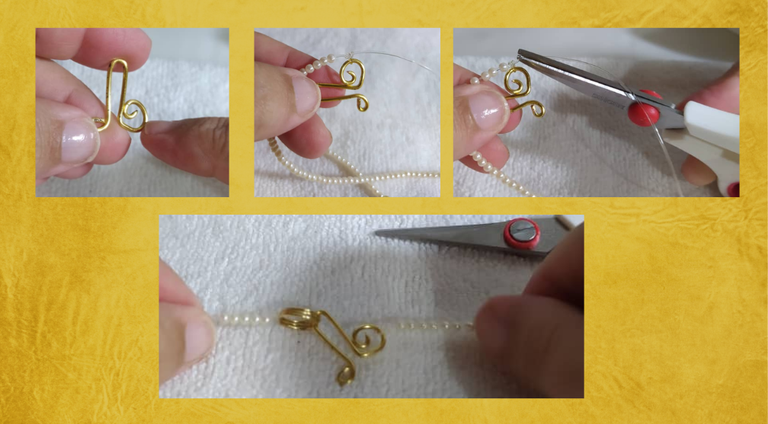
Ahora voy a colocar mis piezas de cierre de alambre dorado en cada extremo libre de mi collar.
Hoy lo haré de la forma más fácil. Una vuelta como cuando empezamos a atar nuestros zapatos, estiramos y luego dos vueltas y apretamos. Estiramos bien para que quede todo bien cerrado. Cortamos el excedente del nylon.
! [ENGLISH VERSION] Now I'm going to attach my gold wire clasp pieces to each free end of my necklace.
Today I'm going to do it the easy way. One turn like when we start tying our shoes, pull tight, then two turns and tighten. Pull tight so everything is closed. Cut off the excess nylon.

Aquí realizamos o repetimos el mismo proceso que expliqué anteriormente.
Me gusta mucho este tipo de cierre, porque cuando una tiene el cabello recogido se ve hermoso el contraste dorados, es como tener otro dije en ese lugar.
! [ENGLISH VERSION] Here we carry out or repeat the same process that I explained earlier.
I really like this type of closure, because when you have your hair up, the golden contrast looks beautiful, it's like having another pendant in that place.
Para serles sincera siempre una pieza de nylon elástico será una pieza más vulnerable que una pieza realizada en otro material más fuerte que garantice su integridad en el tiempo. Para tratar de darle más fuerza podemos colocar un poco de pega instantánea o brillo de uñas en los nudos del nylon elástico.
Esto es opcional, pero realmente me gusta hacerlo. Así que coloqué unas gotas en los nudos de cada extremo, y los coloqué en la tijera para que no se pegaran a la mesa, hasta que secaron muy bien.
! [ENGLISH VERSION]To be honest, a piece of elastic nylon will always be a more vulnerable piece than a piece made of another stronger material that guarantees its integrity over time. To try to give it more strength we can put a little instant glue or nail polish on the knots of the elastic nylon.
This is optional, but I really like to do it. So I put a few drops on the knots at each end, and placed them on the scissors so they wouldn't stick to the table, until they dried really well.

Así terminé este collar con este hermoso diseño, el proceso narrado en este post como vieron es sumamente fácil. Lo que más me llevó tiempo fue determinar el diseño inicial como tal, lo demás si tienes organización lo puedes hacer en poco tiempo.
! [ENGLISH VERSION] This is how I finished this necklace with this beautiful design. The process described in this post, as you can see, is extremely easy. What took me the longest was determining the initial design itself. If you are organized, you can do the rest in a short time.
Si tienes algunas cuentas, abalorios, piedras, etc. entre tus materiales, te recomiendo que inviertas en balines dorados ya que realmente pueden actualizar tus diseños y sacarle provecho.
! [ENGLISH VERSION] If you have some beads, seed beads, stones, etc. in your supplies, I highly recommend investing in some gold plated beads as they can really upgrade your designs and put them to good use.
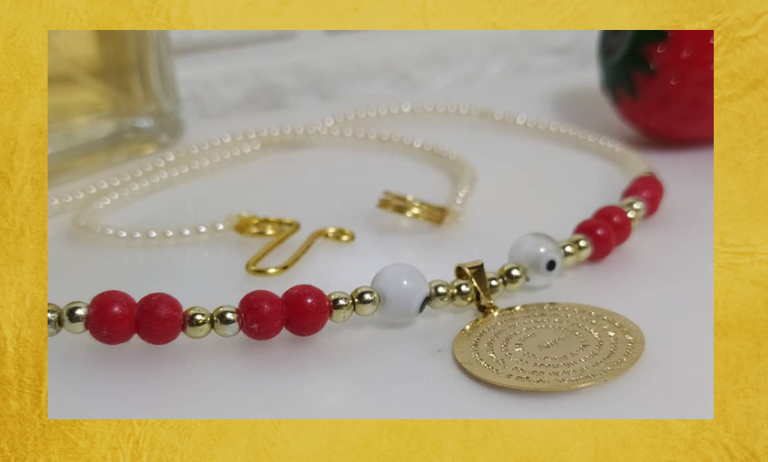
Esta es una pieza totalmente comercial, puedes realizarla y publicarla en tus redes sociales y te aseguro que te preguntaran si haces para vender.
Sácale provecho a tus conocimientos, a tu tiempo e inversión.
! [ENGLISH VERSION] This is a completely commercial piece, you can make it and publish it on your social networks and I assure you that they will ask you if you make it to sell.
Take advantage of your knowledge, your time and investment.


Las fotos las tomé con mi teléfono Redmi Note 8
Apps que utilicé:
Canva Pro para la Portada, Collage y Banners
Utilicé el Traductor Deepl
Mi redes sociales:
Discord: YennysYaneth#0189
Twitter: @yennysferm
Instagram: @yennysyaneth
I took the photos with my phone Redmi Note 8
Apps I used:
Canva Pro for Cover, Collage and Banners
I used Deepl Translator
My social networks:
Discord: YennysYaneth#0189
Twitter: @yennysferm
Instagram: @yennysyaneth


