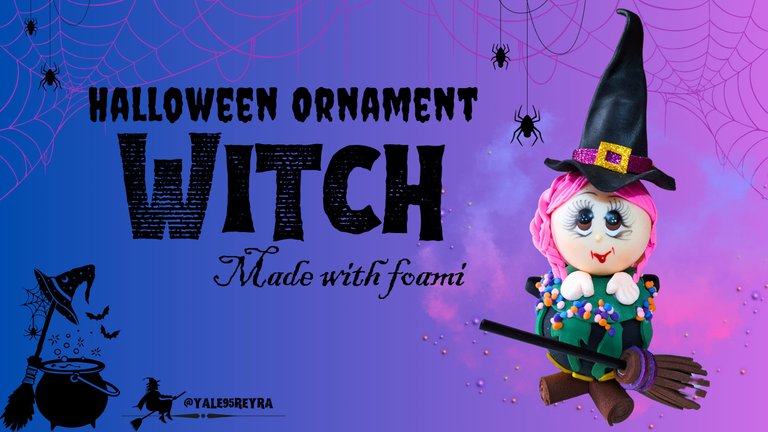
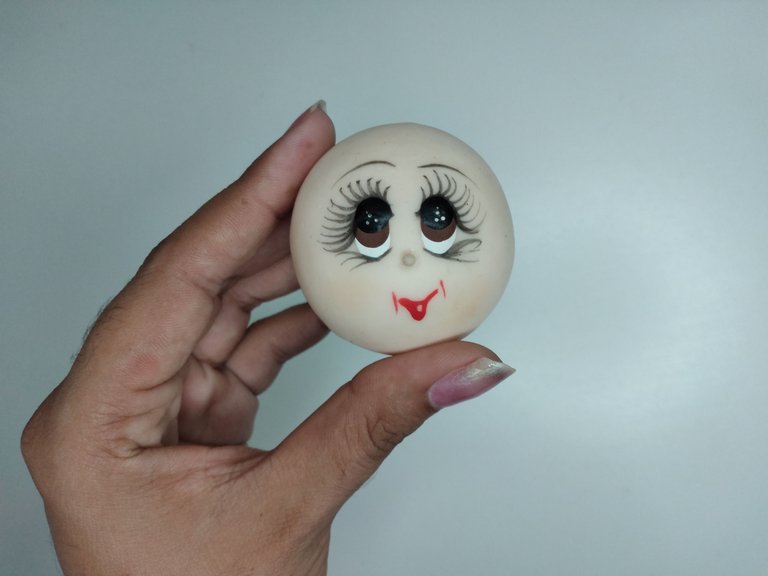
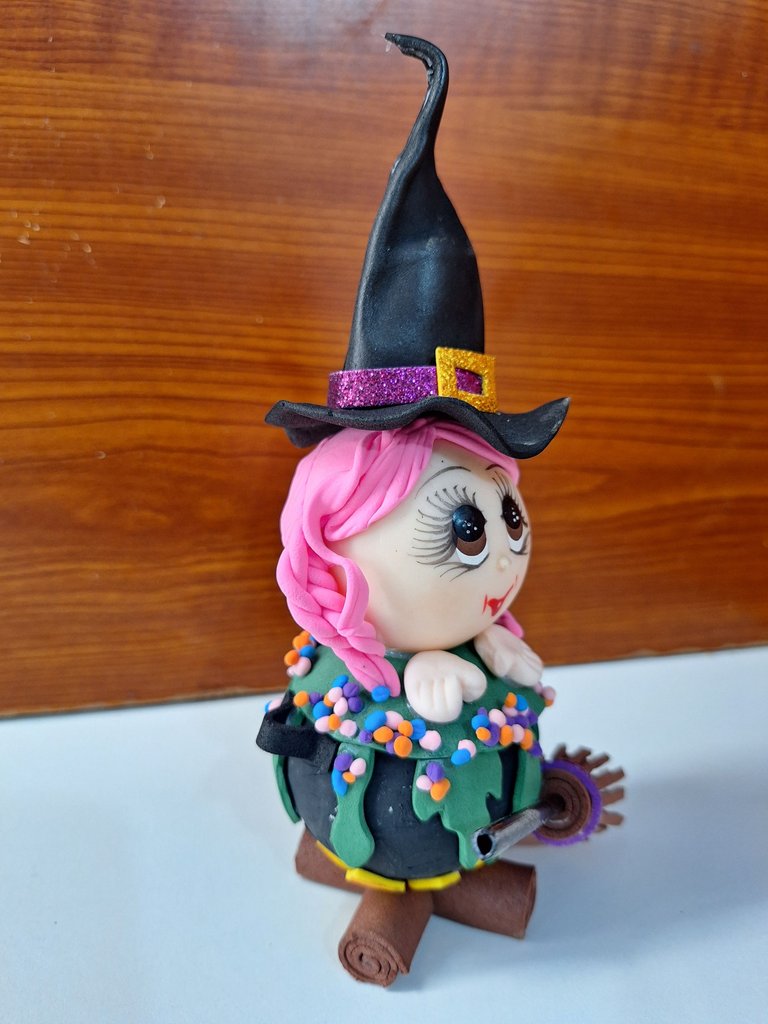
Hello dear craft lover friend, today I bring you a new tutorial where I want to show you how to make a little witch. We are already in the scariest month of the year, as Halloween is approaching and we all begin to prepare for the occasion by decorating our homes. Some watch horror movies, others decorate their surroundings, while others think about the costume they will wear that day. I wanted to start with the decorations, and taking advantage of a little head of fofucha that I got as a gift I started to work with this witch, as it is one of the most famous characters in this season.
I was watching a course of fofuchas and I was so excited to see the amount of characters that can be created, that I decided to make the first of many that I want to do. For this I want to buy a liner brush to make the details of the faces, because the ones I have are not so fine, and so I can create them myself. I hope you like this beautiful little witch, below, I show you the materials used and the step by step of the whole creative process.
Hola querido amigo amante de las manualidades, el día de hoy te traigo un nuevo tutorial donde quiero enseñarte como hacer una brujita. Ya estamos en el mes más terrorífico del año, pues se aproxima Halloween y todos comenzamos a prepararnos para la ocasión decorando nuestros hogares. Unos vemos películas de terror, otros decoran los alrededores, mientras otros piensan en el disfraz que llevarán puesto ese día. Yo quise comenzar con los adornos y aprovechando una cabecita de fofucha que me regalaron me puse manos a la obra con esta bruja, pues es uno de los personajes más famosos en esta temporada.
Estuve viendo un curso de fofuchas y me emocioné tanto al ver la cantidad de personajes que se pueden crear, que decidí elaborar la primera de tantas que quiero hacer. Para ello quiero comprarme un pincel liner para hacer los detalles de las caritas, pues los que tengo no son tan finos, y así las podré crear yo misma. Espero les guste esta hermosa brujita, a continuación, te muestro los materiales utilizados y el paso a paso de todo el proceso creativo.
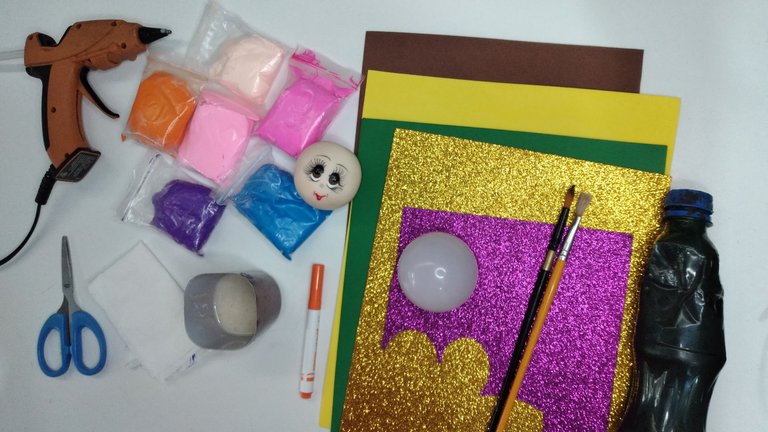
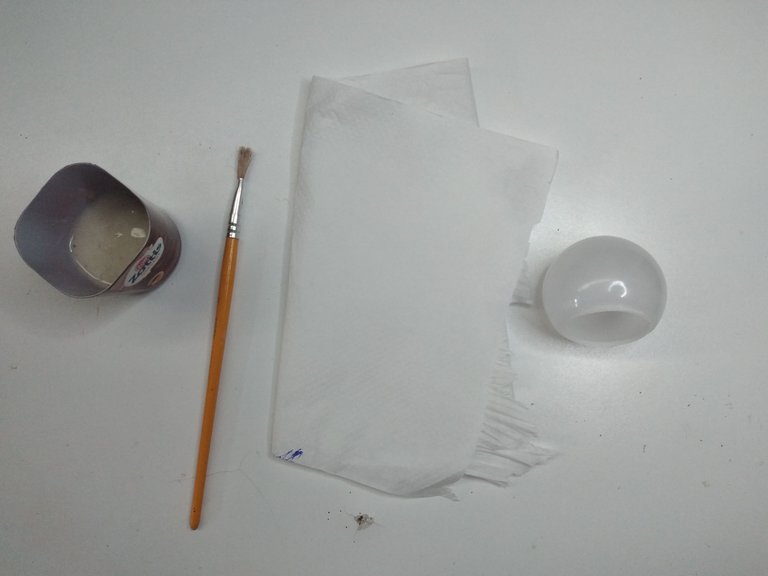
Materials // Materiales
- Puffy head / Cabeza de fofucha
- Foami sheets of various colors / Láminas de foami de varios colores
- Moldable Foami / Foami moldeable
- Orange marker / Marcador naranja
- Black paint / Pintura negra
- Light bulb bulb / Foco de bombillo
- Lollipop stick / Palo de chupa chups
- Liquid glue / Pegamento líquido
- Kitchen paper / Papel de cocina
- Brushes / Pinceles
- Scissors / Tijera
- Silicone / Silicona
Step by step // Paso a paso
 |  |  |
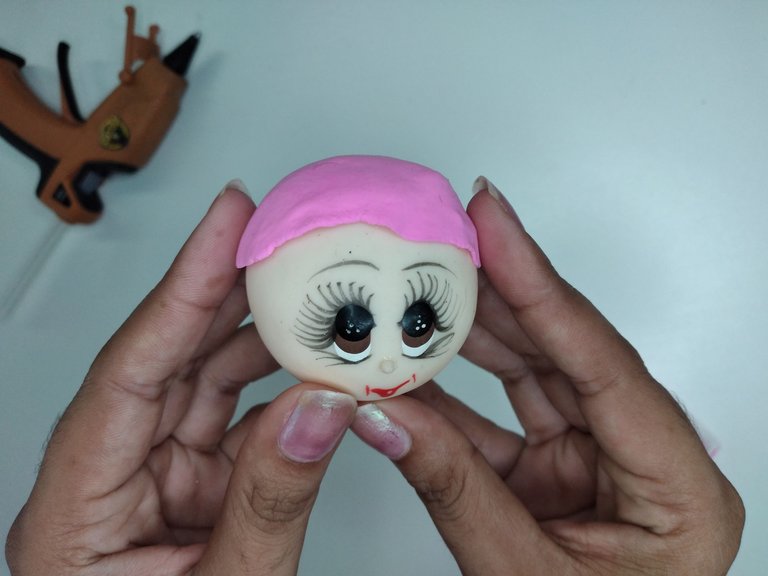 |  |  |
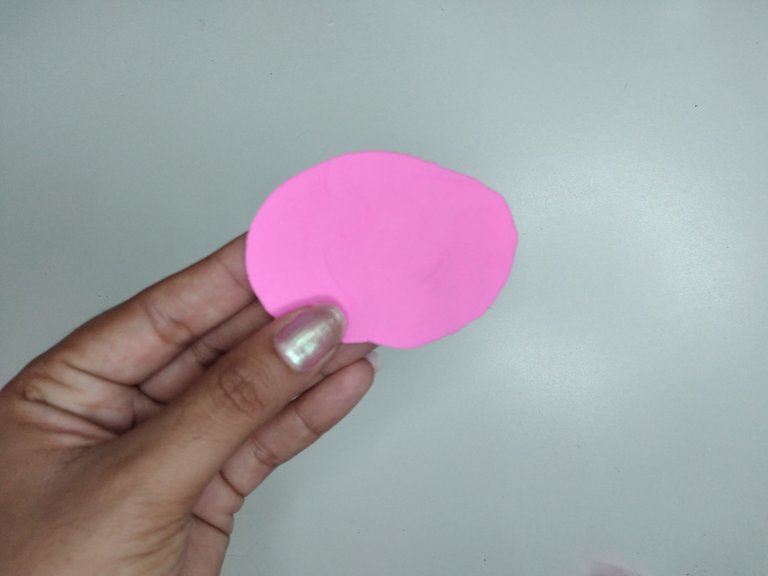
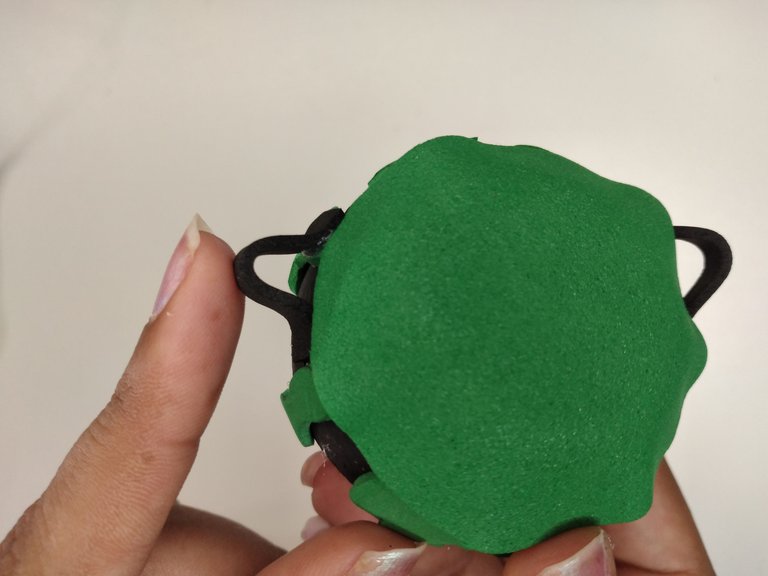
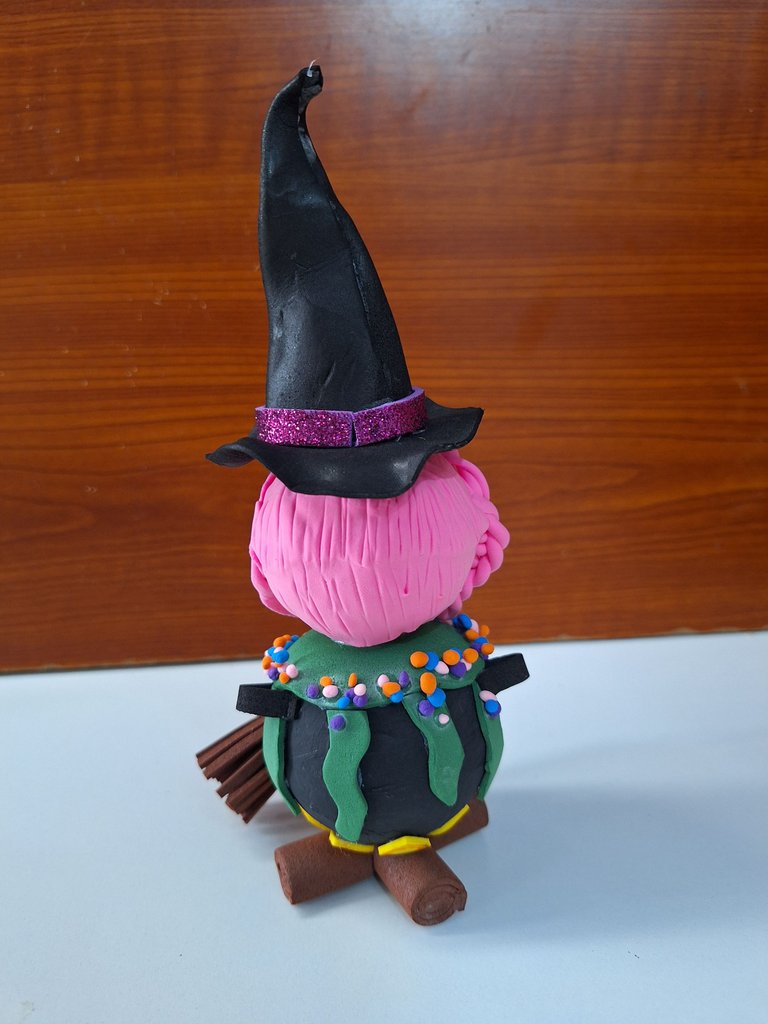
Since I already had the head made, the only thing I had to do was the hair. For this I used pink moldable foami to add a more fantasy effect. I flattened a portion to cover the whole contour of the head and with thin twisted strips I made a braid. Then I placed some strands of hair in the part of the hair fringe, to which I made some lines to give it the look of hair.
Como ya tenía la cabeza de la fofucha hecha, lo único que tuve que hacer fue el cabello. Para ello utilicé foami moldeable de color rosa para agregarle un efecto más de fantasía. Aplané una porción para cubrirle todo el contorno de la cabeza y con tiras finas torcidas le hice como una trenza. Luego coloqué unos mechones en la parte del cerquillo, al cual se le hacen unas líneas para darle el aspecto del cabello.
 |  |  |
 | 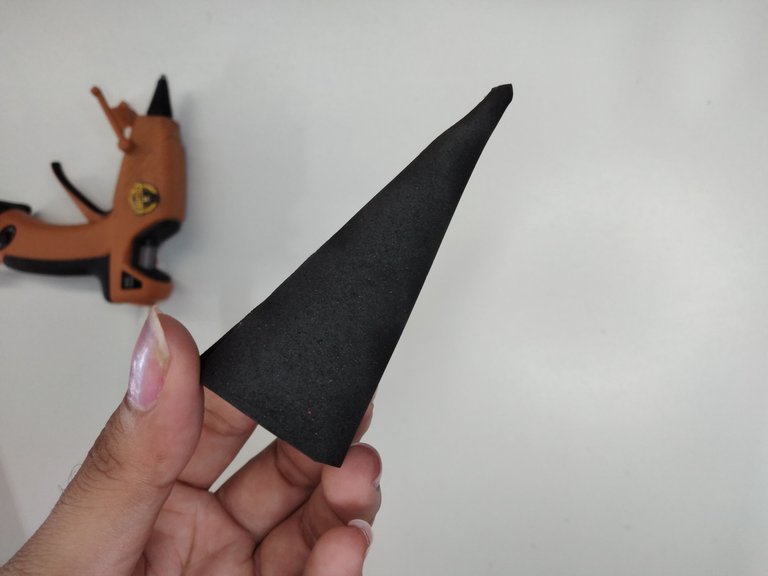 |  |
For the hat I used foil foami, first I cut a circle and thermoformed it in parts to make the waves, then I cut a triangle to make a cone and I also heated it to make the curve of the upper part.
Para el sombrero utilicé foami en lámina, primero corté un círculo y lo termoformé por partes para ir haciendo las ondas, luego corté un triángulo para hacer un cono y a este también le di calor, para hacerle la curva de la parte superior.
 |  |  |
 | 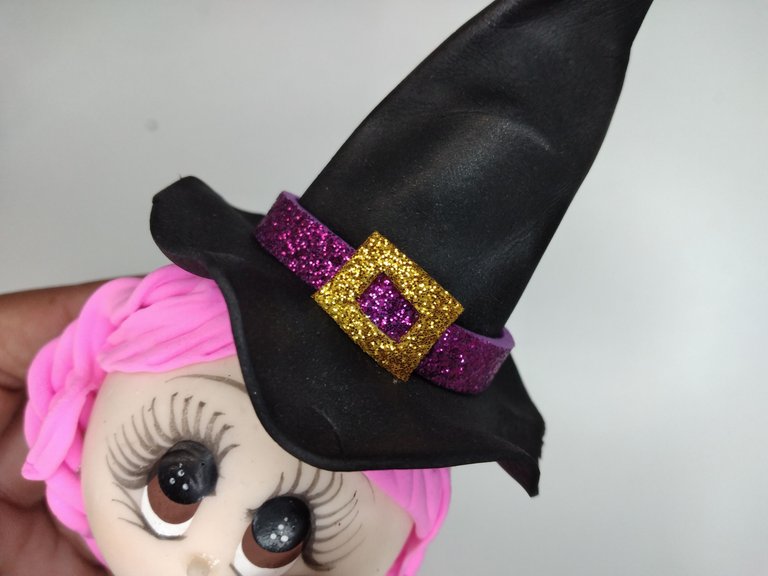 |
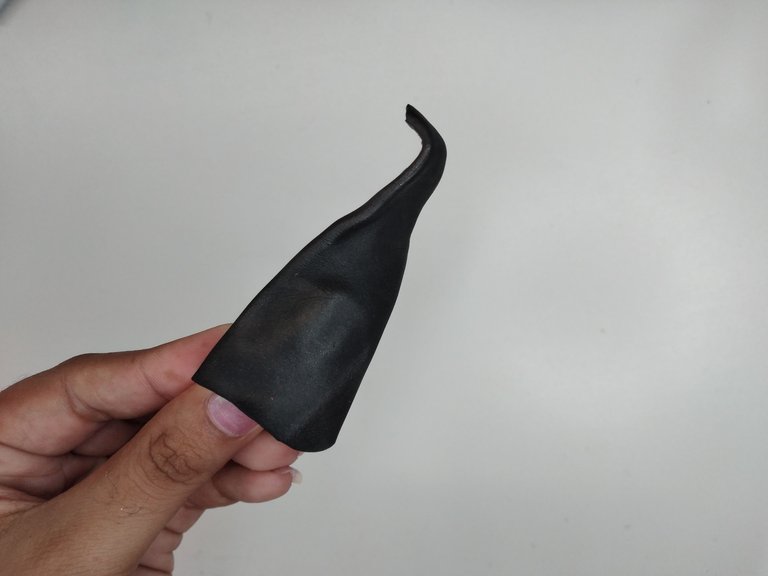
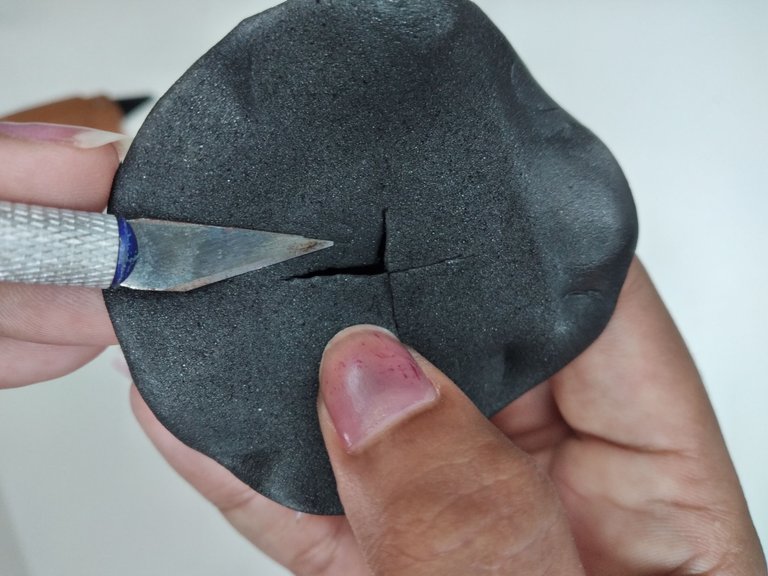
I joined the two parts of the hat. I tried it on the head of the foofucha but it was too flat, so I made a cross at the bottom of the hat, this allows the curve of the head to fit well into the hat. With purple and gold frosted foami I made the belt that goes around the hat.
Uní las dos partes del sombrero. Lo probé en la cabeza de la fofucha pero quedaba muy plano, por lo tanto, le hice una cruz en la parte de abajo del sombrero, esto permite que la curva de la cabeza entre bien en el sombrero. Con foami escarchado de color violeta y dorado elaboré el cinturón que se coloca alrededor de la copa.
 |  |  |
 |  |  |
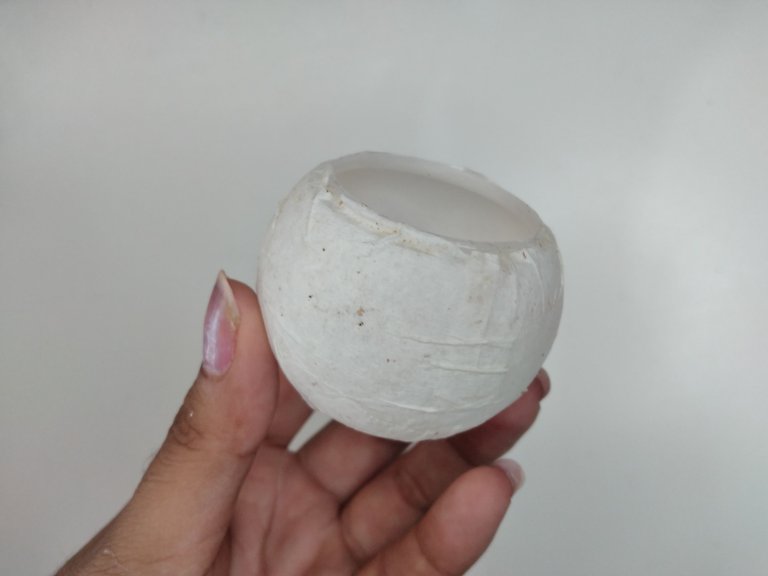
For the cauldron I used the bulb of a light bulb, because it had the perfect shape. I papered it so that the paint would be uniform because the surface was very smooth and there would be streaks when painting. When it was completely dry I painted it black.
Para el caldero utilicé el foco de un bombillo, pues este tenía la forma perfecta. Lo empapelé para que la pintura quedara uniforme porque la superficie era muy lisa y quedarían betas al pintar. Cuando secó completamente lo pinté de negro.
 |  |  |
I placed a round portion of polyfoam to give more height to the center of the cauldron, then I covered it with green foami, this will be the content of the potion.
Coloqué una porción redonda de poliespuma para darle más altura al centro del caldero, luego lo cubrí con foami verde, este será el contenido de la poción.
 |  |
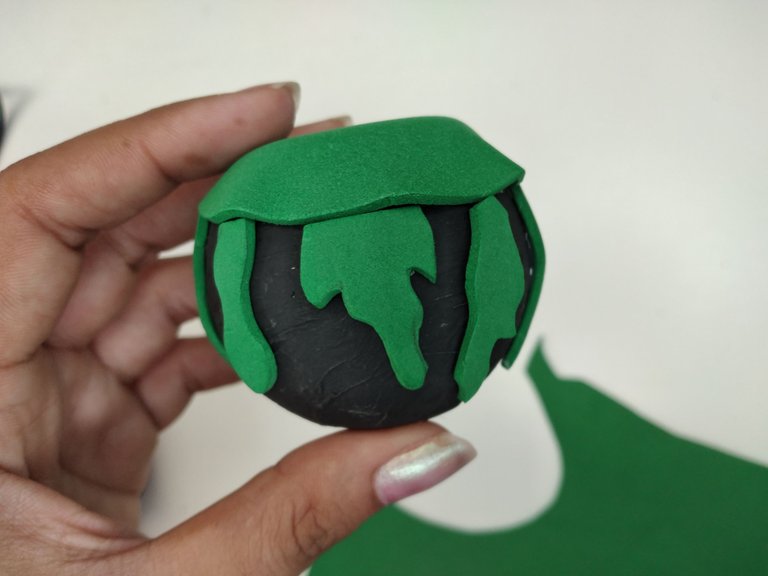 |  |
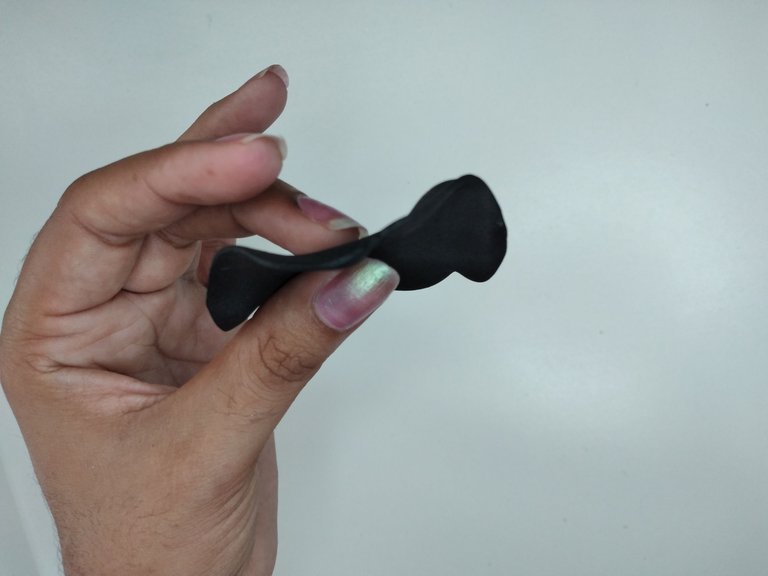
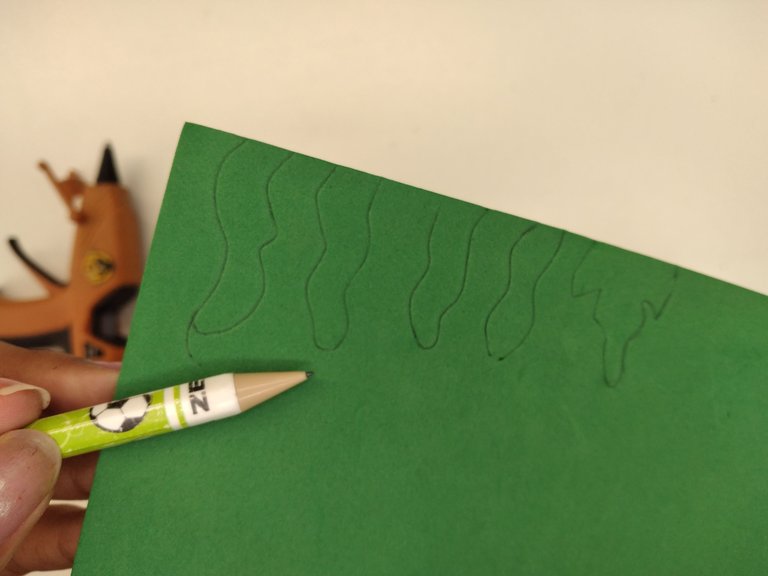
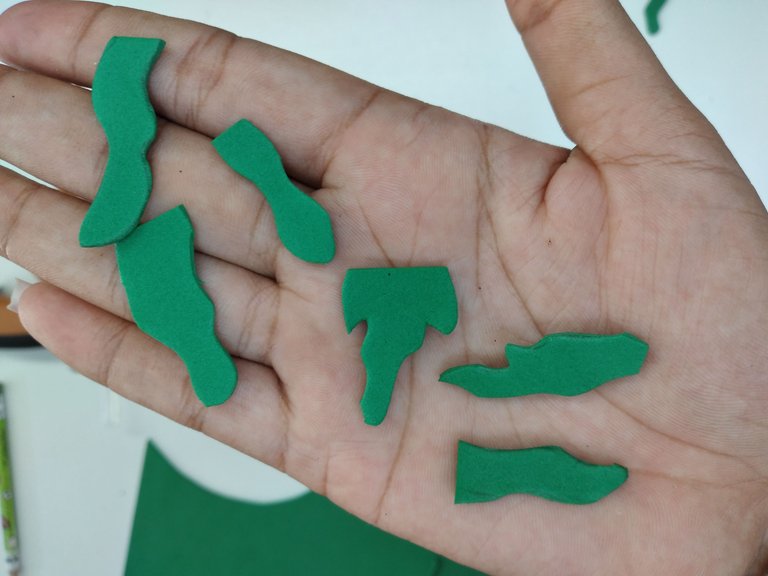
On another piece of green foami I painted some irregular silhouettes, which I cut out and glued all around the edge of the cauldron, this would be the potion spilling. Then with black foami I made the handles of the cauldron.
En otro pedazo de foami verde pinté unas siluetas irregulares, las cuales recorté y pegué por todo el borde del caldero, esta sería la poción derramándose. Luego con foami negro elaboré las asas del caldero.
 |  |  |
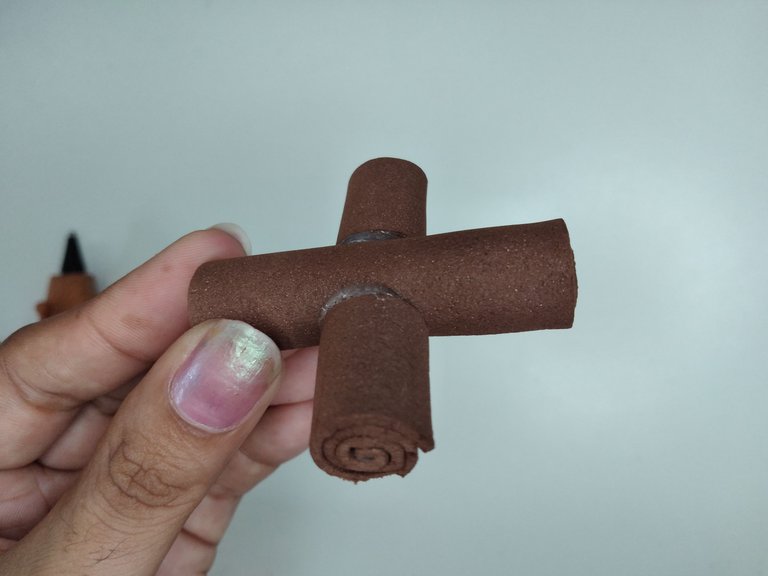 | 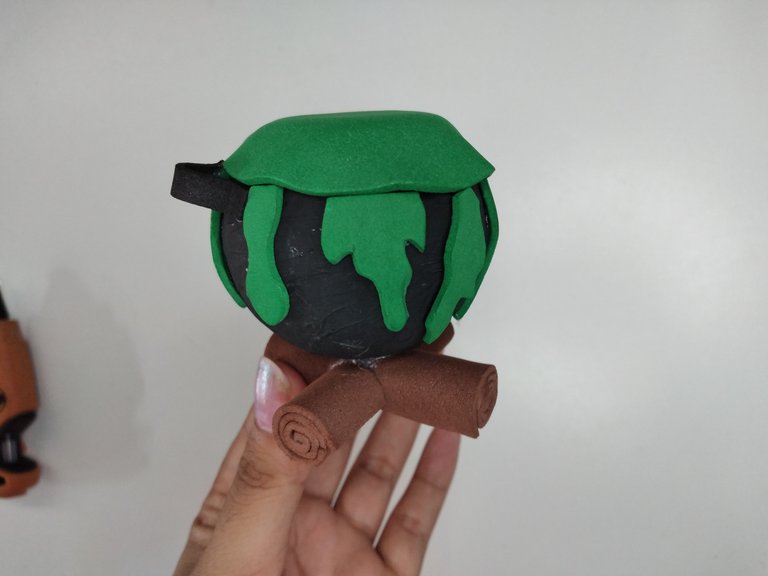 |
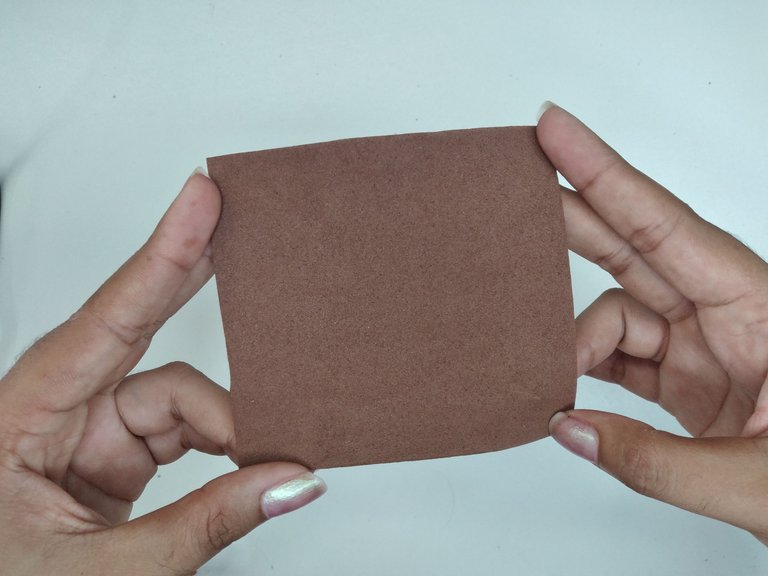
With a square piece of carmelite foami I made the trunks, rolled it and cut it into three parts, one long and two short. Then I glued them in the shape of a cross and placed the cauldron on top.
Con una pieza cuadrada de foami carmelita hice los troncos, la enrollé y piqué en tres partes, una larga y dos cortas. Luego las pegué en forma de cruz y coloqué el caldero encima.
 |  |
 | 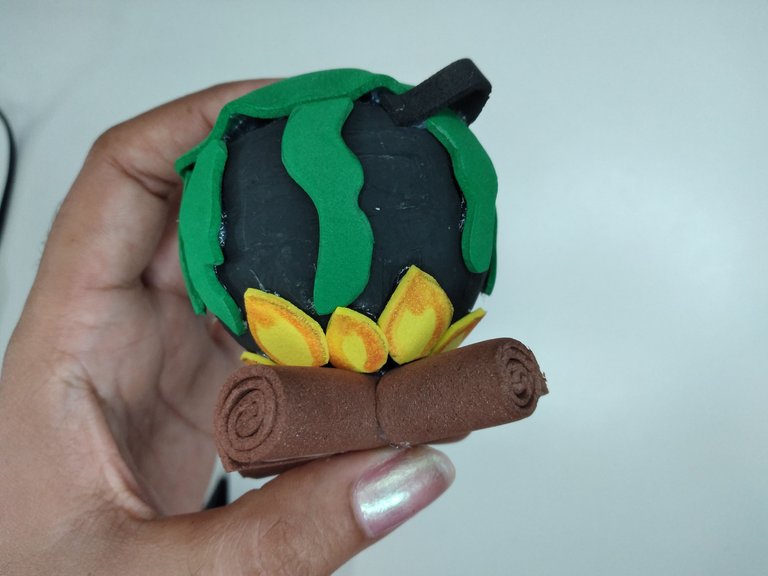 |
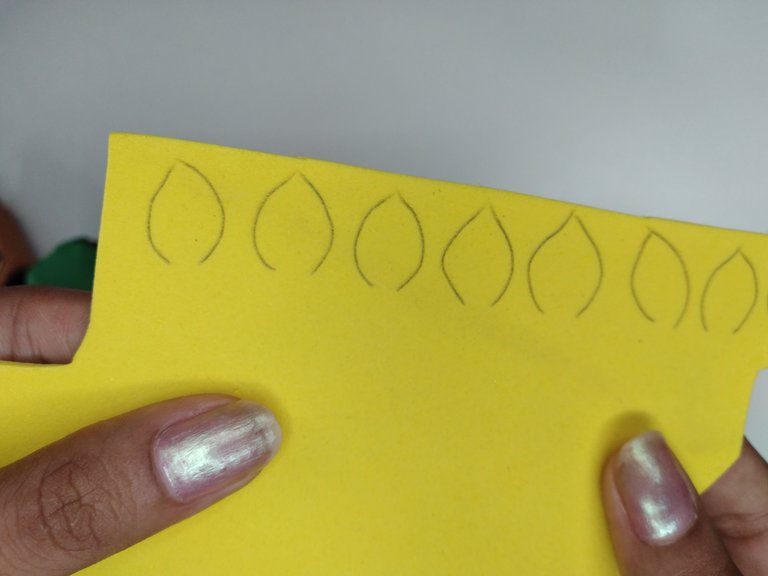
On a sheet of yellow foami we paint the silhouettes of some flames of fire, then with an orange marker we color all around the edge, cut out and glue all over the lower part of the cauldron, on top of the trunks.
En una lámina de foami amarilla pintamos las siluetas de unas llamas de fuego, luego con un marcador naranja le damos color por todo el borde, recortamos y pegamos por toda la parte baja del caldero, encima de los los troncos.
 |  |  |
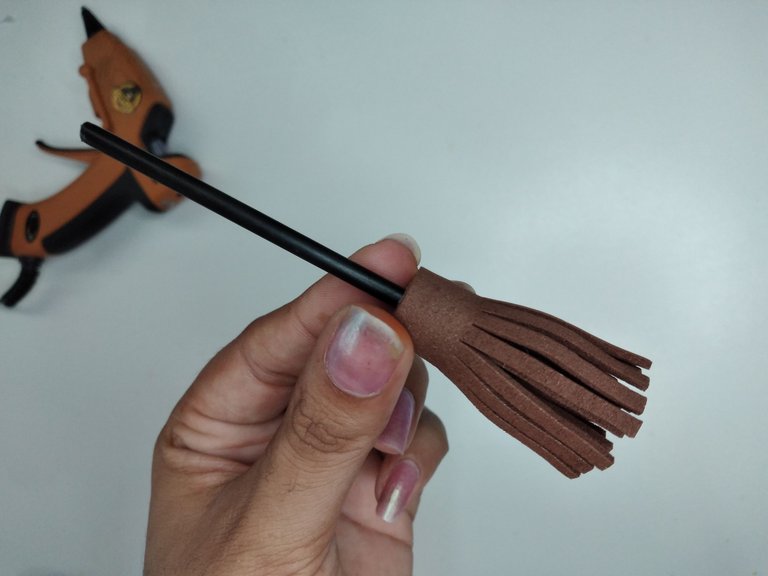 | 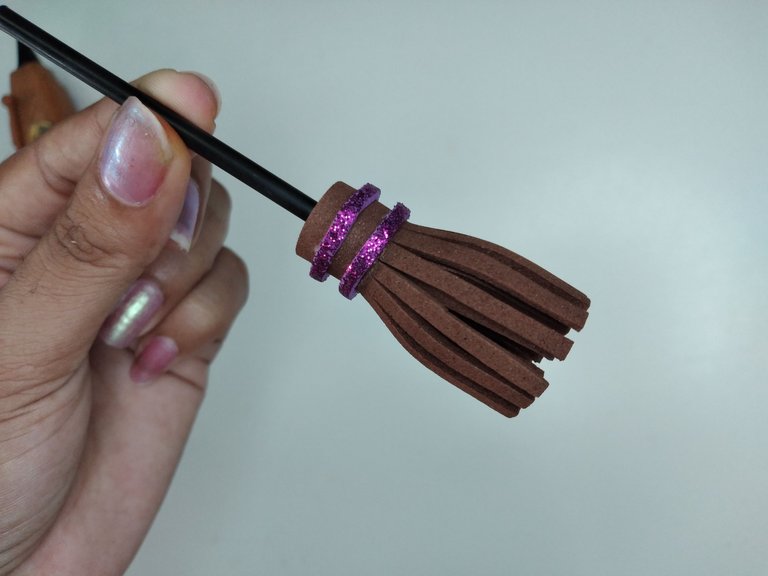 | 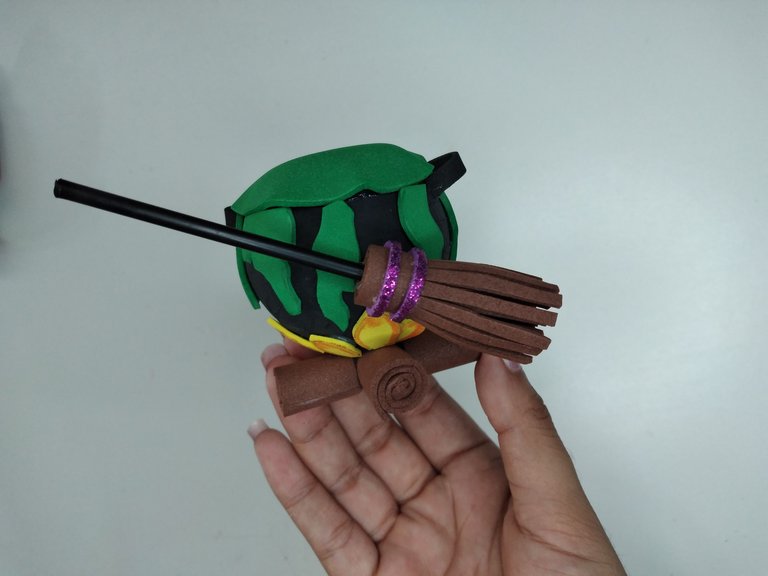 |
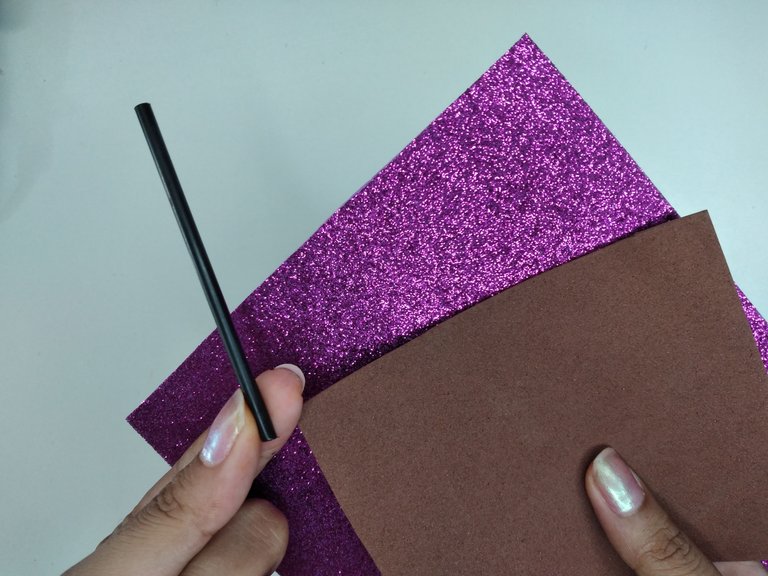
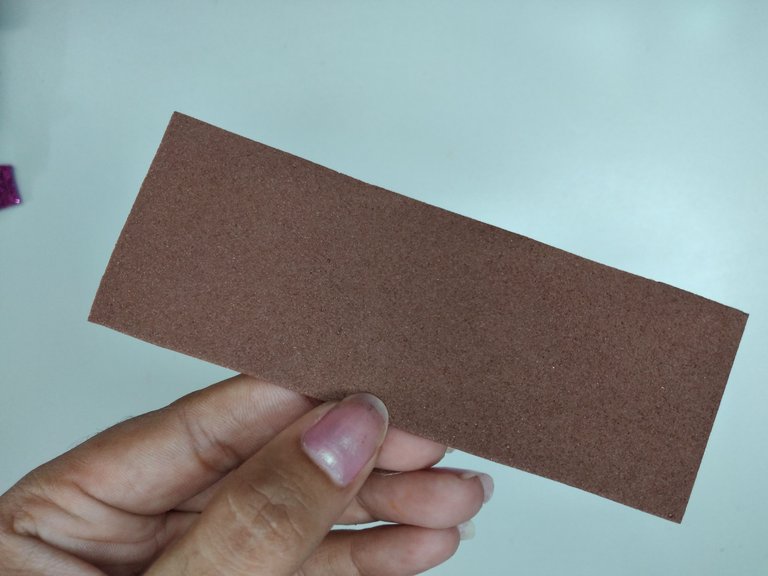
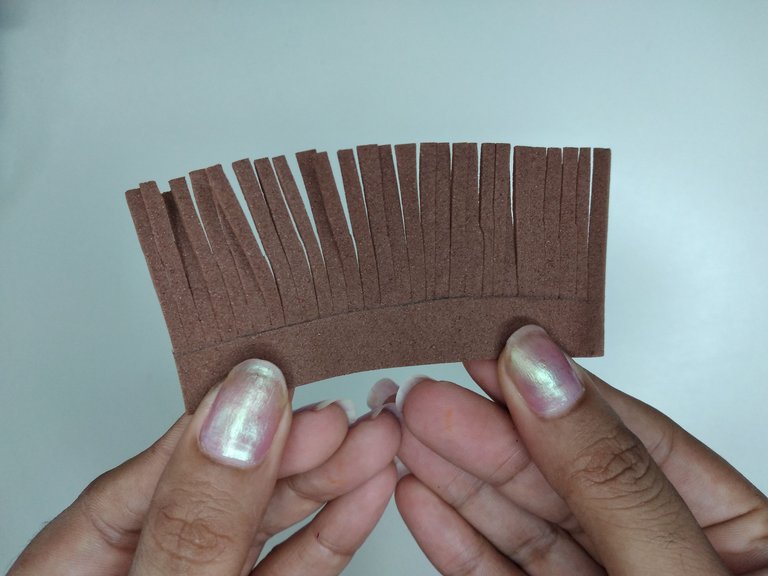
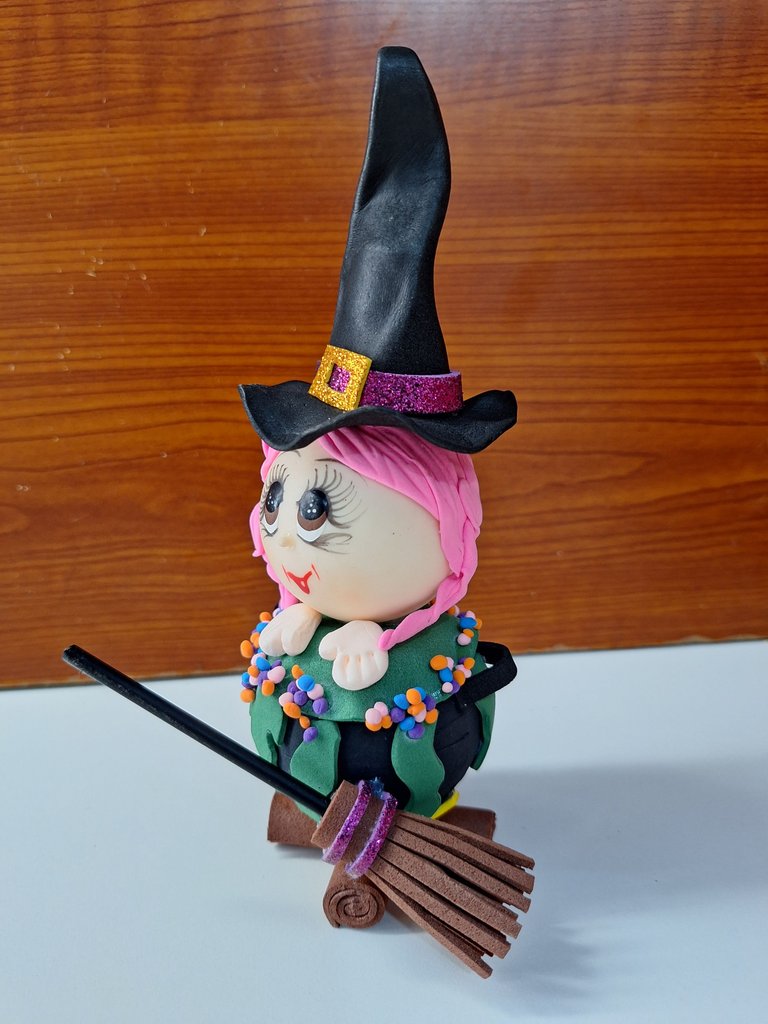
Now it is the turn to make the broom, for this we will use a rectangular piece of foami carmelite color and a horizontal line of one centimeter wide is marked along the entire length. On the other side we cut three mm apart. We take a lollipop stick and roll the piece of foami at one end. Then glue two strips of frosted purple foami on the smooth part of the broom. Finally, the broom is placed in front of the cauldron.
Ahora es el turno de elaborar la escoba, para ello utilizaremos una pieza rectangular de foami color carmelita y a todo largo se marca una línea horizontal de un cm de ancho. A la otra parte se le hacen cortes de tres mm de separación. Tomamos un palito de chupa chups y le enrollamos la pieza de foami en una punta. Luego se pegan dos tirillas de foami violeta escarchado en la parte lisa de la escoba. Por último se sitúa la escoba en el frente del caldero.
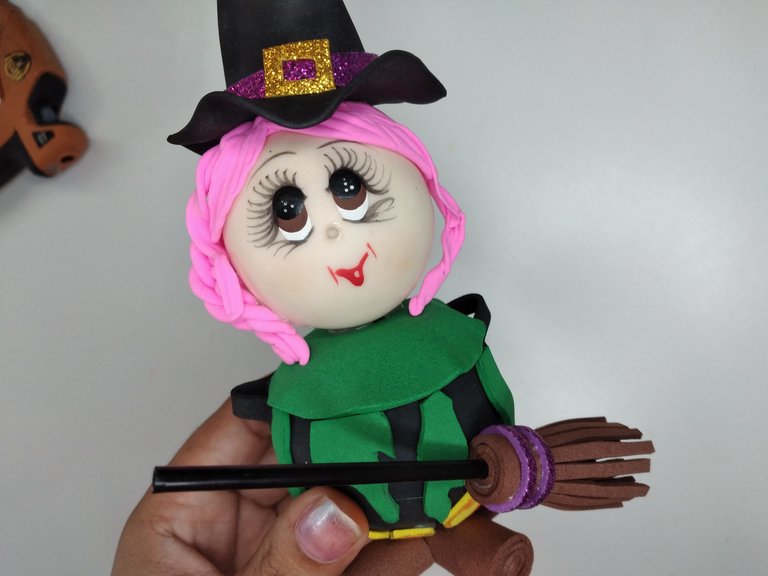
We join the two finished pieces, the cauldron and the witch's head.
Unimos las dos piezas terminadas, el caldero y la cabeza de la bruja.
 |  |  |
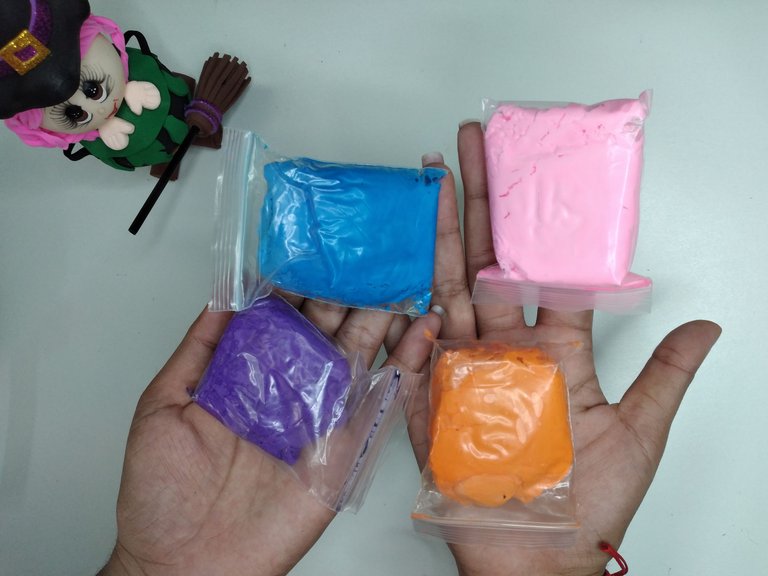 | 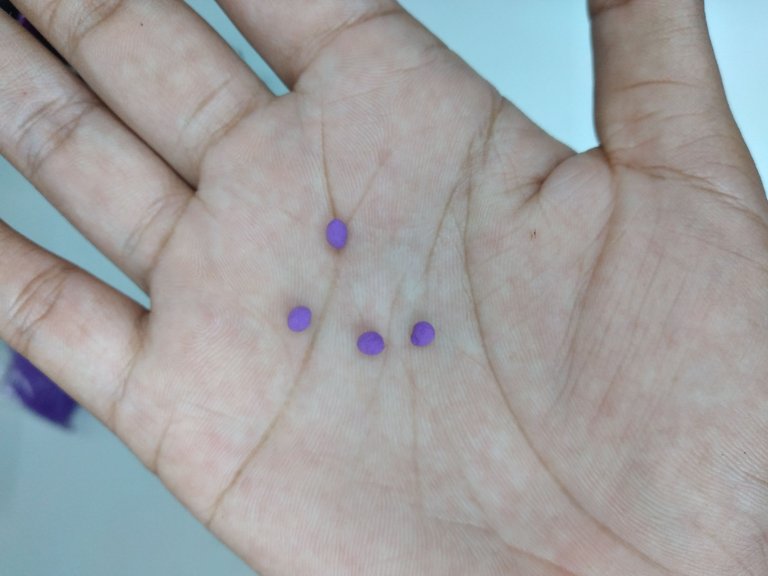 | 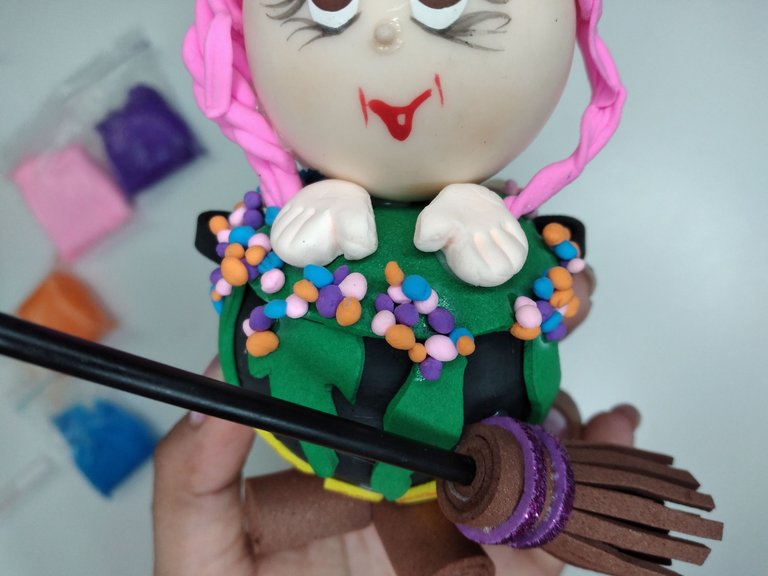 |
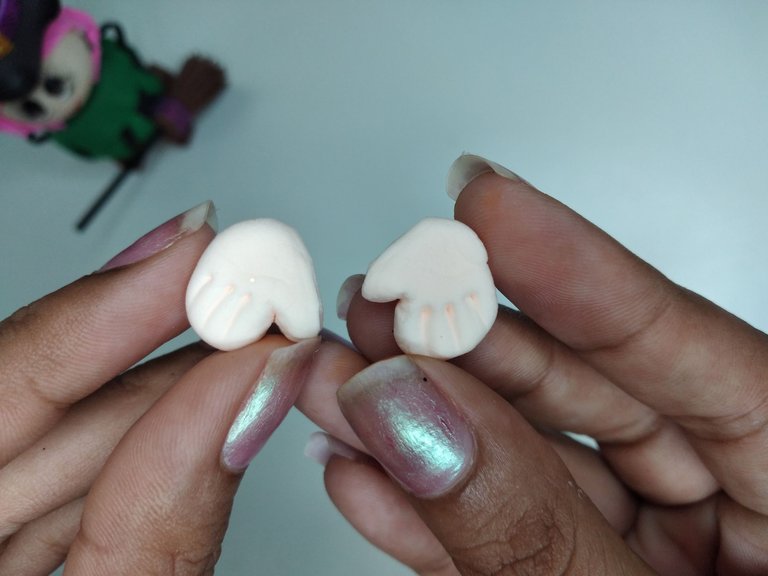
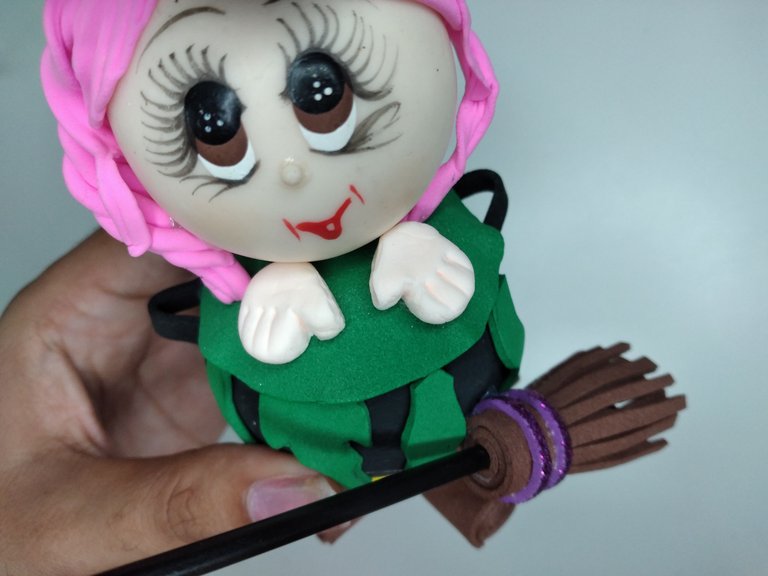
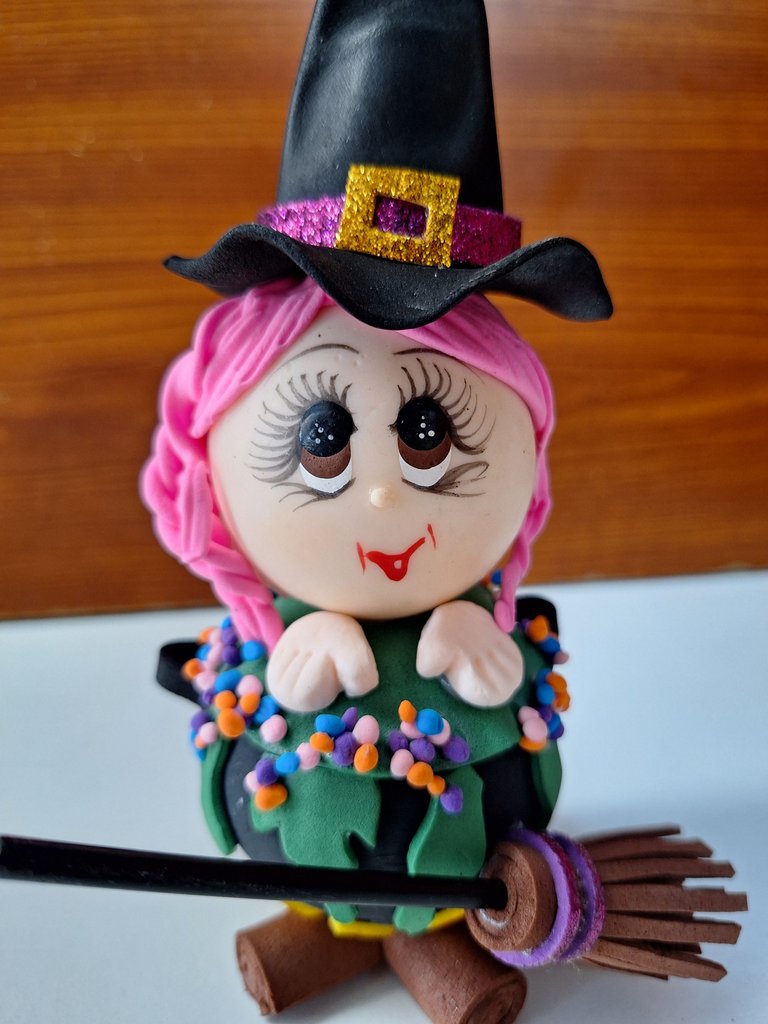
We make the last details, with skin-colored foami we make two little hands and place them in front of the witch's head and with several bright colors of moldable foami we make small balls that will be glued around the edge of the cauldron. These will be like bubbles that are released from the magic potion. Believe it or not, you can see the difference between bubbles and no bubbles, it makes the design look more colorful.
Elaboramos los últimos detalles, con foami color piel se hacen dos manitos y las colocamos frente a la cabeza de la bruja y con varios colores llamativos de foami moldeable se elaboran unas pequeñas bolitas que se pegarán en todo el borde del caldero. Estas serán como unas burbujas que se liberan de la poción mágica. Aunque no lo creas se nota la diferencia con burbujas y sin burbujas, hace ver el diseño más pintoresco.
 |  |
 |  |
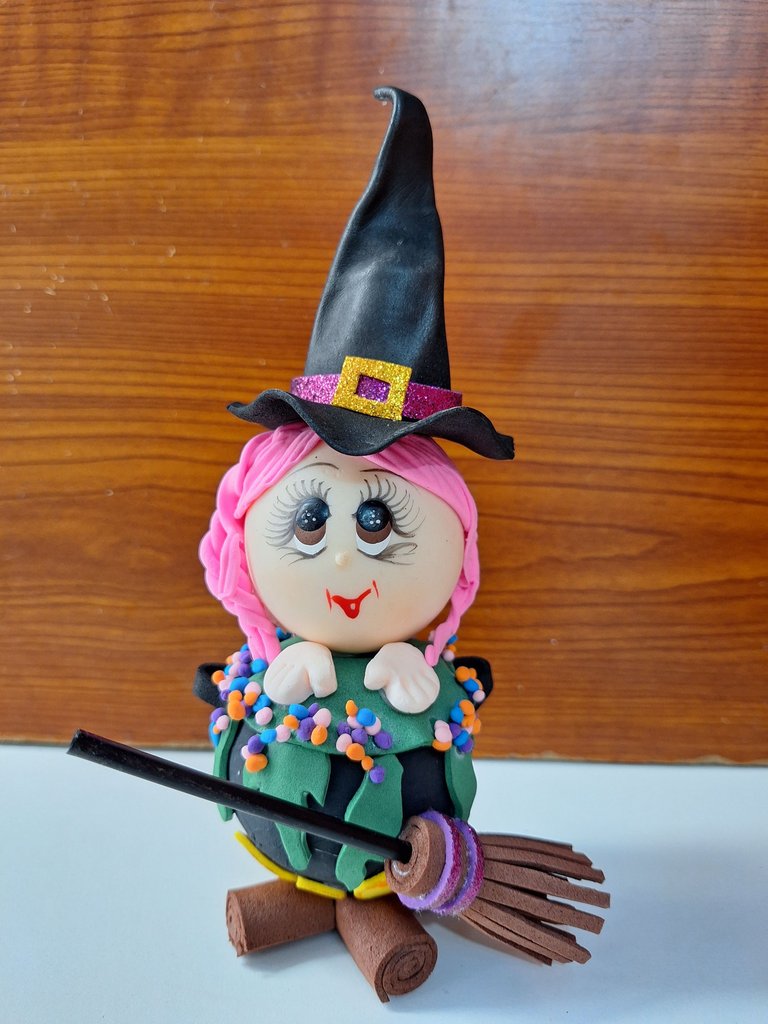
And this is how this beautiful ornament for Halloween is finished, it is the first fofucha I make and I hope it will not be the last because I have many ideas in mind. I thought it was a nice design for the approaching date, leave me in the comments what you thought and new suggestions, best regards.
Y de esta forma se encuentra terminado este hermoso adorno para Halloween, es la primera fofucha que hago y espero que no sea la última porque tengo muchas ideas en mente. Me pareció un lindo diseño para la fecha que se aproxima, déjame en los comentarios que te pareció y nuevas sugerencias, un saludo.
 |  |
Cover made in Canva
English is not my native language, translated by DeepL
Posted Using InLeo Alpha