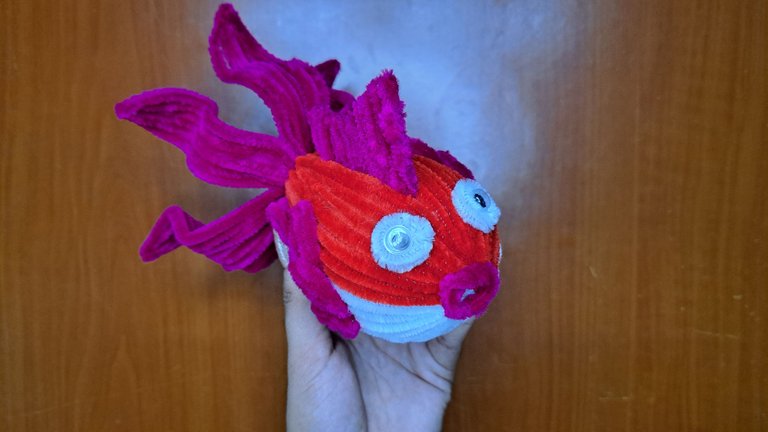
Hello dear friend and lover of crafts, once again here to bring you a new video tutorial. On several occasions I have made pieces made with pipe cleaners, but they have always been flowers or floral arrangements. Today I wanted to bring something different, and combine recycling with this beautiful material, because I used a light bulb that was no longer useful and turned it into a beautiful fish. It occurred to me to take the bulb as a base for its wider silhouette at one end, which looks great in the part of the head, in addition, inside, you can insert small lights that enter through the hole in the mouth and thus turn it into a night lamp.
Below, I show you the materials used and a summary of the step by step. The video explains in detail how to make each part, because in photos it is very difficult to understand. I hope you like it.
Hola querido amigo amante de las manualidades, una vez más por aquí para traerte un nuevo video tutorial. En varias ocasiones he elaborado piezas hechas con limpiapipas, pero siempre han sido flores o arreglos florales. Hoy quise traer algo diferente, y combinar el reciclaje con este hermoso material, pues utilicé un bombillo que ya no servía y lo convertí en un precioso pez. Se me ocurrió tomar el bombillo como base por su silueta más ancha en un extremo, que queda muy bien en la parte de la cabeza, además, en su interior, se pueden introducir pequeñas luces que entren por el orificio de la boca y así convertirlo en una lámpara de noche.
A continuación, te muestro los materiales utilizados y un resumen del paso a paso. En el video se explica detalladamente como hacer cada parte, pues en fotos es muy difícil entenderlo. Espero te guste.
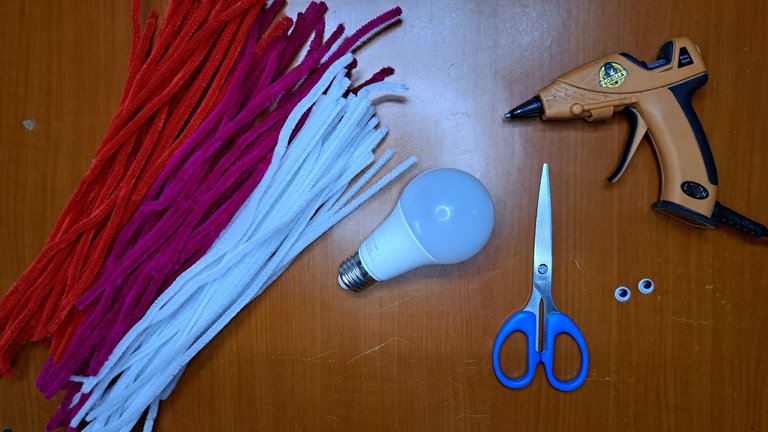
🐠Materials // Materiales🐠
- 10 white pipe cleaners / 10 limpiapipas blancos
- 30 pink pipe cleaners / 30 limpiapipas rosados
- 9 red pipe cleaners / 9 limpiapipas rojos
- 1 pair of crazy eyes / 1 par de ojos locos
- light bulb / bombillo
- scissors / tijera
- silicone / silicona
🐠Step by step // Paso a paso🐠
 |
 |
 |
 |
 |
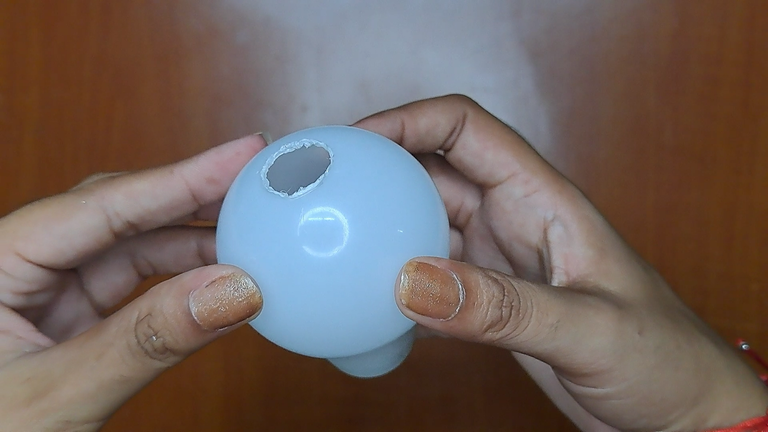 |
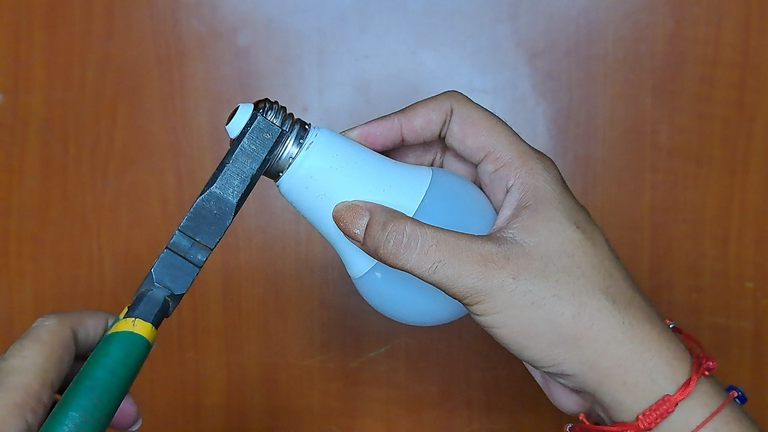
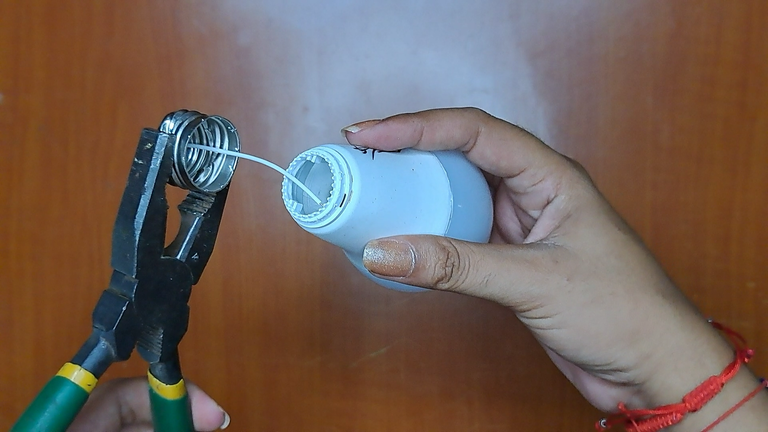
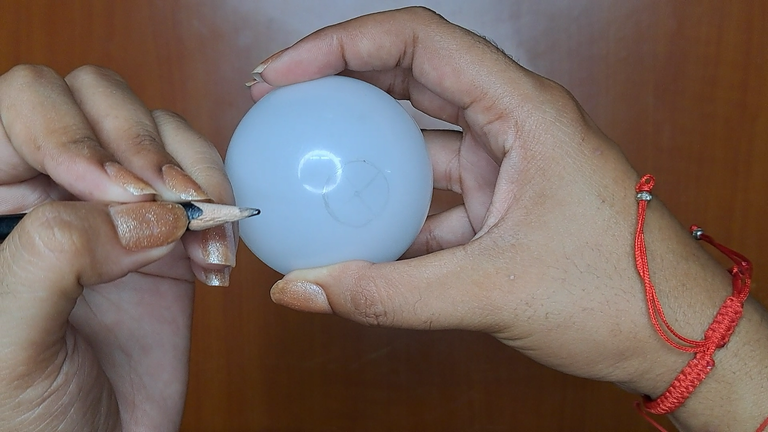
The first thing to do is to take a bulb that is no longer useful and with a pair of pliers remove the top metal part. With a pencil mark a circle in the center and remove that part. I used a soldering iron because it was easier.
Lo primero que debes hacer es tomar un bombillo que ya no sirva y con un alicate eliminar la parte superior metálica. Con un lápiz marcas un círculo en el centro y eliminas esa parte. Yo utilicé un cautín porque se me hizo más fácil.
 |
 |
 |
 |
 |
 |
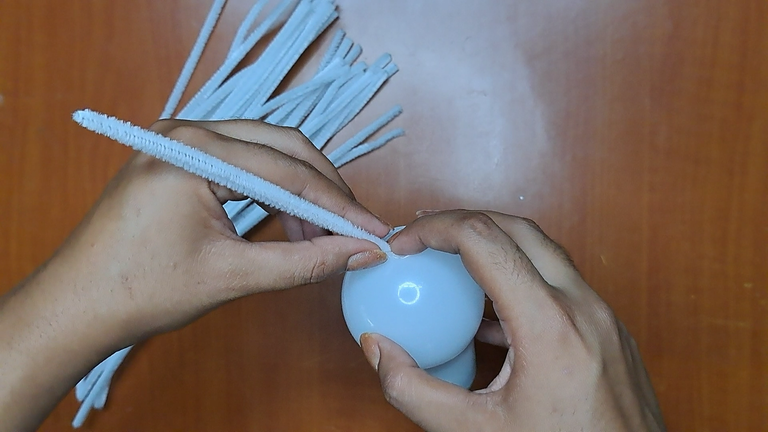
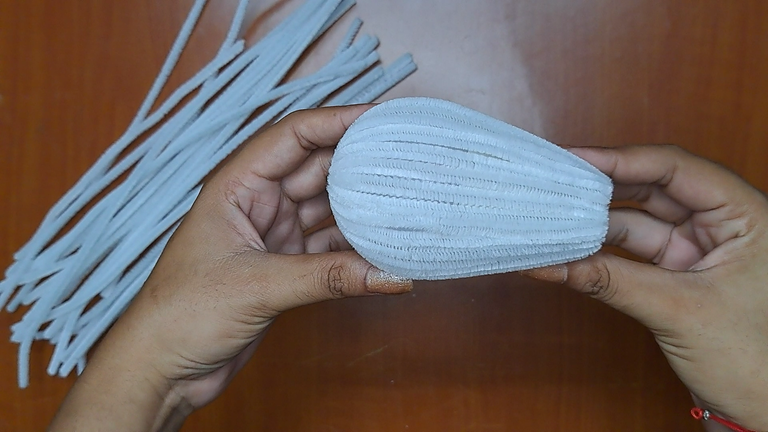
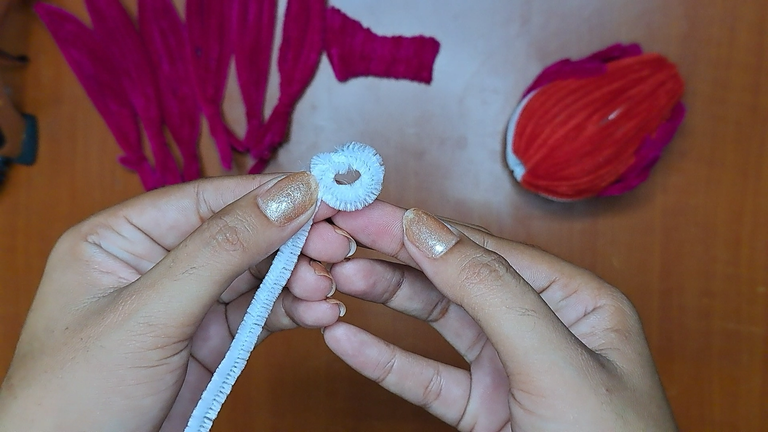
Take a white pipe cleaner and fold it in half and insert the two ends into the hole at each end. Repeat the process until half of the bulb is covered. With red pipe cleaners you complete the other half until you cover it completely. For this I used 9 white and 9 red ones.
Tomas un limpiapipa blanco y lo doblas por la mitad e introduces las dos puntas en el orificio de cada extremo. Repites el proceso hasta cubrir la mitad del bombillo. Con limpiapipas rojo completas la otra mitad hasta que lo cubras totalmente. Para ello utilicé 9 blancos y 9 rojos.
 |
 |
 |
 |
 |
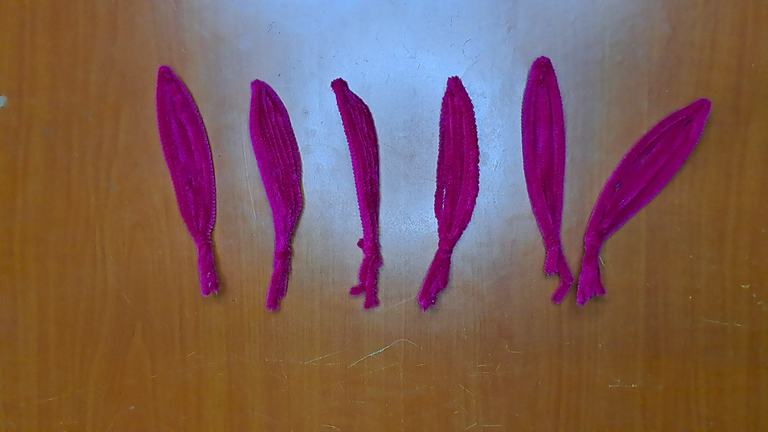 |
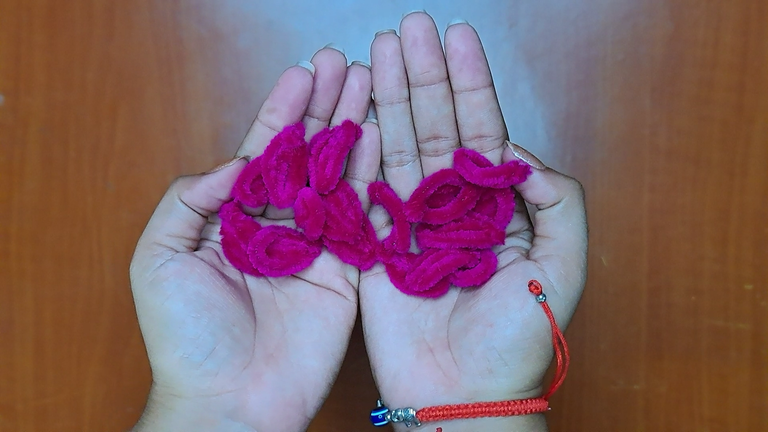
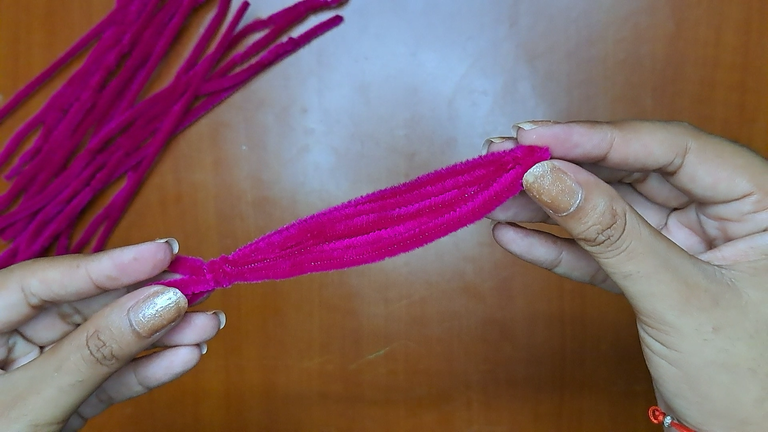
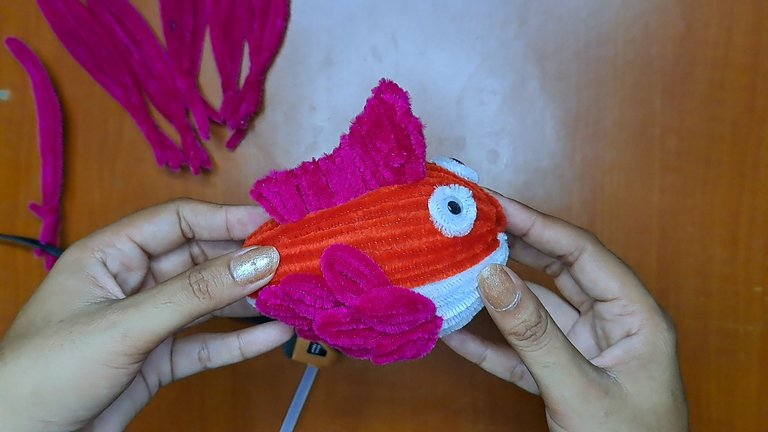
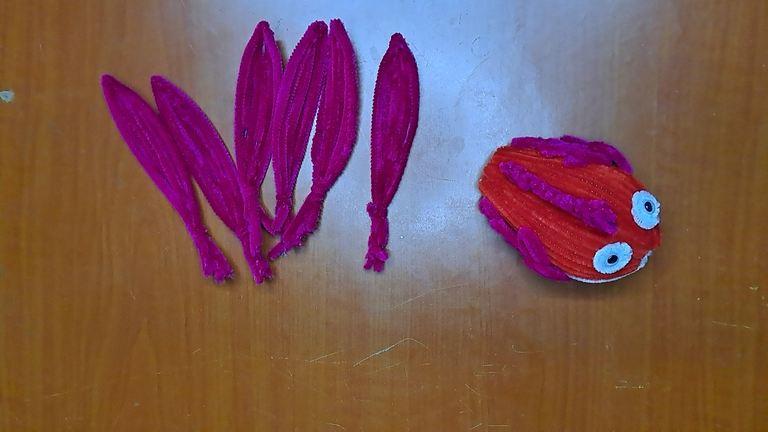
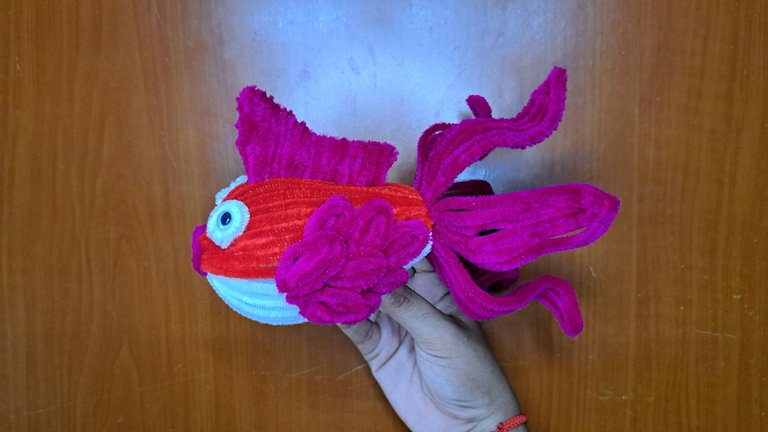
With pink pipe cleaners I made the scales for the sides and the tail. For the scales I used 8 pipe cleaners to obtain 16 because they are cut in half. For the tail, they are divided in threes, so I used 18 pipe cleaners (see the video for the elaboration process).
Con limpiapipas rosados elaboré las escamas de los laterales y la cola. Para las escamas utilicé 8 limpiapipas para obtener 16 porque se pican por la mitad. Para la cola se dividen de tres en tres, por lo tanto, utilicé 18 limpiapipas. (ver el video para el proceso de elaboración)
 |
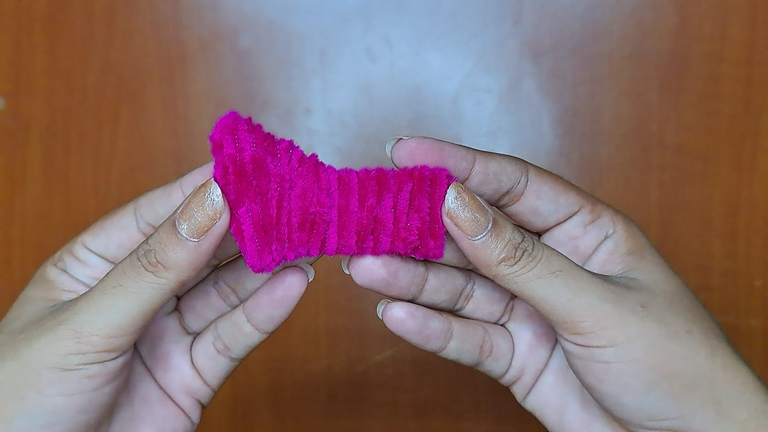 |
For the upper crest use 4 pipe cleaners, one to make the silhouette and the rest to line it.
Para la cresta superior utilice 4 limpiapipas, uno para hacer la silueta y el resto para forrarlo.
 |
 |
 |
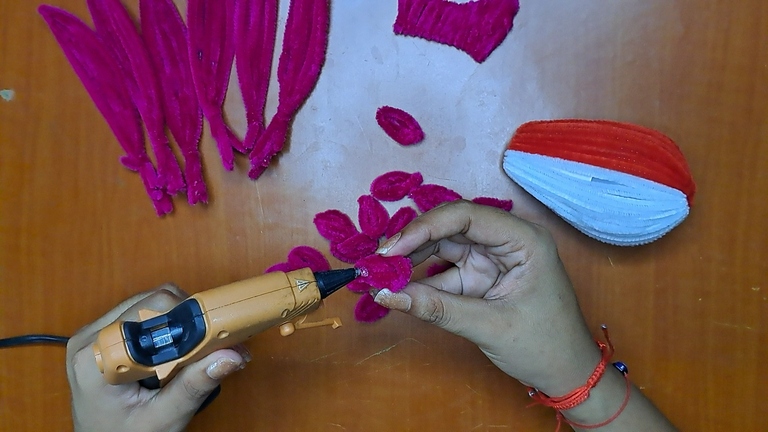
Glue the scales starting from the back to increase the quantity in each row, i.e. place one, then two, then three and finally two.
Pegar las escamas comenzando desde la parte trasera para ir aumentando la cantidades en cada fila, o sea se coloca uno, luego dos, tres y finalmente dos.
 |
 |
 |
 |
 |
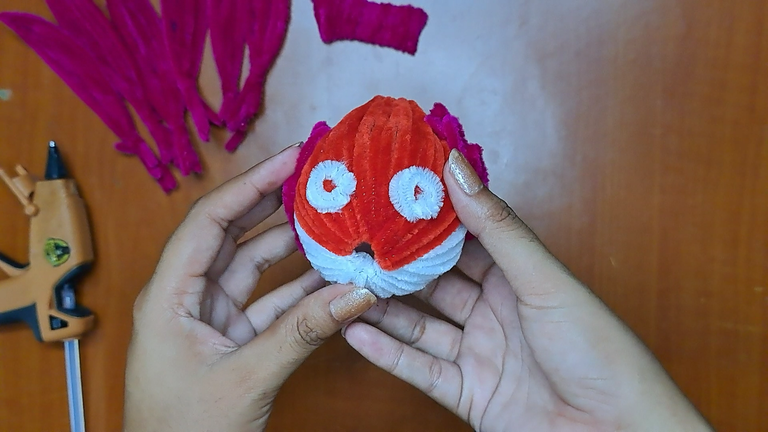
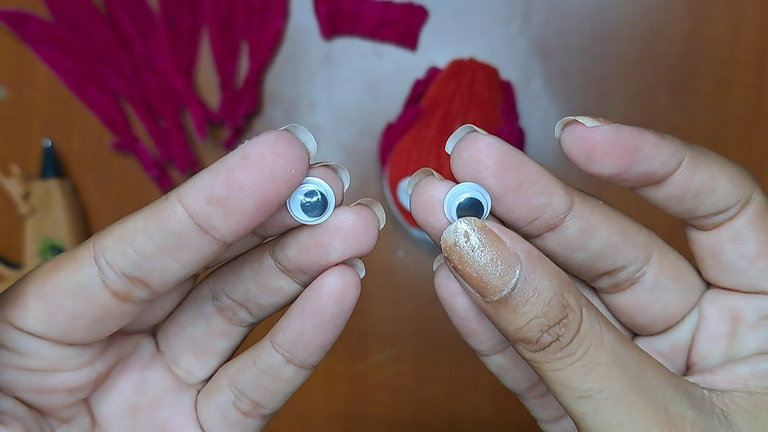
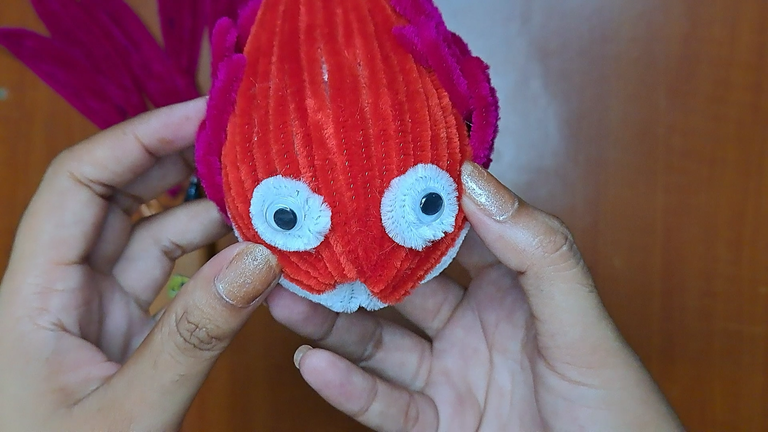
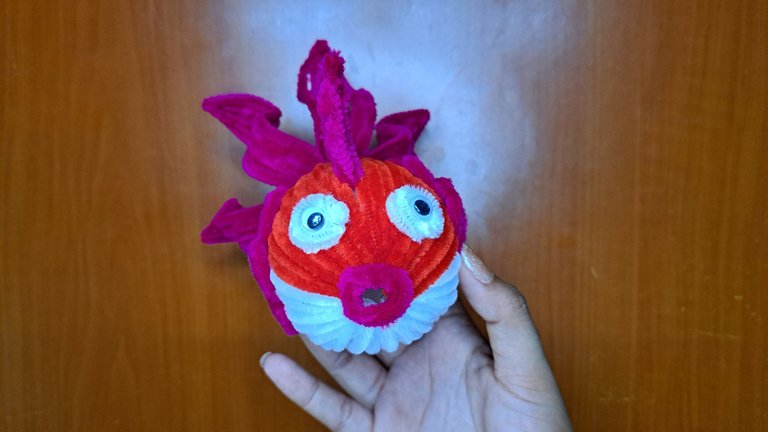
For the eyes, a pipe cleaner is rolled on the finger, cut and glued in place and in the center I placed crazy eyes .
Para los ojos se enrolla un limpiapipas en el dedo, se corta y se pega en su lugar y en el centro coloqué ojos locos .
 |
 |
 |
 |
 |
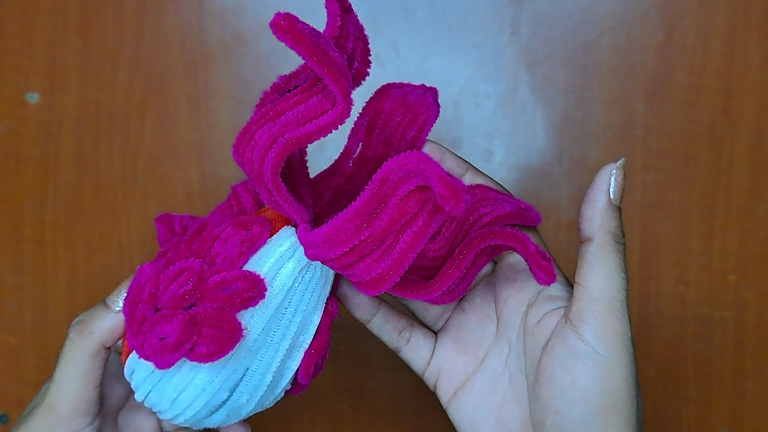 |
Each part of the tail is introduced into the rear hole until this shape is obtained, it is not necessary to glue them because they are well adjusted. For the mouth, the same procedure is done as for the eyes and finally, the tail is given a wavy shape, it is very easy, because this material lends itself to obtain the shape we want.
Cada parte de la cola se va introduciendo en el orificio trasero hasta obtener esta forma, no es necesario pegarlas porque quedan bien ajustadas. Para la boca se realiza el mismo procedimiento de los ojos y por último, se le da la forma ondulada a la cola, es muy fácil, porque este material se presta para obtener la forma que queramos.
 |
 |
 |
 |
And so is finished this beautiful fish made with pipe cleaners. It would be a beautiful gift for the little ones or an ornament for our home. I repeat, you can also turn it into a night lamp, the decision is yours. Leave me in the comments what you thought and new suggestions, best regards.
Y así esta terminado este hermoso pez elaborado con limpiapipas. Sería un hermoso regalo para los pequeños o un adorno más para nuestro hogar. Les repito, también pueden convertirlo en una lámpara de noche, la decisión es suya. Déjame en los comentarios que te pareció y nuevas sugerencias, un saludo.
Cover made in Canva
English is not my native language, translated by DeepL
Edited in Movavi Editor
Music by u_oyayh5ybip from Pixabay
▶️ 3Speak