¡Bienvenidos amigos creativos!👩🎨
🙋♀️ ¡Hola gente bonita y creativa! Espero que se encuentren súper bien y hayan tenido días llenos de gratos momentos. Por este lado de la pantalla todo bien gracias a Dios feliz de estar una vez más aquí, en esta oportunidad mostrándoles el paso a paso de cómo crear una tarjeta que actualmente se encuentra en tendencia lo mejor es que viene con dulce incluido amo las tarjetas que vienen con este detalle, pero sin tantos preámbulos…
Welcome creative friends!👩🎨
🙋♀️Hello beautiful and creative people! I hope you are doing great and have had days full of pleasant moments. On this side of the screen all good thank God happy to be here once again, this time showing you the step by step on how to create a card that is currently trending the best thing is that it comes with candy included I love the cards that come with this detail, but without so much ado ....
¡Llegó la hora de crear! / It's time to create!👩🎨
|
|---|
¿Cuál es el proceso?/ What is the process?⬇️
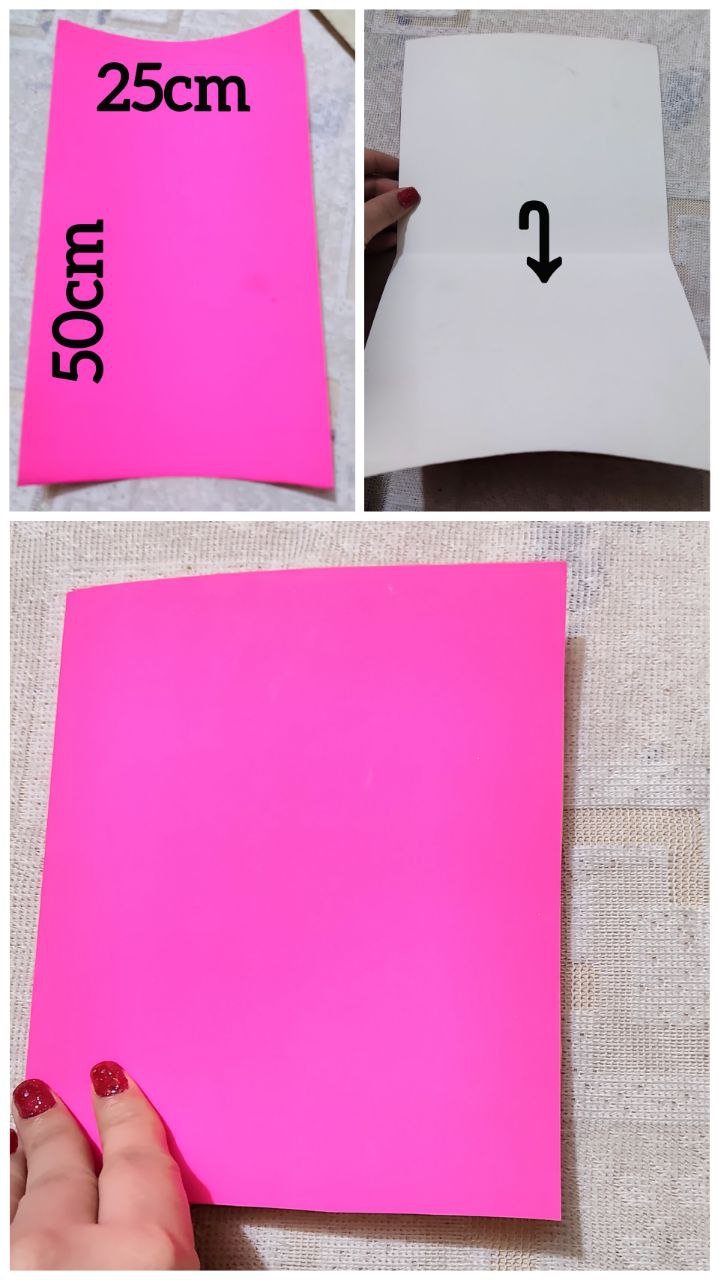
🍫 Paso 1 / Step1
En una cartulina color rosado y blanco por el otro lado realice medidas de 25cm de ancho por 50cm de largo luego doble a la mitad quedando para abrir y cerrar de un lado a otro.
In a pink and white cardboard on the other side make measures of 25cm wide by 50cm long then fold in half remaining to open and close from one side to the other.
🍫 Paso 2 / Step 2
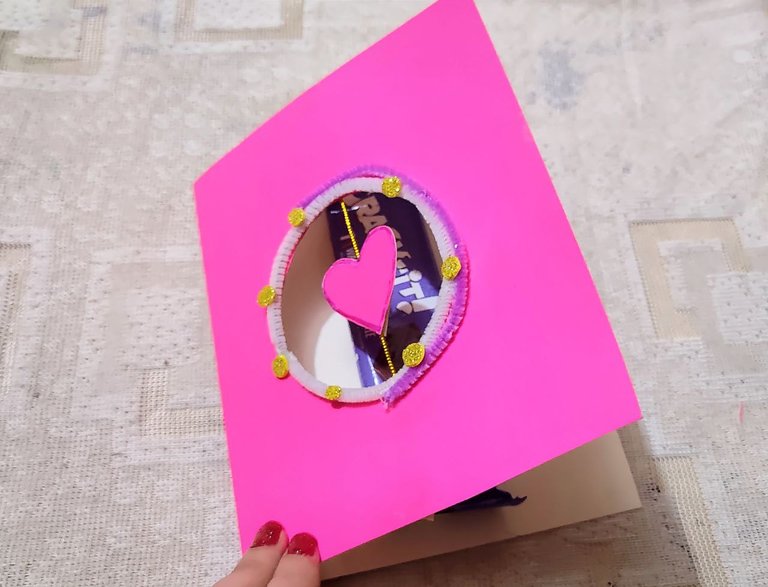
En la tapa del lado izquierdo realice un círculo del tamaño de una cinta, luego con mucho cuidado recorte tratando de quedar lo más derecho posible hay herramientas para que esto quede perfecto pero aún no cuento con ellas luego de recortar el círculo por la parte de adentro y en forma lineal pegue una cinta fina de extremo a extremo y en el medio de la misma agregué un corazón en ambos lados que al momento en que se vueltas se vea del mismo tono el color del corazón.
On the left side cover I made a circle the size of a ribbon, then very carefully cut out trying to be as straight as possible there are tools to make this perfect but I still do not have them after cutting the circle on the inside and linearly glue a thin ribbon from end to end and in the middle of it I added a heart on both sides that at the time that turns the same color as the color of the heart is seen in the same tone.

🍫 Paso 3 / Step 3
Seguidamente para decorar el círculo por la parte de afuera de la tarjeta en todo alrededor agregué limpiapipas blanco y morado por un borde. Con foami dorado agregué pequeños círculos para resaltar un poco más.
Next, to decorate the circle on the outside of the card, I added white and purple pipe cleaners all around one edge. With gold foami I added small circles to highlight a little more.
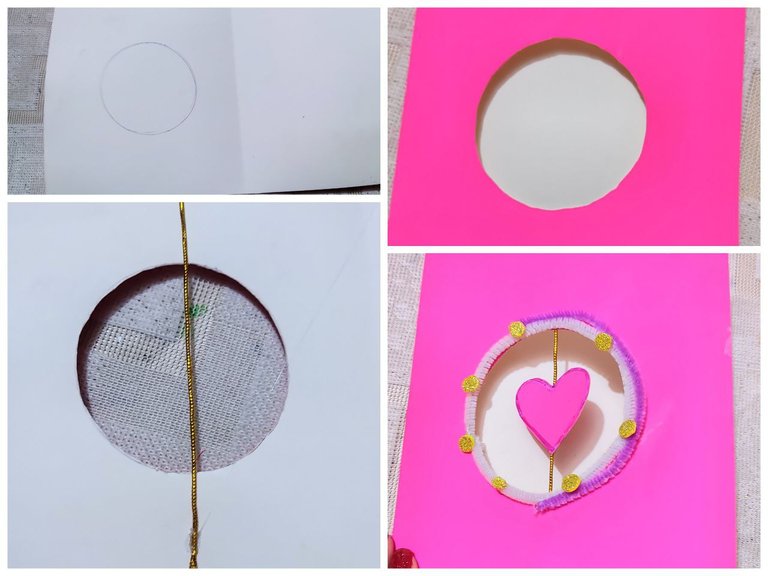
🍫 Paso 4 / Step 4
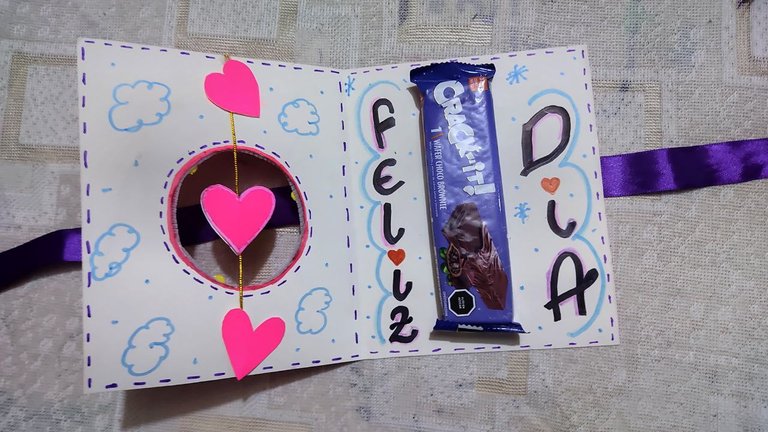
En la parte interior de la tarjeta en la primera tapa que es donde está el círculo y la cinta agregué del mismo color dos corazones y con ello tapar el silicón con el cual pegue la cinta. En la otra tapa pegue el dulce en el centro de la misma.
On the inside of the card, on the first cover where the circle and the ribbon are, I added two hearts of the same color to cover the silicone with which I glued the ribbon. In the other lid I glued the candy in the center of it.
🍫 Paso 5 / Step 5
Seguidamente con marcador morado agregué líneas alrededor de todo el borde incluyendo la del círculo.
Then with a purple marker I added lines around the entire border including the circle.
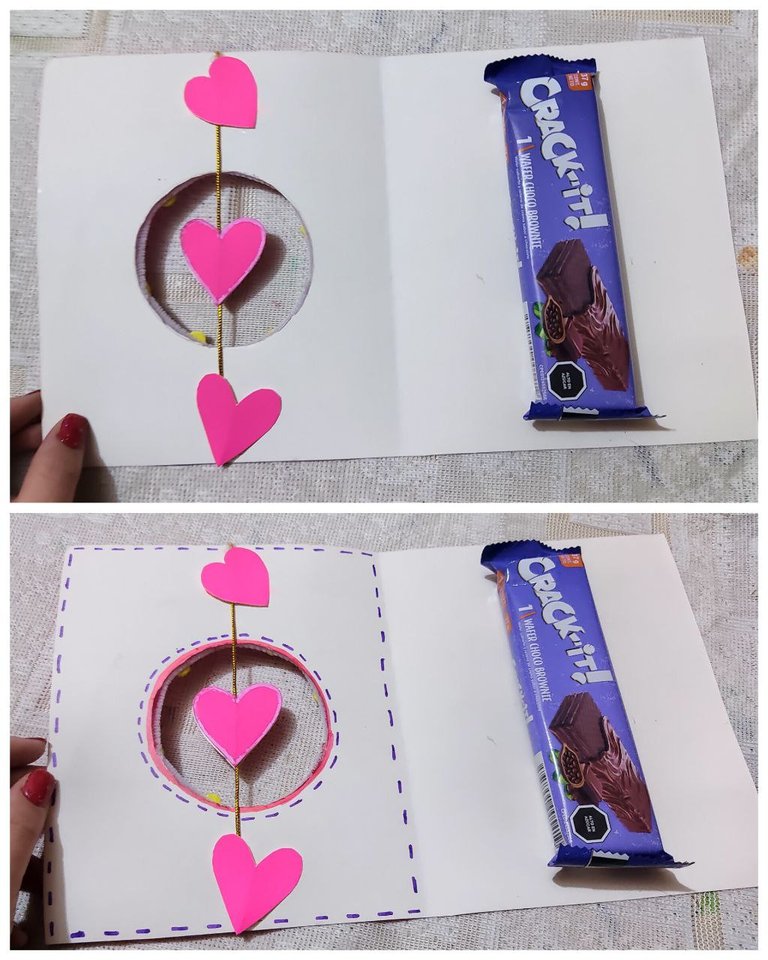
🍫 Paso 6 / Step 6
Con marcador negro y u tipo de letra bonita escribí la palabra “Feliz” por un lado del chocolate en forma lineal de arriba a bajo y en el otro extremo la palabra “Día”.
With a black marker and a nice font I wrote the word “Happy” on one side of the chocolate in a linear fashion from top to bottom and on the other side the word “Day”.
🍫 Paso 7 / Step 7
Con marcador azul claro realice algunos bordes en las letras y como relleno de los espacios en blancos algunas nubes y puntos.
With light blue marker make some borders on the letters and as fill in the blanks some clouds and dots.
🍫 Paso 8 / Step 8
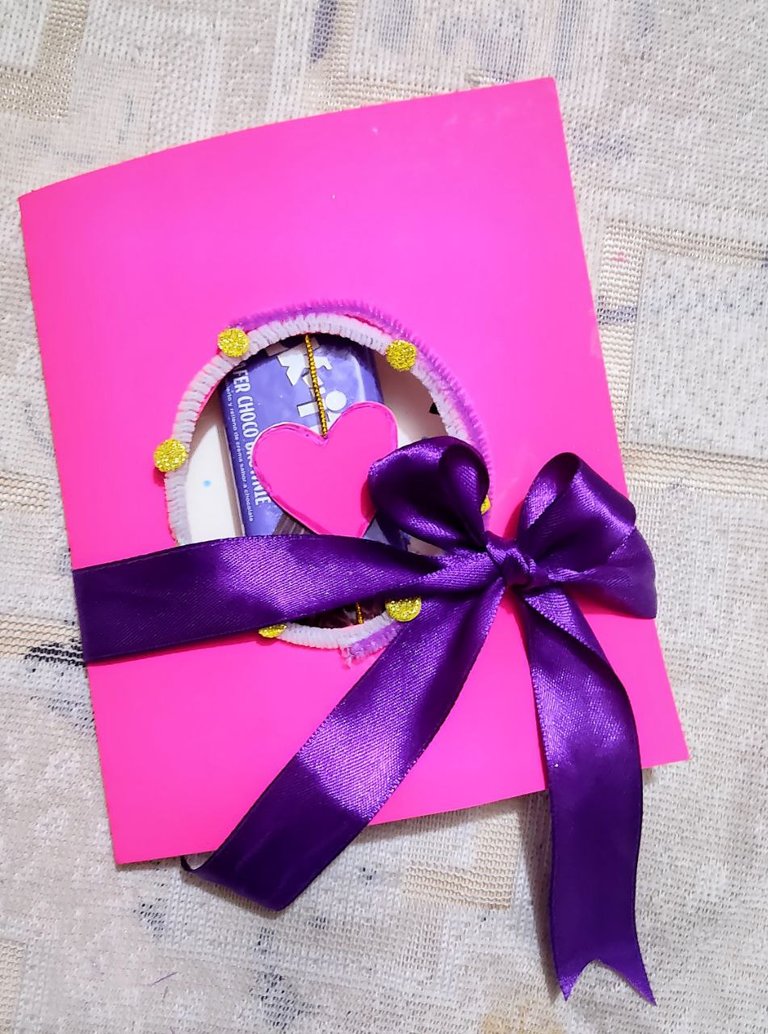
Por último, como la tarjeta adiciona un dulce se abrirá con facilidad y para evitar eso agregué un lazo muy fácil de quitar solo con el fin de evitar que la tarjeta se abriera sola.
Finally, as the card adds a candy it will open easily and to avoid that I added a loop that is very easy to remove just to prevent the card from opening by itself.

Creación finalizada / Creation completed⬇️
¡Y de esta forma tuve una linda tarjeta con dulce!💜✨.
La combinación de colores fue mi favorita y sin pensarlo surgió de la nada es que fue solo coincidencia de que esté dulce fuera morado resaltando perfecto en la tarjeta. Y como siempre les digo estos son detalles que para mí nunca pasan de moda y menos con este tipo de tarjetas en tendencia. Se le puede adaptar el mensaje y los colores que más te gusten, gracias por llegar hasta acá. Espero que lo hayas disfrutado tanto como yo.
And this way I had a nice card with candy!💜✨.
The color combination was my favorite and without thinking it came out of nowhere, it was just a coincidence that this candy was purple and it stood out perfectly on the card. And as I always say these are details that for me never go out of style and even less with this type of cards in trend. You can adapt the message and the colors you like, thanks for coming here. I hope you enjoyed it as much as I did.
See you in a new creation👩🎨
Mil gracias por leerme una vez
Nos vemos en una próxima publicación.
Muchas bendiciones y abrazos digitales🤗
Thank you very much for reading me once
See you in an upcoming post.
Many blessings and digital hugs🤗
👩🏼💻 Edición: Inshot y Canva / Edition: Inshot and Canva
✨ Traducción: DeepL.com / Translation: DeepL.com