
¡Bienvenidos amigos creativos!👩🎨
🙋♀️ ¡Hola gente bonita y creativa! Espero que se encuentren súper bien y hayan tenido días llenos de gratos momentos. Por este lado de la pantalla todo bien gracias a Dios feliz de estar una vez más aquí, en esta oportunidad mostrándoles el paso a paso de cómo crear un Caballete o como coloquialmente yo lo llamo “tablero de pintura para los niños”, y así evitar esas lindas decoraciones que nuestros pequeños hacen en las mesas al momento de pintar.
Esta idea principalmente surge puesto que mi sobrino ama pintar y luego de llevarlo a un parque con el cual cuenta con caballetes elaborados de madera y de los cuales mi sobrino quedó encantado, yo quise recrear uno con material reciclado, pero sin tantos preámbulos…
Welcome creative friends!👩🎨
🙋♀️Hello beautiful and creative people! I hope you are feeling great and have had days full of pleasant moments. On this side of the screen all well thank God happy to be here once again, this time showing you the step by step on how to create an easel or as I colloquially call it “painting board for children”, and thus avoid those cute decorations that our little ones make on the tables when painting.
This idea arose mainly because my nephew loves to paint and after taking him to a park with wooden easels, which my nephew loved, I wanted to recreate one with recycled material, but without so many preambles...
¡Llegó la hora de crear! / It's time to create!👩🎨
Materiales/ Materials✍🏻 |
|---|
| 🎨 Cartón / Cardboard. |
| 🖌️ Cartulina (opcional) / Cardboard (optional). |
| 🎨 Tapas de refresco / Soda caps. |
| 🖌️ Cinta adhesiva transparente / Transparent adhesive tape. |
| 🎨 Tubo de cartón / Cardboard tube. |
| 🖌️ Foami liso / Smooth Foami. |
| 🎨 Silicón caliente / Hot Silicone. |
| 🖌️ Palito de altura / High stick. |
| 🎨 Gancho de madera / Wooden hook. |
¿Cuál es el proceso?/ What is the process?⬇️
🖌️ Paso 1 / Step1
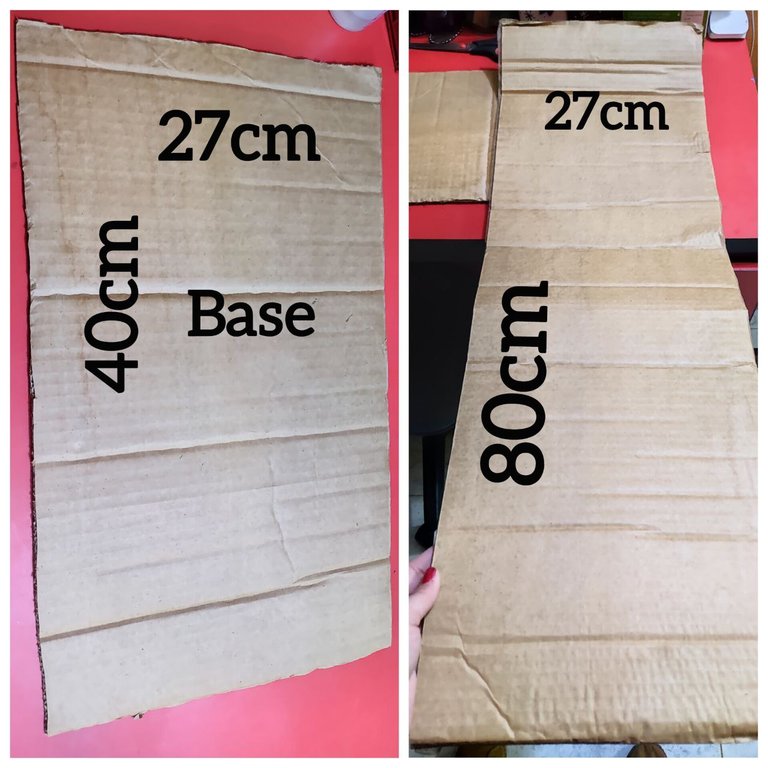
Lo primero es ubicar cartón suficiente para crear la base y la parte superior del caballete, estas medidas estarán establecidas de acuerdo al tamaño en que se desee el caballete, en mi caso no seria algo tan grande puesto que mi sobrino está pequeño, en mi caso la base fue de 27cm de ancho con un largo de 40cm, y para la parte superior del caballete o en donde irá apoyado el lienzo utilice un cartón de 27cm de ancho por 80cm de largo.
The first thing is to place enough cardboard to create the base and the top of the easel, these measures will be established according to the size you want the easel, in my case it would not be something so big because my nephew is small, in my case the base was 27cm wide with a length of 40cm, and for the top of the easel or where the canvas will be supported I used a cardboard 27cm wide by 80cm long.
🎨 Paso 2 / Step 2
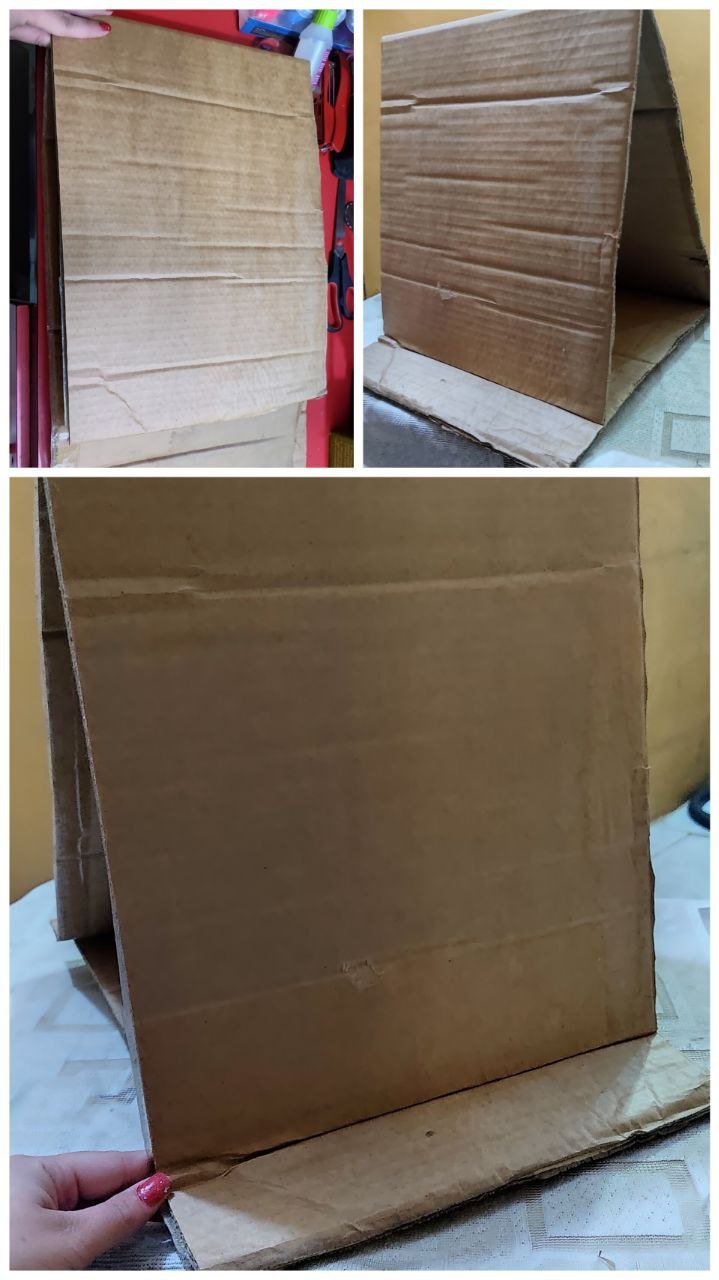
Para armar el caballete realice un dobles a la mitad del segundo cartón antes realizado, hice un dobles en ambas puntas y pegue sobre la base con silicón caliente para más resistencia.
To assemble the easel, I made a double in the middle of the second cardboard, made a double on both ends and glued it on the base with hot silicone for more resistance.
🖌️ Paso 3 / Step 3
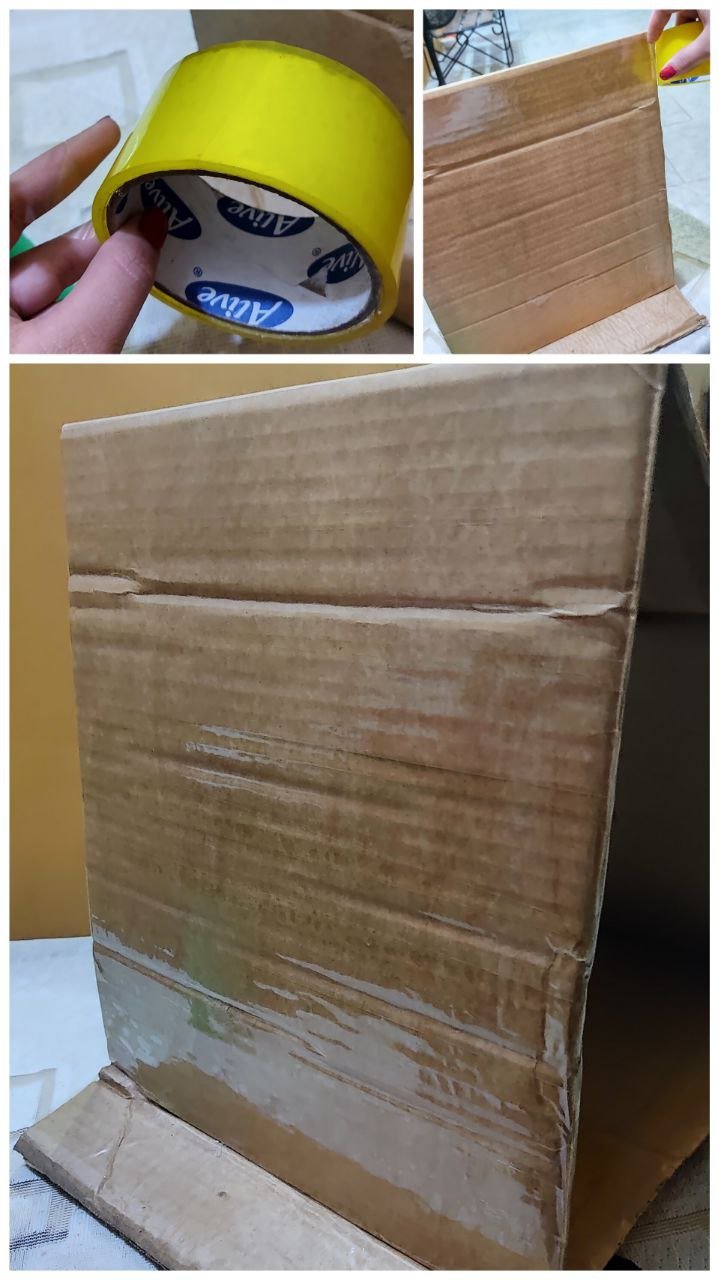
Para que el caballete sea más duradero y no se dañe con cada pintura realizada lo forre con cinta adhesiva transparente, puesto que con esto, con un pañito húmedo se podrá retirar la pintura sobrante fácilmente.
To make the easel more durable and to avoid damaging it with each painting, I lined it with transparent adhesive tape, since with this, a damp cloth can be used to easily remove the excess paint.
🎨 Paso 4 / Step 4
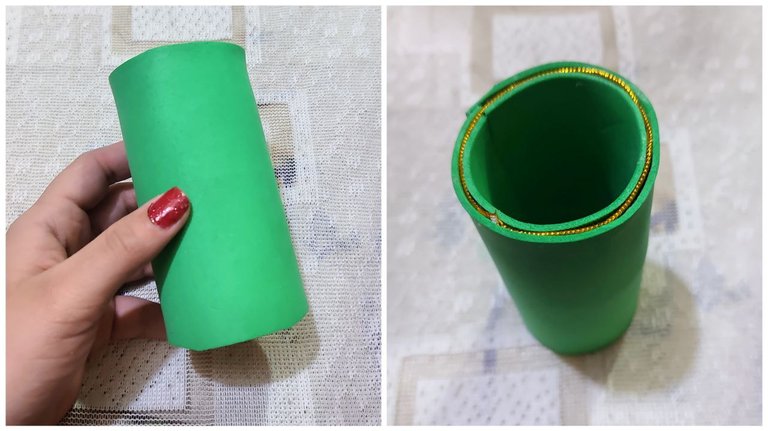
En un tubo de cartón lo forre con foami color verde por dentro y por fuera, y para cubrir el reborde pegue un hilo dorado.
In a cardboard tube I lined it with green foami inside and out, and to cover the rim I glued a golden thread.
🖌️ Paso 5 / Step 5
El tubo de cartón forrado lo pegue a un extremo del caballete, siendo este el porta pinceles.
I glued the lined cardboard tube to one end of the easel, this being the brush holder.

🎨 Paso 6 / Step 6
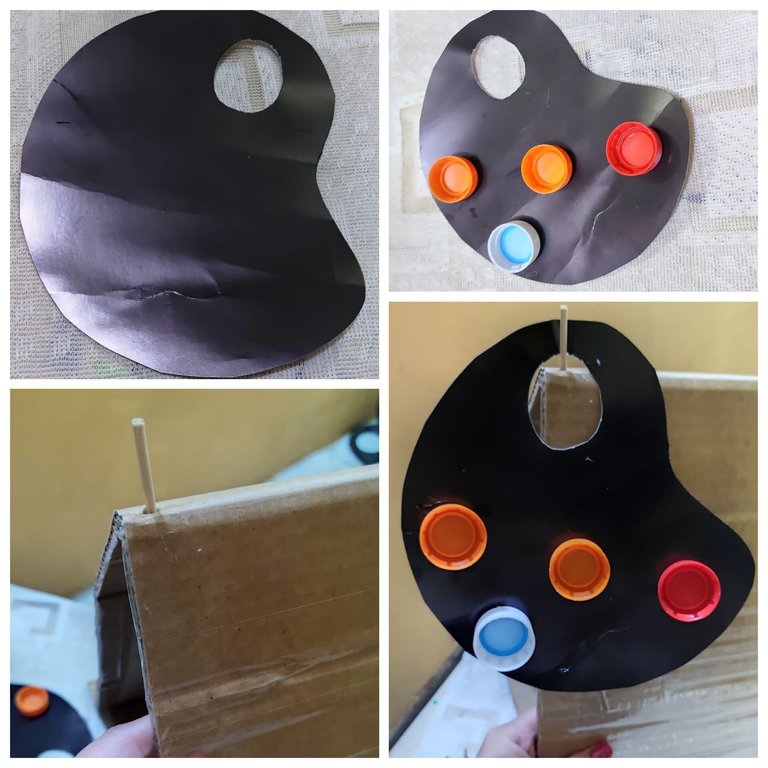
En una cartulina color negro resistente realice la paleta de colores, y como recipiente para agregar las pinturas al frío pegue tapas de refresco. La cartulina es opcional de igual forma se puede usar cartón para hacer está paleta.
On a sturdy black cardboard make the color palette, and as a container to add the cold paints, glue soda lids. The cardboard is optional, but you can also use cardboard to make this palette.

🖌️ Paso 7 / Step 7
Con un trozo de palito de altura lo inserte en la parte superior del caballete siendo este en donde se colgará la paleta de colores en el momento en que ya no sea usada.
With a piece of a tall stick insert it into the top of the easel where the color palette will be hung when it is no longer in use.
🎨 Paso 8 / Step 8
Por último, para sostener el lienzo o la hoja blanca en el cual se pintara está la presione con un gancho de madera para retirar y colocar fácilmente hojas nuevas al momento en que terminen de pintar.
Finally, to hold the canvas or the white sheet on which you will paint, there is the press with a wooden hook to easily remove and place new sheets when you finish painting.
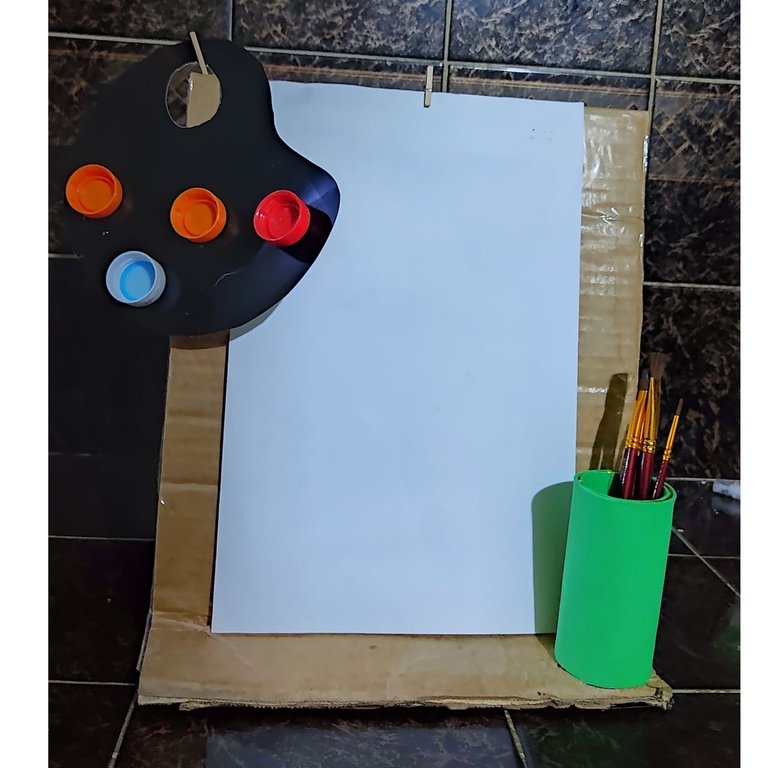
Creación finalizada / Creation completed⬇️
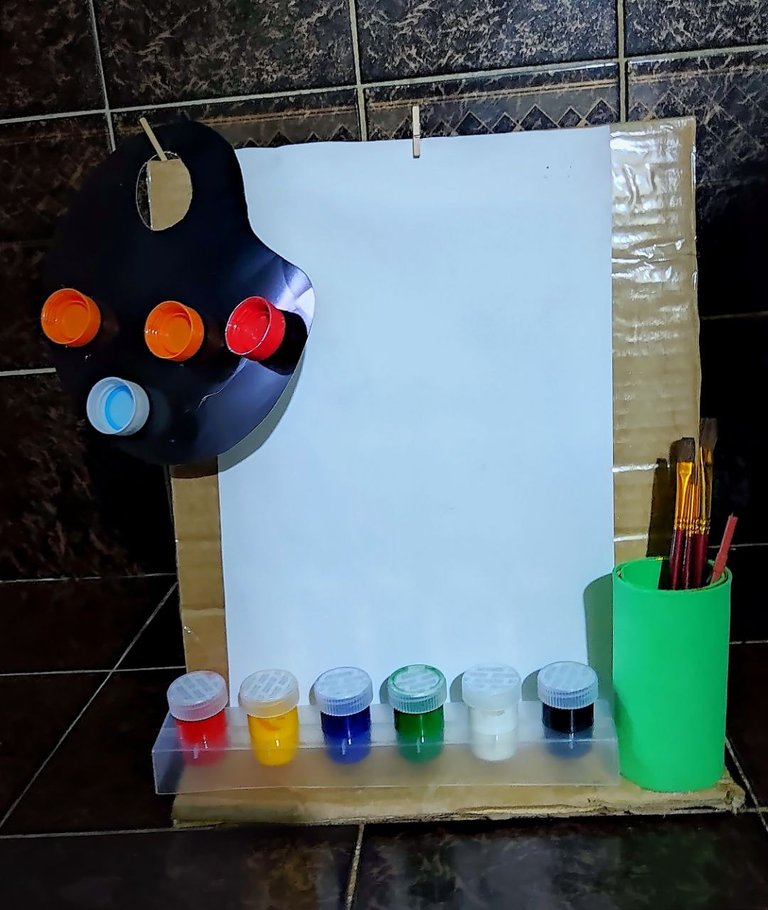
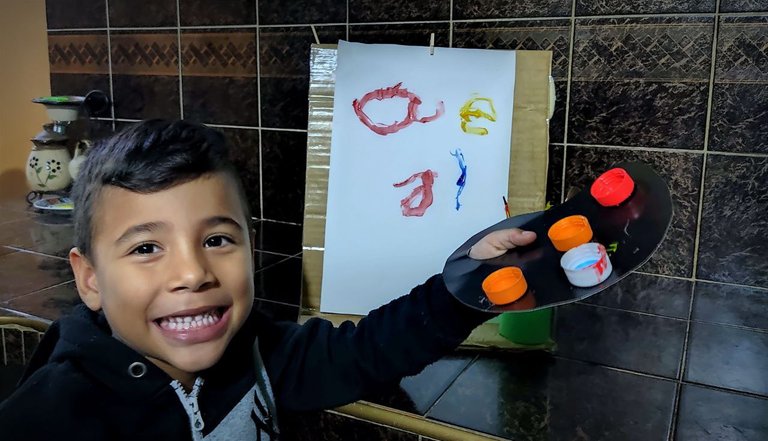
¡Y de esta forma se obtiene un caballete realizado con material reciclado!
👩🎨✨.
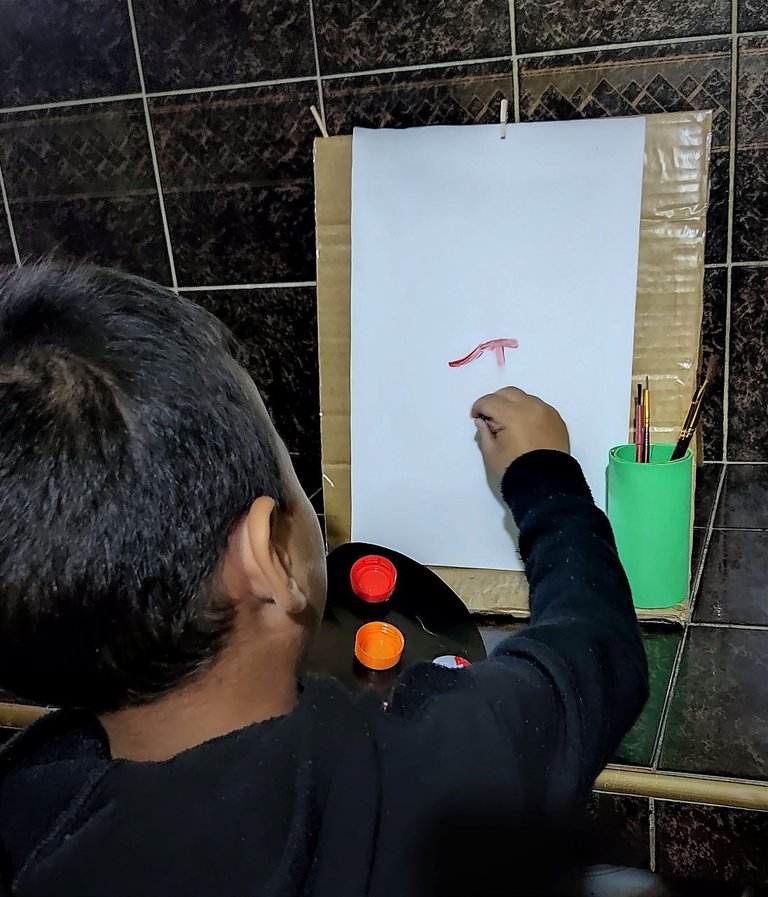
Mi sobrino lo amo y no dude que a tu pequeño también le gustará. Es un proceso fácil de hacer y con materiales fáciles de conseguir. Siendo una gran idea para olvidarnos de esas pintadas regadas en la mesa, solo es cuestión de seleccionar una ropa exclusiva para cuando sea el momento de pintar.
Nos vemos en una nueva creación👩🎨
And this is how you get an easel made from recycled material!👩🎨✨.
My nephew loved it and no doubt your little one will love it too. It's an easy process to do and with easy to find materials. It's a great idea to forget about those graffiti all over the table, it's just a matter of selecting a unique outfit for when it's time to paint.
See you in a new creation👩🎨


Mil gracias por leerme una vez
Nos vemos en una próxima publicación.
Muchas bendiciones y abrazos digitales🤗
Thank you very much for reading me once
See you in an upcoming post.
Many blessings and digital hugs🤗
📷 Fotografía: De mi propiedad / Photography: From my property
👩🏼💻 Edición: Inshot y Canva / Edition: Inshot and Canva
✨ Traducción: DeepL.com / Translation: DeepL.com
