🙋♀️
¡Hola gente bonita!🎨✨. Espero que se encuentren súper bien y hayan tenido bonitos días.
En esta oportunidad te muestro el paso a paso de cómo elabore
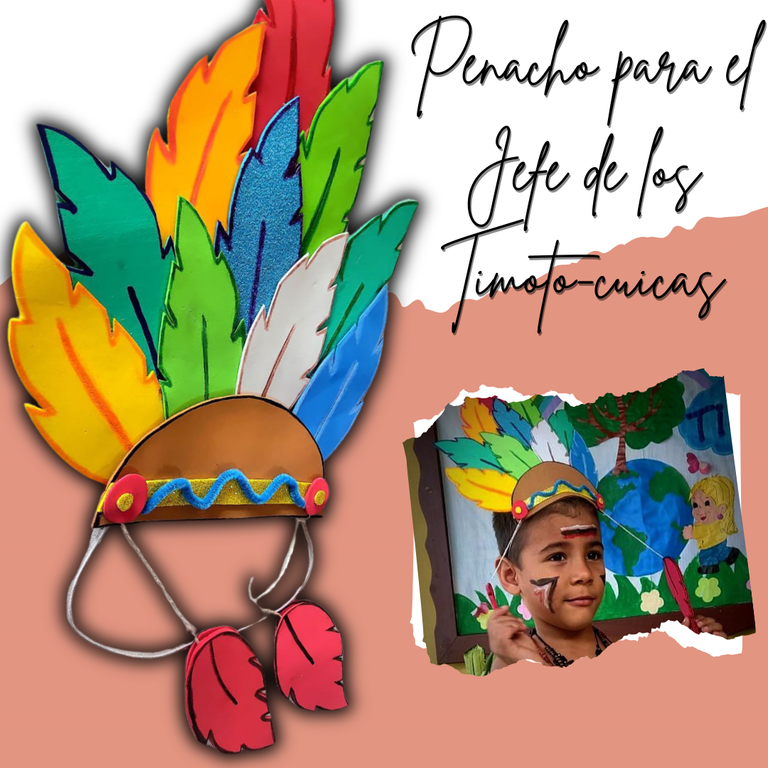
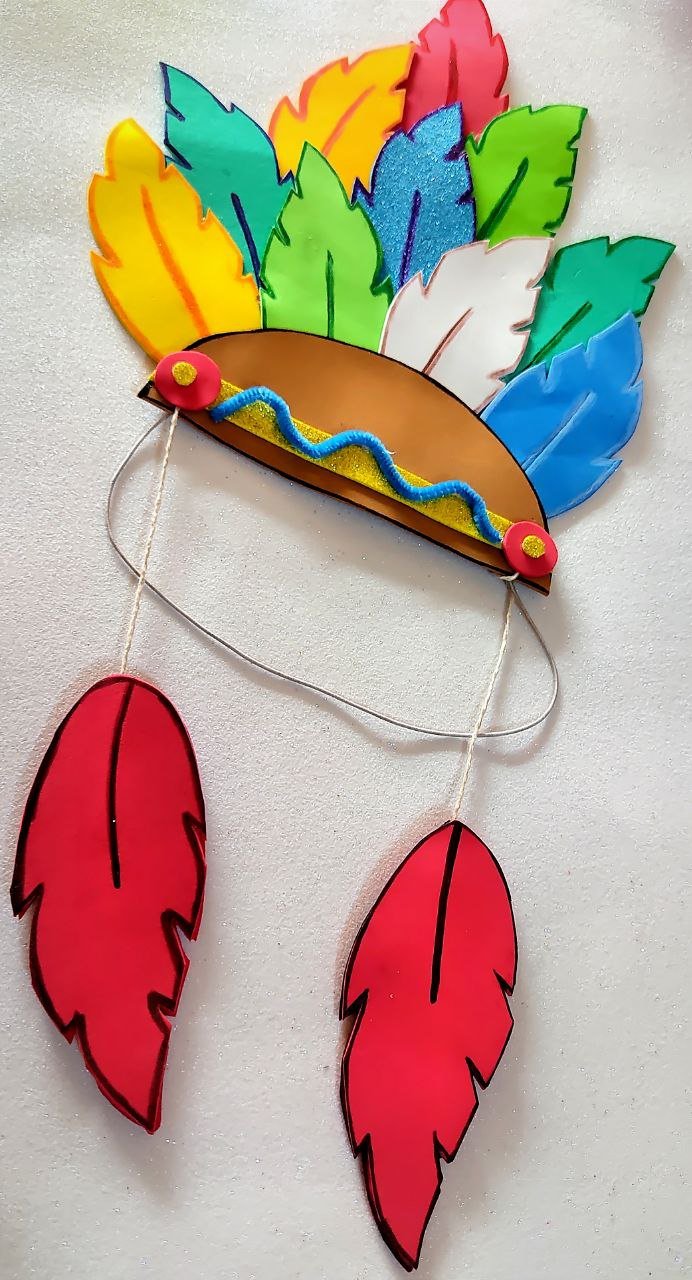
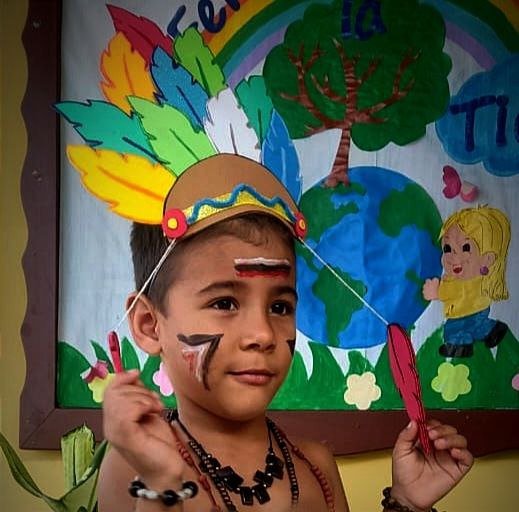
un Penacho... Pero para ponerlos en contexto antes de iniciar el paso a paso, esto surgió puesto que mi sobrino hace algunos días tuvo una actividad referente a los recorridos por los pueblos indígenas, siendo mi sobrino el jefe de los Timoto-cuicas, llamado 10 Plumas. Su abuela estuvo encargada del vestuario pero para completar faltaba el penacho eso que va en la parte de la cabeza, y es allá donde entró yo a completar dicho vestuario, pero sin tanto preámbulos acá te cuento cómo fue posible…
Welcome, creative friends🎨💜
🙋♀️Hi beautiful people!🎨✨. I hope you are feeling super well and had nice days.
In this opportunity I will show you the step by step of how to make a Penacho... But to put you in context before starting the step by step, this arose because my nephew a few days ago had an activity related to the tours of the indigenous peoples, being my nephew the chief of the Timoto-cuicas, called 10 Plumas. His grandmother was in charge of the costume but to complete it was missing the plume that goes on the part of the head, and that's where I came in to complete the costume, but without so much ado here I tell you how it was possible...
🎨 Paso 1 / Step1
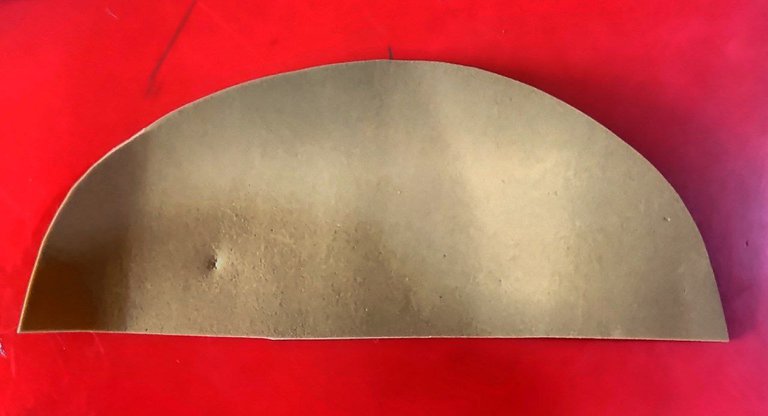
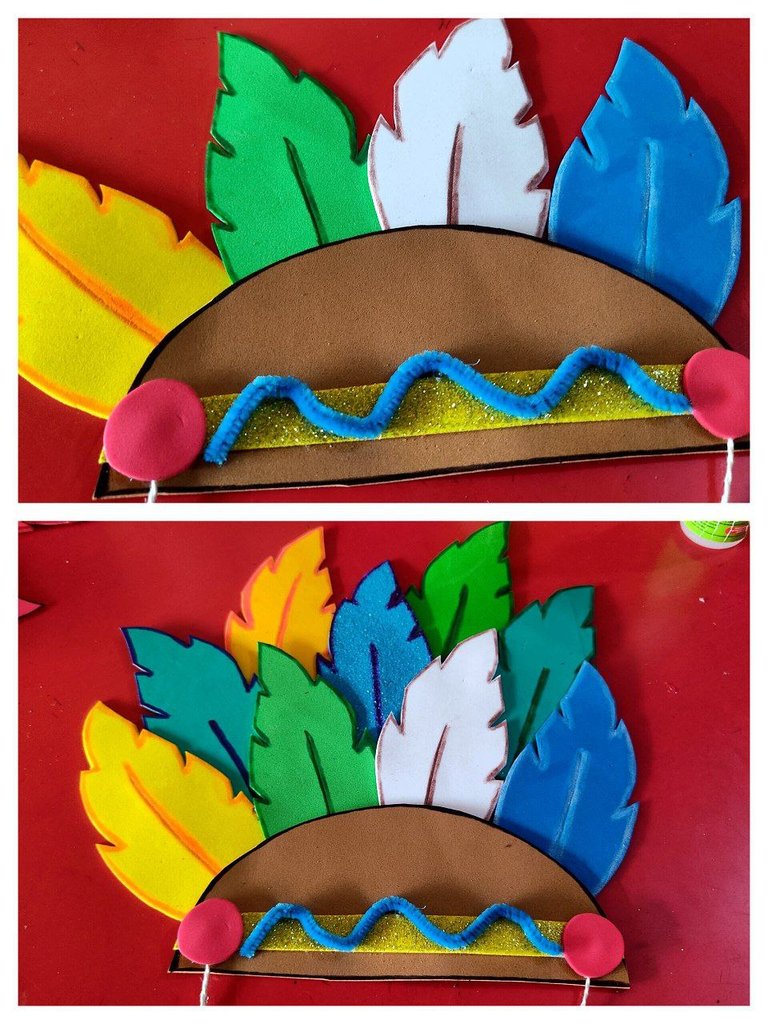
Lo primero que hice fue realizar un medio círculo a la medida de la cabeza de mi sobrino puesto que está parte es la base de las plumas, la cual esta ubicada en la frente. Su nombre exacto no lo sé, si tú lo sabes me lo podrías dejar en los comentarios…
The first thing I did was to make a half circle to the size of my nephew's head since this part is the base of the feathers, which is located on the forehead. I don't know its exact name, if you know it you could leave it in the comments....
🎨 Paso 2 / Step 2
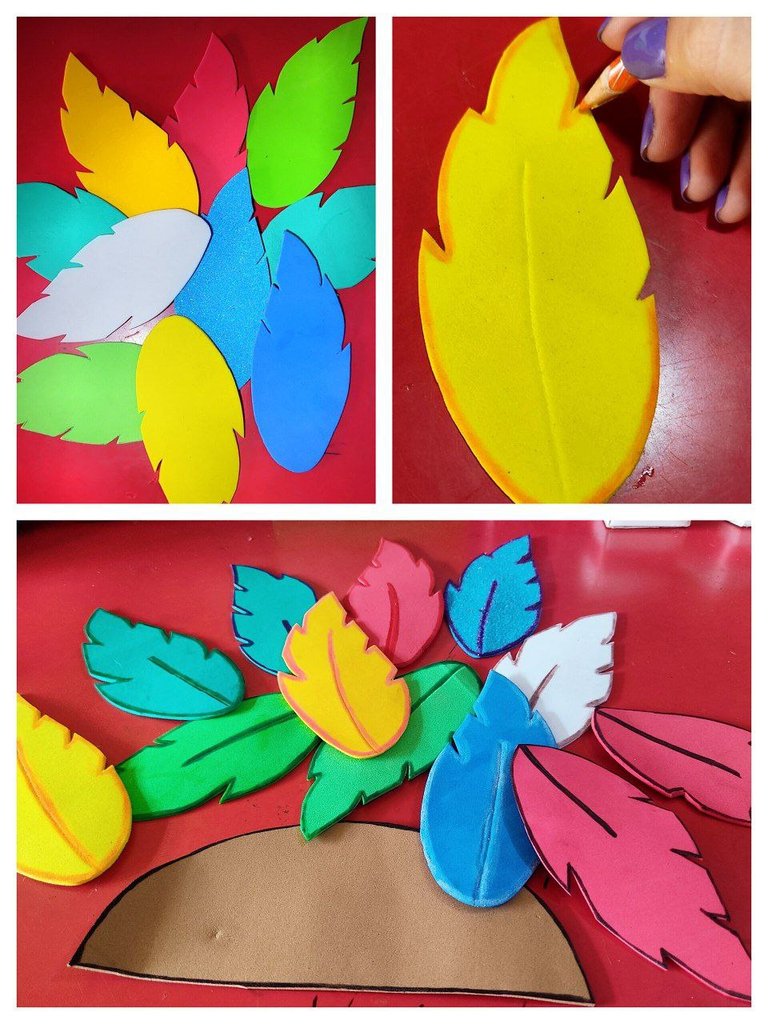
Realice exactamente 12 plumas, diez para la parte superior y dos que van colgando en los laterales. Mi hermana me comenta que debo hacer en la parte de arriba 10 plumas porque esto es lo que caracteriza al jefe de los Timoto-cuicas, luego de estar listo resulta que eran 10 plumas contando las dos colgantes, pero dicho diseño ya estaba listo y desarmarlo sería un desastre, por ende decidimos dejar así… Siguiendo con este paso luego de tener las plumas en foami de varios colores procedí a realizar delineados con colores y resaltar la parte del medio con una pequeña línea.
I made exactly 12 feathers, ten for the upper part and two hanging on the sides. My sister told me that I should make 10 feathers on the top because this is what characterizes the head of the Timoto-cuicas, after being ready it turns out that there were 10 feathers counting the two hanging ones, but this design was already ready and disassembling it would be a disaster, so we decided to leave it like this... Continuing with this step after having the feathers in foami of various colors I proceeded to make outlines with colors and highlight the middle part with a small line.
🎨 Paso 3 / Step 3
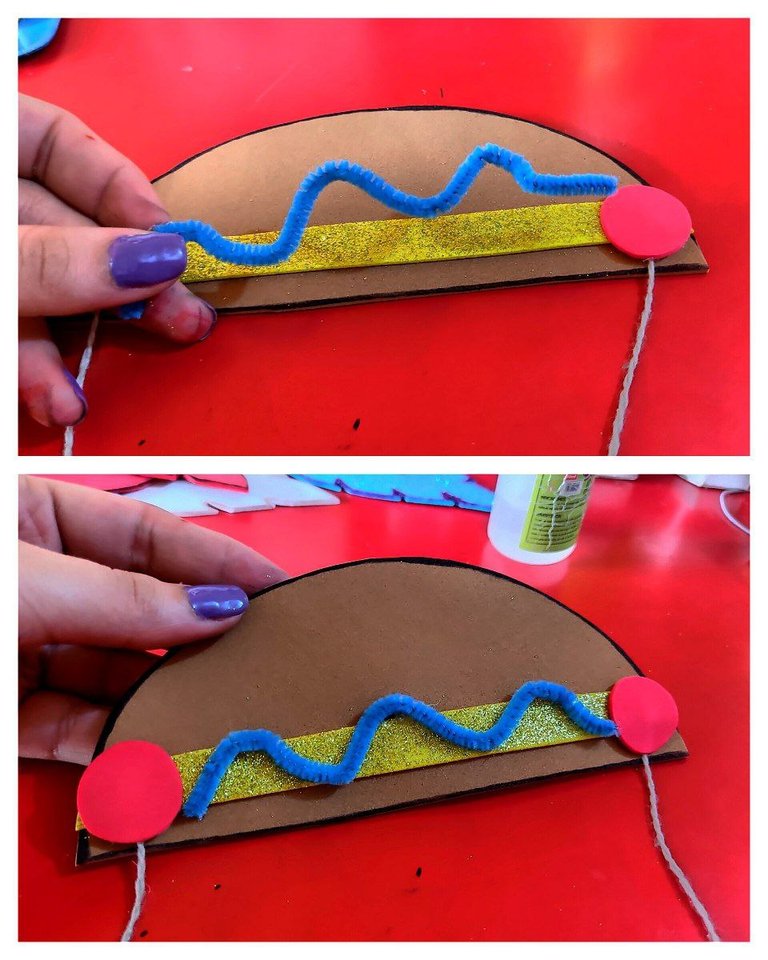
En la parte realizada en el paso número 1, recorte una franja en foami dorado, dos círculos en rojo pegándolos en ambos laterales para cubrir el hilo pábilo que pegue en esa parte. Adicional con un limpiapipas en forma curvada pegue de un círculo a otro.
In the part made in step 1, cut out a gold foami strip, two red circles gluing them on both sides to cover the pablum thread that I glued in that part. Additional with a pipe cleaner in a curved shape glue from one circle to the other.
🎨 Paso 4 / Step 4
Luego empecé a pegar las plumas en forma descendientes, es decir, de mayor a menor comenzando por cuatro hasta llegar a una sola.
Then I began to glue the feathers in descending order, that is, from the largest to the smallest, starting with four and ending with a single feather.
🎨 Paso 5 / Step 5
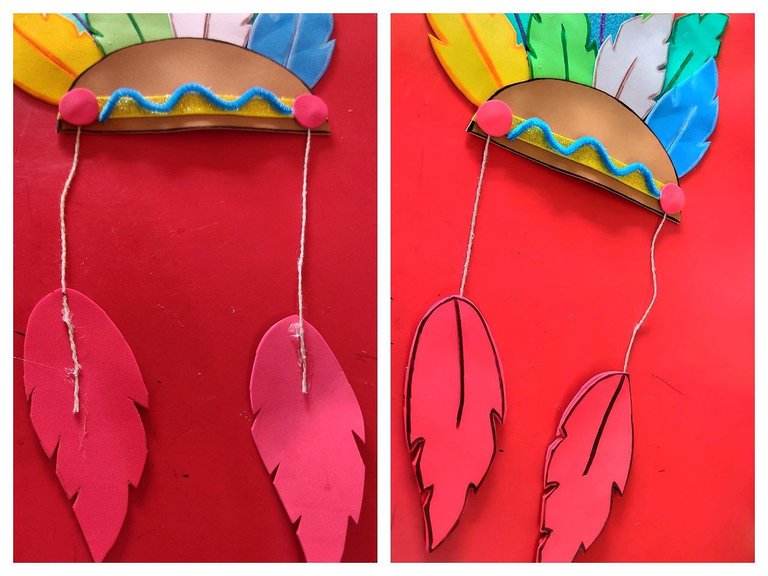
Para las plumas colgantes las pegué antes de culminar el hilo pábilo, y como este se moverá mucho pegue otras plumas en frente dejando el hilo pábilo en el centro y así tendría dos caras, puesto que al momento de moverse se vería en ambas direcciones.
For the hanging feathers I glued them before finishing the pábilo thread, and as this will move a lot I glued other feathers in front leaving the pábilo thread in the center and thus it would have two faces, since at the moment of moving it would be seen in both directions.
🎨 Paso 6 / Step 6
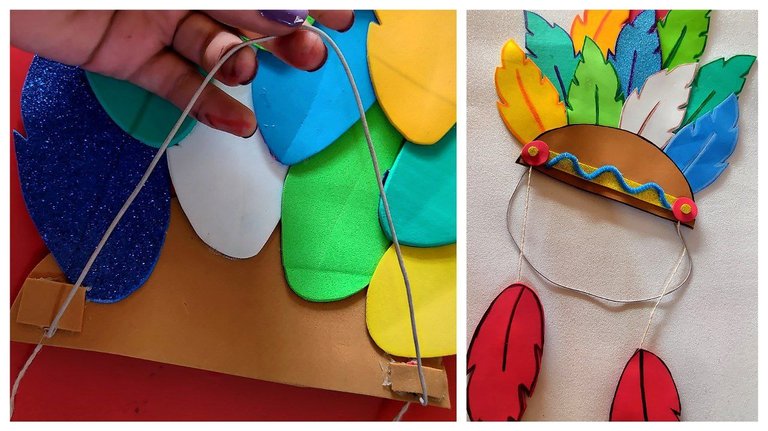
Como último detalle en la parte de atrás pegue un cordón elástico sostenido con un pedazo de foami para más resistencia siendo este la parte en la que se sostendrá el penacho con la cabeza de mi sobrino.
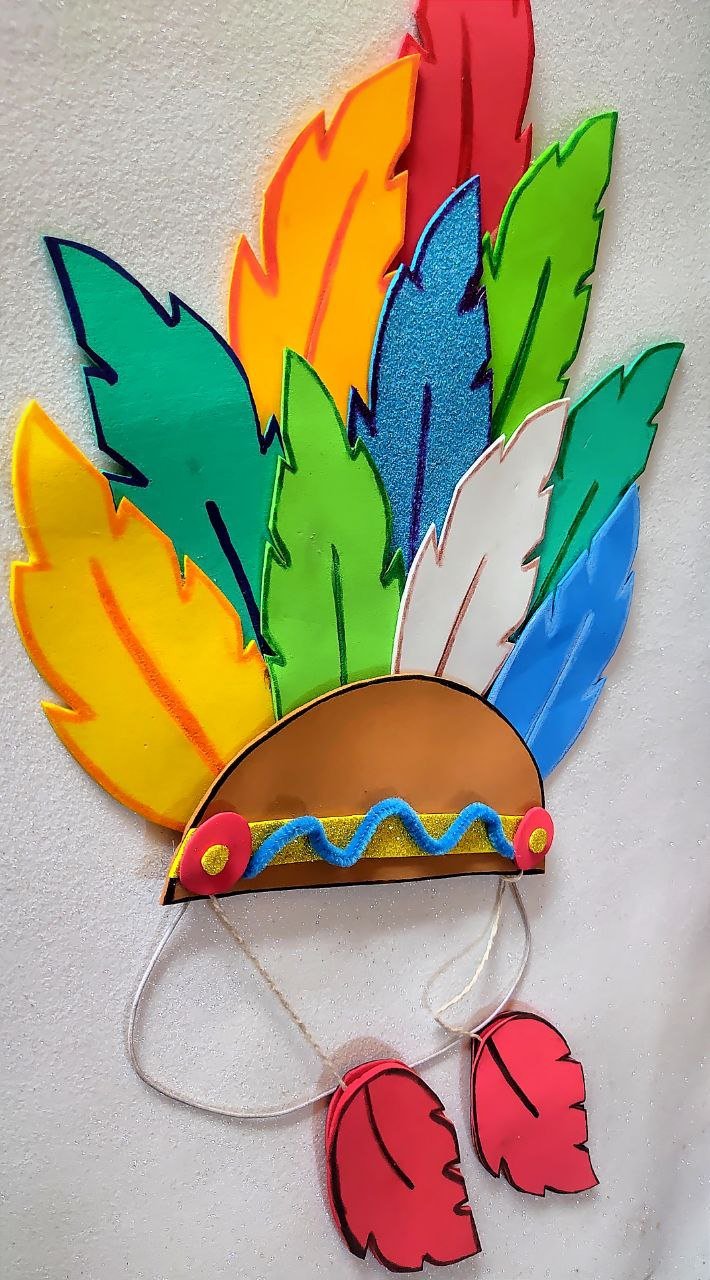
¡Y de esta forma realice un penacho hecho en foami!!✨👩🎨.
Totalmente un reto para mí, no sabía si esto quedaría bien, pero no sé los niego a medida que iba juntando las partes lo ame porque realmente completo el vestuario de mi sobrino y se veía tan hermoso. Fue un reto total pero cumplí con todas las expectativas solo tome el consejo que siempre les dio y acá se los recuerdo:
“Dejen volar su imaginación”
Nos vemos en una nueva creación👩🎨
And in this way I made a tuft made of foami!
✨👩🎨.
Totally a challenge for me, I didn't know if this would look good, but I don't deny it, as I was putting the parts together I loved it because it really completed my nephew's wardrobe and it looked so beautiful. It was a total challenge but I met all the expectations, I just took the advice he always gave you and here I remind you: "Let your imagination run wild".
See you in a new creation👩🎨
Mil gracias por leerme una vez
Nos vemos en una próxima publicación.
Muchas bendiciones y abrazos digitales🤗
Thank you very much for reading me once
See you in an upcoming post.
Many blessings and digital hugs🤗
📷 Fotografía: De mi propiedad / Photography: From my property
👩🏼💻 Edición: Inshot and Canva / Edition: Inshot y Canva
✨ Traducción: DeepL.com / Translation: DeepL.com

