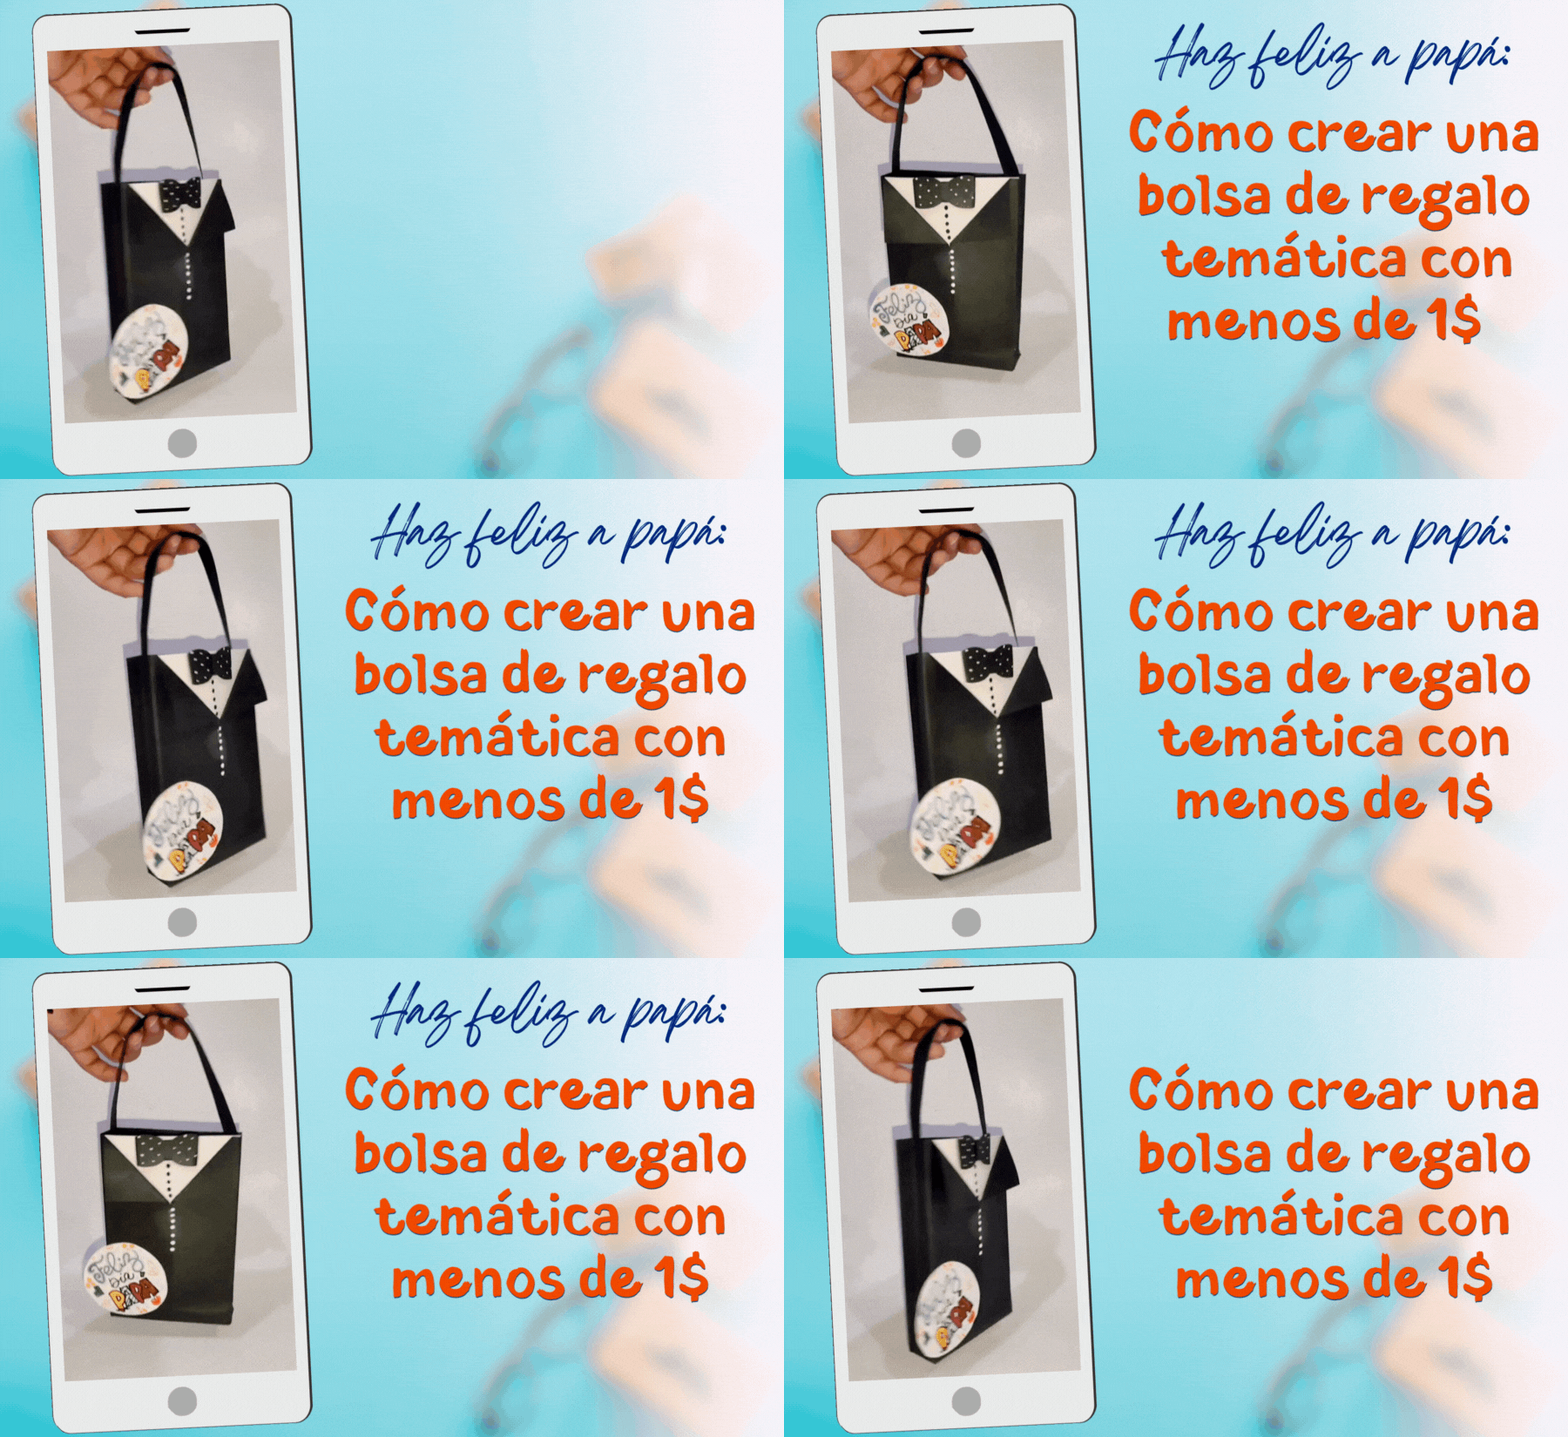
¡Bienvenidos amigos creativos!👩🎨
¡Hola a todos!🙋♀️ Espero que se encuentren súper bien y hayan tenido unos días súper excelentes llenos de gratos momentos y buena salud✨, por este lado de la pantalla todo bien gracias a Dios, feliz de estar una vez más aquí y compartir con ustedes la personalización de una
bolsa de regalo que realice para papá✨❤️.El domingo 16 es el
Día del Padre, debido a ello ya me había preparado con algún detalle para papá pero no había caído en cuenta que faltaba la bolsa de regalo, averiguando en algunas tiendas las bolsas que tienen un diseño más bonito cuestan alrededor de 1,50$ a 2$, personalmente cuento con una diversidad de materiales así que decidí realizarla por mi parte, y lo mejor de todo que a parte de ser bonita me costó hacerla mucho menos de 1$👀⁉️… Pero sin más a que hacer referencia …
Welcome creative friends!👩🎨
Hello everyone!🙋♀️ I hope you are super well and have had super excellent days full of pleasant moments and good health✨, on this side of the screen all good thanks to God, happy to be here once again and share with you the personalization of a gift bag I made for Dad✨❤️.
Sunday 16 is Father's Day, because of this I had already prepared myself with some detail for dad but I had not realized that the gift bag was missing, finding out in some stores the bags that have a nicer design cost about 1.50$ to 2$, personally I have a variety of materials so I decided to make it on my part, and best of all that besides being beautiful it cost me much less than 1$👀⁉️ ... But without further reference...
¡Llegó la hora de crear! / It's time to create!👩🎨
Materiales/ Materials |
|---|
| 🎁 Cartulina escolar / School cardboard. |
| 🎁 Pinturas al frío / Cold paints. |
| 🎁 Silicón / Silicone. |
| 🎁 Marcadores /Markers. |
| 🎁 Tijera / Scissors. |
¿Cuál es el proceso?/ What is the process?⬇️
🎁 Paso 1 / Step1
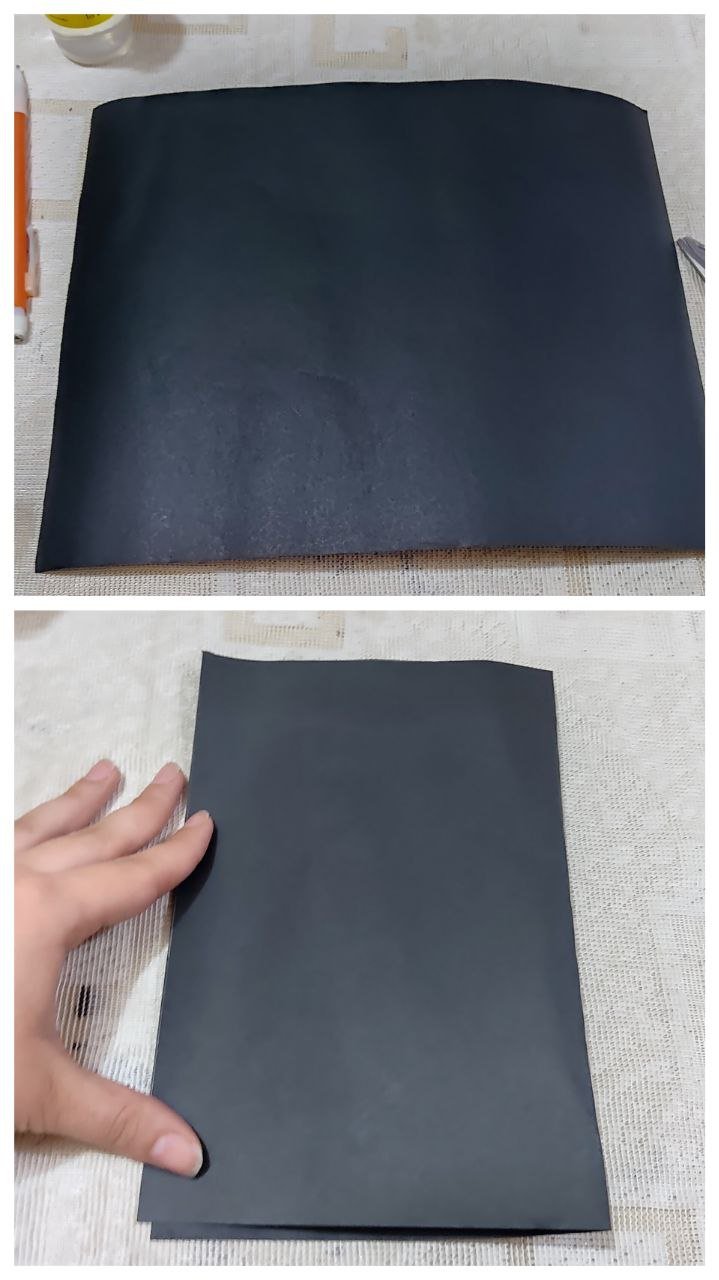
Procedí a comprar una cartulina tamaño carta en 16bs aproximadamente 0,43$, seguidamente doble hasta la mitad, esto con el fin de tener la referencia de la misma para ello solo marce la parte de arriba y debajo de la cartulina.
I proceeded to buy a letter size cardboard in 16bs approximately 0.43$, then fold it in half, this in order to have the reference of the same for it just mark the top and bottom of the cardboard.
🎁 Paso 2 / Step 2
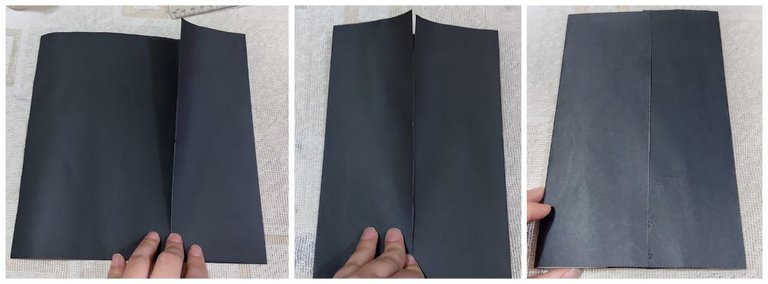
Luego de tener marcada la mitad de la cartulina procedí a llevar los extremos hasta el centro y pegar uno encima de otro con el silicón sin que la pega de este no toque la parte de abajo.
After marking the middle of the cardboard, I proceeded to bring the ends to the center and glue one on top of the other with the silicone without the glue touching the bottom.
🎁 Paso 3 / Step 3
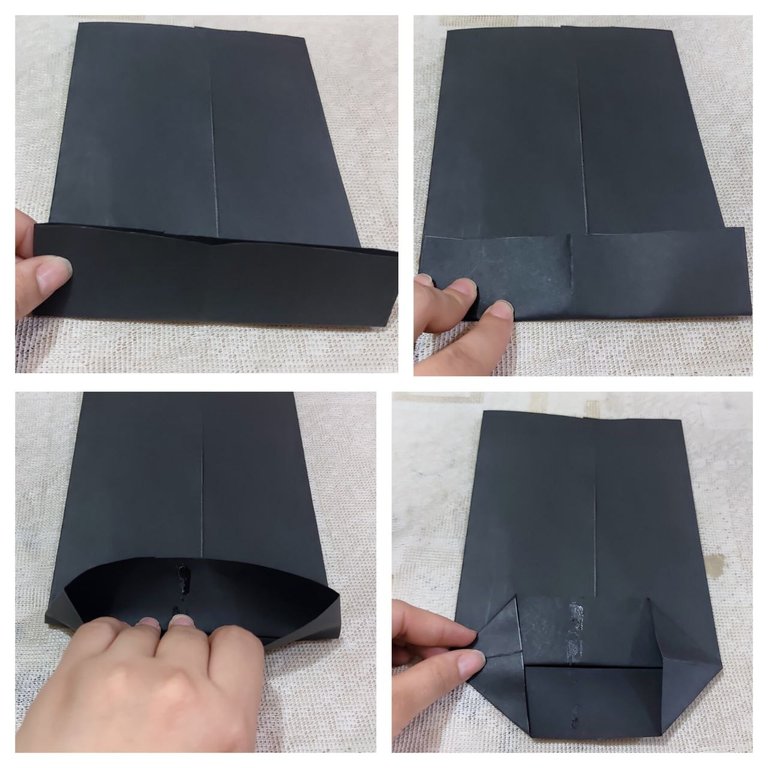
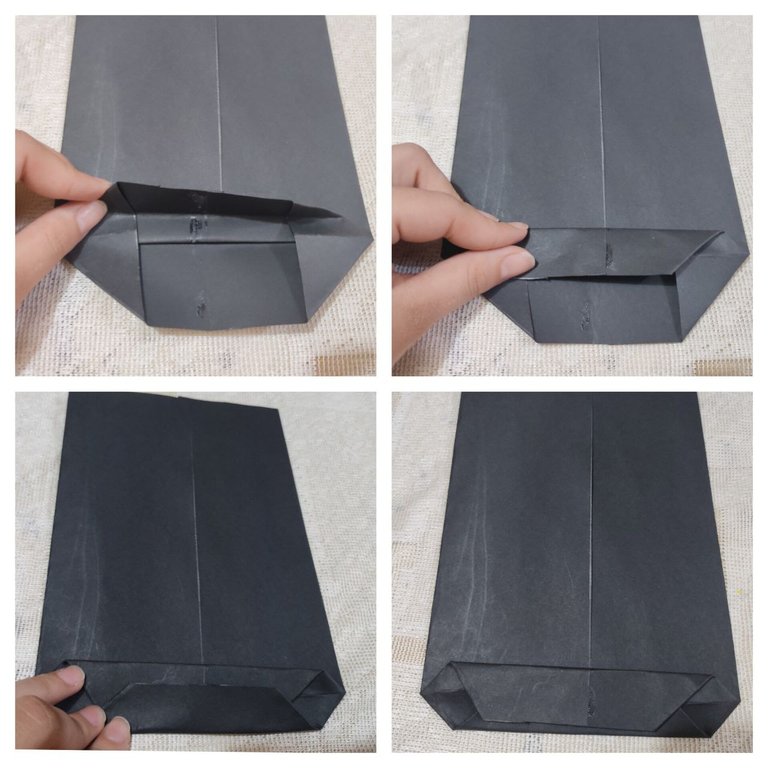
Luego de que secara bien la parte de la cartulina realice unos dobles en la parte inferior de la carpeta aproximada de 5cm luego de final muy bien los dobles abrí ambas caras y al mismo tiempo las pestañitas las inserte hasta el centro (resultando de la forma apreciada en la siguiente imagen).
After the cardboard part dried well, I made some folds in the bottom of the folder of approximately 5cm. After finishing the folds very well, I opened both sides and at the same time I inserted the tabs to the center (resulting in the shape shown in the following image).
🎁 Paso 4 / Step 4
Posteriormente aplique silicón solo en los cuatro triángulos y pegar la pestaña de arriba y de abajo que se formó en la parte inferior en el paso anterior.
Then apply silicone only on the four triangles and glue the top and bottom tab that was formed at the bottom in the previous step.
🎁 Paso 5 / Step 5
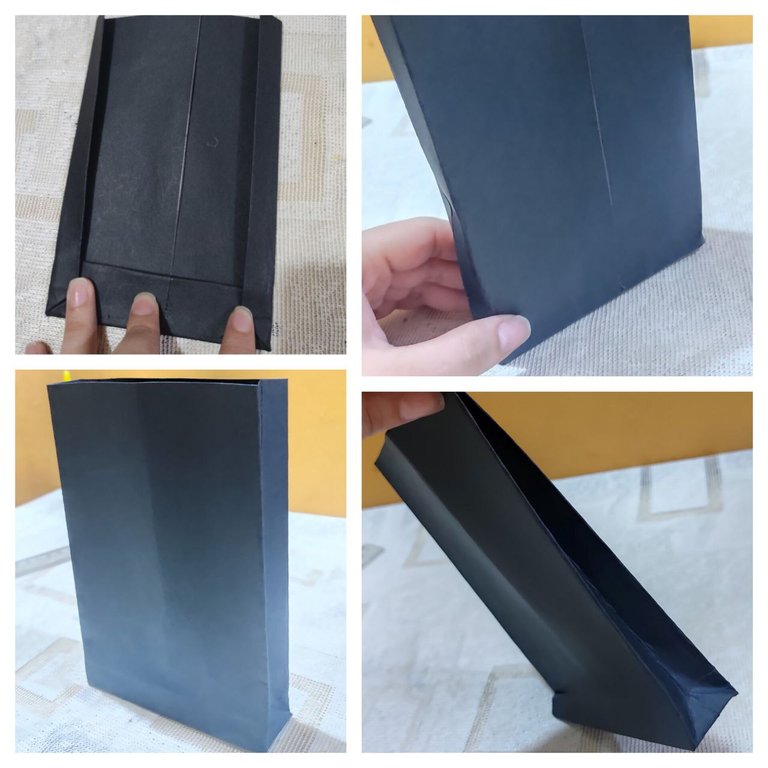
Del tamaño del grosor de una regla pequeña me apoye para realizar los dobles en los lados de la cartulina, fijándome que estás coincidan con el triangulo formado en la parte inferior de la cartulina realizado anteriormente fijando muy bien los dobles para que de esta forma abrir la bolsa.
I used the size of a small ruler to make the doubles on the sides of the cardboard, making sure that they coincide with the triangle formed at the bottom of the cardboard previously made, fixing the doubles very well so that in this way I could open the bag.
🎁 Paso 6 / Step 6
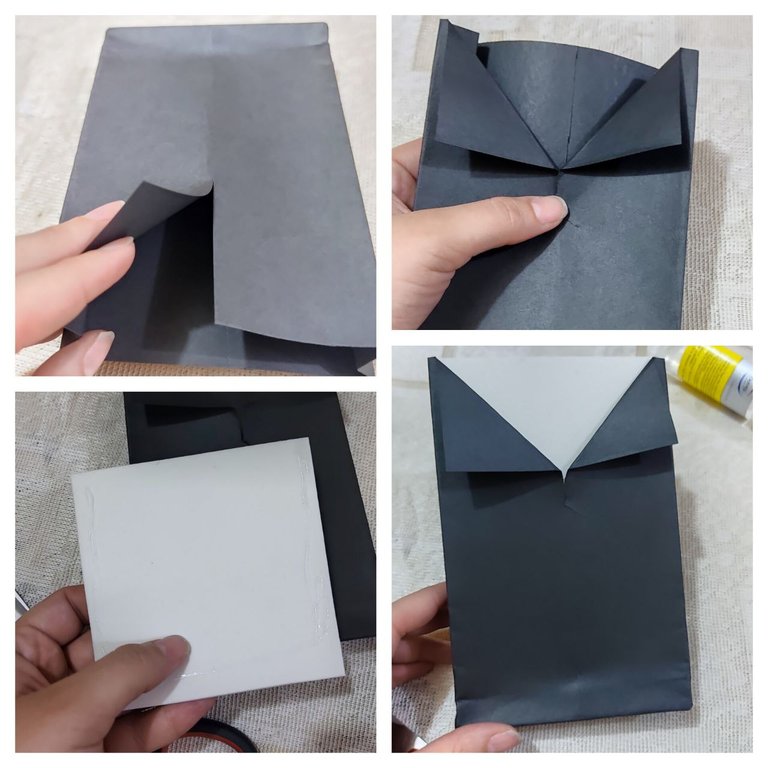
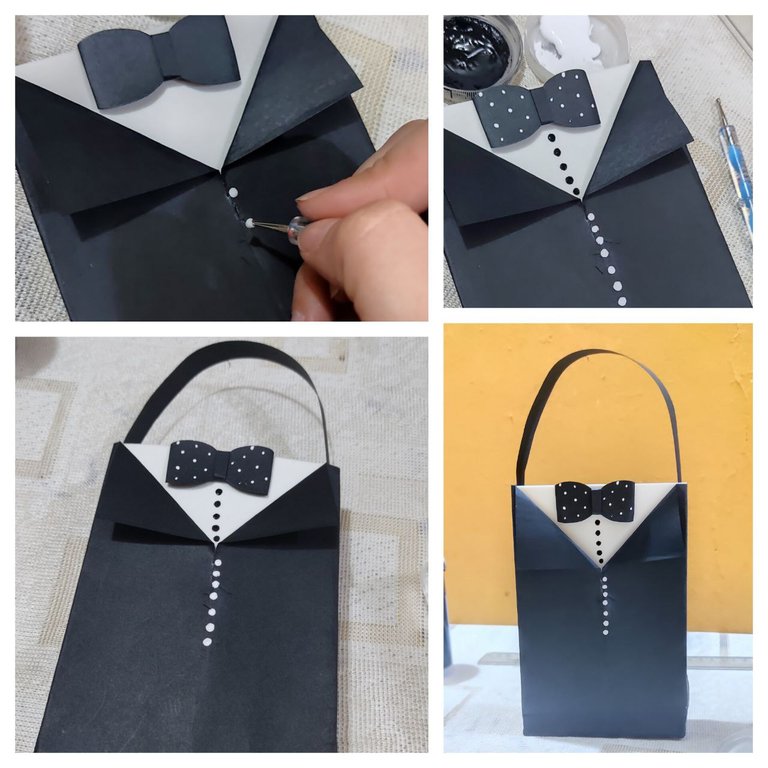
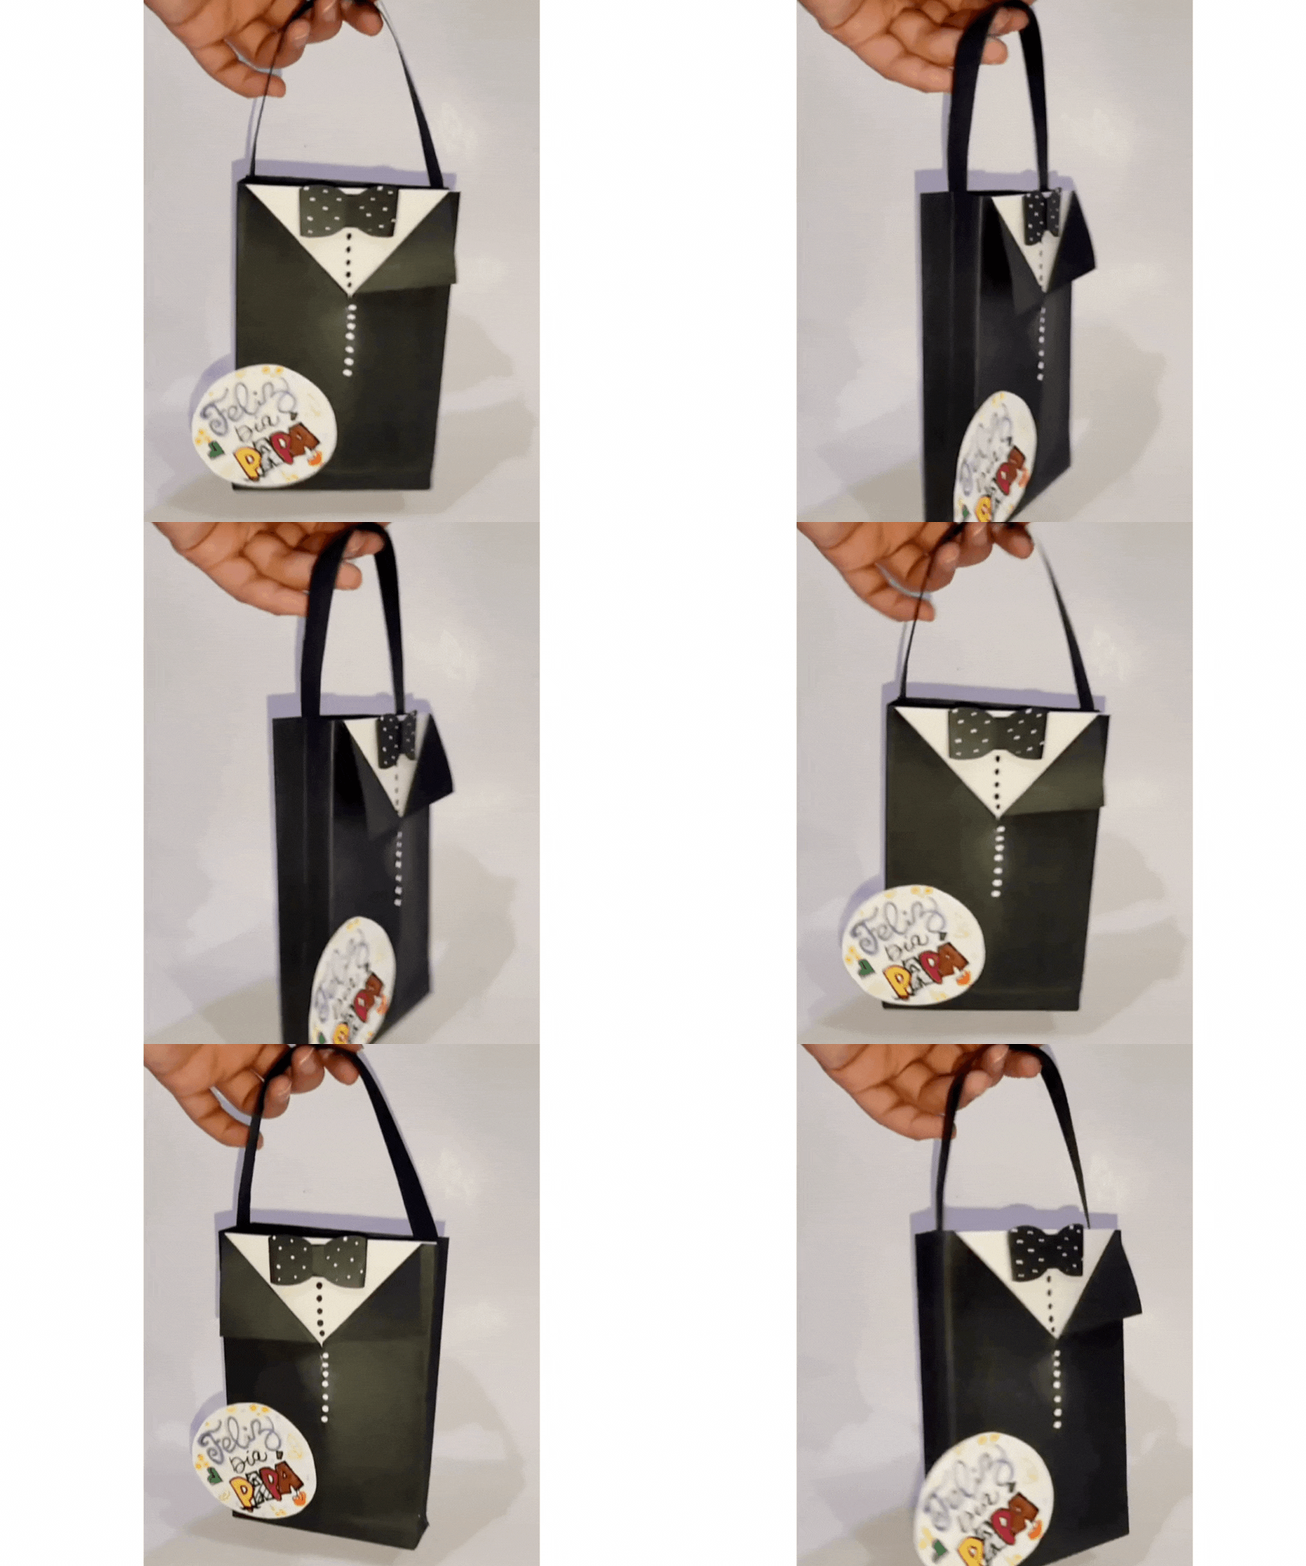
En cuanto a la decoración decidí una forma de camisa, así que realice un recorte recto y ambas pestañas que salieron dobles hacia los lados, luego con un cuadrado blanco realizado en foami liso y pegue en la primera cara de la bolsa simulando la camisa blanca.
As for the decoration I decided on a shirt shape, so I made a straight cutout and both tabs that came out double to the sides, then with a white square made in plain foami and glued on the first side of the bag simulating the white shirt.
🎁 Paso 7 / Step 7
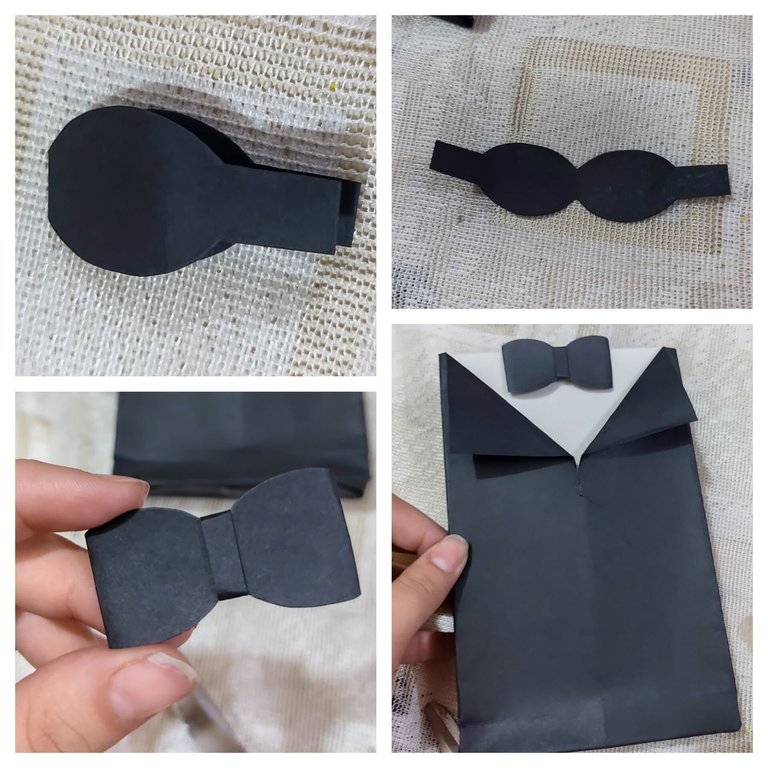
Seguidamente en cartulina negra realice un lazo y pegue en el centro de la parte blanca antes realizada.
Then, on black cardboard, make a ribbon and glue it in the center of the white part previously made.
🎁 Paso 8 / Step 8
En pintura al frío blanco y negro realice unos pequeños puntos en la camisa y el lazo, después con cartulina negra realice el agarradero de la bolsa para ello solo recorte una tira y pegue de extremo a extremo.
In black and white cold paint make some small dots on the shirt and the bow, then with black cardboard make the handle of the bag for it just cut a strip and glue from end to end.
🎁 Paso 9 / Step 9
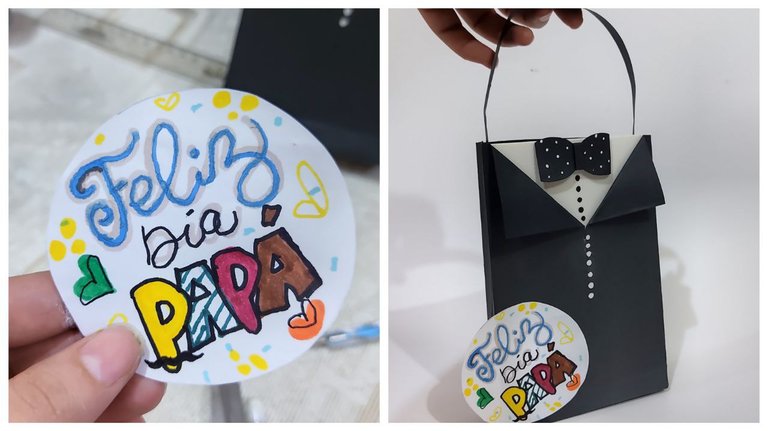
Como último detalle y con ayuda de varios marcadores escribí en un circulo pequeño de cartulina “Feliz día papá” y pegue en una esquina de la bolsa.
As a last detail and with the help of several markers I wrote on a small circle of cardboard "Happy daddy's day" and glued it in a corner of the bag.
Creación finalizada / Creation completed⬇️
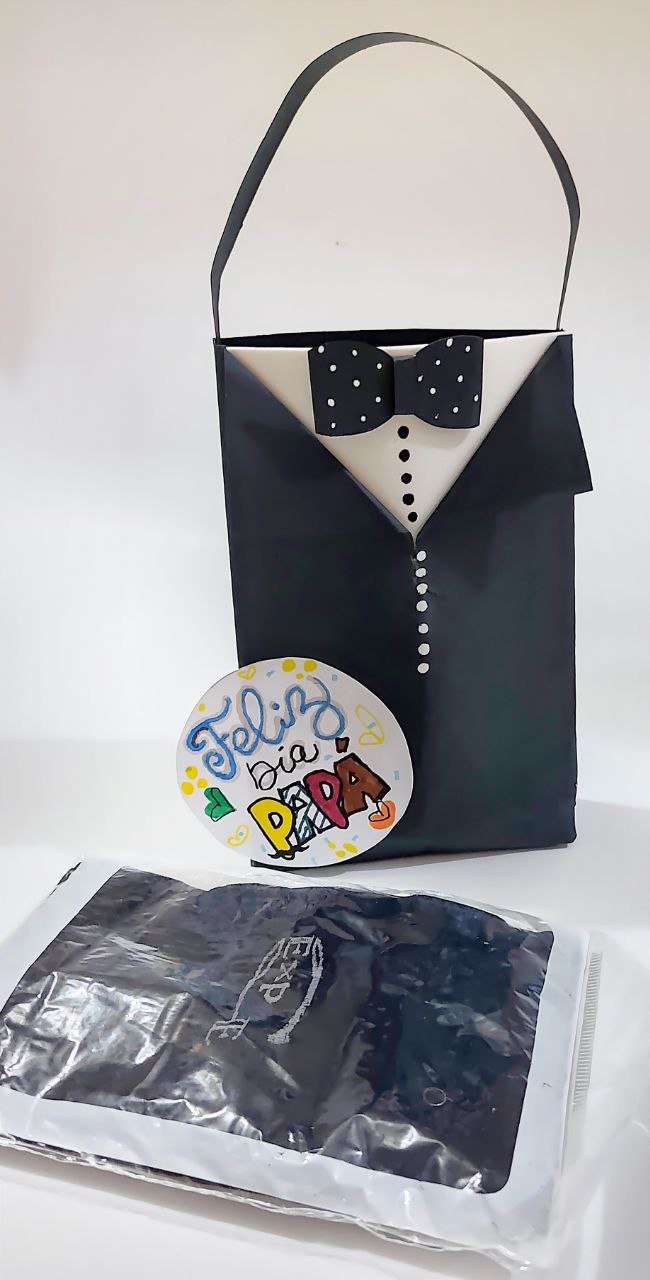
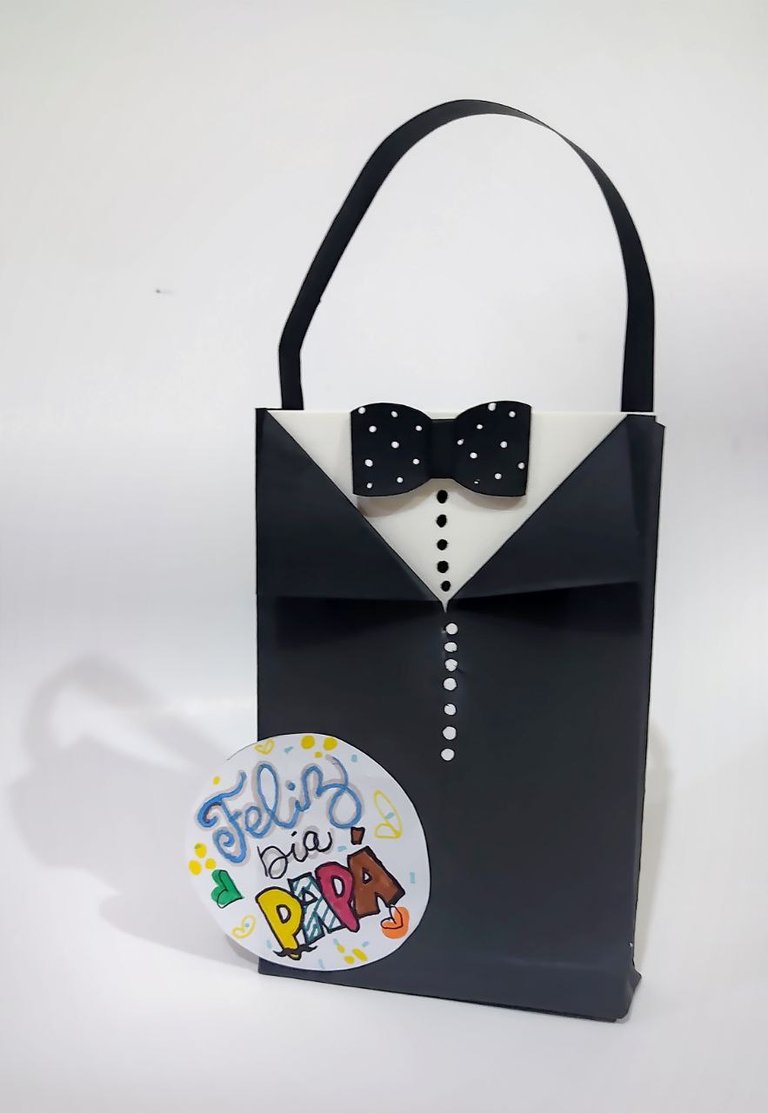
¡Y de esta forma obtuve una económica forma de darle el regalo a mi papá!🎁👴🏻✨.
Quedé totalmente enamorada es primera vez que diseño tal manualidad, la verdad cuento con estas diversidad de materiales así que se convirtió en una forma económica de personalizar la bolsa de regalo, fue algo sencillo de hacer sacándome de apuros prácticamente de un día a otro. Ahora sí puedo decir que está listo el regalo para mi papá. Espero te sirva de ayuda, claro que la puedes personalizar a tu gusto y con el mensaje que prefieras.
Nos vemos en una nueva creación👩🎨
And this way I got an inexpensive way to give the gift to my dad!🎁👴🏻✨.
I was totally in love, it's the first time I design such a craft, the truth is that I have this diversity of materials so it became an economical way to personalize the gift bag, it was something simple to do, getting me out of trouble practically from one day to the next. Now I can say that the gift for my dad is ready. I hope it helps you, of course you can personalize it to your liking and with the message you prefer.
See you in a new creation👩🎨
Mil gracias por leerme una vez
Nos vemos en una próxima publicación.
Muchas bendiciones y abrazos digitales🤗
Thank you very much for reading me once
See you in an upcoming post.
Many blessings and digital hugs🤗
📷 Fotografía: De mi propiedad / Photography: From my property
👩🏼💻 Edición: Inshot and Canva / Edition: Inshot y Canva
✨ Traducción: DeepL.com / Translation: DeepL.com


