¡Hola a todos!🙋♀️ Feliz día, espero que se encuentren de la mejor manera deseando para ustedes un muy buen fin de semana lleno de cosas bonitas✨. Por este lado de la pantalla todo bien gracias a Dios, feliz de estar una vez más aquí.
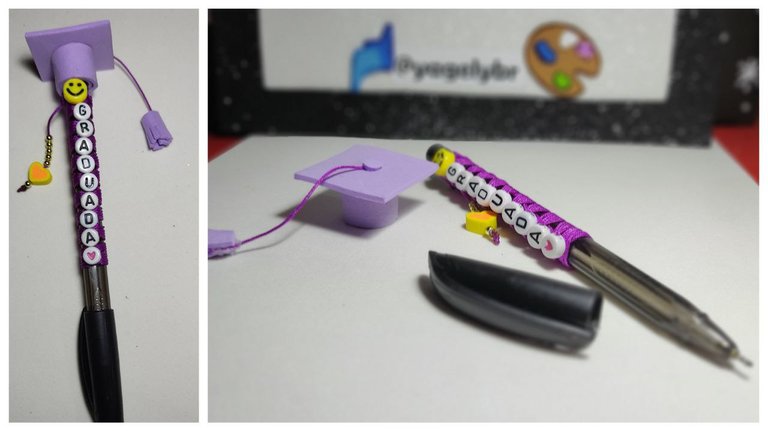
Pronto se acercan las fechas de graduaciones, por tal motivo decidí realizar una decoración de lápiz para ser obsequiado a esa persona que esta por graduarse, siendo un detalle económico y fácil de hacer, pero sin tantos preámbulos…✨.
Welcome creative friends!👩🎨
Hello everyone!🙋♀️ Happy day, hope you are in the best way wishing for you a very good weekend full of beautiful things✨. On this side of the screen all is well thank God, happy to be here once again.
Soon the graduation dates are approaching, for that reason I decided to make a pencil decoration to be given to that person who is about to graduate, being an economic and easy to make detail, but without so many preambles...✨.
🎓 Paso 1 / Step1
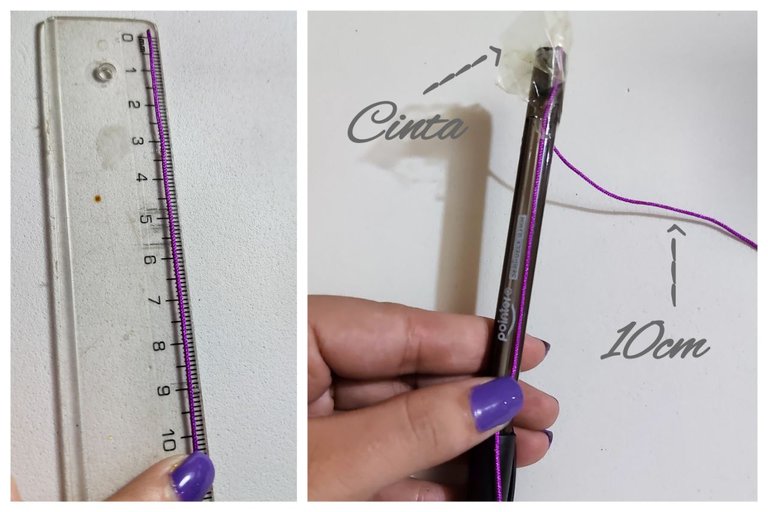
Lo primero que hice fue medir en la cinta 10cm (o la medida que desees) ubicando el hilo chino en la punta superior del lapicero o bolígrafo, fijando está con una cinta transparente. Posteriormente con mis dedos extendí la otra parte de la cinta hacia abajo del lapicero formando una línea recta siendo este, el largo que desees en mi caso fue en un aproximada de 7cm dependerá de la palabra o decoración que se este haciendo.
The first thing I did was to measure on the ribbon 10cm (or the measure you want) placing the Chinese thread at the top of the pen or pencil, fixing it with a transparent tape. Then with my fingers I extended the other part of the tape down the pen forming a straight line being this, the length you want in my case was in an approximate of 7cm depending on the word or decoration that is being done.
🎓 Paso 2 / Step 2
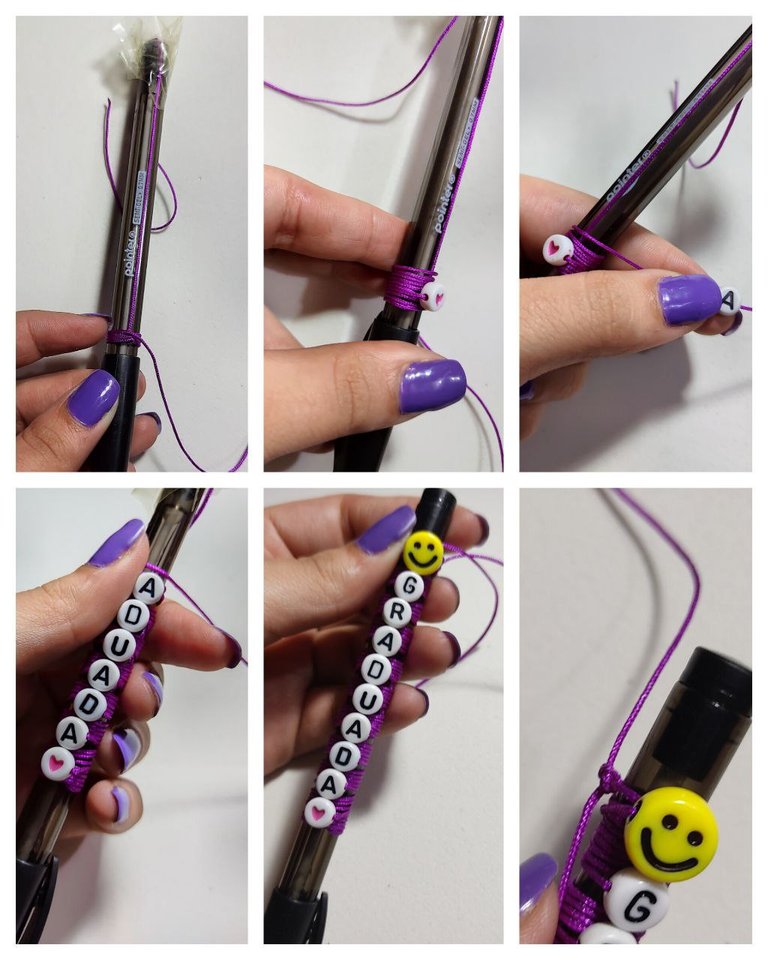
Con mis dedos de la mano izquierda sostuve el lápiz y con los de la derecha procedí a enrollar hacia arriba dando aproximadamente cuatro vueltas completas luego comencé por insertar las figuras o letras, para ello comencé con la parte final de la palabra, la cual decidí que terminara en corazón es por ello que comencé con ese.
With the fingers of my left hand I held the pencil and with the fingers of my right hand I proceeded to roll it upwards giving approximately four complete turns, then I began to insert the figures or letters, for this I started with the final part of the word, which I decided to end in a heart, that's why I started with that one.
🎓 Paso 3 / Step 3
Sin soltar el lápiz y con mis dedos fui moviendo hasta juntar el corazón con el lápiz, seguidamente enrolle el hilo, de igual forma dando vueltas completas de cuatro o cinco e insertar la siguiente piedra y así sucesivamente hasta completar la palabra deseada, la cual yo termine con una carita feliz.
Without letting go of the pencil and with my fingers I moved until I joined the heart with the pencil, then I rolled the thread, in the same way making complete turns of four or five and inserting the next stone and so on until I completed the desired word, which I finished with a happy face.
🎓 Paso 4 / Step 4
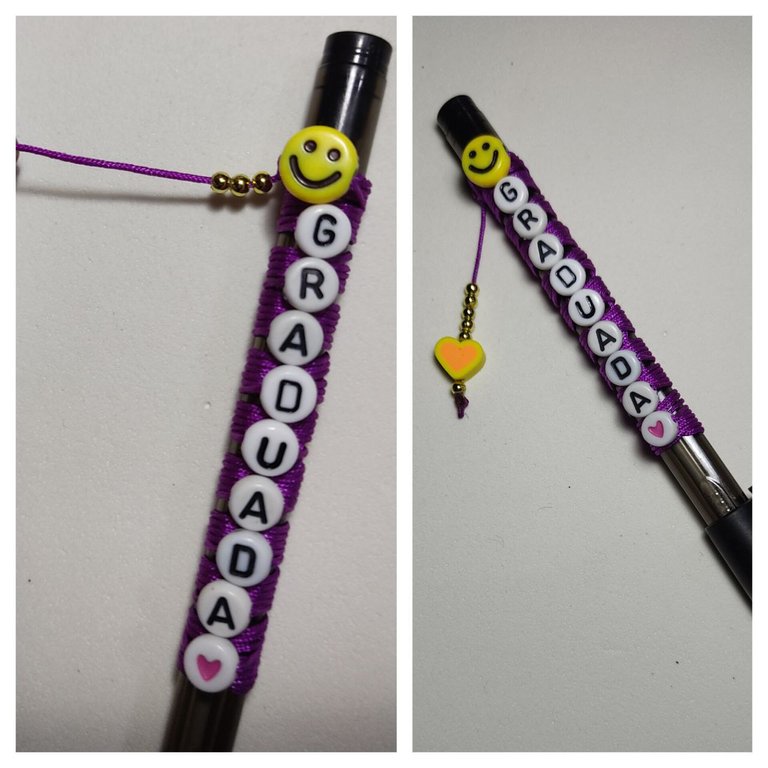
Al terminar todas las piedras solté la cinta que estaba fijando el hilo con la medida de los 10 cm tomadas al principio luego realice un nudo junto a la sobrante que quedó al culminar las letras, esto si apretando lo más fuerte que pude para que la misma decoración no soltará.
When I finished all the stones I loosened the ribbon that was fixing the thread with the measure of the 10 cm taken at the beginning then I made a knot next to the excess that was left at the end of the letters, this if tightening as hard as I could so that the same decoration would not come loose.
🎓 Paso 5 / Step 5
Para terminar la decoración luego del nudo inserte cinco balines seguida de un corazón y otro balín culminando con un nudo y así estás no se saldrían, para sellar un poco la punta la queme y así no quedarán hilos sueltos.
To finish the decoration after the knot insert five balls followed by a heart and another ball culminating with a knot and so they will not come out, to seal the tip a little burn it and so there will be no loose threads.
🎓 Paso 6 / Step 6
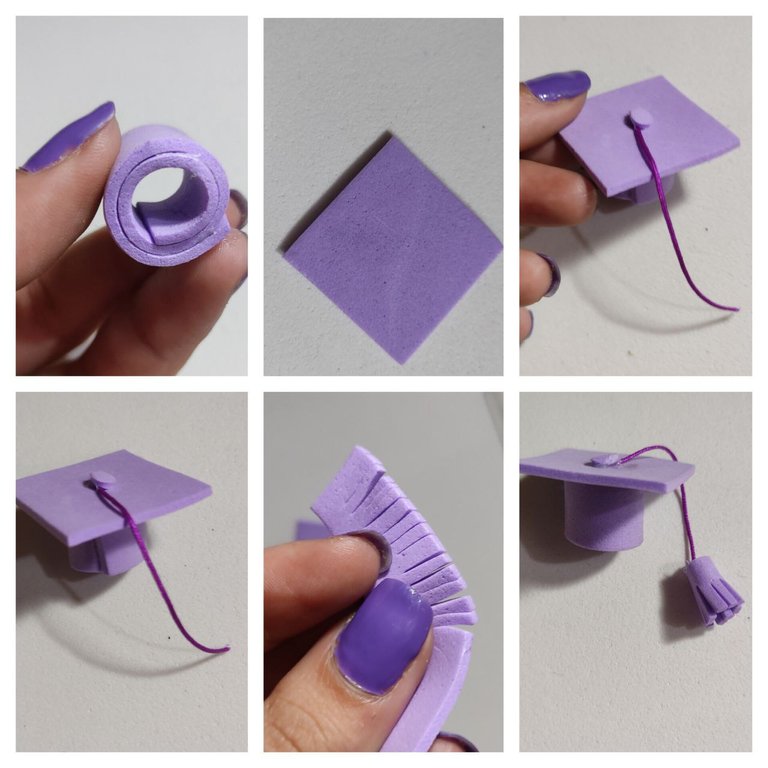
Para la parte superior decidí hacer un birrete pero que esté pudiera quitarse y poner, para esto en foami morado enrolle un poco haciendo forma de círculo para la parte de arriba realice un pequeño cuadro. Para la borla use un trozo de hilo chino y complete con foami cortado en varias tiras y enrollado en dos vueltas.
For the upper part I decided to make a biretta but that it could be put on and taken off, for this I rolled a little purple foami in a circle shape and for the top part I made a small square. For the tassel I used a piece of Chinese thread and completed with foami cut in several strips and rolled in two turns.
🎓 Paso 7 / Step 7
Teniendo listo el birrete lo inserte en el lápiz completando así la decoración del mismo que fácilmente puede quitarse si es de alguna comodidad aunque con el puesto también se escribe cómodamente.
Having the biretta ready, insert it into the pencil, thus completing the decoration of the same, which can easily be removed if it is of any comfort, although it is also comfortable to write with it.
🎓 Paso 8 / Step 8
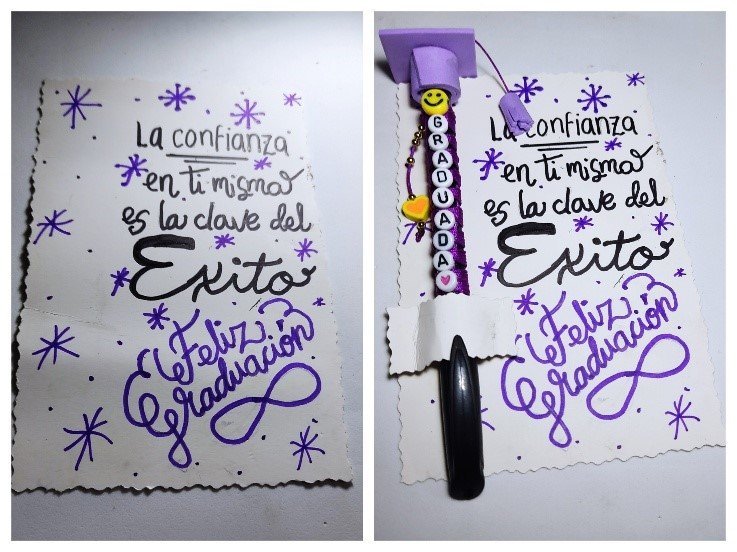
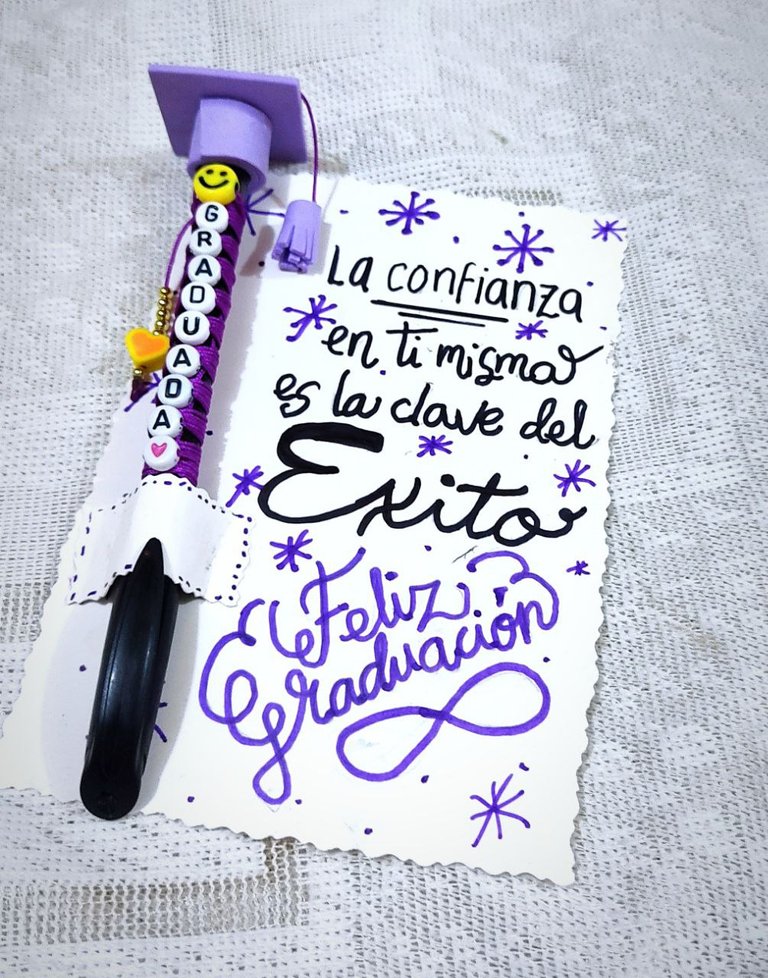
Como último detalle para completar el obsequio en una cartulina blanca realice un pequeño mensaje motivador a un lado coloque el lápiz decorado el cual sostuve con un trozo de cartulina del mismo color.
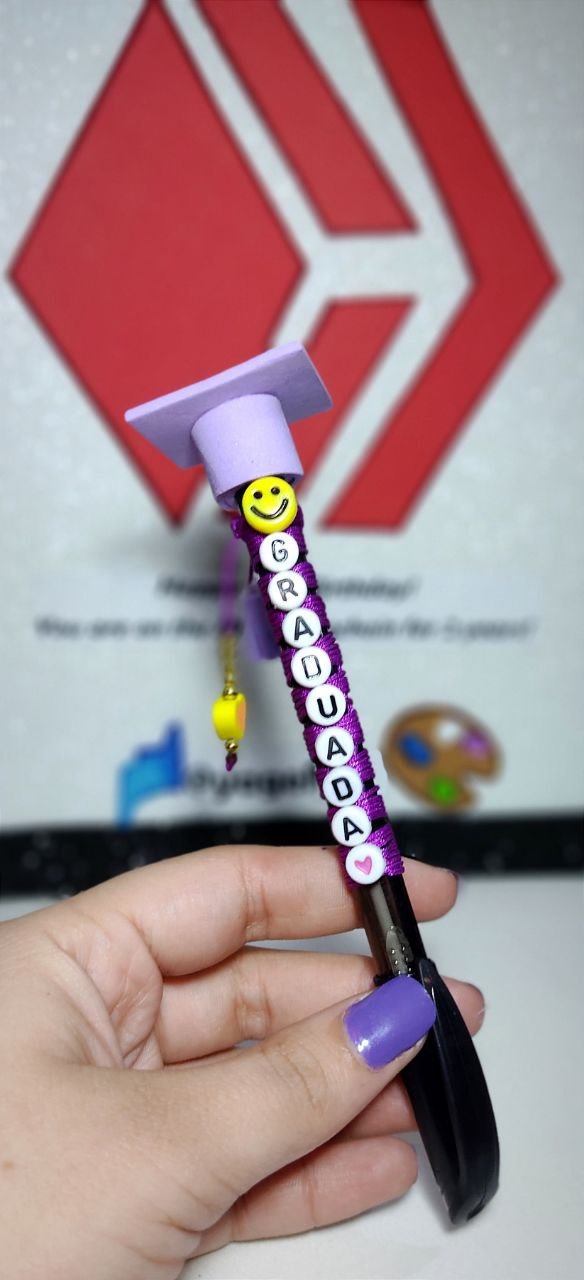
¡Y de esta forma obtuve un lindo lapicero para regalar deseando una feliz graduación con mensajes motivacional!🎓✨.
Realmente los materiales no fueron tan costosos y el resultado me encantó se puede adaptar ante cualquier ocasión y personalizarlo.
Nos vemos en una nueva creación👩🎨
And this way I got a nice pen to give as a gift wishing a happy graduation with motivational messages!🎓✨.
The materials were really not that expensive and I loved the result, it can be adapted to any occasion and can be personalized.
See you in a new creation👩🎨
Mil gracias por leerme una vez
Nos vemos en una próxima publicación.
Muchas bendiciones y abrazos digitales🤗
Thank you very much for reading me once
See you in an upcoming post.
Many blessings and digital hugs🤗
📷 Fotografía: De mi propiedad / Photography: From my property
👩🏼💻 Edición: Inshot and Canva / Edition: Inshot y Canva
✨ Traducción: DeepL.com / Translation: DeepL.com

