¡Bienvenidos amigos creativos!👩🎨
🙋♀️ ¡Hola gente bonita y creativa!Les mando un cordial saludo y mis mejores deseos para ustedes, espero que estén teniendo unos días súper lindos y hayan culminado una semana muy feliz✨. Por este lado de la pantalla todo bien gracias a Dios, feliz de estar una vez más aquí y compartir con ustedes el paso a paso de una fácil decoración con temática de Halloween🎃🔦.
Welcome creative friends!👩🎨
🙋♀️Hello beautiful and creative people! I send you a warm greeting and my best wishes for you, I hope you are having super nice days and have culminated a very happy week✨. On this side of the screen all well thank God, happy to be once again here and share with you the step by step of an easy Halloween-themed decoration.🎃🔦.
¡Llegó la hora de crear! / It's time to create!👩🎨
|
|---|
¿Cuál es el proceso?/ What is the process?⬇️
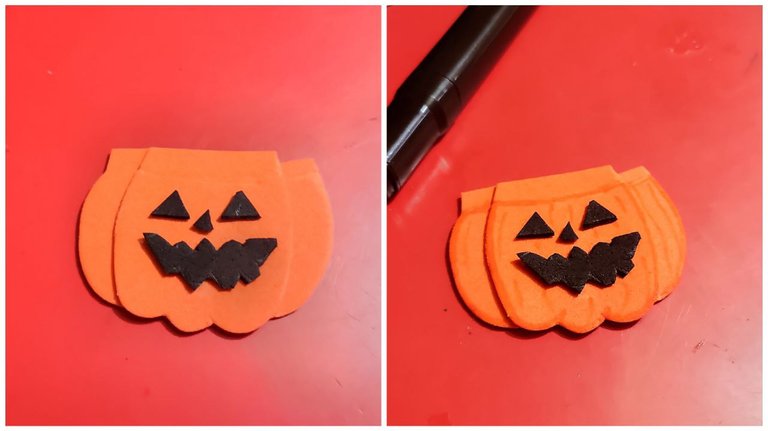
🎃 Paso 1 / Step1
Lo primero que hice fue hacer el molde en una hoja blanca, así que dibuje una calabaza con sombrero y escoba adicionalmente la palabra Halloween. Seguidamente transferí parte por parte a los foamis de colores correspondientes, comenzando por la calabaza para ello lo dividí en tres y así hacer forma de relieve al momento en que las pegue, siendo las dos formas laterales por debajo de la que iba en el centro.
The first thing I did was to make the mold on a white sheet, so I drew a pumpkin with a hat and a broom and the word Halloween. Then I transferred part by part to the corresponding color foamis, starting with the pumpkin, I divided it in three to make a relief shape at the time I glued them, being the two side shapes below the one in the center.

🎃 Paso 2 / Step 2
Con foami color negro realice tres pequeños triángulos dos para los ojos y uno muy chiquito para la nariz, de este mismo color hice la boca siendo una sonrisa algo tenebrosa.
With black foami I made three small triangles, two for the eyes and a very small one for the nose. With the same color I made the mouth, which is a somewhat scary smile.

🎃 Paso 3 / Step 3
Con marcador naranja remarque los bordes y algunas líneas alrededor de la calabaza.
With orange marker outline the edges and some lines around the pumpkin.
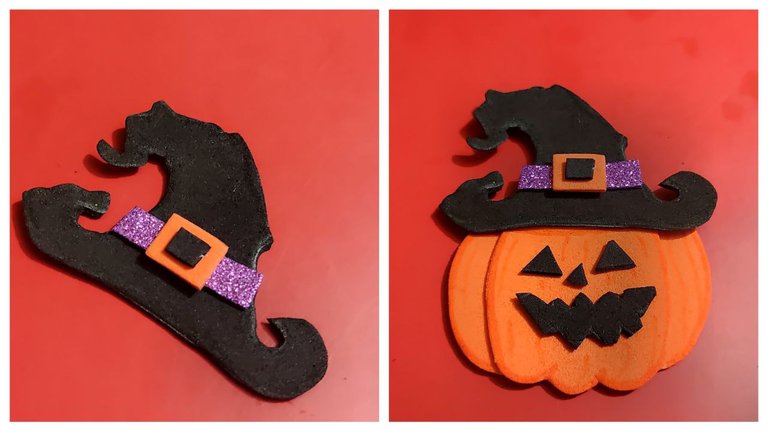
🎃 Paso 4 / Step 4
Con foami negro utilizando el molde del sombrero de igual forma lo transferí al foami, realice la correa de morado y el centro naranja con negro. Luego lo pegue en la parte superior de la calabaza.
With black foami using the mold of the hat I transferred it to the foami in the same way, made the purple strap and the orange center with black. Then I glued it on the top of the pumpkin.
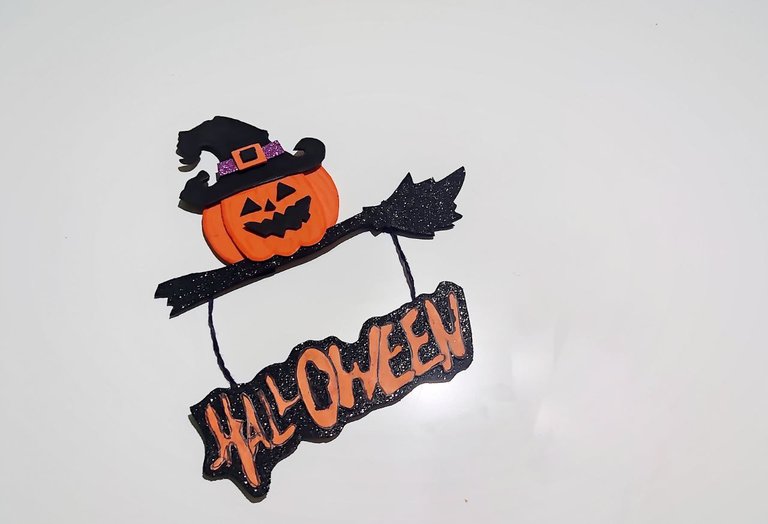
🎃 Paso 5 / Step 5
Con foami escarchado color negro realice la escoba con la ayuda del molde realizado anteriormente, luego pegue la calabaza encima de la escoba.
With black frosted foami, make the broom with the help of the mold previously made, then glue the pumpkin on top of the broom.

🎃 Paso 6 / Step 6
Luego realice la palabra Halloween en color naranja luego hice un pequeño borde con color negro en casa letra, está mismas las pegue sobre foami negro color escarchado al momento en que recorte dejé un pequeño borde y así resaltar un poco más los tonos de Halloween.
Then I made the word Halloween in orange, then I made a small border with black color in each letter, I glued it on black frosted foami and when I cut it out I left a small border to highlight a little more the Halloween tones.

🎃 Paso 7 / Step 7
Seguidamente recorte dos trozos de hilo pábilo y los pinté con la ayuda de un marcador negro estos los pegué por la parte de atrás de la escoba y en las puntas sobrantes pegue la palabra Halloween antes realizada, en las cuatro puntas pegue un soporte con foami de color negro para que esté fuese más resistente.
Then I cut two pieces of pábilo thread and painted them with the help of a black marker, these I glued on the back of the broom and on the remaining ends I glued the word Halloween before, on the four ends I glued a support with black foami to make it more resistant.

🎃 Paso 8 / Step 8
Como último detalle pegue un trozo de imán en la parte de atrás de la calabaza, dejando secar muy bien antes de ser colocado en el refrigerador.
As a last detail, glue a piece of magnet on the back of the pumpkin, letting it dry very well before placing it in the refrigerator.

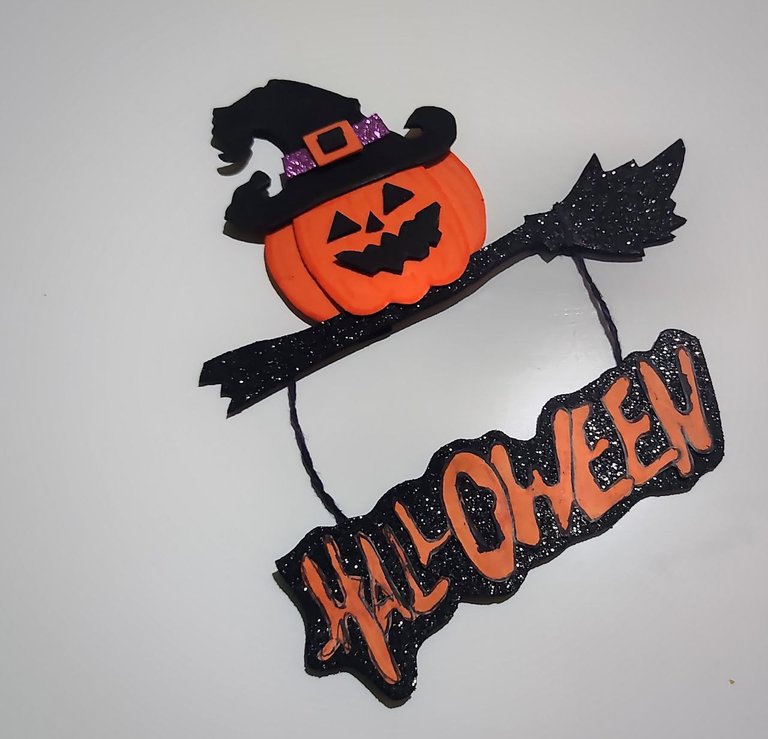
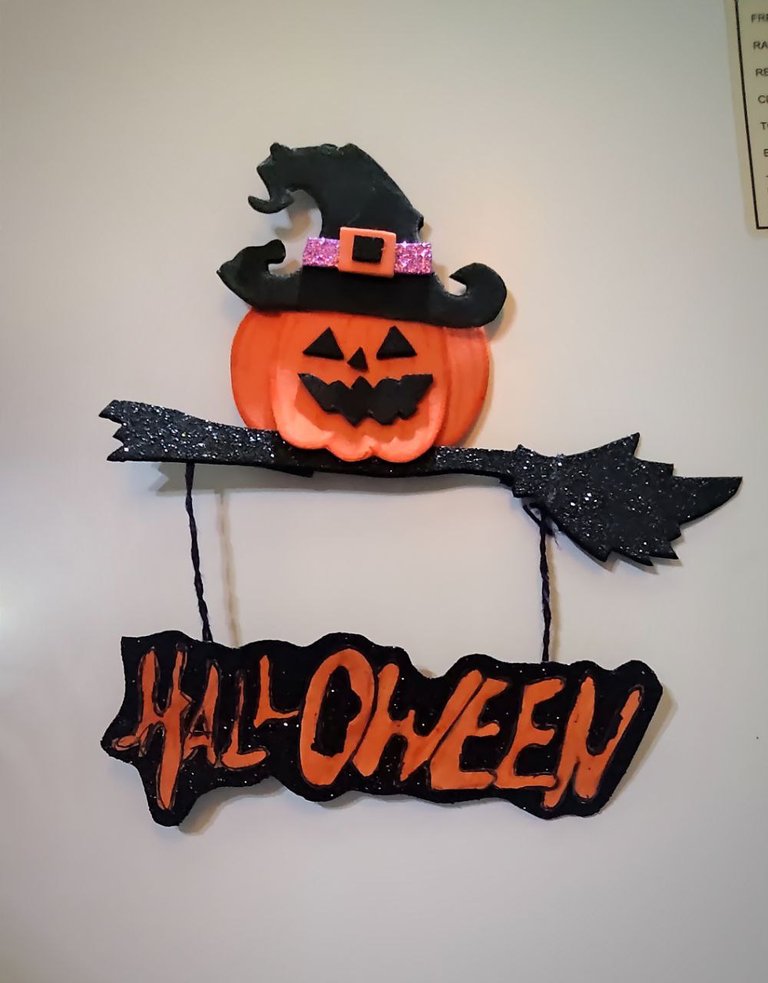
Creación finalizada / Creation completed⬇️
¡Y de esta forma obtuve una fácil decoración con la temática de Halloween!🎃✨
El proceso es muy fácil y con materiales realmente económicos, me gustó que la calabaza realmente se ve un poco tenebrosa😂, siento que los detalles del sombrero y la escoba hace captar por completo la esencia de Halloween. Adorna perfecto mi refrigerador, en mi caso es blanco así que resalta por completo. Espero que les haya gustado tanto como a mí.
And this way I got an easy Halloween-themed decoration!🎃✨
The process is very easy and with really inexpensive materials, I liked that the pumpkin really looks a bit spooky😂, I feel that the details of the hat and the broom completely captures the essence of Halloween. It adorns my fridge perfectly, in my case it's white so it completely stands out. I hope you liked it as much as I did.
See you in a new creation👩🎨

Mil gracias por leerme una vez
Nos vemos en una próxima publicación.
Muchas bendiciones y abrazos digitales🤗
Thank you very much for reading me once
See you in an upcoming post.
Many blessings and digital hugs🤗
👩🏼💻 Edición: Inshot y Canva / Edition: Inshot and Canva
✨ Traducción: DeepL.com / Translation: DeepL.com
