¡Bienvenidos amigos creativos!👩🎨
🙋♀️Hola gente bonita! Espero que se encuentren súper bien deseo para ustedes mucha salud y calma para sobrellevar todo esto que estamos viviendo en nuestro país y que para nadie es un secreto, aunque no queramos nos toca seguir con nuestra vida diaria confiando mucho en Dios para que lleguemos al camino correcto y justo.
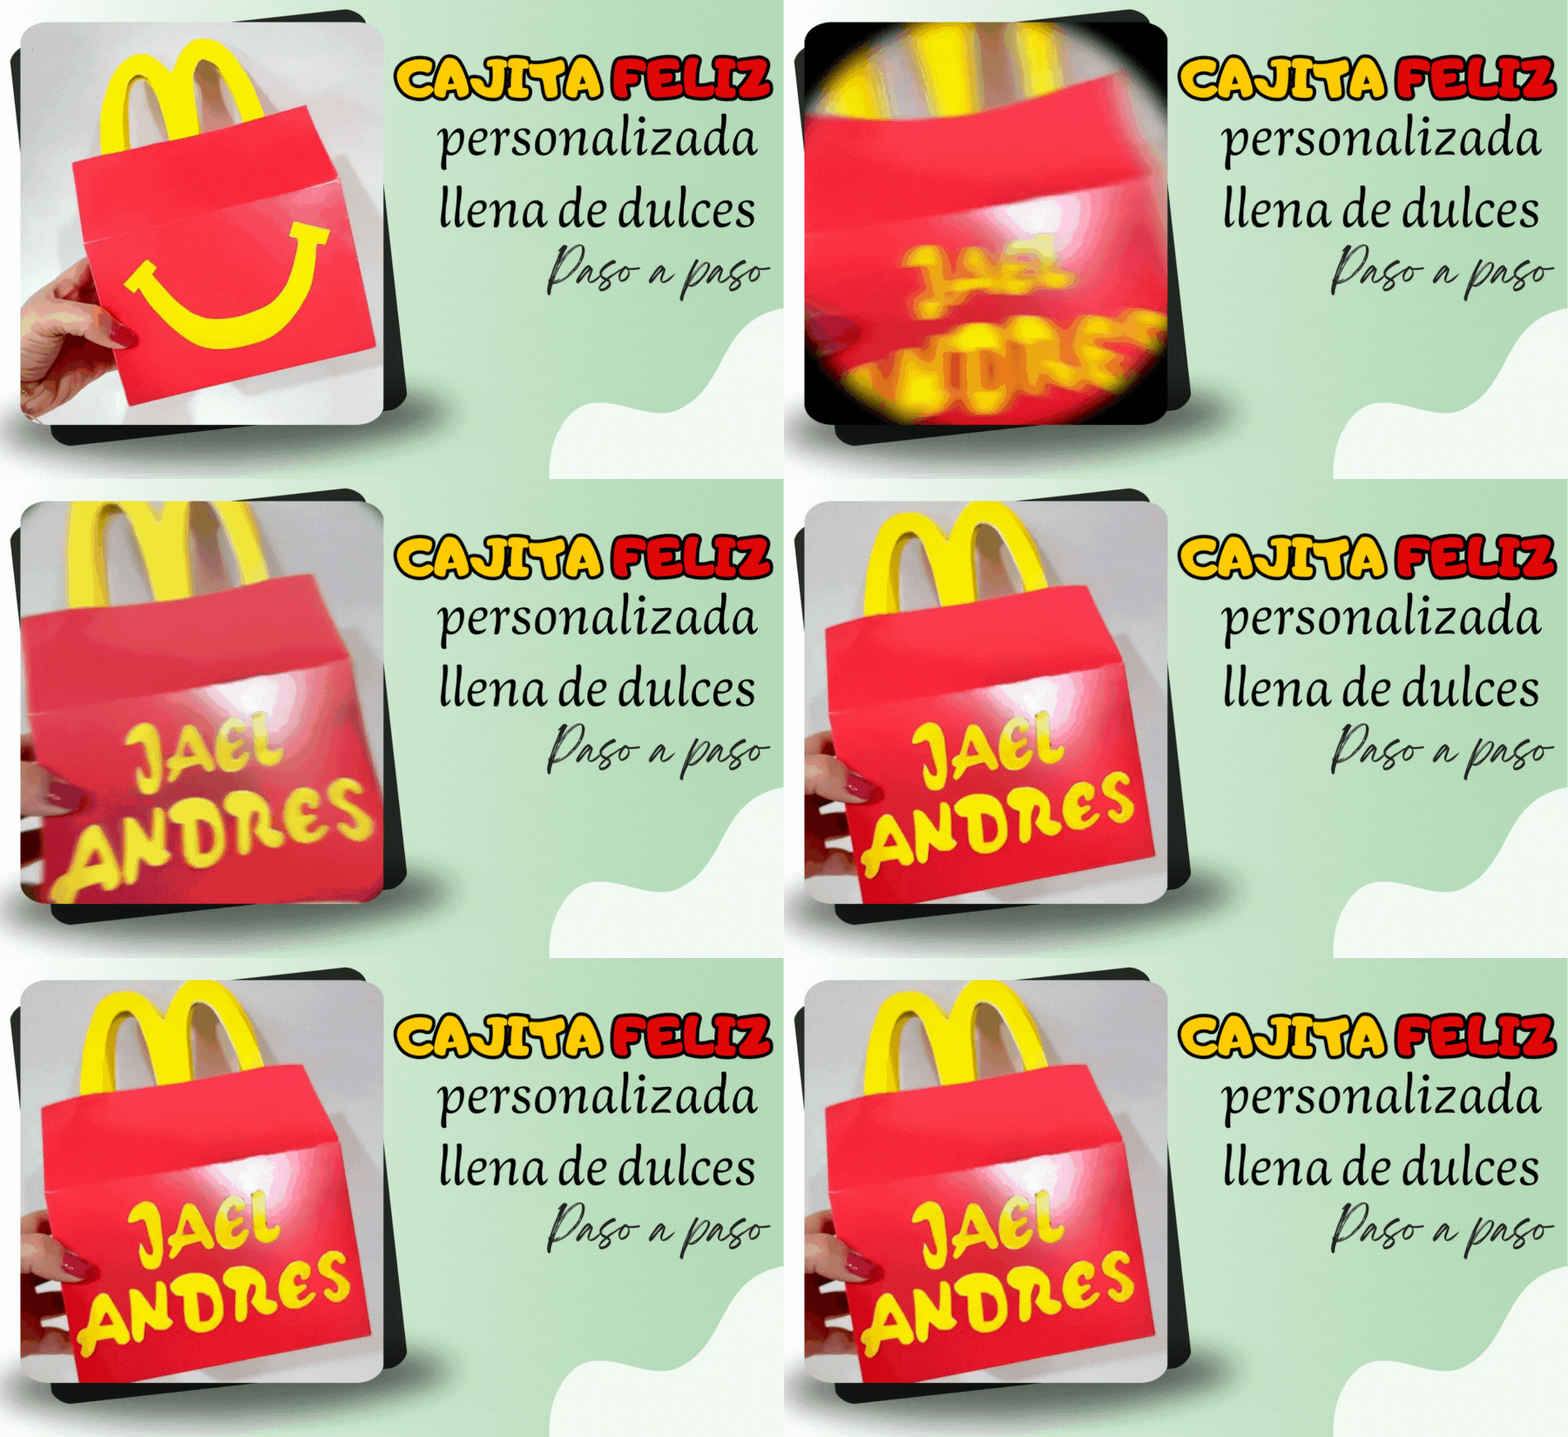
Por otro lado siento que los más pequeños de la casa se encuentran más afectados porque es complicado explicarles todo esto y darle una pausa a sus rutinas, es por ello que decidí hacerle a mi sobrino una cajita feliz para sacarle esa hermosa sonrisa que lo caracteriza, sin más preámbulos…
Welcome creative friends!👩🎨
🙋♀️ Hello beautiful people!I hope you are super well I wish you good health and calm to cope with all this that we are living in our country and that for no one is a secret, although we do not want we have to continue with our daily lives relying heavily on God to get to the right path and just
On the other hand, I feel that the little ones at home are more affected because it is complicated to explain all this to them and give them a break from their routines, that is why I decided to make my nephew a happy box to get that beautiful smile that characterizes him, without further ado.....
¡Llegó la hora de crear! / It's time to create!👩🎨
Materiales/ Materials |
|---|
| ✨ Cartulina roja / Red cardboard. |
| ✨ Cartulina amarilla / White sheet. |
| ✨ Silicón / Silicone. |
| ✨ Dulces / Sweets. |
| ✨ Tijera / Scissors. |
¿Cuál es el proceso?/ What is the process?⬇️
✨ Paso 1 / Step 1
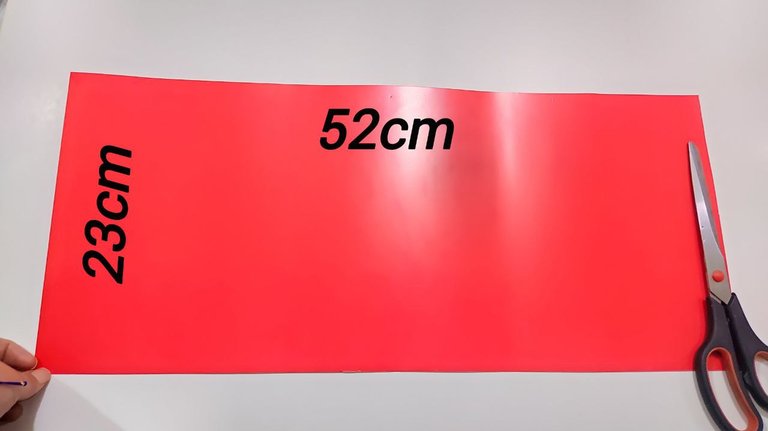
Lo primero que hice en una cartulina escolar roja realizar medidas de 52cm horizontalmente y 23cm en forma vertical, seguidamente recorte.
The first thing I did on a red school cardboard was to measure 52cm horizontally and 23cm vertically, then cut it out.
✨ Paso 2 / Step 2
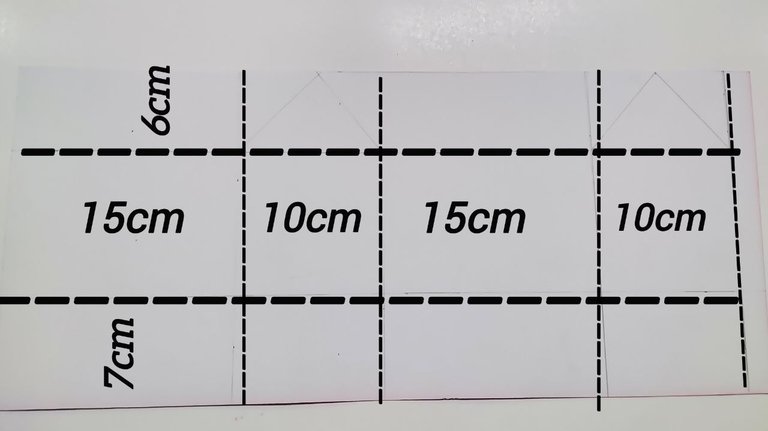
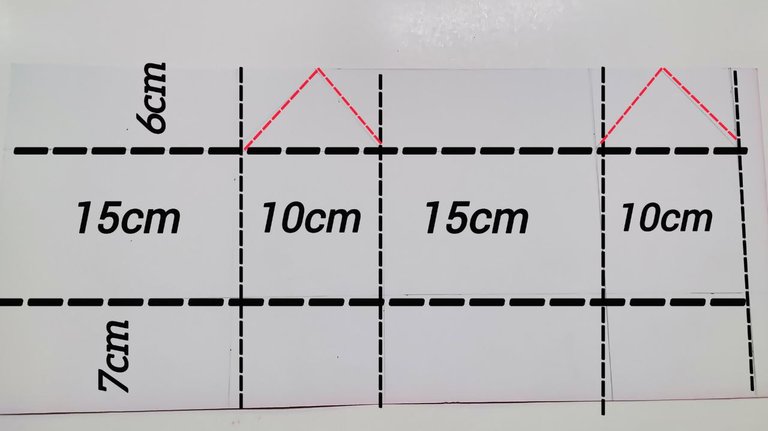
La cartulina que estaba usando por el otro lado era blanco, así que en este realice las siguientes medidas: primero en forma horizontal realice una línea a los 15cm, luego 10cm, nuevamente 15cm y 10cm, por último deje una pestaña de 2cm.
The cardboard I was using on the other side was white, so in this one I made the following measurements: first horizontally make a line at 15cm, then 10cm, again 15cm and 10cm, and finally leave a 2cm tab.

✨ Paso 3 / Step 3
Las siguientes medidas fueron en forma vertical para cada cuadro usando 6cm en la parte inferior y 7cm en la parte del fondo, resultando así 10cm para el centro.
The following measurements were taken vertically for each square using 6cm at the bottom and 7cm at the bottom, resulting in 10cm for the center.
✨ Paso 4 / Step 4
Luego en el cuadro que lleva marcado los 10cm realice un triángulo en ambos cuadros.
Then in the square marked 10cm make a triangle in both squares.
✨ Paso 5 / Step 5
Listas todas las medidas correspondientes la pestañita que se ve en la imagen en rojo el recorte retirando esa parte. Seguidamente con una regla y con la ayuda de un puntero reafirme cada línea esto para un mejor dobles.
Ready all the corresponding measures, the little tab that you can see in the image in red, the trimming by removing that part. Then with a ruler and with the help of a pointer reaffirm each line for better doubling.
✨ Paso 6 / Step 6
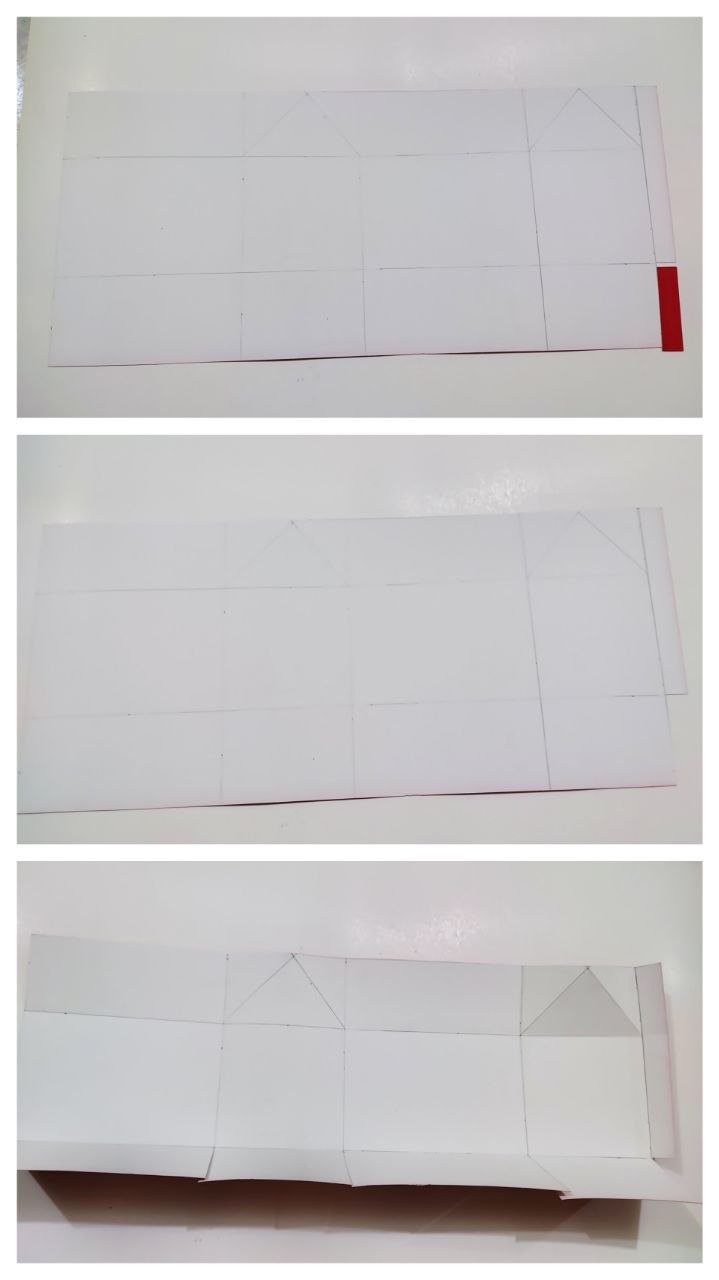
Listos los dobles anteriores volteé para la parte roja de la cartulina y realice los dobles del triángulo que he hecho en la parte superior.
Once the previous doubles were ready, I turned to the red part of the cardboard and made the doubles of the triangle that I made at the top.
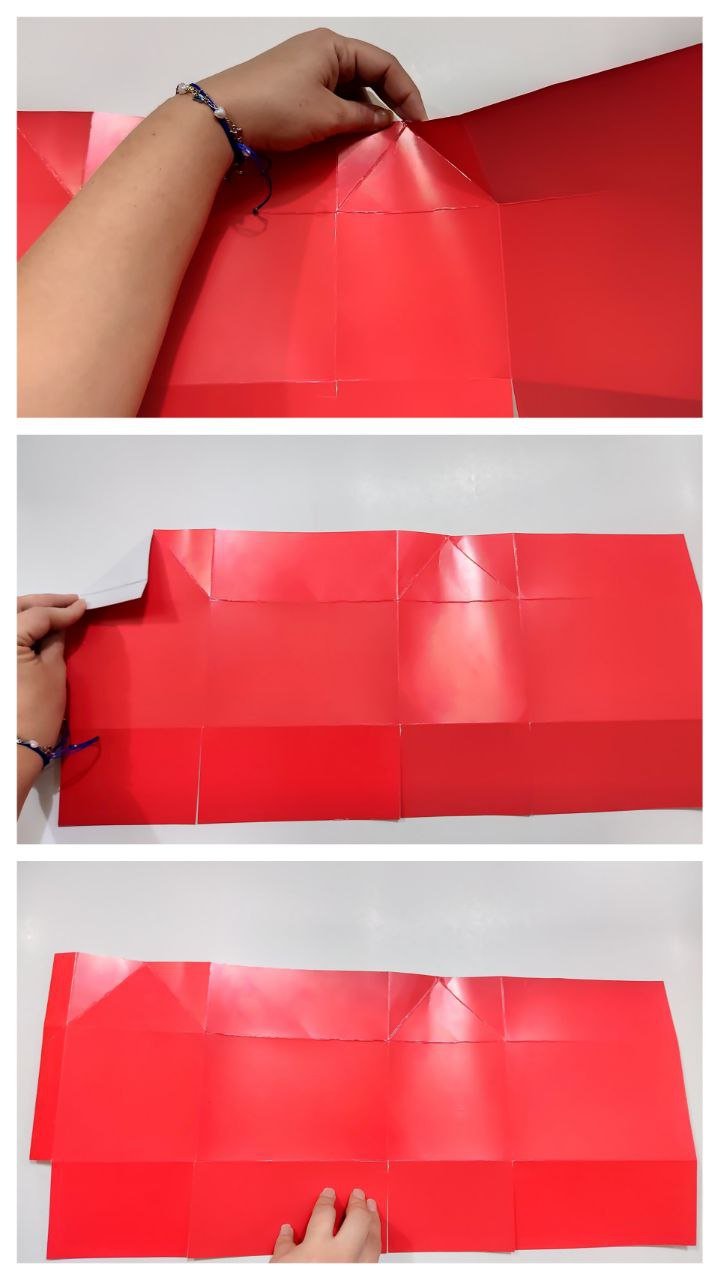
✨ Paso 7 / Step 7
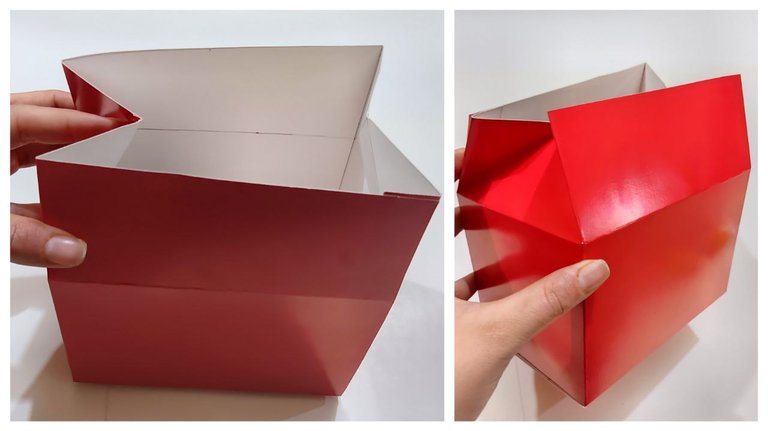
Seguidamente fui dando la forma de la caja de acuerdo a los dobles realizados, pegue la parte superior de la caja y por último para terminar de juntar pegue la pestaña de 2cm hasta el otro extremo de la caja.
Next, I shaped the box according to the doubles made, glued the top of the box and finally, to finish the assembly, I glued the 2cm flange to the other end of the box.
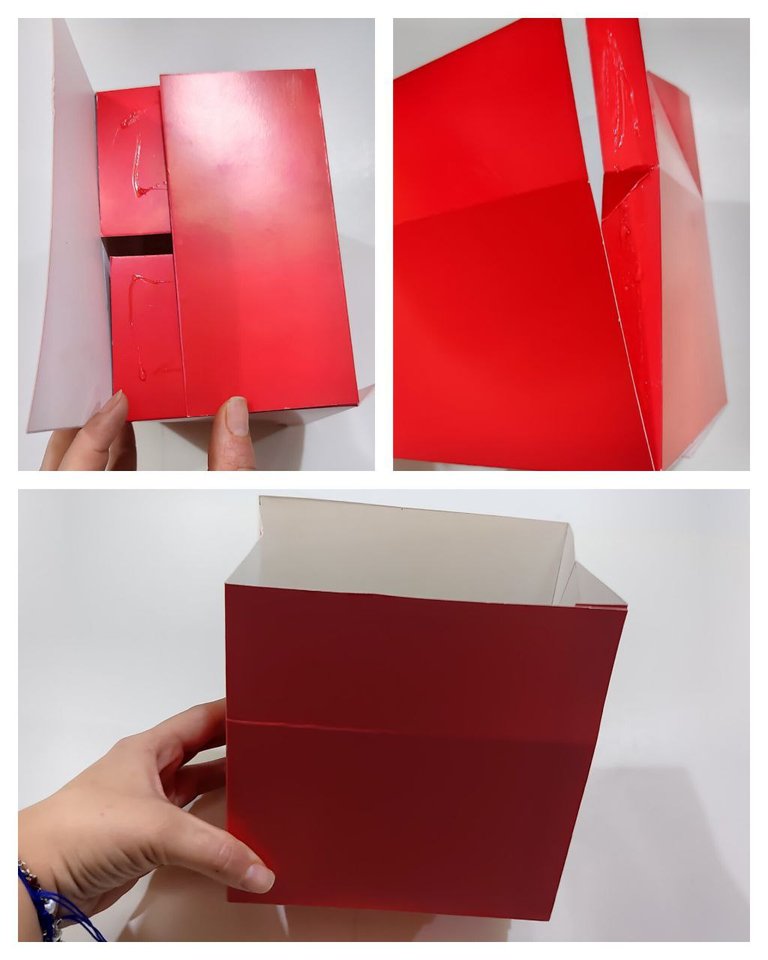
✨ Paso 8 / Step 8
Como último doble para dar forma a la caja los extremos de la parte superior los lleve hacia adentro.
As a last double to give shape to the box, the ends of the upper part of the box should be turned inwards.
✨ Paso 9 / Step 9
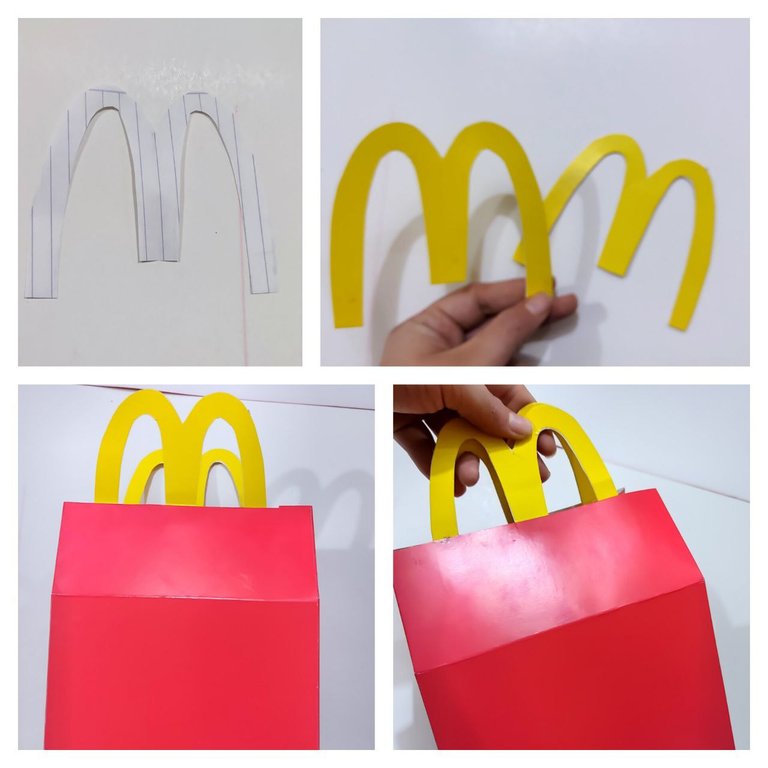
Luego en cartulina amarilla realice eso que caracteriza a McDonalds la inicial de su nombre, la m en forma curva realice dos siendo este el agarre de la cajita feliz.
Then on yellow cardboard make that which characterizes McDonalds the initial of its name, the m in a curved shape make two being this the grip of the happy box.
✨ Paso 10 / Step 10
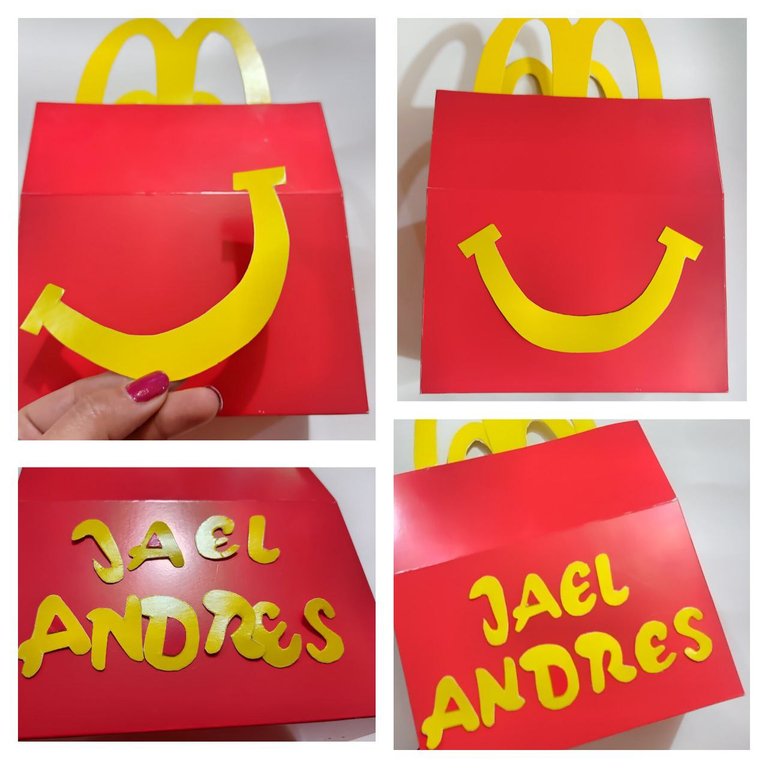
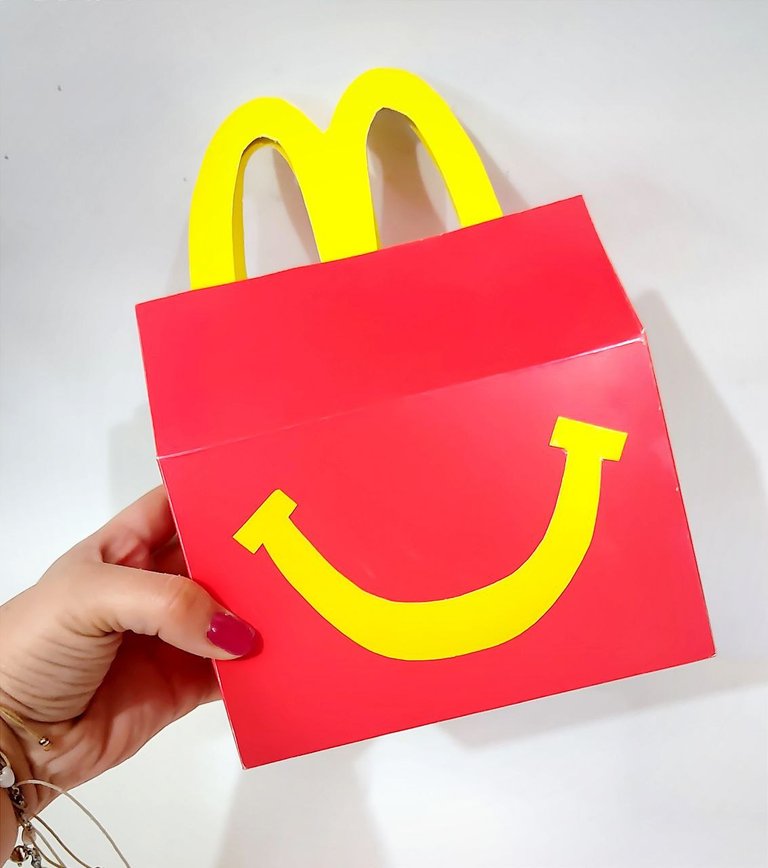
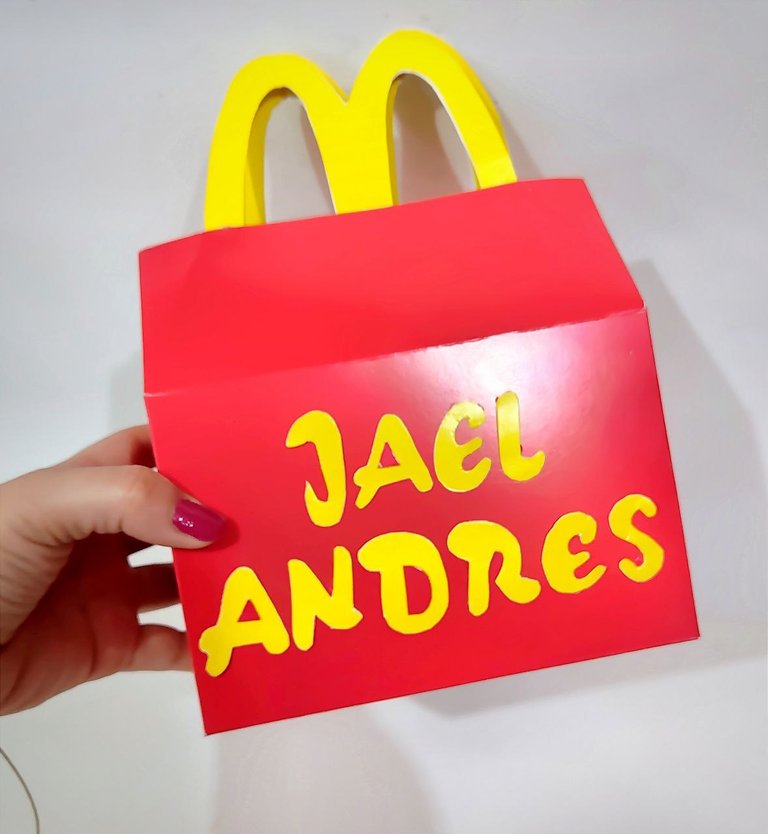
Del mismo color amarillo anteriormente utilizado realice la forma de sonrisa para ser pegada en una cara de la cajita y para la otra cara decidí personalizarla con el nombre de mi sobrino.
In the same yellow color I used before, I made the smile shape to be glued on one side of the box and for the other side I decided to personalize it with the name of my nephew.
✨ Paso 11 / Step 11
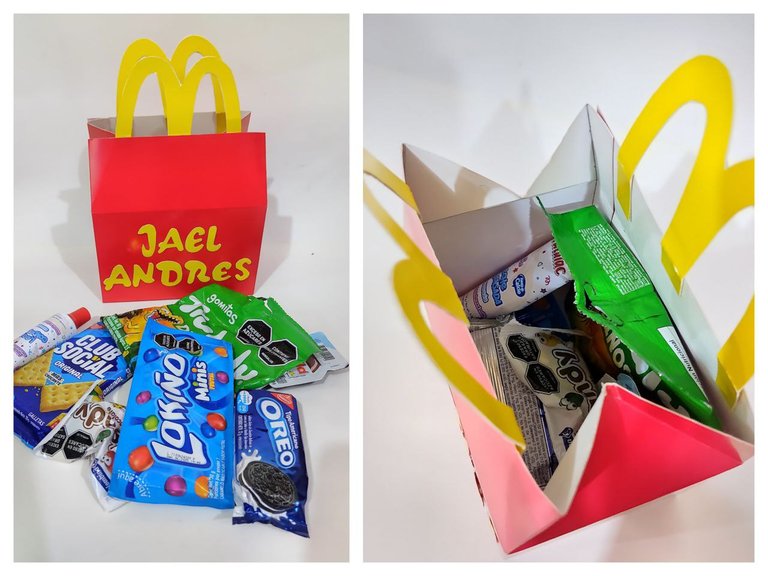
Por último rellene esta cajita con los dulces favoritos de mi sobrino.
Lastly, I filled this little box with my nephew's favorite candies.
Creación finalizada / Creation completed⬇️
¡Y de esta forma obtuve una cajita feliz personalizada! 👩🎨✨
Ame con locura el resultado siento que quedó muy parecida a las cajitas feliz que entregan en McDonald's, lo mejor es que está es una idea para muchas ocasiones como para dar un regalo, dulcero, e incluso cotillones para tu fiesta. Resulta más económico que comprar la cajita original, mi sobrino quedó encantado y yo feliz de complacerlo. No olvides dejar volar tu imaginación✨.
Nos vemos en una nueva creación👩🎨
And this way I got a personalized happy box! 👩🎨✨
I loved the result I feel it was very similar to the happy boxes that they deliver at McDonalds, the best thing is that this is an idea for many occasions such as giving a gift, candy box, and even cotillions for your party. It is cheaper than buying the original box, my nephew was delighted and I was happy to please him. Don't forget to let your imagination run wild✨.
See you in a new creation👩🎨

Mil gracias por leerme una vez
Nos vemos en una próxima publicación.
Muchas bendiciones y abrazos digitales🤗
Thank you very much for reading me once
See you in an upcoming post.
Many blessings and digital hugs🤗
📷 Fotografía: De mi propiedad / Photography: From my property
👩🏼💻 Edición: Inshot y Canva / Edition: Inshot and Canva
✨ Traducción: DeepL.com / Translation: DeepL.com
