✨🛍🌸¡Hola amigos amantes de la creatividad! Espero que hayan pasado un muy buen comienzo de semana.🌸🛍✨
🔸Sin más que añadir, a continuación los dejo con el paso a paso:
✨🛍🌸¡Hello friends who love creativity! I hope you had a very good start to the week.🌸🛍✨
I hope you are well and that you had a good Monday. This time I share the step by step to make a nice souvenir for parties. You don't know how happy I am to bring you this creation, because I had this idea in mind for a while, but I didn't know how to decorate it. After a lot of thinking, I came up with this cute idea of a fabric flower. At first I thought I wasn't going to like the final result, so I was a bit intrigued, but I still took a chance. After seeing it I was super happy with this beautiful result.
I always do all kinds of crafts, although I have my favorites, I love to try and do new things, that's why I came up with the idea of making a nice and easy souvenir. Really, if you like it, it's too easy to do, I didn't want to do something very complex, but with a decoration that stood out and that, in addition, was quite simple.
🔸Without more to add, then I leave you with the step by step:
♥️ESPERO QUE TE GUSTE,
¡Empecemos!
♥️I HOPE YOU LIKE IT,
Let's start!

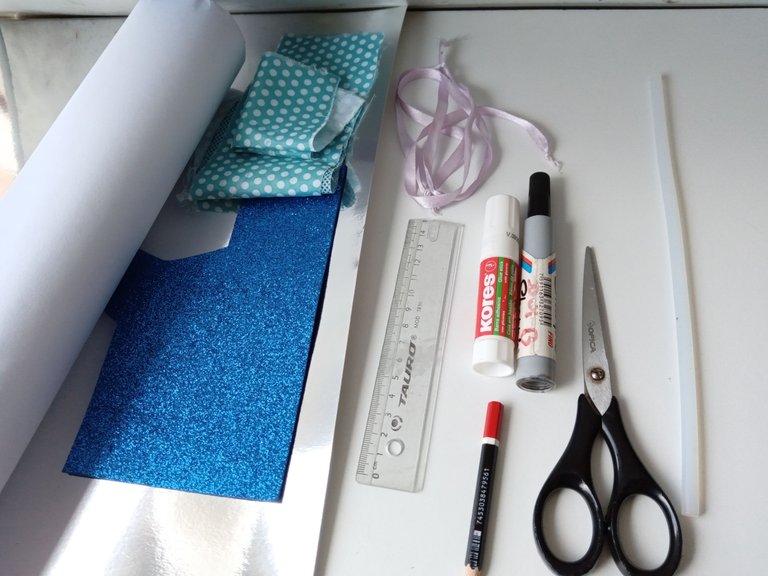
🌸 MATERIALES | 🌸 MATERIALS
- Cartulina metalizada plateada.
- Tela (Color o diseño de preferencia).
- Foami escarchado azul.
- Marcador negro.
- Aguja e hilo.
- Abre huecos.
- Algodón.
- Hoja.
- Cinta.
- Pega.
- Tijera.
- Regla.
- Lápiz.
- Silver metallic cardboard.
- Fabric (Colour or design of preference).
- Blue frosty foami.
- Black marker.
- Needle and thread.
- Open holes.
- Cotton.
- Sheet.
- Tape.
- Job.
- Scissors.
- Ruler.
- Pencil.
🛍 PROCEDIMIENTO | 🛍 PROCESS
- PASO 1:
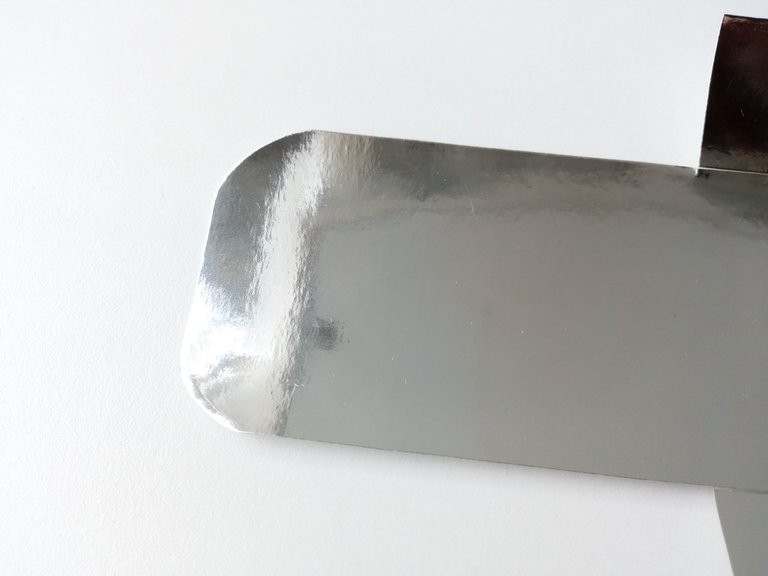
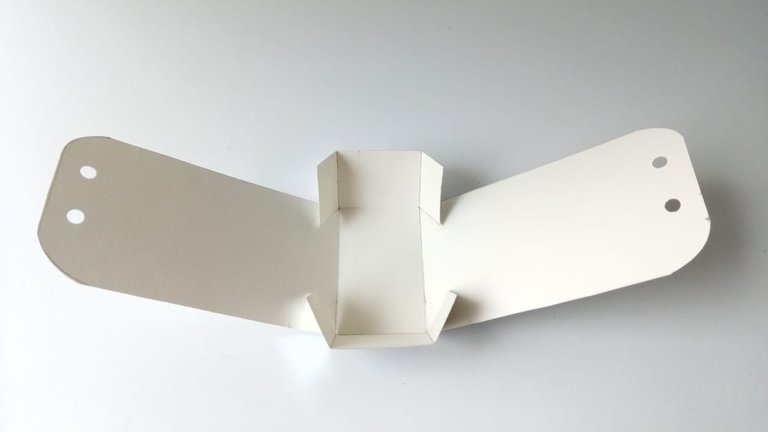
Lo primero que hice fue el patrón de la caja en la cartulina metalizada plateada. Las medidas en este caso fueron: la base de 7.5 cm x 4 cm; las paredes más largas de 12 cm x 6.5 cm; las paredes más pequeñas de 3 cm x 4 cm y los pliegues de 2 cm. Recorté y en las paredes más altas le di una forma curva con las tijeras.
- STEP 1:
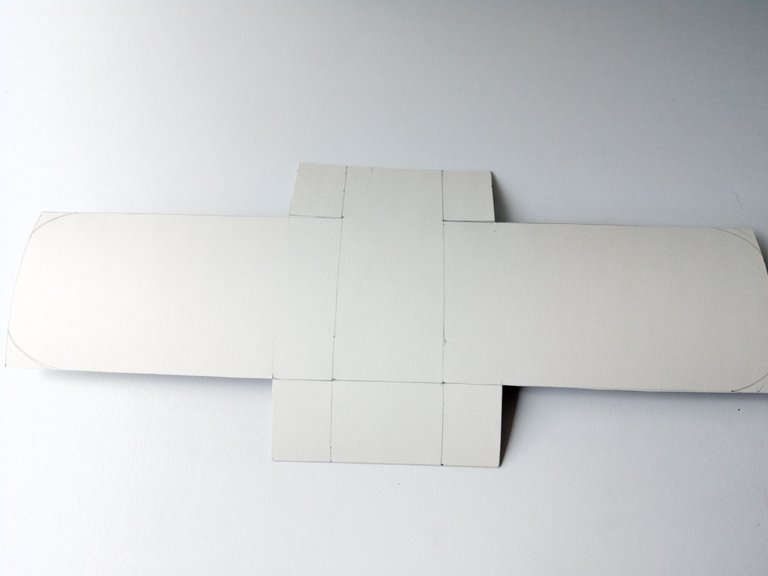
- PASO 2:
Después de cortar, doblé cada una de las paredes y pliegues (puedes ayudarte con la punta de la tijera). Luego pegué los pliegues a las paredes más grandes y en la parte superior hice dos agujeros en ambas paredes.
- STEP 2:
After cutting, I folded each of the walls and creases (you can help with the tip of the scissors). I then glued the folds to the larger walls and at the top made two holes on both walls.

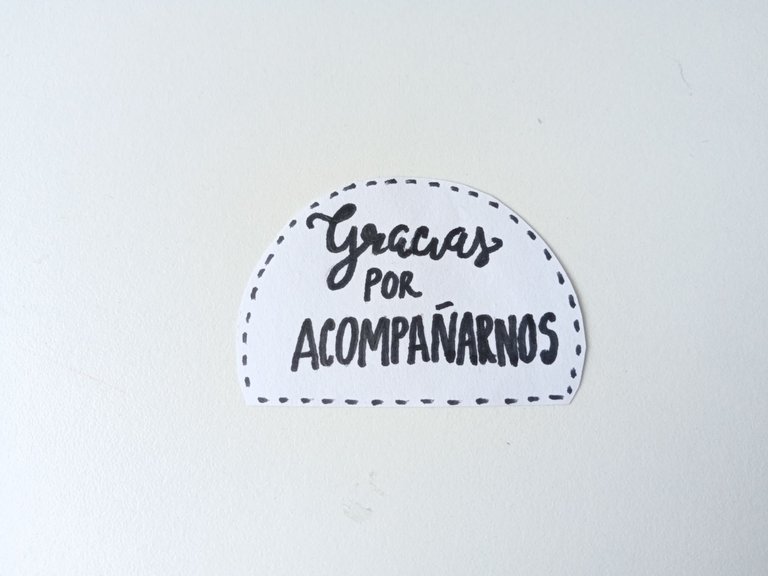
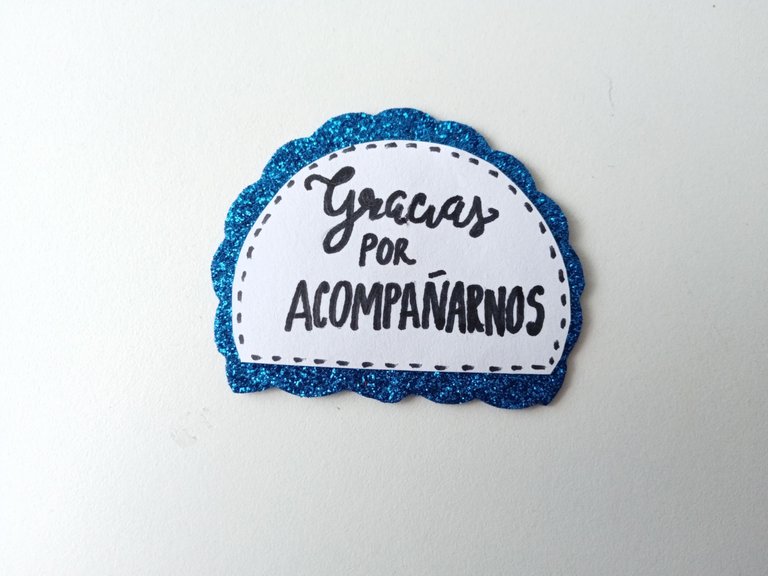
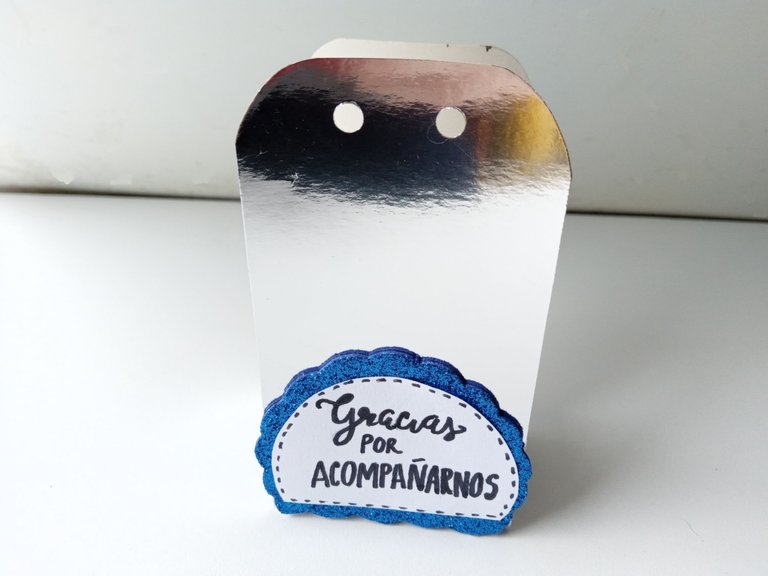
- PASO 3:
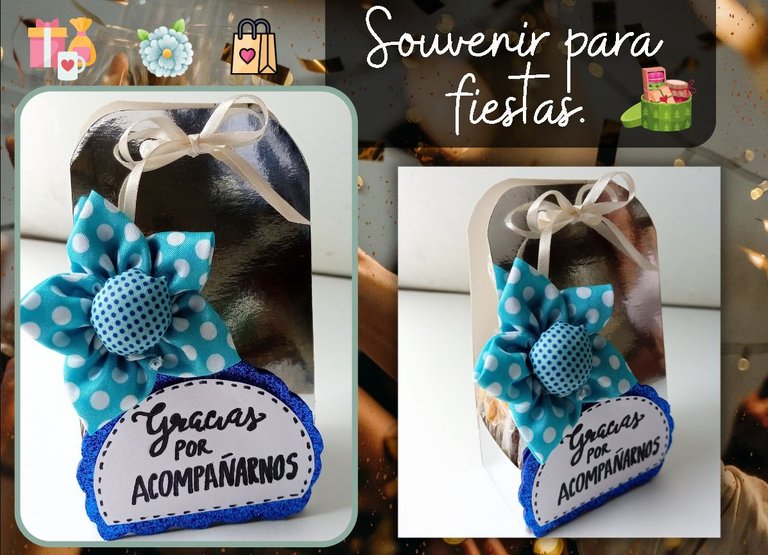
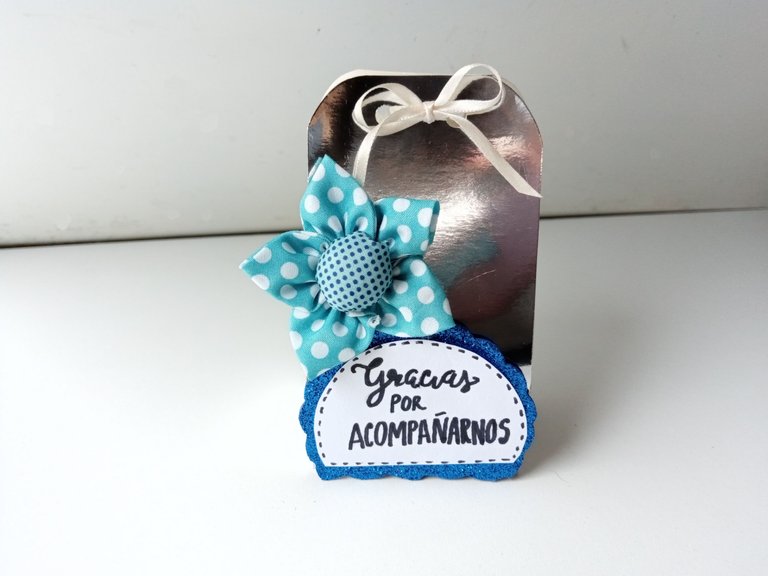
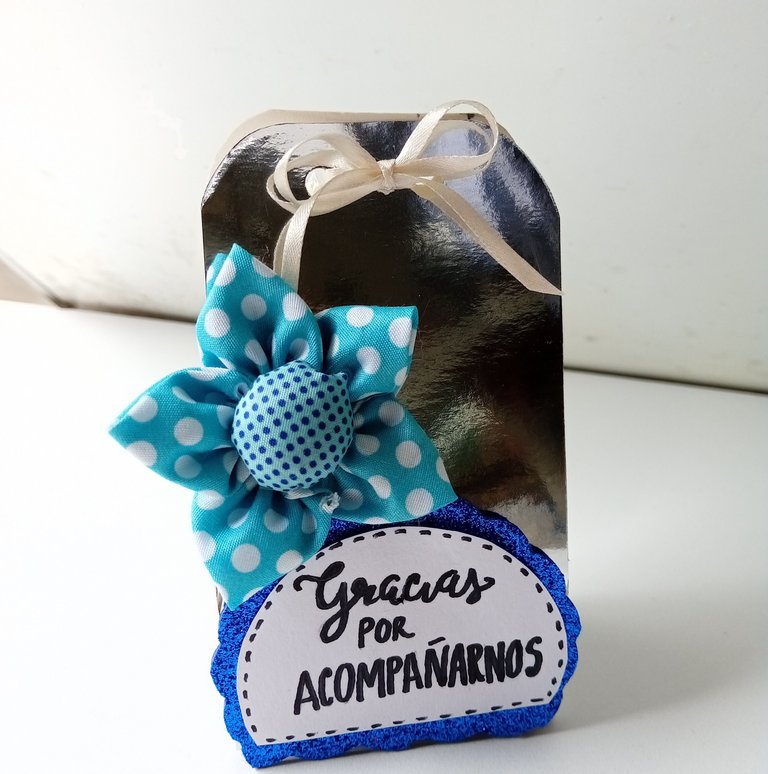
Luego procedí a escribir un bonito mensaje en una hoja. En este caso escribí: “Gracias por acompañarnos”. Luego, pase marcador negro, recorté la hoja dándole una forma ovalada, arriba y plana, abajo y le pasé unas líneas pequeñas por todo el borde de la hoja. Después, recorté el foami escarchado azul un poco más grande que la hoja con la misma forma, pero recortando de una forma diferente. Pegué la hoja sobre el foami y luego a la parte inferior de la caja.
- STEP 3:
I then proceeded to write a nice message on a piece of paper. In this case I wrote: "Thank you for joining us." Then using a black marker, I cut out the paper making it oval on top and flat on the bottom and I traced little lines around the edge of the paper. Next, I cut the blue frosted foam a bit larger than the sheet in the same shape, but cut differently. I glued the sheet to the foam and then to the bottom of the box.
- PASO 4:
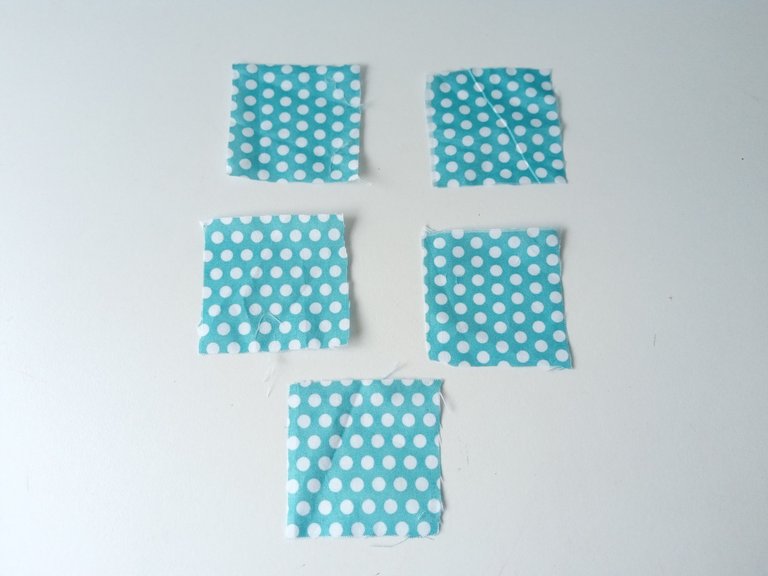
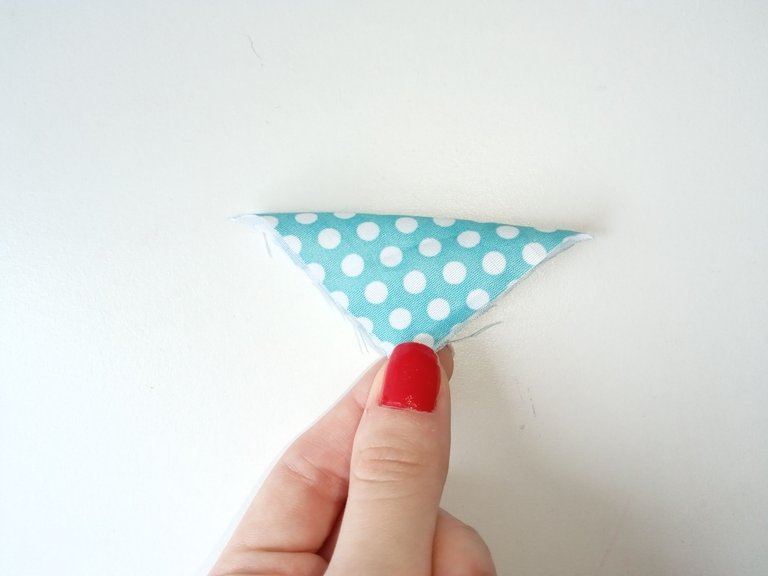
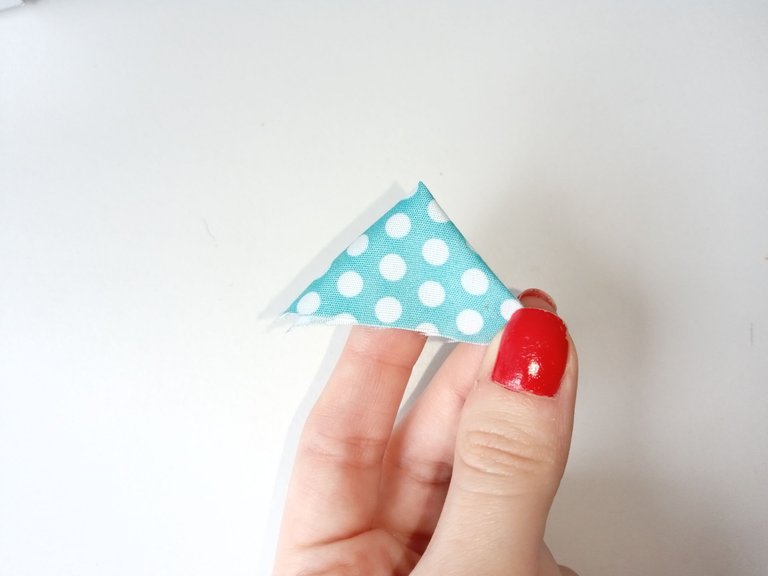
Ahora sí, vamos con la tierna decoración. Como la caja es pequeña, decidí hacer una flor de tamaño moderado, así que recorté 5 cuadrados de tela de 7 cm x 7 cm. Luego, para formar cada pétalo, simplemente, doblé el cuadrado formando un triángulo y volví a doblar a la mitad formando un triángulo más pequeño.
- STEP 4:
Now yes, let's go with the tender decoration. Since the box is small, I decided to make a flower of moderate size, so I cut 5 7cm x 7cm squares of fabric. Then, to form each petal, I simply folded the square into a triangle and folded it in half again into a smaller triangle.
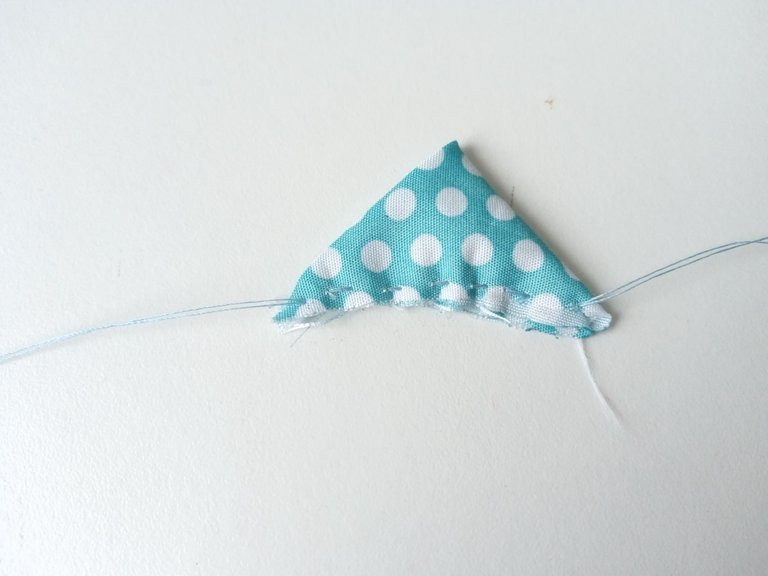
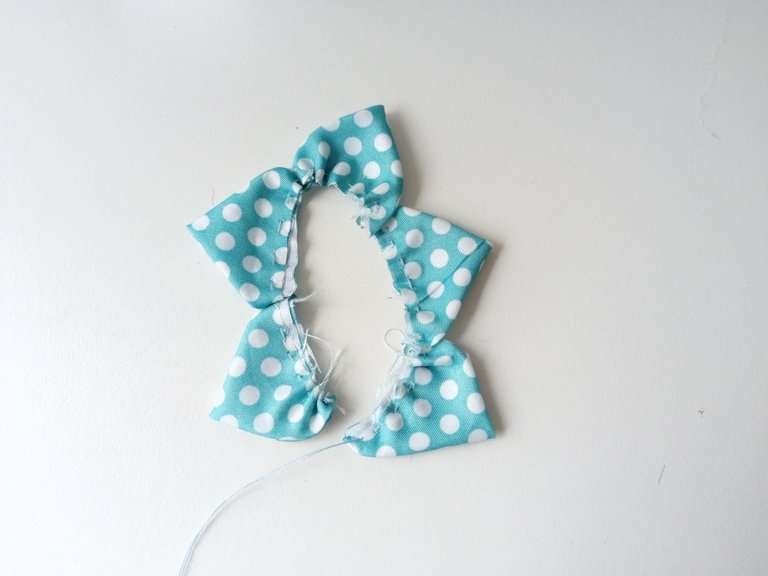
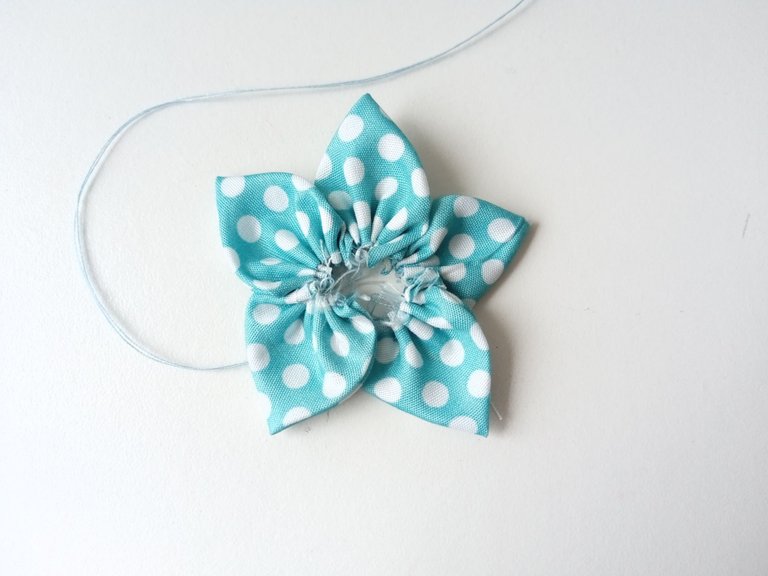
- PASO 5:
Luego, con aguja e hilo, cosemos a lo largo de la parte inferior del triángulo y bajamos el pétalo hacia abajo del hilo. Repetir el mismo proceso con el resto de los cuadrados y una vez listos, tiramos del hilo para que se arruchen y cosemos el primer pétalo con el último.
- STEP 5:
Then, using a needle and thread, sew along the bottom of the triangle and down the thread. I repeated the same process with the rest of the squares and once ready, we pulled the thread so that it rolled up and we sewed the first petal with the last one.
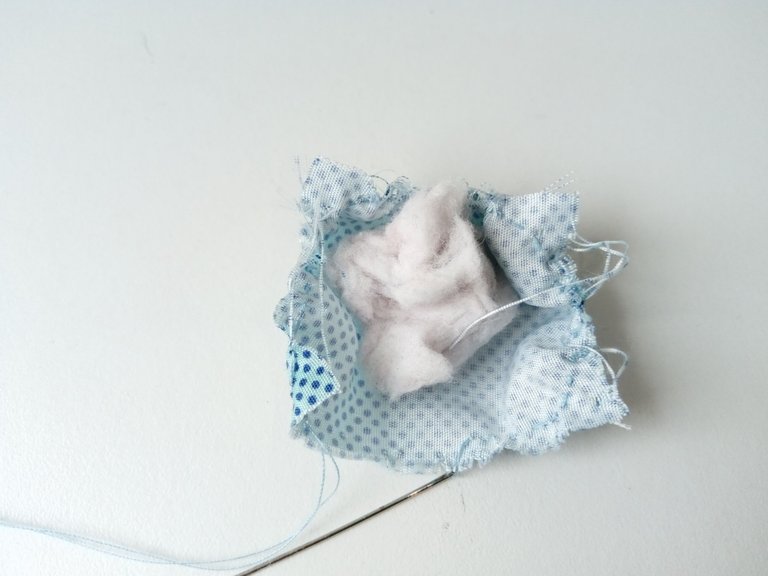
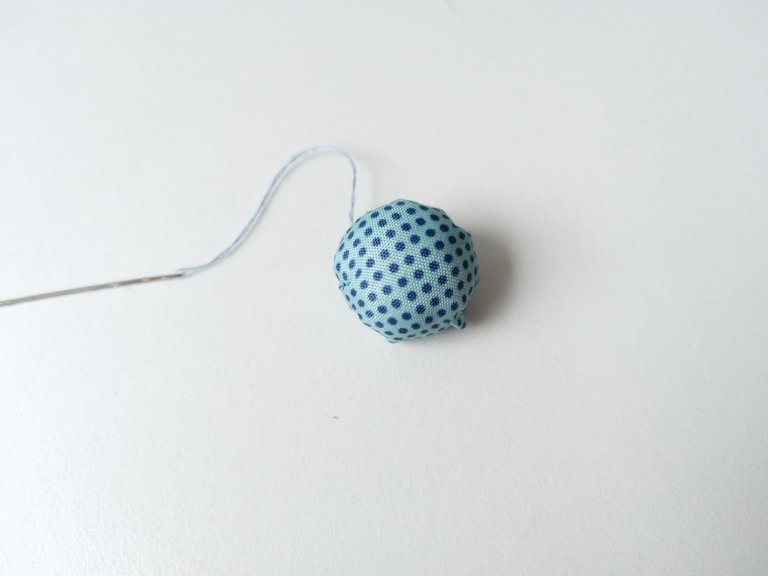
- PASO 6:
Por último, recortar un círculo de tela del mismo tamaño, coser por todo el borde y antes de arruchar agregar un poco de algodón. Después Arruchar, cerrar y pegar o coser en medio de los pétalos. Una vez listo, pegué sobre el mensaje, coloqué el detalle dentro de la cajita y lo cerré con un pequeño lazo en la parte superior.
- STEP 6:
Lastly, cut a circle of fabric the same size, sew the entire edge and before wrinkling add some cotton, wrinkle, close and glue or sew in the middle of the petals. Once ready, I pasted the message, added the detail inside the box and closed it with a small bow at the top.
✨🛍🌸¡And ready!🌸🛍✨ In this super simple way, you can make a nice detail to give away at your parties or a special meeting. I was fascinated with this little detail and the flower, I am sure that soon I will bring you a beautiful idea with fabric flowers. I hope you liked the step by step and you are encouraged to elaborate it.
❤️Until the next post.
✨RESULTADO: | ✨RESULT:


Todas las fotografías son de mi propiedad.
Separador y Fotos editadas en Canva
All photographs are my property.
Photos edited in Canva


