✨¡Hola amigos amantes de la creatividad! Espero que estén todos bien.✨
🔸Sin más que añadir, a continuación los dejo con el paso a paso:
✨¡Hello friends who love creativity! I hope you are all well.✨
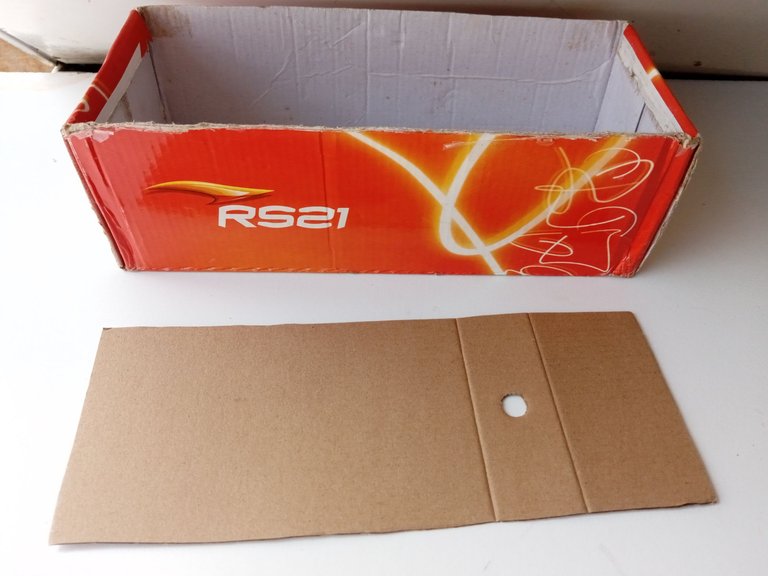
Good afternoon, friends! I hope you are having a great week. For my part, I'm happy to stop by and share a new creation with you. This time I'm sharing with you the step-by-step to make a beautiful organizer for your dressing table. It's been a while since I've shared with you ideas of organizers, and as I was cleaning and throwing away things I no longer needed, I found this box, which has helped me a lot to put my paints in the cold, but when I tidy it up it's empty and ready to throw away.
However, as you know, I love to recycle cardboard haha so I thought of turning it into a vanity organizer, so I was not getting rid of the box, but it was placed in another place that was needed to give order to another space.
🔸Without more to add, then I leave you with the step by step:

♥️ESPERO QUE TE GUSTE,
¡Empecemos!
♥️I HOPE YOU LIKE IT,
Let's start!

✂️ MATERIALES | ✂️ MATERIALS
- Caja de zapatos.
- Telas con distinto color.
- Foami metalizado dorado.
- 2 paletas de madera.
- Pinturas.
- Pegamento.
- Tijeras.
- Lápiz.
Shoe box.
Fabrics with different colors.
Gold metallic foam.
2 wooden palettes.
Paints.
Glue.
Scissors.
Pencil.
🌟 PROCEDIMIENTO | 🌟 PROCESS
- PASO 1:
En mi caso, me tocó recortar en cartón un rectángulo 1 cm más pequeño que la base, ya que como no tenía la tapa, no podía utilizar la pieza superior para más adelante cubrir la parte interna de la caja. Pero en caso de tener tapa, simplemente hay que recortar los bordes y dejar la parte superior o central de la tapa.
- STEP 1:
In my case, I had to cut out a rectangle 1 cm smaller than the base from cardboard, since I didn't have a lid, so I couldn't use the top piece to cover the inside of the box later. But if you have a lid, you just have to cut the edges and leave the top or middle part of the lid.
- PASO 2:
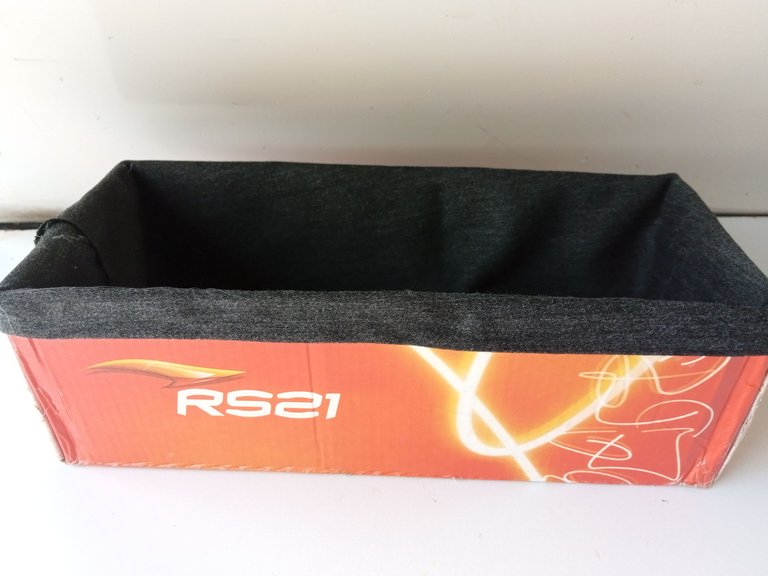
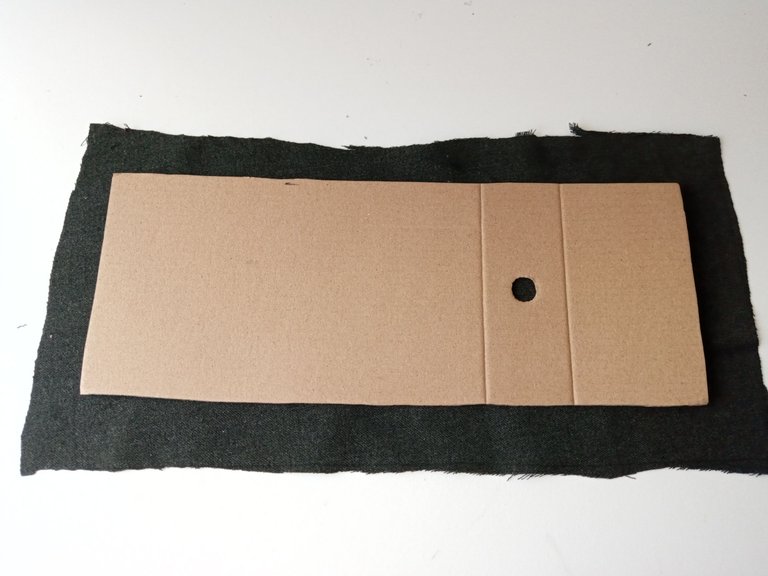
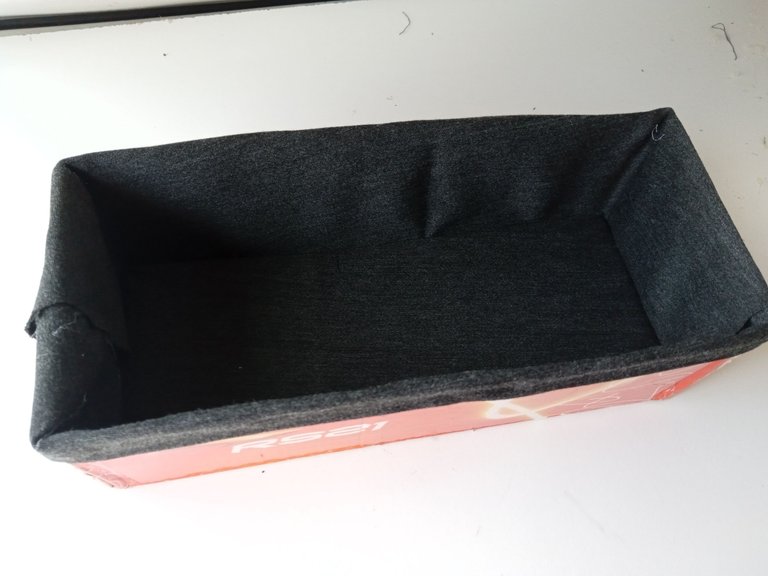
Lo primero que hice fue tomar la tela con diseño más sencillo y pegar por todo el borde superior, en mi caso solo quise un borde de aproximadamente 1 cm, pero pueden hacerlo más largo. Al estar listo, arreglé el excedente a la parte interna de las paredes de la caja para cubrir. Luego, tomé el cartón que recorté en el primer paso y lo forré con la misma tela, así que solo recorté la tela dejando 1 cm o 2 cm más larga que la pieza, pegué y al estar lista, cubrí la parte interna de la caja con la pieza.
- STEP 2:
The first thing I did was take the fabric with the simplest design and glue it all around the top edge. In my case, I only wanted a border of about 1 cm, but you can make it longer. When I was ready, I fixed the excess to the inside of the walls of the box to cover. Then, I took the cardboard I cut out in the first step and covered it with the same fabric, so I just cut out the fabric leaving 1 cm or 2 cm longer than the piece, glued it and when it was ready, I covered the inside of the box with the piece.
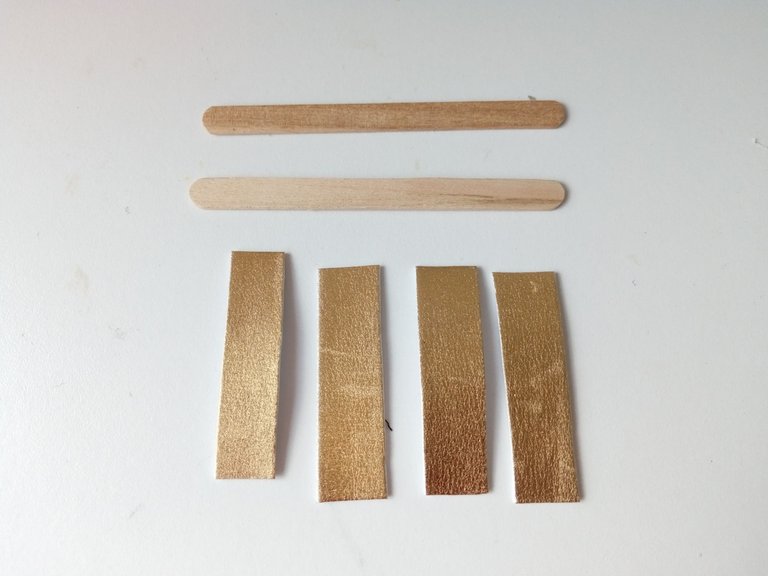
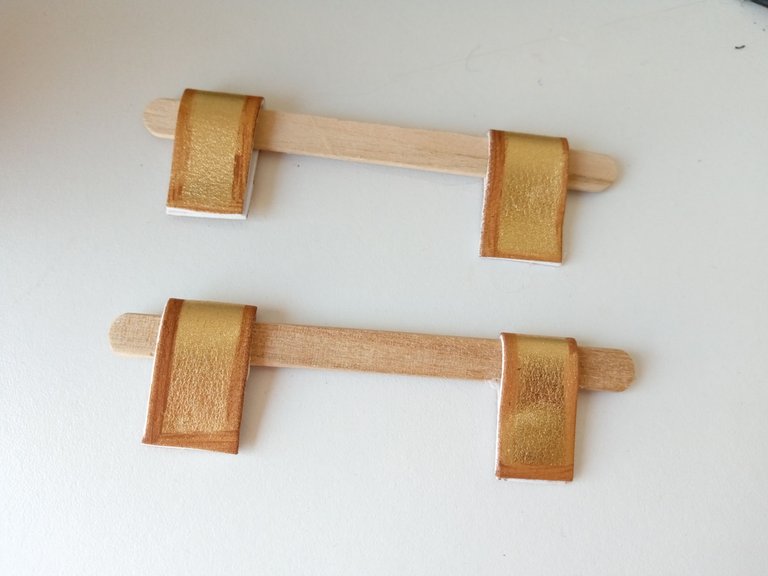
- PASO 3:
Seguidamente, tomé las paletas de madera y recorté 4 tiras en foami metalizado dorado de 8 cm x 1 cm. Al tenerlos listos, le di color a los bordes con pintura marrón para que diera una apariencia oxidada. Al estar seco, pegué 2 tiras a los extremos de cada una de las paletas (como se muestra en la imagen de a continuación) y las pegué a los laterales de la caja, justo por debajo de la tela y así, obtener unas agarraderas.
- STEP 3:
Next, I took the wooden pallets and cut out 4 strips of 8cm x 1cm gold metallic foam. Once they were ready, I colored the edges with brown paint to give it a rusty look. Once it was dry, I glued 2 strips to the ends of each of the pallets (as shown in the image below) and glued them to the sides of the box, just below the fabric, to make handles.

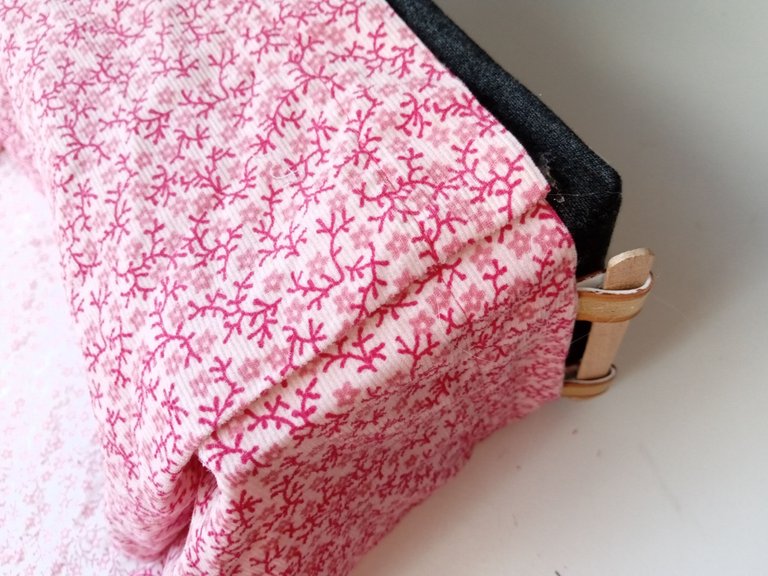
- PASO 4:
Después, tocó forrar el resto de la caja con la tela decorada, la cual tiene que ser lo suficientemente grande para forrar las paredes y la base. Así que pegué justo por el borde de la primera tela y para que quede prolijo, le hice un pequeño doblez antes de pegar la última parte. Con el excedente, cubrí toda la parte superior de la caja, como si estuviera envolviendo un regalo para que quede más prolijo.
- STEP 4:
Next, it was time to cover the rest of the box with the decorated fabric, which has to be big enough to cover the walls and the base. So I glued just along the edge of the first fabric and to make it neat, I made a small fold before gluing the last part. With the excess, I covered the entire top of the box, as if I were wrapping a gift, to make it neater.


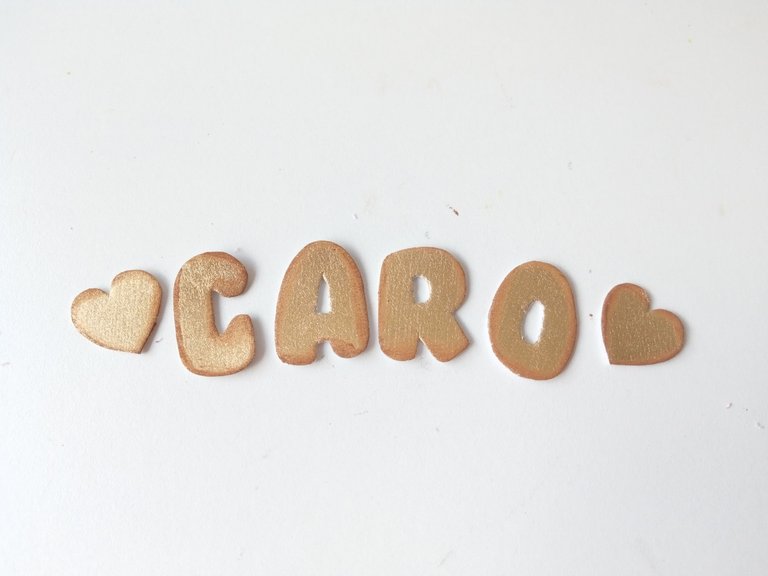
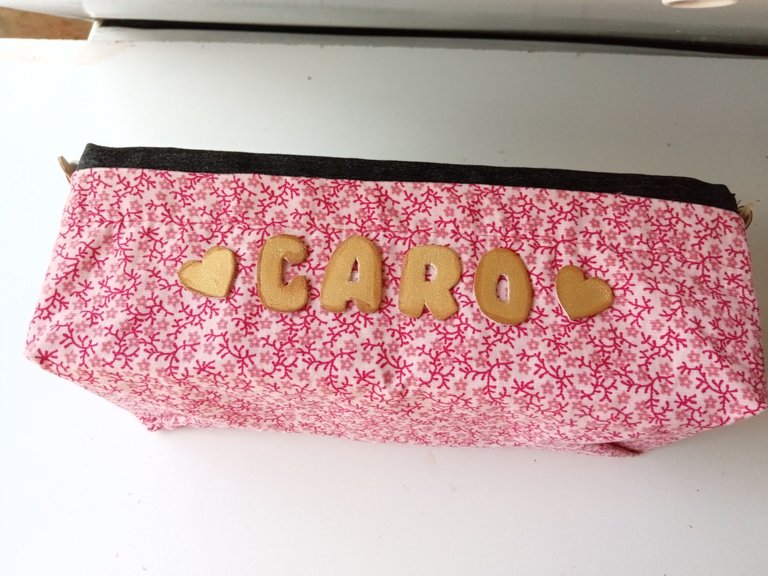
- PASO 5:
Una vez totalmente cubierta, recorté un nombre en foami metalizado junto con dos corazones y, al igual que las tiras, les di color a los bordes con pintura marrón, para dar esta apariencia como oxidada. Al estar seco, pegué hasta formar el nombre en medio de una de las paredes de la caja y los corazones a los lados.
- STEP 5:
Once it was completely covered, I cut out a name in metallic foam along with two hearts and, like the strips, I colored the edges with brown paint, to give it a rusty appearance. When it was dry, I glued it until the name was in the middle of one of the walls of the box and the hearts on the sides.
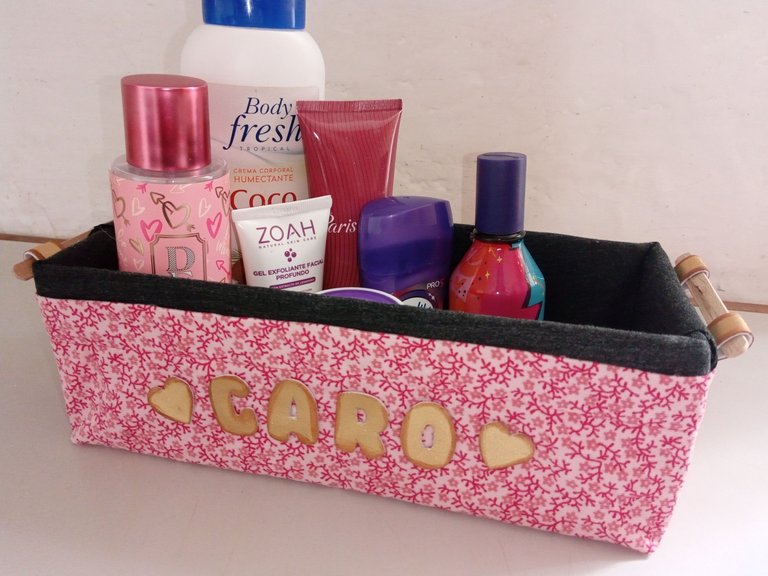
✨Once it was ready, we can start placing our creams or whatever we want in this cute and easy organizer. I loved the colors I used, in this case it was my mother's choice, because the organizer was hers. The fun thing is that you can customize it to your liking. I hope you liked it and are encouraged to make it.
❤️Until the next post.
✨RESULTADO: | ✨RESULT:


Todas las fotografías son de mi propiedad.
Separador y Fotos editadas en Canva
All photographs are my property.
Photos edited in Canva


