✨¡Hola amigos amantes de la creatividad! Espero que estén todos bien✨
🔸Sin más que añadir, a continuación los dejo con el paso a paso:
✨¡Hello friends who love creativity! ✨
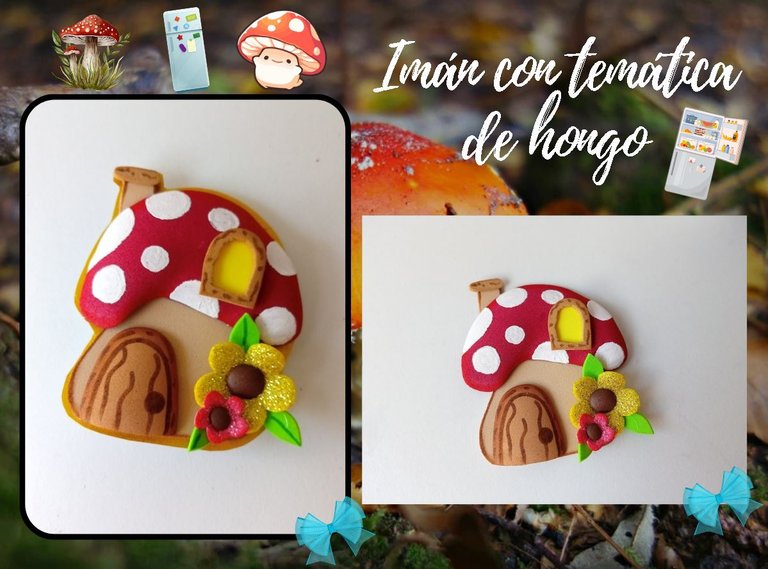
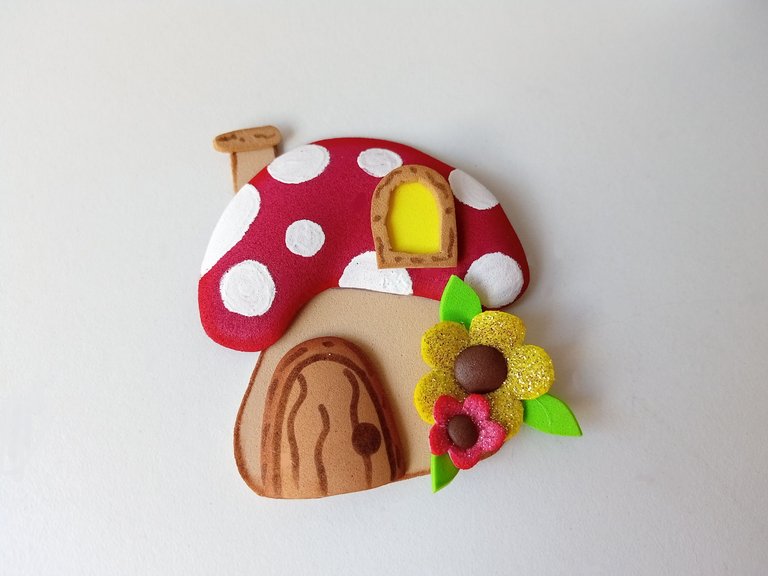
Good afternoon, friends. I hope you are having a great week. For my part, I am doing very well, thank God. On this occasion, I am sharing with you the step-by-step instructions for making a nice mushroom-themed decoration for the refrigerator. I think it has been a few weeks or months since the last time I shared a decoration for the refrigerator with you and as usual, I usually share two magnet ideas, but this time I wanted to make a mushroom and have it be the protagonist on this occasion.
I have always thought about making some decoration with this theme, but I was a little nervous about knowing what the final result would be, so I always let it go. What do you think? Did this idea turn out nice?
🔸Without more to add, then I leave you with the step by step:
♥️ESPERO QUE TE GUSTE,
¡Empecemos!
♥️I HOPE YOU LIKE IT,
Let's start!

✂️ MATERIALES | ✂️ MATERIALS

- Cartulina escarchada dorada.
- Foami escarchado dorado.
- Foami escarchado rosa.
- Foami rojo.
- Foami beige.
- Foami marrón.
- Foami amarillo.
- Pinturas y marcadores.
- Pegamento.
- Hoja blanca.
- Tijeras.
- Imán.
- Lápiz.
- Golden frosted cardboard.
- Golden frosted foam.
- Pink frosted foam.
- Red foam.
- Beige foam.
- Brown foam.
- Yellow foam.
- Paints and markers.
- Glue.
- White paper.
- Scissors.
- Magnet.
- Pencil.

🌟 PROCEDIMIENTO | 🌟 PROCESS

- PASO 1:
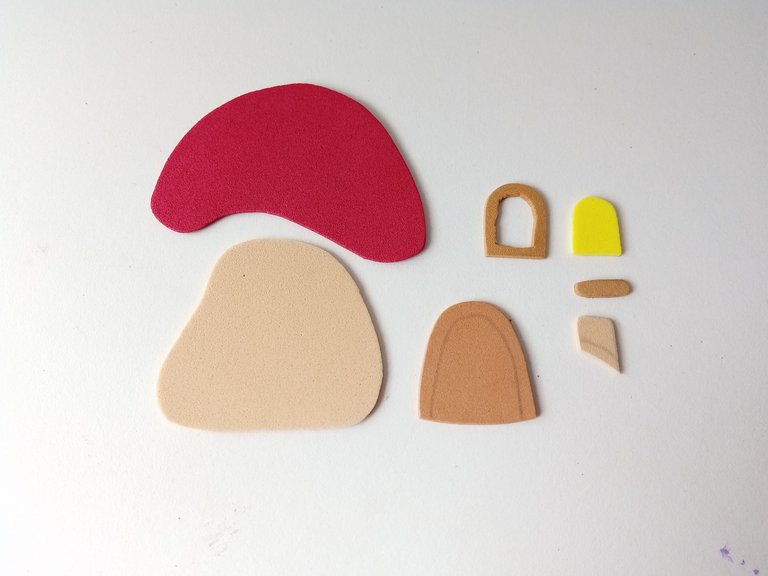
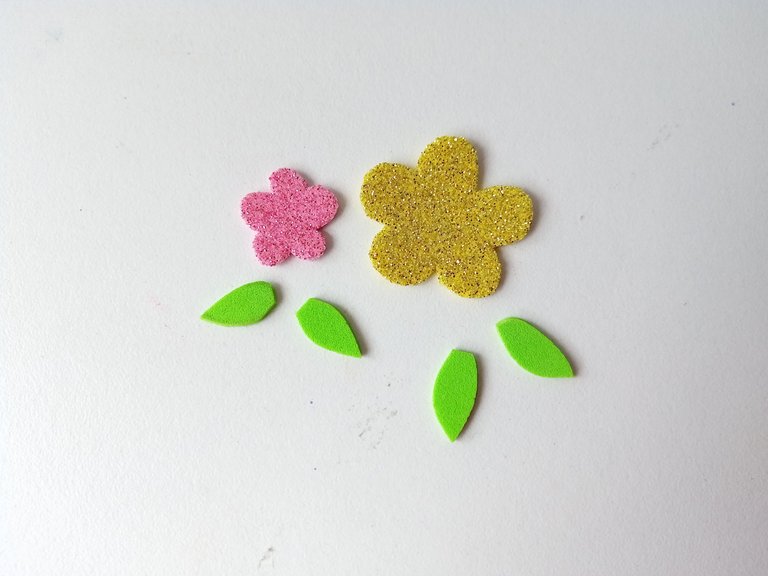
Lo primero que hice fue buscar algún dibujo o diseño de hongo que me gustara y comencé a dibujar en una hoja blanca para formar el patrón. También dibujé dos flores de diferente tamaño. Luego, transferí cada una de las piezas a los colores correspondientes de foami de la siguiente manera: la parte superior del hongo en foami rojo; la base y la chimenea en foami beige; la puerta, ventana y la parte superior de la chimenea en foami marrón y la luz de la ventana en foami amarillo. En cuanto a la decoración de las flores, una la hice en escarchado dorado, la otra en escarchado rosa, el centro en marrón y las hojas en verde.
- STEP 1:
The first thing I did was look for a drawing or mushroom design that I liked and started drawing on a white sheet to form the pattern. I also drew two flowers of different sizes. Then, I transferred each of the pieces to the corresponding colors of foam as follows: the top of the mushroom in red foam; the base and the chimney in beige foam; the door, window and the top of the chimney in brown foam and the window light in yellow foam. As for the flower decoration, I made one in gold frosting, the other in pink frosting, the center in brown and the leaves in green.


- PASO 2:
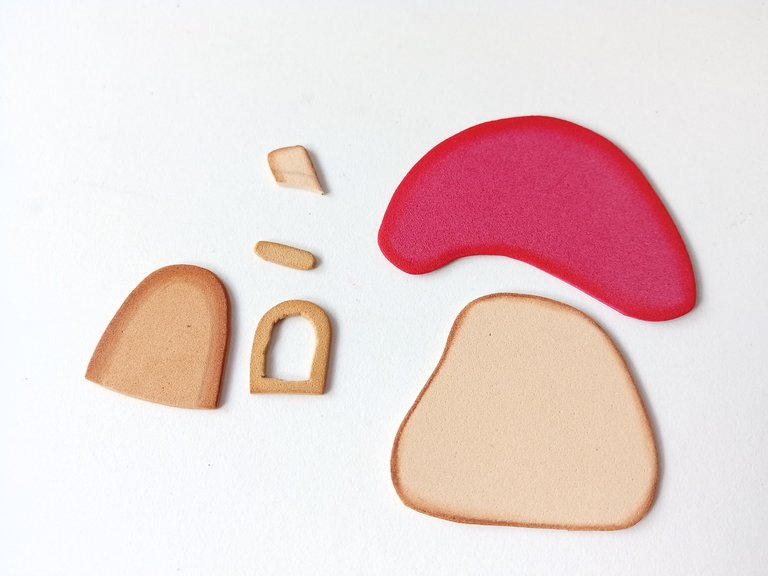
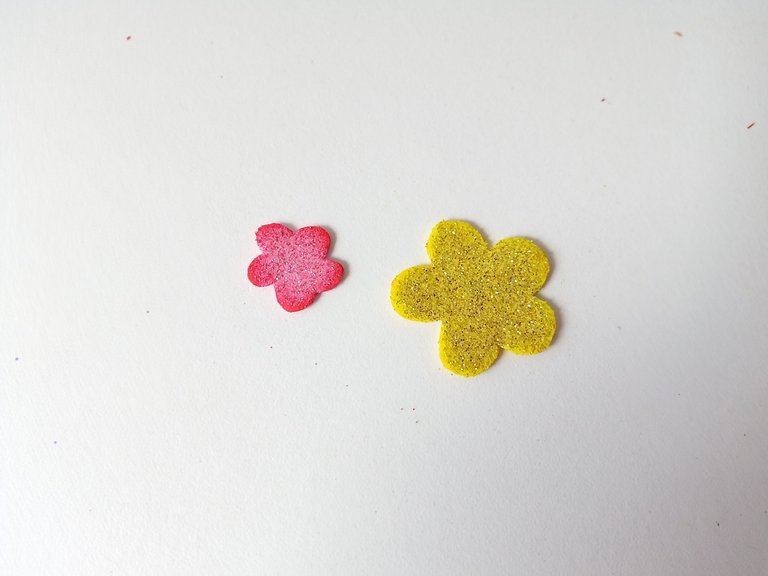
Al tener todas las piezas recortadas, comencé a dar color al borde con ayuda de un pañito y con tonos de pintura que contrasten con cada una de las piezas, tanto de la casa como de las flores. Esta vez, también decidí dar color a los bordes de las flores en foami escarchado porque realza más los colores.
- STEP 2:
Once I had all the pieces cut out, I began to color the edge with the help of a cloth and with shades of paint that contrast with each of the pieces, both the house and the flowers. This time, I also decided to color the edges of the flowers with frosted foam because it enhances the colors more.


- PASO 3:
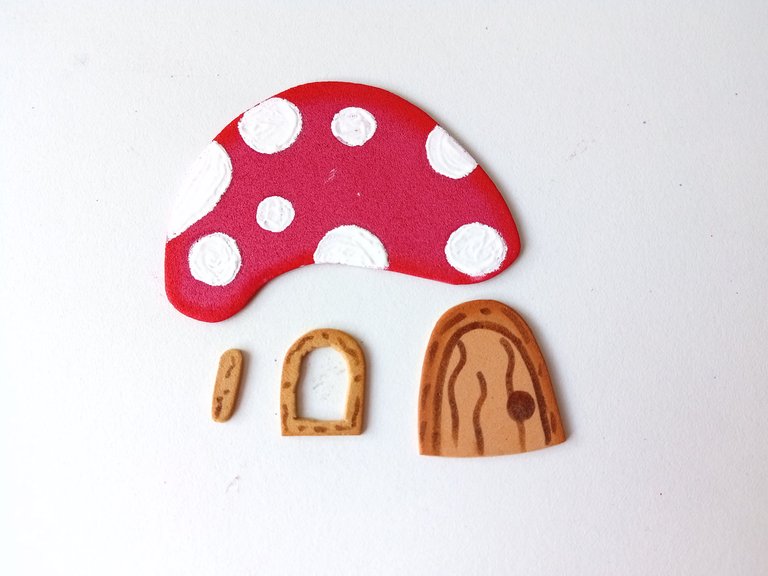
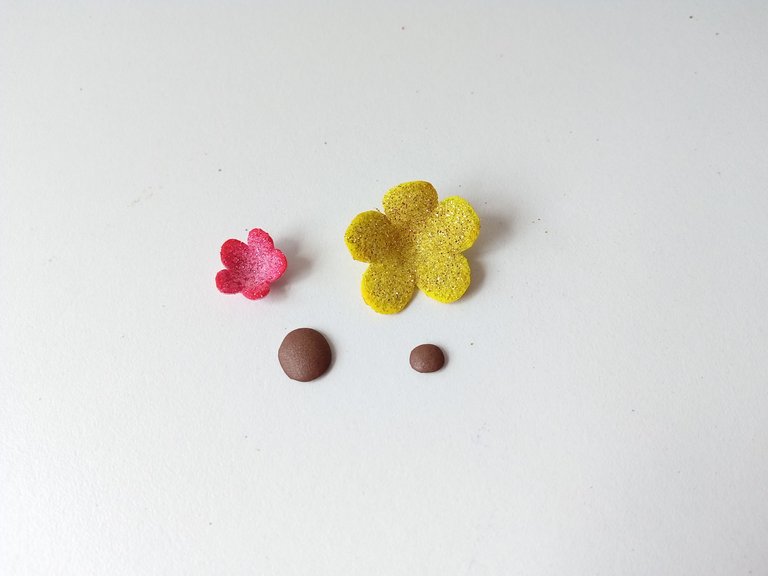
Al estar secas todas las piezas, di más detalles con marcadores, como a las piezas de madera y al hongo le pinté los círculos en la parte superior con pintura blanca. Además, pasé las flores por la plancha caliente para que tuvieran relieve, y repetí el mismo proceso con la parte superior del hongo y la puerta.
- STEP 3:
Once all the pieces were dry, I added more details with markers, such as the wooden pieces and the mushroom, which I painted the circles on the top with white paint. I also passed the flowers over the hot iron so they would have relief, and I repeated the same process with the top of the mushroom and the door.


- PASO 4:
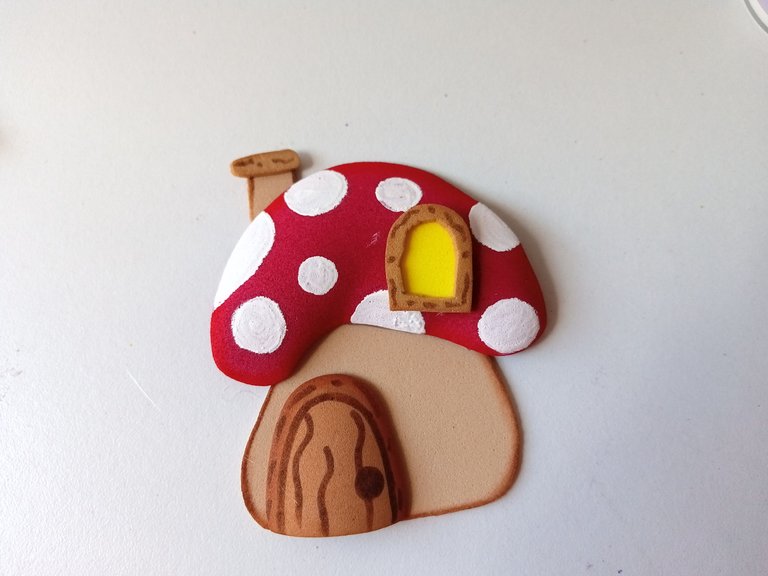
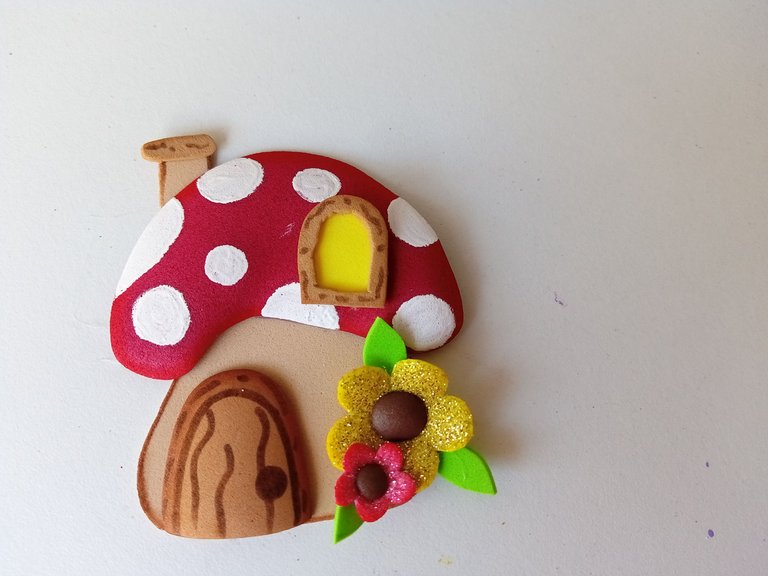
Después, pegué todas las piezas para formar el hongo, luego las decoraciones como ventana, puerta y chimenea. Finalmente, formé las flores y las pegué a la parte inferior derecha de la casa.
- STEP 4:
Afterwards, I glued all the pieces together to form the mushroom, then the decorations such as the window, door and chimney. Finally, I formed the flowers and glued them to the bottom right of the house.


- PASO 5:
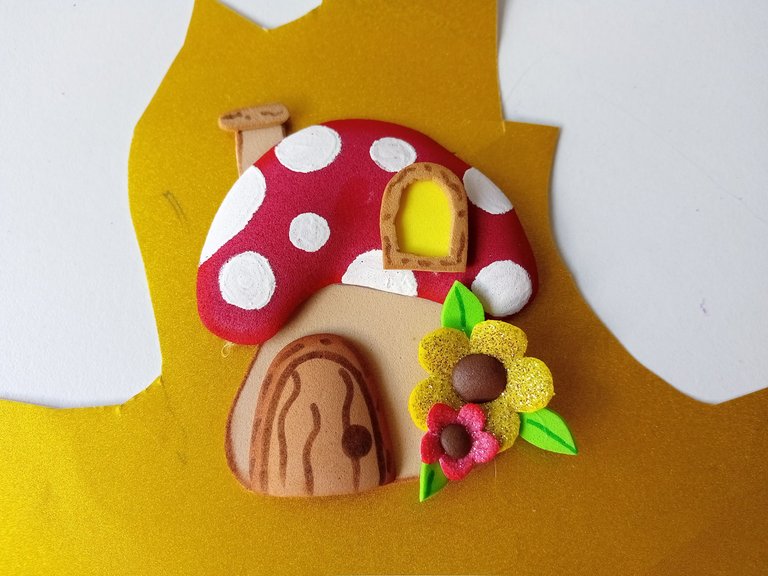
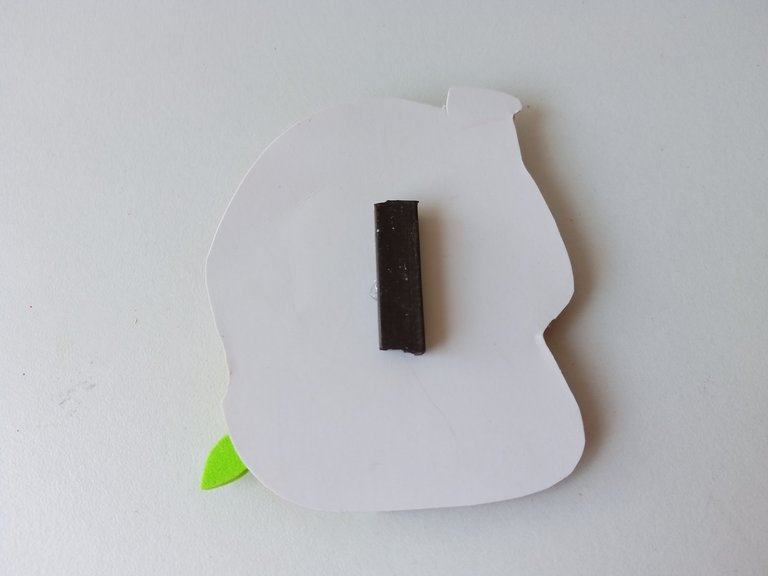
Por último, al tener toda la pieza armada, pegué sobre la cartulina escarchada dorada y recorté dejando un borde de 0.5 cm de ancho y pegué el imán a la parte trasera de la cartulina de forma vertical.
- STEP 5:
Finally, once I had the whole piece assembled, I glued it onto the gold frosted cardboard and cut it out leaving a 0.5 cm wide border and glued the magnet to the back of the cardboard vertically.

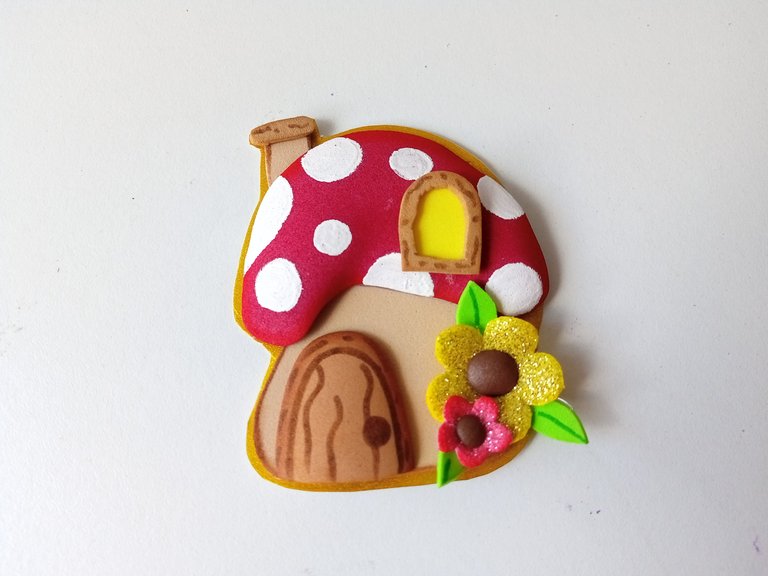

✨¡And ready!✨ This is how I made this nice, easy and simple magnet to decorate the refrigerator at home. It is also a nice idea to give a gift to a loved one, since many people love to decorate the refrigerator with lots of magnets. I hope you liked the step by step and are encouraged to make it.
❤️Until the next post.

✨RESULTADO: | ✨RESULT:



Todas las fotografías son de mi propiedad.
Separador y Fotos editadas en Canva
All photographs are my property.
Photos edited in Canva


