✨🐓¡Hola amigos amantes de la creatividad! Espero que hayan pasado un muy buen comienzo de semana.✨
🔸Sin más que añadir, a continuación los dejo con el paso a paso:
✨🌼¡Hello friends who love creativity! I hope you had a very good start to the week.✨
For my part, I am writing this post when it is terribly cold, haha. The cold that should have been in December began in January and came with everything. But hey, very happy to be back in this beautiful community. On this occasion I share with you the step by step of a beautiful decoration for the kitchen. As they told you, little by little I am creating decorations for my home, because the Christmas decorations will soon be gone and I want to update the decorations for each sector of the house.
This time I wanted to make a decoration using foami as the main material. I wanted to make a chicken, since it is more common for the kitchen to be decorated with cow ornaments, but this time I wanted something different. Also, I wrote a message to read whenever I get a little overwhelmed in the kitchen, when the food doesn't turn out the way I want, haha.
🔸Without more to add, then I leave you with the step by step:

♥️ESPERO QUE TE GUSTE,
¡Empecemos!
♥️I HOPE YOU LIKE IT,
Let's start!

✂️ MATERIALES | ✂️ MATERIALS
- Foami: marrón, blanco
y rojo. - Foami escarchado: negro.
dorado y verde. - Tizas o marcadores.
- Pintura blanca.
- Tenedor desechable.
- Pegamento.
- Tijeras.
- Lápiz.
- Foami: brown, white
and red. - Frosted foam: black.
gold and green. - Chalk or markers.
- White paint.
- Disposable fork.
- Glue.
- Scissors.
- Pencil.
🐓 PROCEDIMIENTO | 🐓 PROCESS
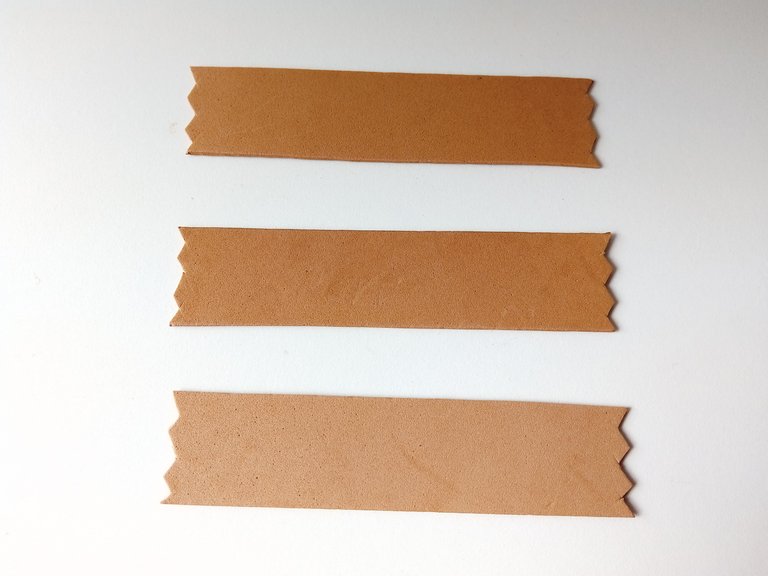
- PASO 1:
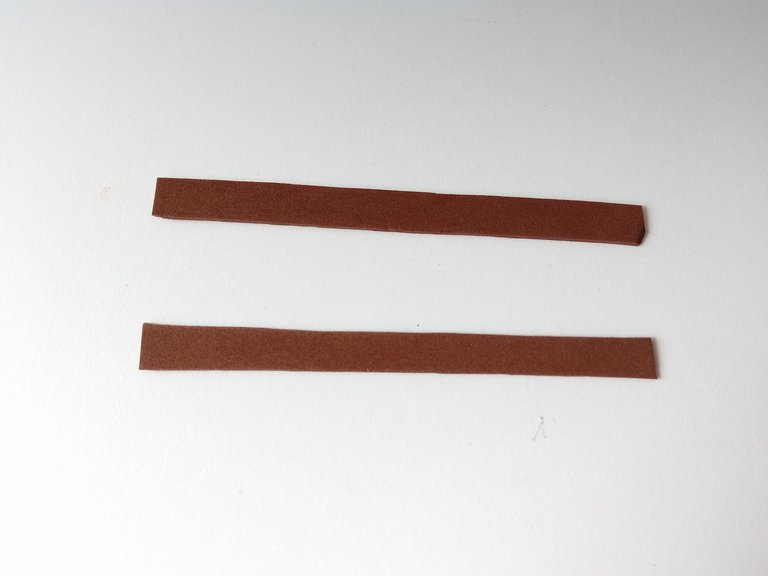
Lo primero que hice fue trazar y recortar 3 tiras de foami color marrón de 13 cm x 3 cm cada una. Luego, a los laterales le recortamos pequeños triángulos para que parezcan madera cortada. Con otro tono de foami marrón (puede ser el mismo), recorté 2 tiras de 13 cm x 0,5 cm.
- STEP 1:
The first thing I did was trace and cut out 3 strips of brown foam measuring 13 cm x 3 cm each. Then, we cut out small triangles on the sides so that they look like cut wood. With another tone of brown foam (it can be the same), I cut out 2 strips of 13 cm x 0.5 cm.
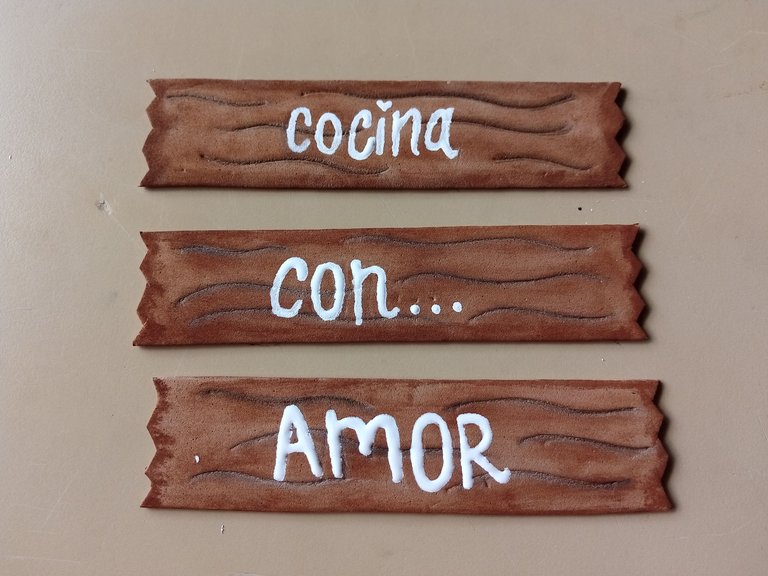
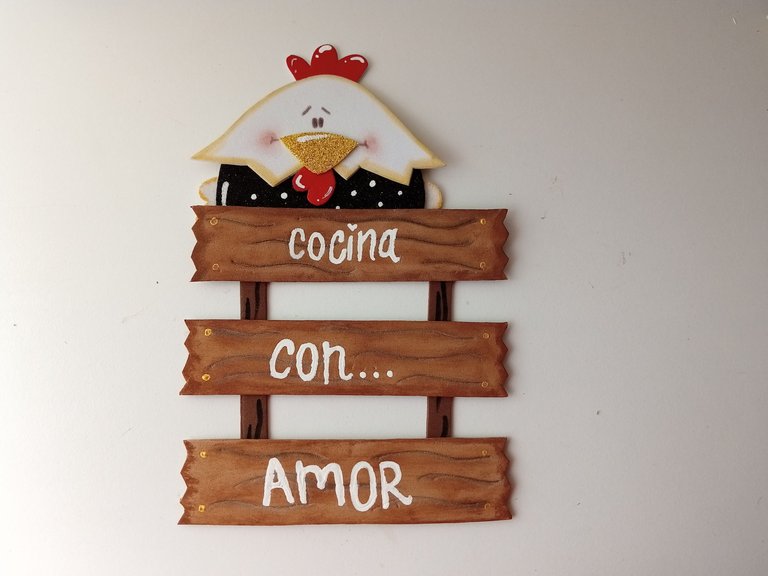
- PASO 2:
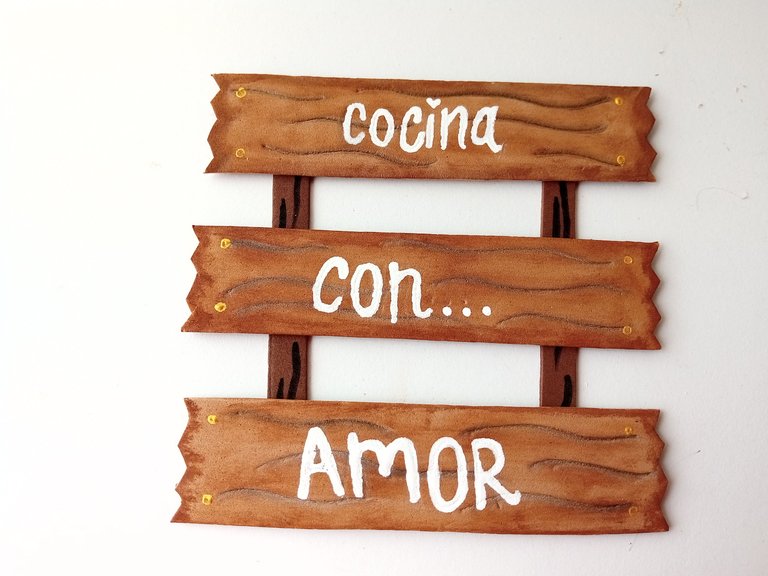
Una vez listas las piezas, comencé a pasar tiza de un tono más oscuro por todo el borde de las 3 piezas más grandes. Con un color o lápiz, dibujé los detalles para que parezcan madera y pase un poco de la misma tiza por encima. Luego, con pintura blanca, escribí ''COCINA CON AMOR'' distribuyendo cada palabra en las 3 piezas de madera y al secar, pequé a las 2 piezas más delgadas, dejando distancia entre cada una y pegando las 3 piezas en horizontal e igualmente, dejando espacio entre cada pieza.
- STEP 2:
Once the pieces were ready, he began running chalk of a darker tone along the entire edge of the 3 largest pieces. With a color or pencil, I drew the details to look like wood and ran a little of the same chalk over it. Then, with white paint, I wrote ''COOK WITH LOVE'' distributing each word on the 3 pieces of wood and when dry, I glued the 2 thinnest pieces, leaving distance between each one and gluing the 3 pieces horizontally and equally, leaving space between each piece.

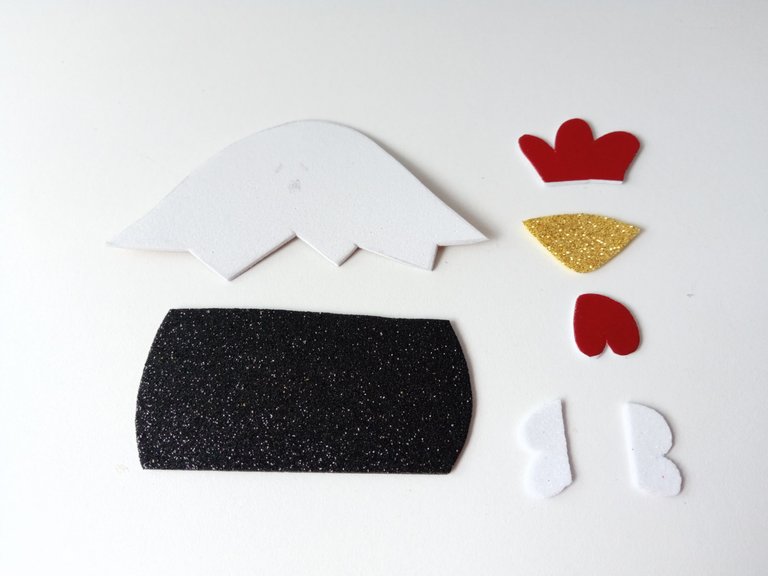
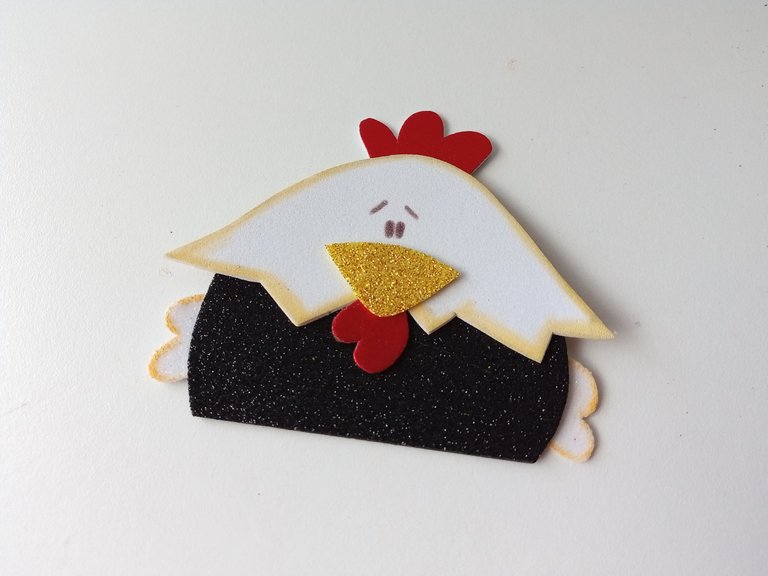
- PASO 3:
Ahora vamos con la gallina. Comencé dibujando el patrón, luego transferí cada pieza al color correspondiente de foami, de la siguiente manera: cabeza y alas en foami blanco, cuerpo en foami escarchado negro, pico en foami escarchado dorado, cresta y barbilla en foami rojo. Al tener las piezas recortadas, tracé por el borde de la cabeza y alas tiza amarilla, dibujé ojos, cejas y pegué toda la figura.
- STEP 3:
Now let's go with the chicken. I started by drawing the pattern, then transferred each piece to the corresponding color of foami, as follows: head and wings in white foami, body in black frosty foami, beak in gold frosted foami, crest and chin in red foami. Having the pieces cut out, I traced yellow chalk along the edge of the head and wings, drew eyes, eyebrows and glued the entire figure.
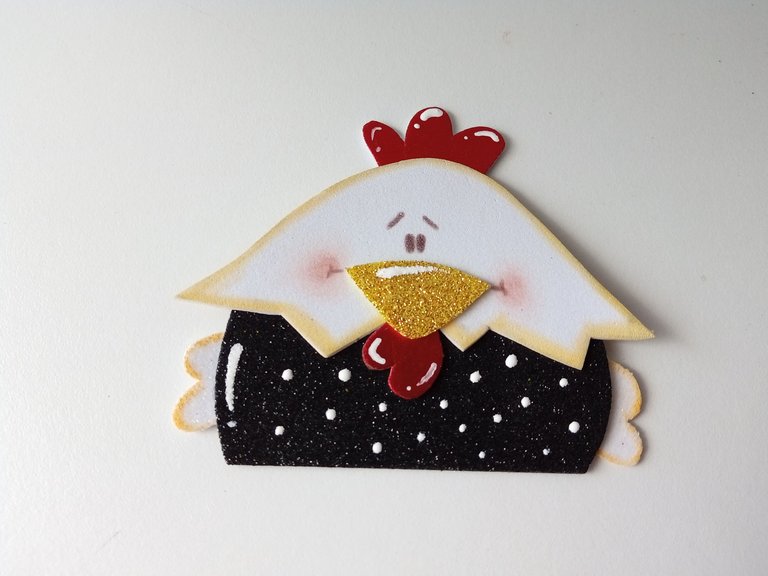
- PASO 4:
Luego di color a las mejillas con tiza roja y detalles de luz donde creí conveniente, pero también, al cuerpo le hice puntitos blancos. Al estar listo, pegué en la parte superior de la pieza que hicimos anteriormente.
- STEP 4:
Then I colored the cheeks with red chalk and highlighted details where I thought appropriate, but I also made white dots on the body. When ready, I glued on top of the piece we made earlier.
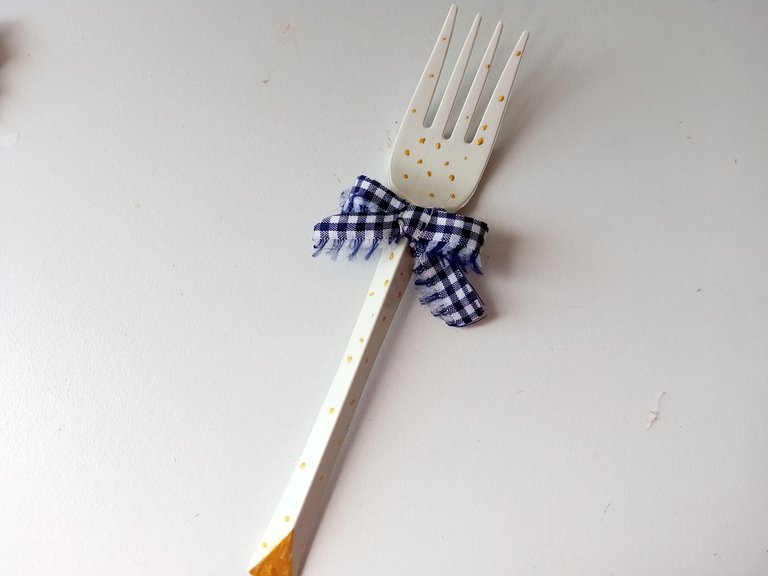
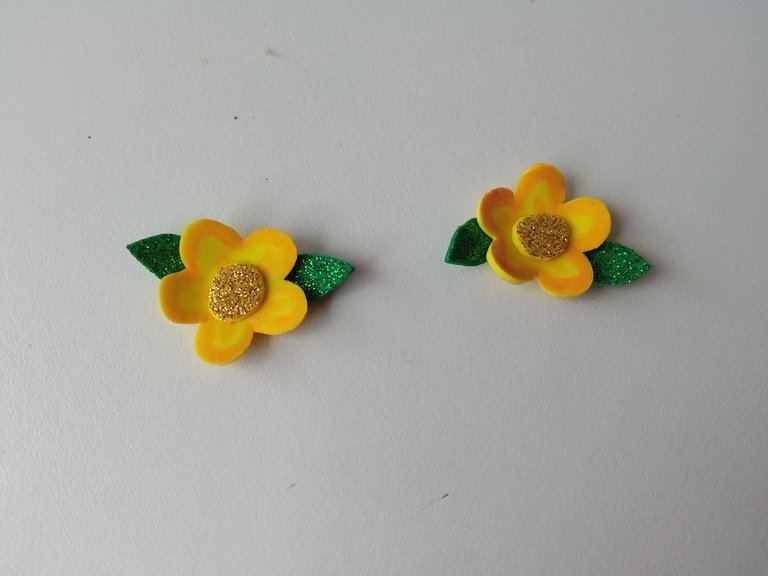
- PASO 5:
Como últimos detalles, tomé un tenedor desechable al que le pinté puntos dorados, le pegué un pequeño lazo y pegué una tira sobre la gallina para poder colgar. Pegué el tenedor en uno de los laterales de las maderas. Por último, hice 2 flores amarillas a las que le di color en el borde con marcador naranja, en medio pegué un círculo dorado e hice unas hojas con verde escarchado, armé las flores y del otro lado del colgante pegué las flores en lugares diferentes.
- STEP 5:
As last details, I took a disposable fork on which I painted gold dots, glued a small bow on it and glued a strip on the chicken so I could hang it. I glued the fork to one of the sides of the wood. Finally, I made 2 yellow flowers that I colored on the edge with an orange marker, in the middle I glued a gold circle and made some leaves with frosty green, I assembled the flowers and on the other side of the pendant I glued the flowers in different places.
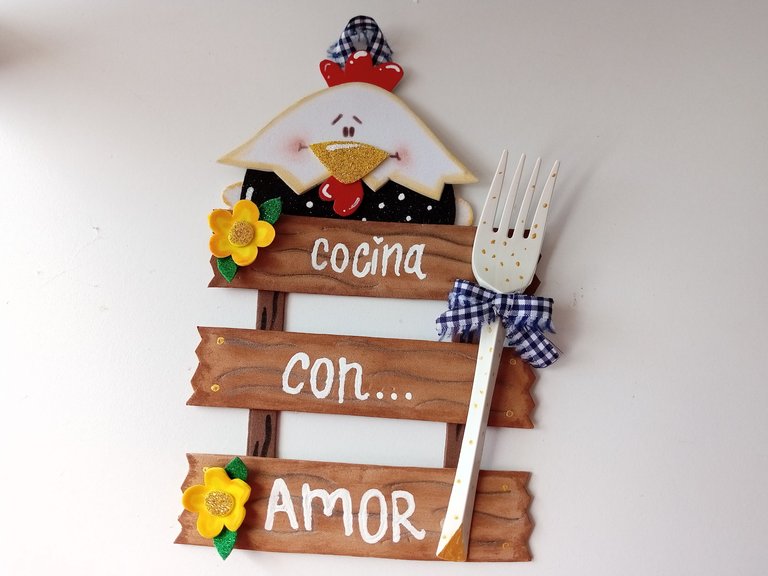
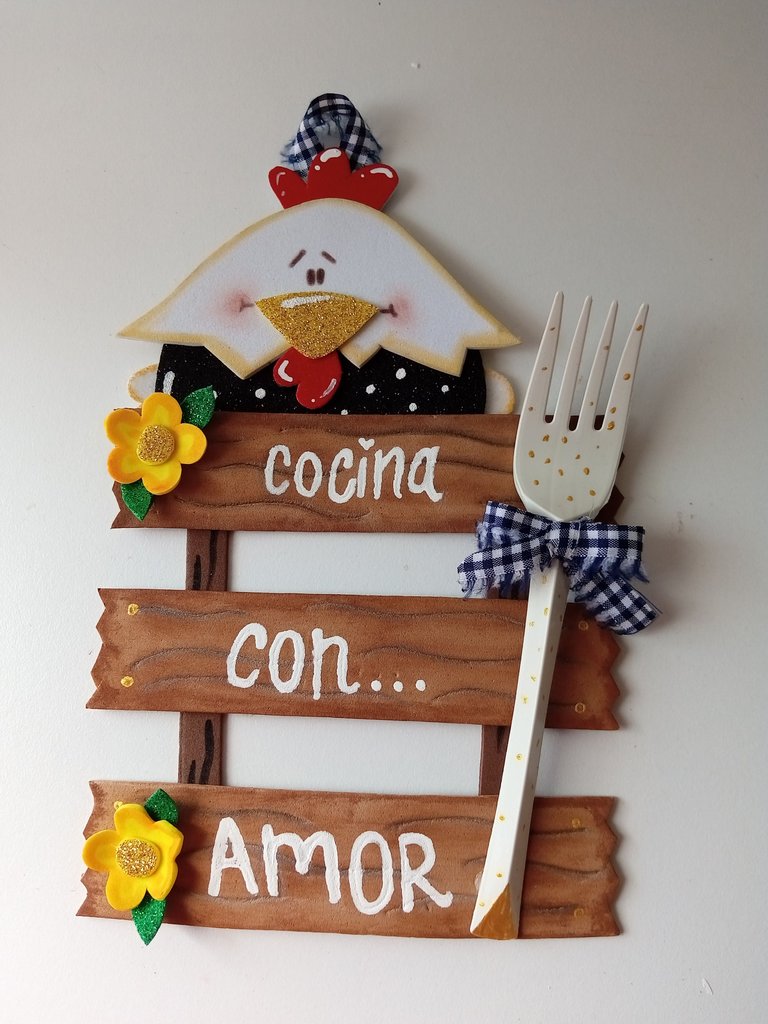
✨🐓¡And ready!🐓 ✨This way you can make a nice pendant to decorate the kitchen. I know it's difficult to let go of Christmas decorations, but hey... Here I will be sharing beautiful ideas to cheer you up a little. I hope you liked it and are encouraged to make this beautiful decoration.
❤️Until the next post.
✨RESULTADO: | ✨RESULT:


Todas las fotografías son de mi propiedad.
Separador y Fotos editadas en Canva
All photographs are my property.
Photos edited in Canva