✨¡Hola amigos amantes de la creatividad! Espero que hayan pasado un muy buen comienzo de semana.✨
🔸Sin más que añadir, a continuación los dejo con el paso a paso:
✨¡Hello friends who love creativity! I hope you had a very good start to the week.✨
Good afternoon, friends! I hope you are having a great week. For my part, I am in a little better spirits. On this occasion I am sharing with you the step by step to make a nice bee-themed pendant idea. Lately, I am a little enchanted with the bee theme and well, that is what happens when you spend a lot of time here in the hive haha.
I have already made one or two bee ideas, but for days I have been thinking about making a nice pendant and making a slightly larger creation so that each detail can be appreciated more. Honestly, it is a fairly easy pendant to make and I am satisfied with the final result.
🔸Without more to add, then I leave you with the step by step:

♥️ESPERO QUE TE GUSTE,
¡Empecemos!
♥️I HOPE YOU LIKE IT,
Let's start!

✂️ MATERIALES | ✂️ MATERIALS
- Cartón grueso.
- Trozo de tela.
- Foami amarillo, azul y verde.
- Foami escarchado negro,
blanco y dorado. - Pegamento.
- Marcadores.
- Pinturas.
- Cinta.
- Hoja blanca.
- Regla.
- Lápiz.
- Thick cardboard.
- Piece of fabric.
- Yellow, blue and green foam.
- Black, white and gold frosted foam.
- Glue.
- Markers.
- Paints.
- Tape.
- White sheet.
- Ruler.
- Pencil.
🌟 PROCEDIMIENTO | 🌟 PROCESS
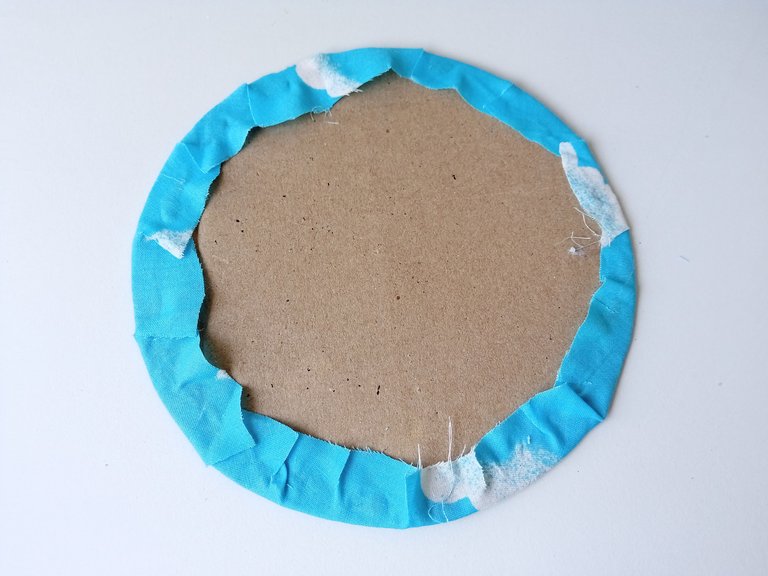
- PASO 1:
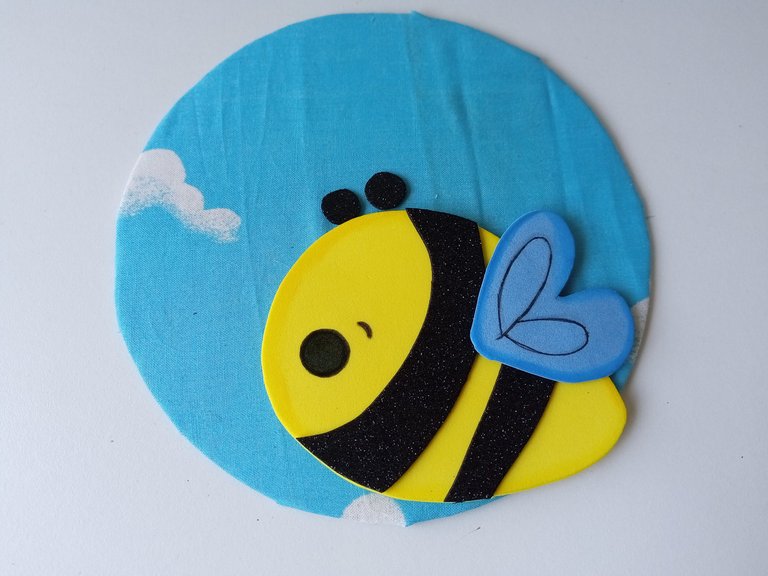
Lo primero que elaboré fue la base del colgante, así que tomé el cartón grueso y tracé la circunferencia del tamaño deseado que en mi caso fueron las medidas de un plato pequeño de 16 cm de circunferencia. Recorté el cartón con las medidas, tomé la tela y la recorté 1.5 cm más ancho que la circunferencia. Luego, pegué el excedente a la parte trasera.
📌Pueden recortar el excedente en varias tiras para que sea mucho más sencillo que la tela tome la forma circular.
📌Además, para que se vea prolija la parte trasera, pueden pegar un trozo de cartulina.
- STEP 1:
The first thing I made was the base of the pendant, so I took the thick cardboard and traced the circumference of the desired size, which in my case were the measurements of a small plate with a circumference of 16 cm. I cut the cardboard to the measurements, took the fabric and cut it 1.5 cm wider than the circumference. Then, I glued the excess to the back.
📌You can cut the excess into several strips to make it much easier for the fabric to take the circular shape.
📌Also, to make the back look neat, you can glue a piece of cardboard.


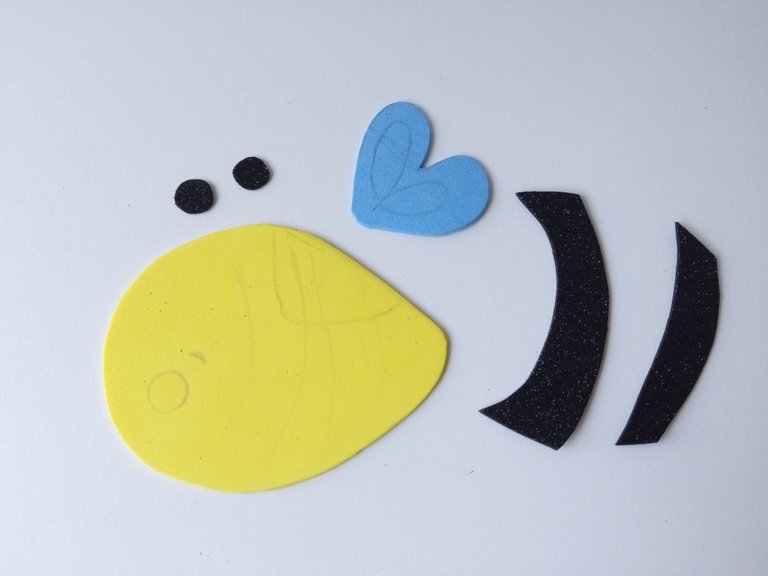
- PASO 2:
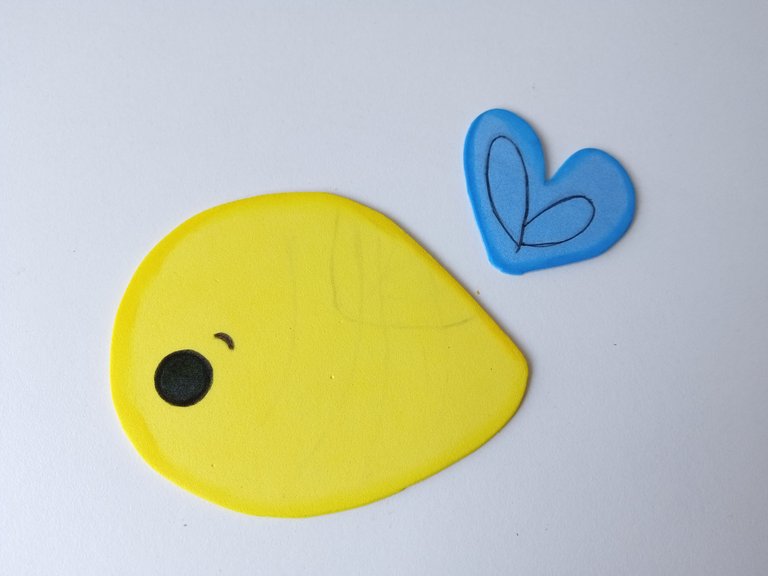
Ahora vamos con la abeja, dibujé las partes de la abeja en una hoja blanca, al tener los patrones listos los transferí a los colores correspondientes de foami de la siguiente manera: el cuerpo en foami amarillo, las alas en foami azul, las antenas y las rayas del cuerpo en foami escarchado negro.
- STEP 2:
Now we go with the bee, I drew the parts of the bee on a white sheet, when I had the patterns ready I transferred them to the corresponding colors of foam as follows: the body in yellow foam, the wings in blue foam, the antennae and the stripes of the body in black frosted foam.
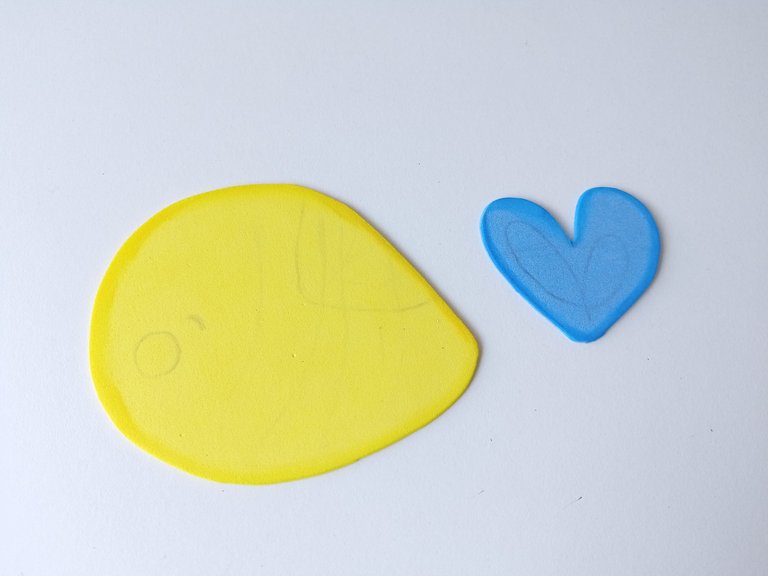
- PASO 3:
Después, di color a los bordes con pinturas un tono más oscuro en las piezas de foami liso, que en este caso es el cuerpo y las alas. Por otra parte, di más detalles con marcador dibujando el ojo, la ceja y detalles en la parte interna de las alas. Al estar listo, pegué todas las piezas hasta formar la abeja en el colgante.
- STEP 3:
Then, I colored the edges with paints a darker shade on the pieces of smooth foam, which in this case is the body and the wings. On the other hand, I added more details with a marker by drawing the eye, the eyebrow and details on the inside of the wings. When it was ready, I glued all the pieces together to form the bee on the pendant.
- PASO 4:
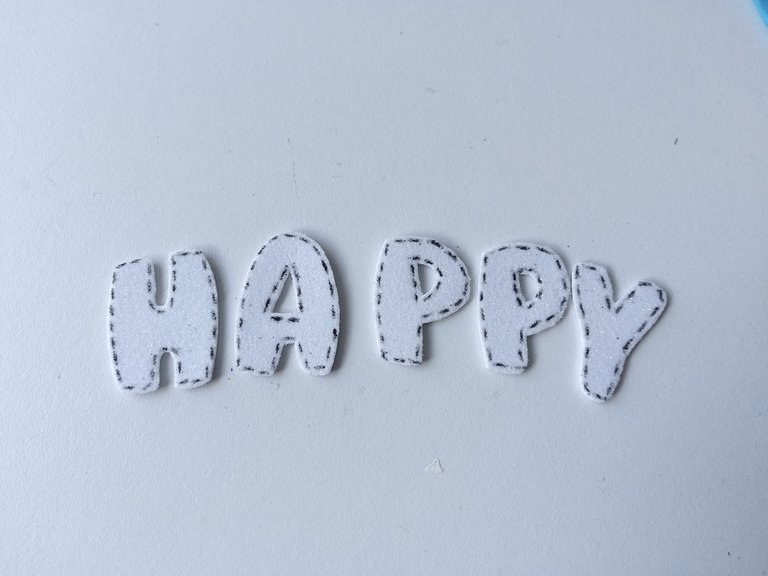
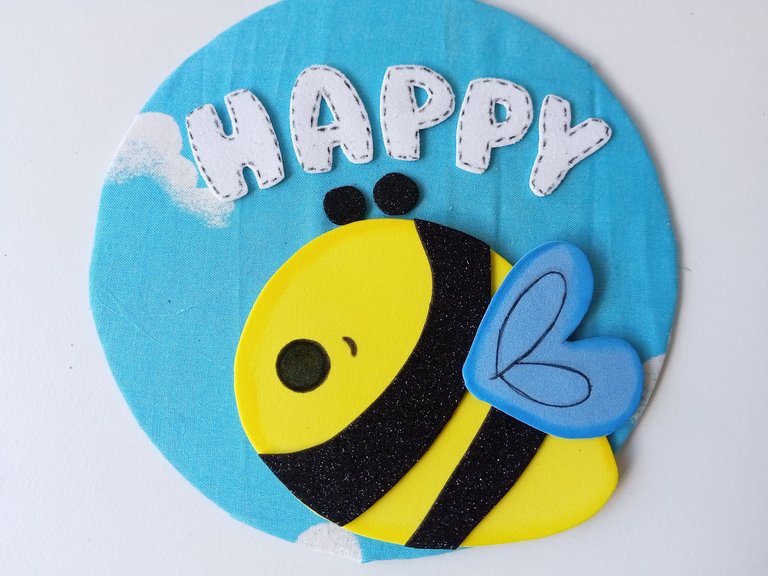
Para dar más vida a la decoración, quise recortar letras en foami escarchado blanco para formar la palabra ‘‘HAPPY’’. Al estar lista, di detalles a los bordes trazando pequeñas líneas en cada una de las letras. Al estar listas, las pegué al colgante.
- STEP 4:
To give more life to the decoration, I wanted to cut out letters in white frosted foam to form the word ‘‘HAPPY’’. When it was ready, I gave details to the edges by drawing small lines on each of the letters. When they were ready, I glued them to the pendant.
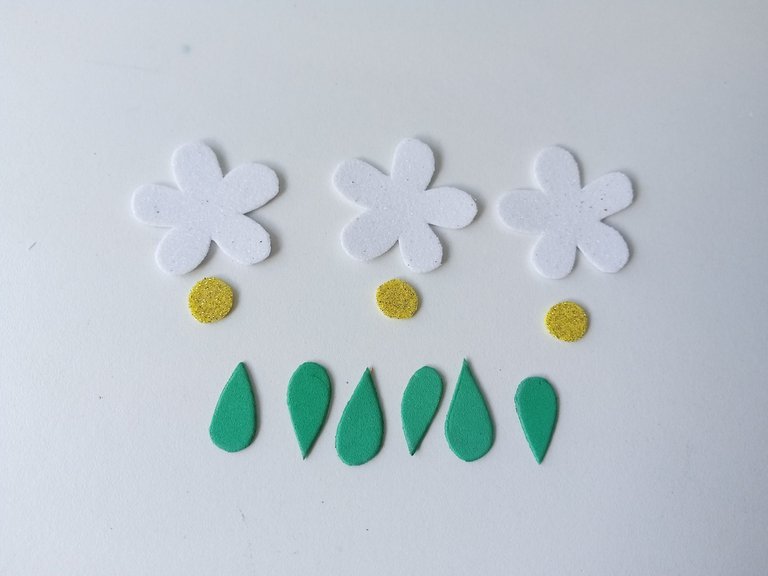
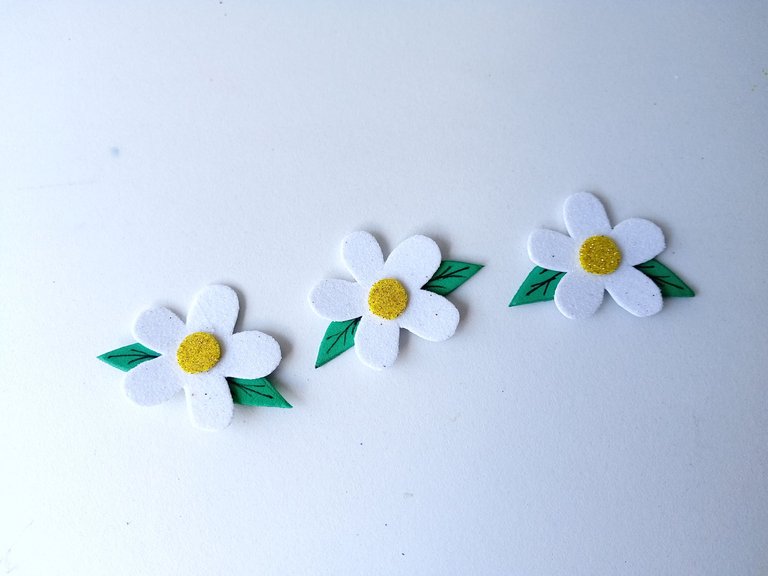
- PASO 5:
Como lo veía muy simple, dibujé y recorté un par de margaritas en foami escarchado blanco, el centro de las flores en foami escarchado dorado y las hojas en foami verde. Al estar listas, di detalles con marcador a las hojas y pegué en el orden deseado al colgante. Además, recorté un trozo de cinta y la pegué en la parte superior, dando a la parte trasera, para poder colgar esta linda decoración.
- STEP 5:
As it seemed so simple, I drew and cut out a couple of daisies in white frosted foam, the center of the flowers in gold frosted foam and the leaves in green foam. Once they were ready, I gave details to the leaves with a marker and glued them in the desired order to the pendant. In addition, I cut out a piece of ribbon and glued it to the top, facing the back, so I could hang this cute decoration.
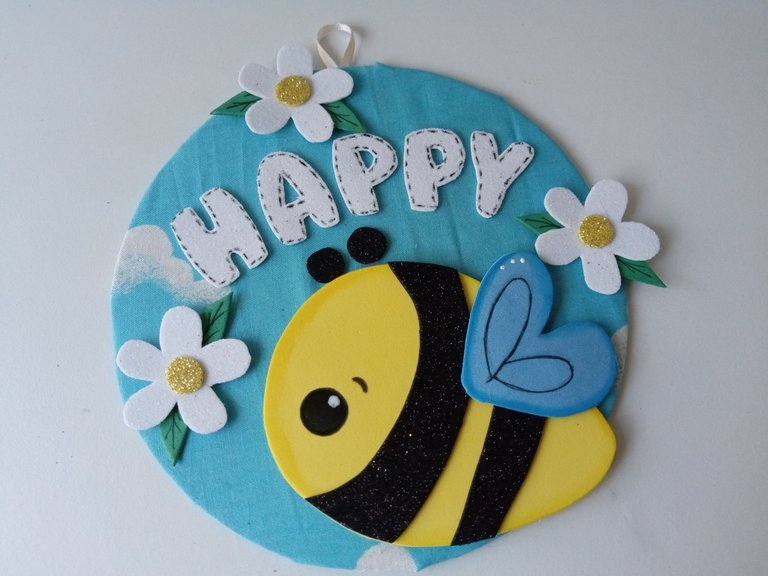
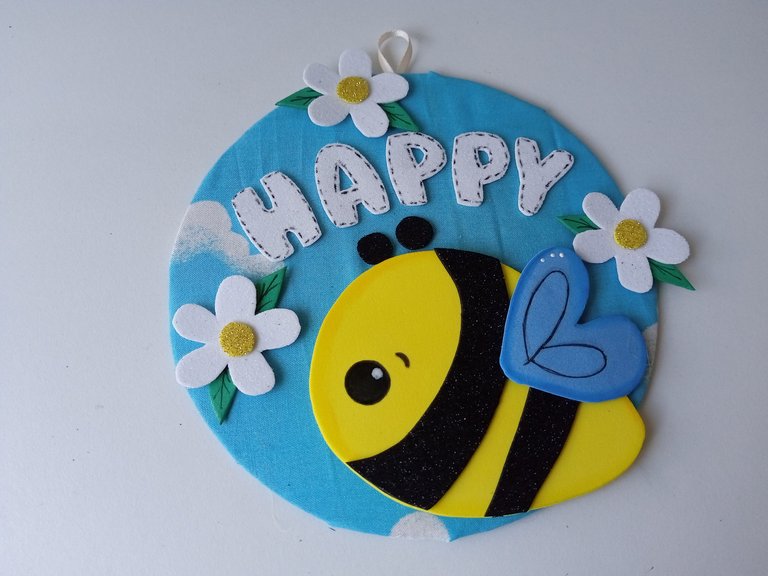
✨¡And ready!✨ This is how you can make this or any decoration with the desired theme to decorate any space in the house. I was very happy with the result of this pretty pendant, because I love the bee theme. I hope you liked it and are encouraged to make it.
❤️Until the next post.
✨RESULTADO: | ✨RESULT:


Todas las fotografías son de mi propiedad.
Separador y Fotos editadas en Canva
All photographs are my property.
Photos edited in Canva