Cardboard Christmas tree 🌲

in #hive-1305602 years ago

Christmas! Christmas time is here, time for the toys and time for the cheers🥂. Everywhere is smelling Christmas, the weather looks Christmas, Christmas jingles are heard everywhere and decorations have been displayed in public places already.

Talking about decorations, I was asked to but a few decorative items in the market. It was a window shopping at first. I got a few ornaments and decorative prices then part of it was meant to be a Christmas tree.

Well the smallest tree I could get was way more expensive than my budget, therefore there'll be no Christmas tree. 😔
Where I worked, the children never had a tree in all those parties, and I really wanted one this time around buhhhh the money couldn't get one.
IMG_20211208_123355_206.jpg

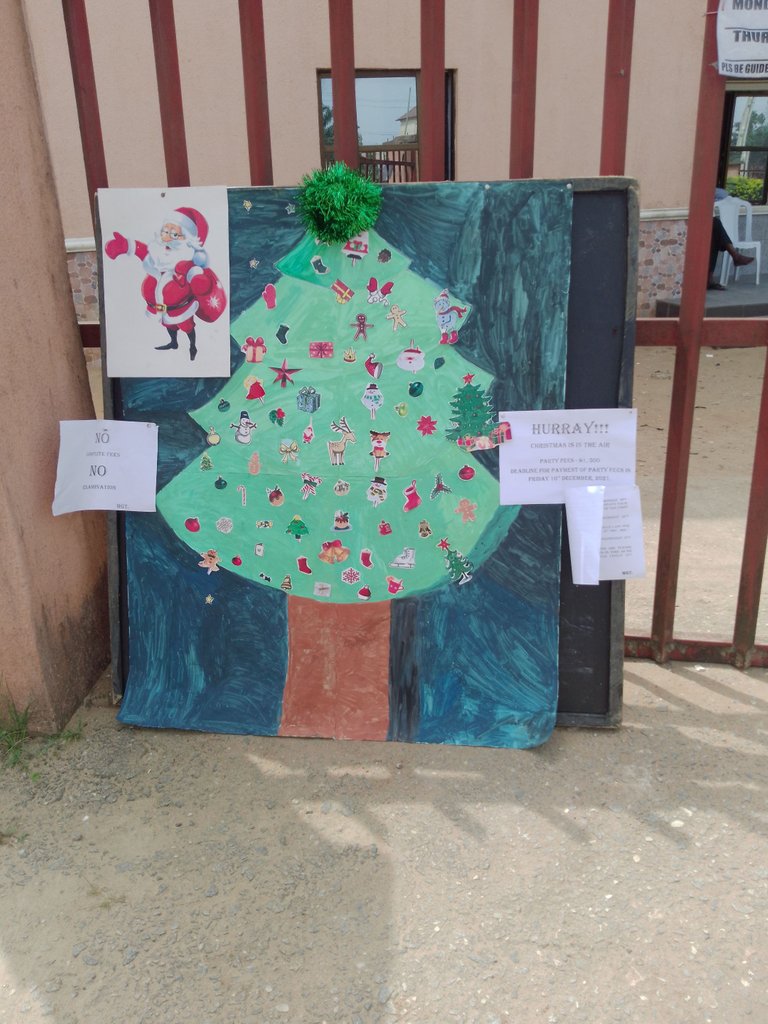
Well whilst decorating I had an idea pop up on my mind that I could make a Christmas tree for my children using cartons and cardboard.
This time around like 2-3 person called and asked for the cardboard tree.

So I will share here how I made the tree, it's quite simple and you can make one for yourself.

Materials:

  • Cardboard ( 4-6pieces)
  • Gum
  • Poster color or any paint of your choice
  • Cut out of Christmas ornaments ( I made a print of various Christmas ornaments then I carved them out)
  • Brush
  • Glitters.

Procedures:

  • Gum the 6 cardboards together
  • And sketch your tree to the desire shape and size
  • Paint the tree with your color paint(green color) and the stem with brown color
  • When the whole painting gets dried
  • Glue your cut outs as the ornaments for the trees
  • Sprinkle the glitter as the light
    Since it is made of cardboard, it won't stand on it's own so it needs to be pasted on the wall or a board.
    Well, your Christmas tree is ready.

Not hard right?
It was last year's work that is still useful this year.

Sort:  

That's so smart.
The ingenuity is commendable too.
I'm sure the kids would be happy. Woulda been great to see more photos of the process tho 🙂

!discovery 25
!DIY

Thanks so much♥️♥️

They loved it, they helped me paint it and glue the ornaments
I checked for the pictures I took during the process but I couldn't find them
I lost it, it was since last year

stevenson7 just sent you a DIY token as a little appreciation for your post! Feel free to multiply it by sending someone else !DIY in a comment :) You can do that x times a day depending on your balance so:

Don't be shy - share some DIY!


This post was shared and voted inside the discord by the curators team of discovery-it
Join our community! hive-193212
Discovery-it is also a Witness, vote for us here
Delegate to us for passive income. Check our 80% fee-back Program
Thank you for sharing this post on HIVE!

Your content got selected by our fellow curator stevenson7 & you just received a little thank you upvote from us for your great work! Your post will be featured in one of our recurring compilations which are aiming to offer you a stage to widen your audience within the DIY scene of Hive. Stay creative & HIVE ON!


Please vote for our hive witness <3

Thank you♥️
I really appreciate
@stevenson7, I appreciate

Congratulations @utymarvel! You have completed the following achievement on the Hive blockchain And have been rewarded with New badge(s)

You distributed more than 100 upvotes.
Your next target is to reach 200 upvotes.

You can view your badges on your board and compare yourself to others in the Ranking
If you no longer want to receive notifications, reply to this comment with the word STOP

To support your work, I also upvoted your post!

Check out the last post from @hivebuzz:

HiveBuzz World Cup Contest - Round of 16 - Recap of Day 4
The Hive Gamification Proposal Renewal
Our Hive Power Delegations to the November PUM Winners
Support the HiveBuzz project. Vote for our proposal!