Greetings, fellow lovers of repairs and DIY, here I bring you the renovation of the hoops of a mandolin, this due to the blow suffered in the lower part of the neck, we will restore it and leave it as new, enjoy the process and put them into practice for projects close to the art of wood.
The blow of the mandolin is located a few centimeters from the tailpiece, the objective was to return it to its state without the need to replace the hoops, which is usually done in these cases, but the ideas is always to look for several practical solutions.
Within the characteristic of the instrument we could say that its soundboard is made of plywood (plywood) both bottom and top, it is a study instrument that is to explore in the execution of the same, the materials confirm this fact, the neck / handle is the only thing that has solid cedar wood (cedrela odorata) but ultimately also deserves an appreciated arrangement because behind every object there is an effort to acquire it now let's go on and start the practical process.
Note: Some of the present pictures were taken specially to explain the practical processes since I did not have enough pictures of the mandolin when I was fixing it, this way we facilitate the understanding and the sense of the step by step.
Materials and tools to be used: .
- Blade or scraper
- Thiner
- Ink
- Sealer
- Carpenter's glue
- Varnish
- Gun and compressor
Saludos, compañeros amantes de las reparaciones y el bricolaje, por acá les traigo la renovación de los aros de una mandolina, esto debido al golpe que sufrió en la parte baja del zoque, lo restauraremos y lo dejaremos como nuevo, que disfruten del proceso y los pongan en práctica para proyectos cercanos al arte de la madera.
El golpe de la mandolina se sitúa a unos centímetros del cordal, el objetivo fue volverlo a su estado sin necesidad de remplazar los aros, lo cual suele hacerse en estos casos, pero la ideas siempre es buscar varias soluciones prácticas.
Dentro de la característica del instrumento podríamos decir que su caja armónica está hecha de madera terciada (contrachapada) tanto fondo como tapa armónica, es un instrumento de estudio es decir para explorar en la ejecución del mismo, los materiales nos confirman tal hecho, el mástil / mango es lo único que tiene de madera maciza de cedro (cedrela odorata) pero en definitiva también merece un apreciado arreglo ya que detrás de todo objeto hay un esfuerzo de por medio para adquirirlo ahora sigamos y comencemos el proceso práctico.
Nota: Algunas de las presentes fotografías fueron tomadas especialmente para explicar los procesos prácticos ya que no tenía suficiente imágenes de la mandolina cuando la estuve arreglando, de esta manera facilitamos la compresión y el sentido del paso a paso.
Materiales y herramientas a usar:
- Cuchilla o raspador
- Thiner
- Tinta
- Sellador
- Cola de carpintero
- Barniz
- Pistola y compresor
Paso 1 / Step 1
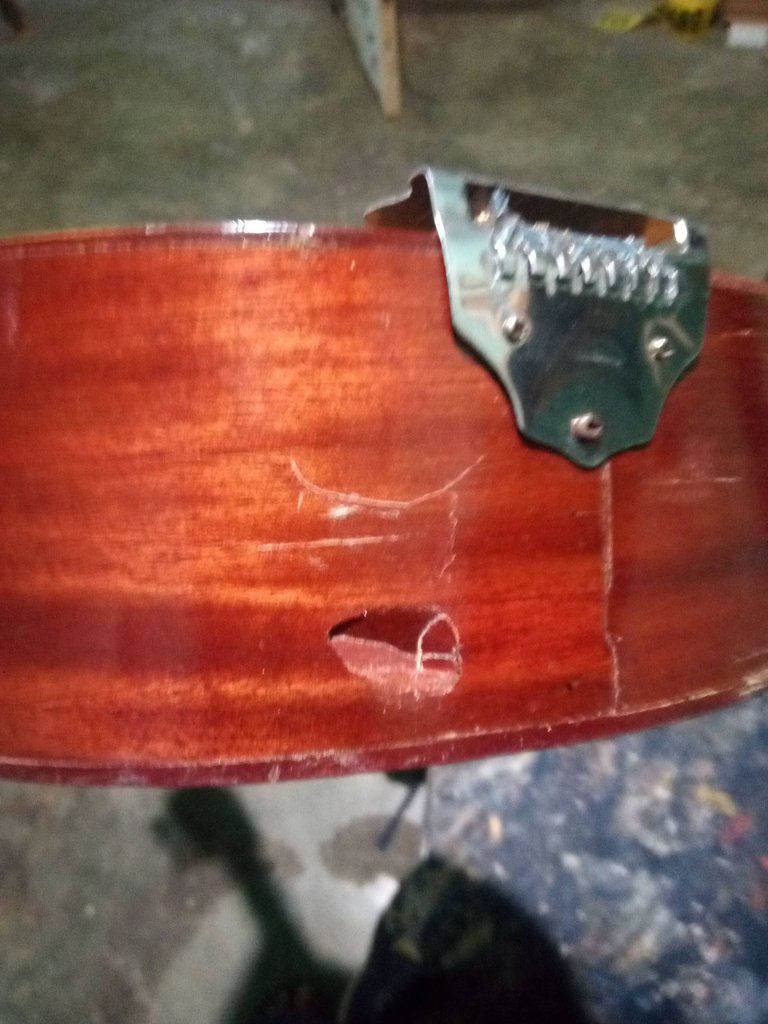 |  |
In this step after having gone through the diagnosis and determine what to do in this situation, what is usually done is to replace the ring, only this involves another procedure, so in view that it is not solid wood, which usually loses the piece, we follow the plans to try to make it look neat.
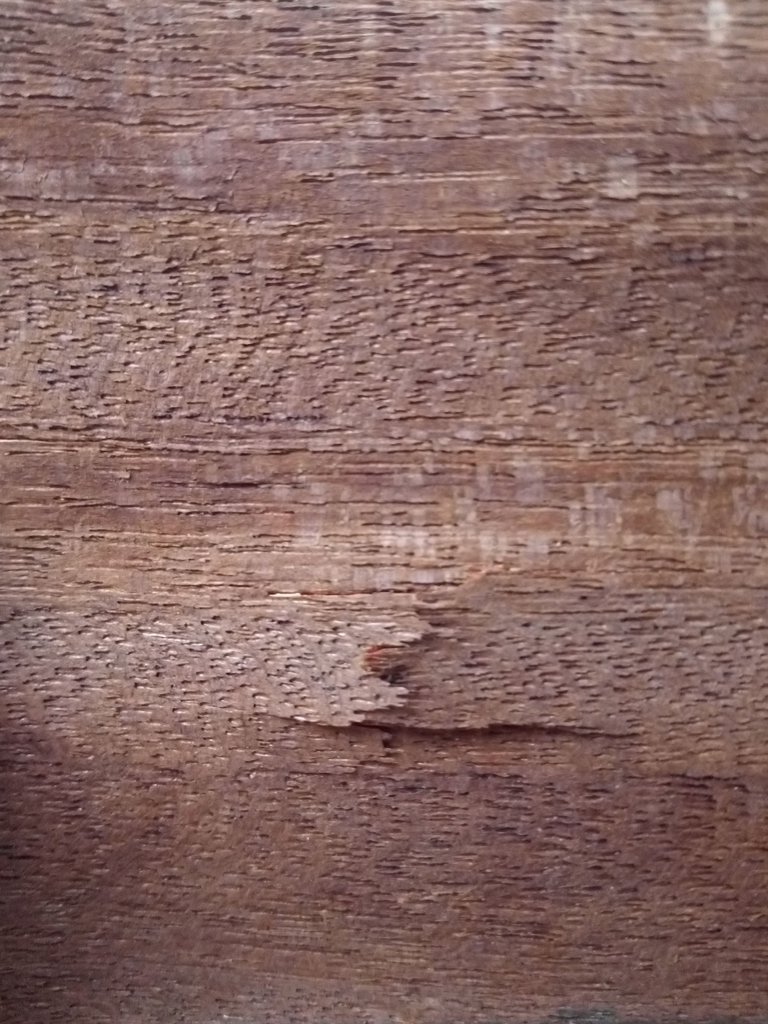
It should be noted that the laminated wood comes overlapped which generates greater hardness which limits a common fracture we can only observe a sinking by some impact, here we will use carpenter's glue, a wooden block and a dowel that will have the function to push and return to its place the fiber of the wood.
En este paso tras haber pasado por el diagnóstico y determinar que procederemos hacer ante esta situación, lo que suele hacerse es remplazar el aro, solo que esto implica otro procedimiento, así que en vista de que no es madera maciza, que por lo general pierde el pedazo, seguimos los planes de tratar de que quede con pulcritud.
Cabe destacar que la madera laminada viene superpuesta lo cual genera mayor dureza lo que la limita una fractura común solo podemos observar un hundimiento por algún impacto, acá usaremos cola de carpintero, un taco de madera y un tarugo que tendrá la función de empujar y regresar a su lugar la fibra de la madera.
Paso 2 / Step 2
 |  | |
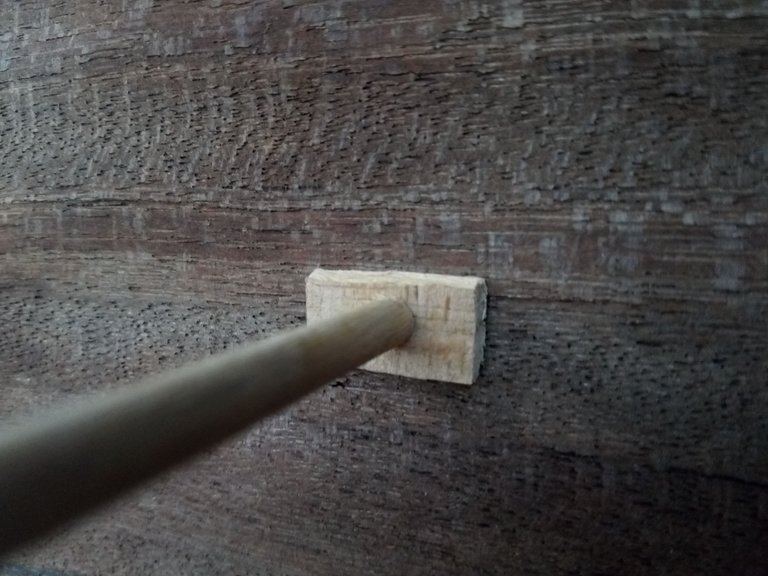 | 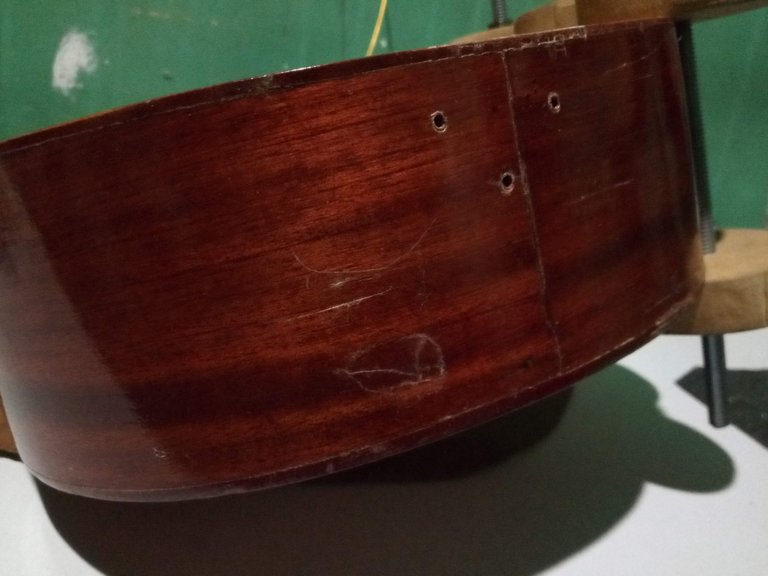 |
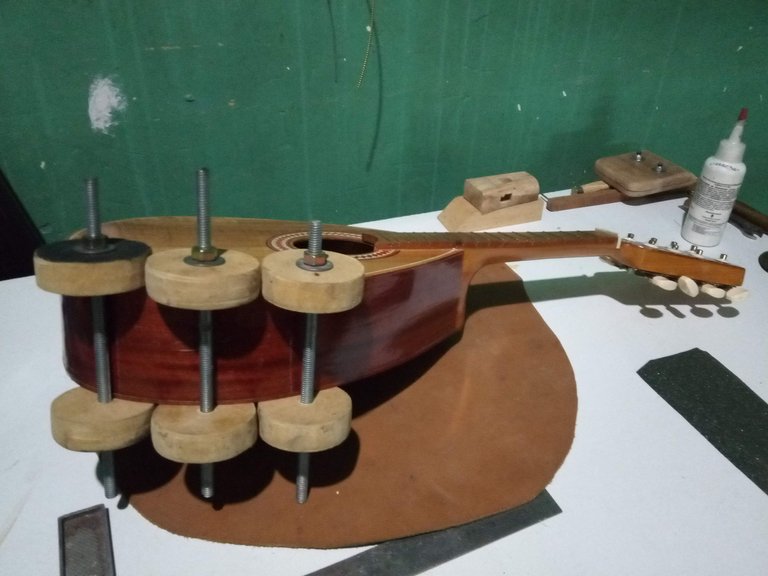
We disassemble the accessories of the instrument, the strings, the bridge and the tailpiece and add a little glue in the fracture, we take the dowel and the wooden block and we place it inside the soundboard in the image I show how it should be located.
| Note: the dimensions of this tool is made from the length of the mandolin and then determine the length of the dowel through the thickness of the wooden block, ie if the mandolin is 30 cm the tool would have to have at least 30.2 cm, the idea is that it fits, this being the simplest way we can handle all in a workshop, as there are special tools for this. |
Desmontamos los accesorios del instrumento, las cuerdas, el puente y el cordal y agregamos un poco de cola en la fractura, agarramos el tarugo y el taco de madera y lo colocamos en el interior de la caja armónica en la imagen demuestro como tendría que estar situada.
| Nota: las dimensiones de esta herramienta se hace a partir del largo de la Mandolina y luego se determina el largo del tarugo a través de espesor del taco de madera, es decir si la mandolina tiene 30 cm la herramienta tendría que tener al menos 30.2 cm, la idea es que quede ajustada, esto siendo la forma más sencilla que podemos manejar todos en un taller, ya que existen herramientas especiales para esto. |
Paso 3 / Step 3
 |  | |
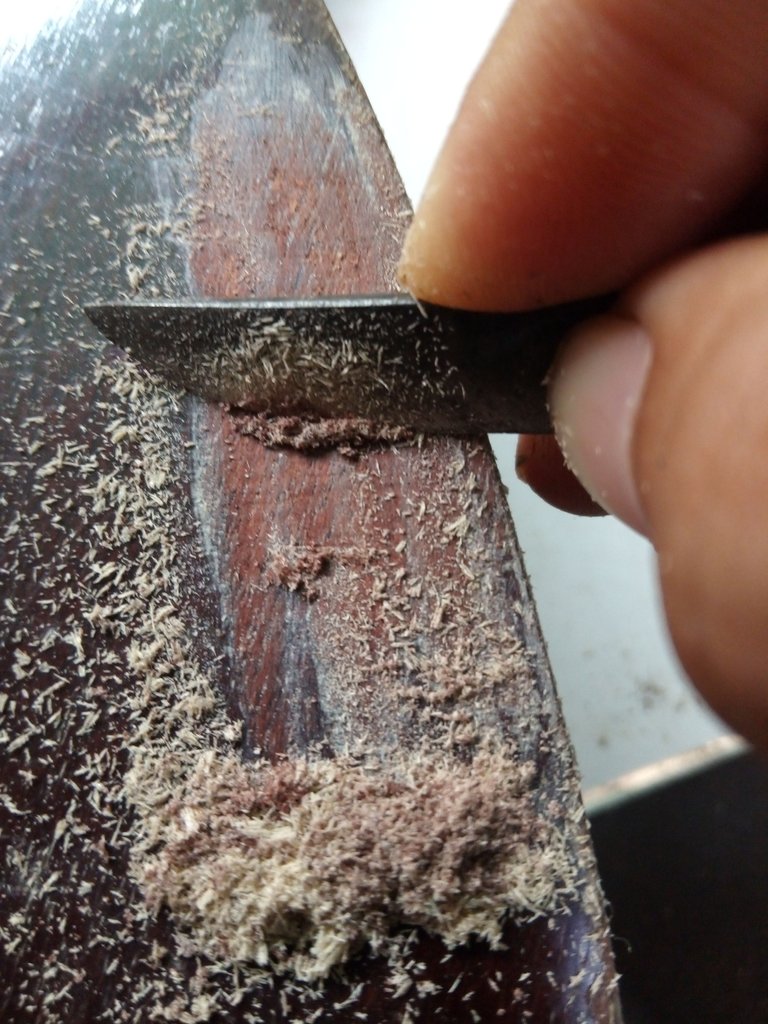 | 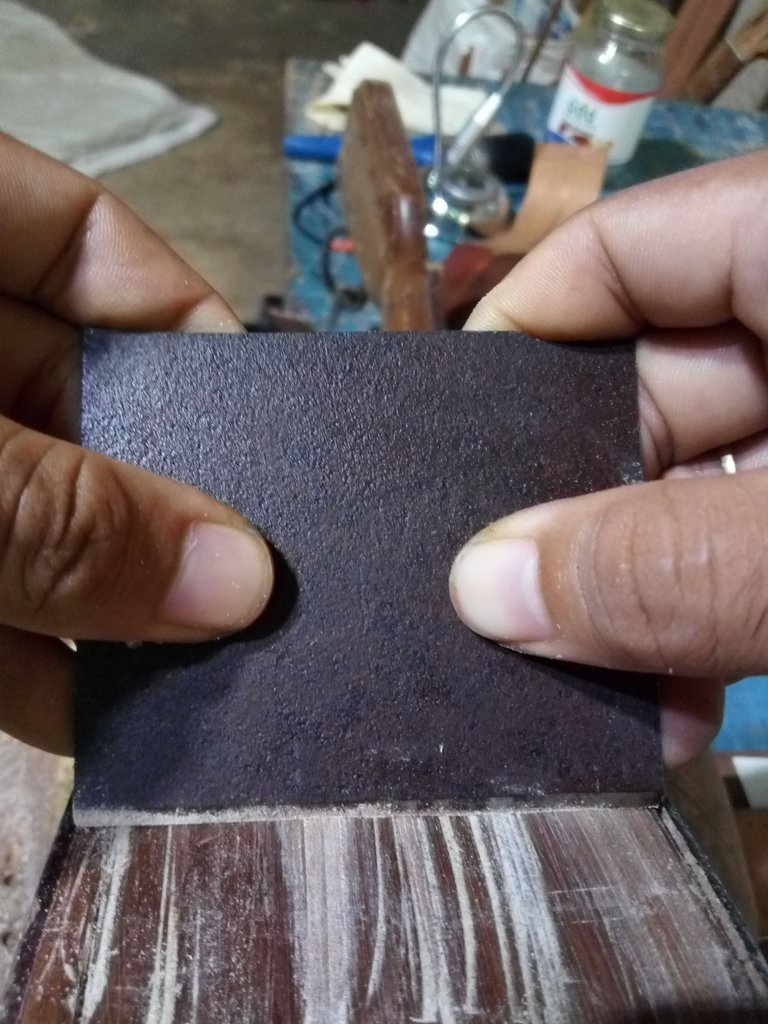 |
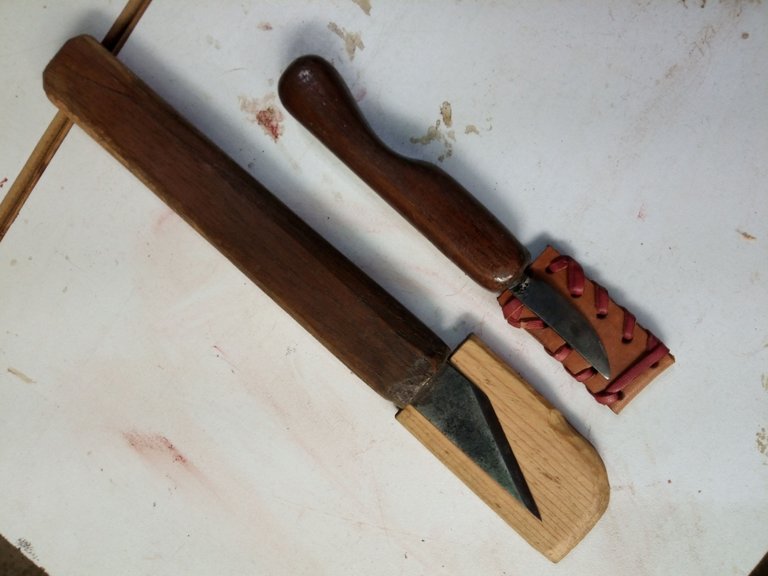
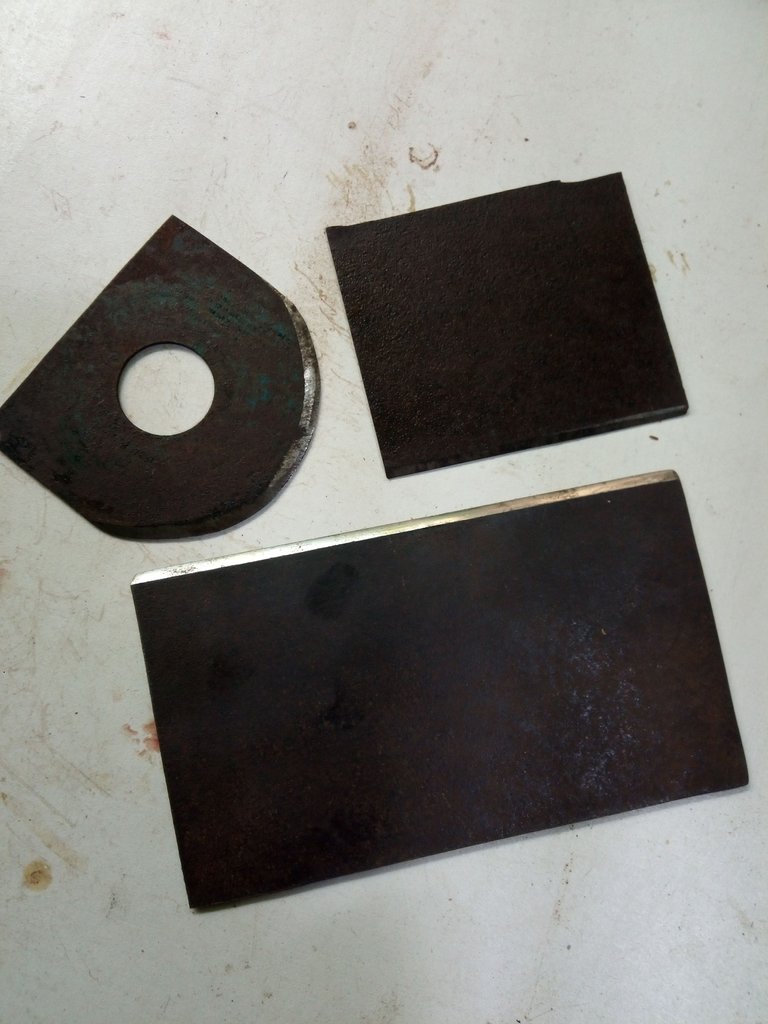
Once dry we proceed to remove the work tools and we must scrape the surface not only where the blow is but to the two rings, as we must ink again so that everything is uniform, here we must have a blade or a glass and begin to scrape the varnish to uncover the wood, we can also scrape with a luthier knife, preferably with the rounded tip, it should be noted that the blades or scraper that I show in the picture, are manufactured by me with a tempered steel, when we finish this task we sand and make a sandpaper descent example: 80, 100, 150, 220.
Una vez seca procedemos a quitar los instrumentos de trabajo y debemos raspar la superficie no solo en donde está el golpe sino al los dos aros, ya que debemos entintar de nuevo para que todo quede uniforme, acá debemos de tener una cuchilla o un vidrio y empezamos a raspar el barniz hasta descubrir la madera, podemos también raspar con un cuchillo de luthier, preferiblemente con la de punta redondeada, cabe destacar que las cuchillas o raspador que muestro en la imagen, son fabricadas por mi con un acero templado, al terminar esta tarea lijamos y hacemos una bajada de lija ejemplo: 80, 100, 150, 220.
Paso 4 / Step 4
 |  | |
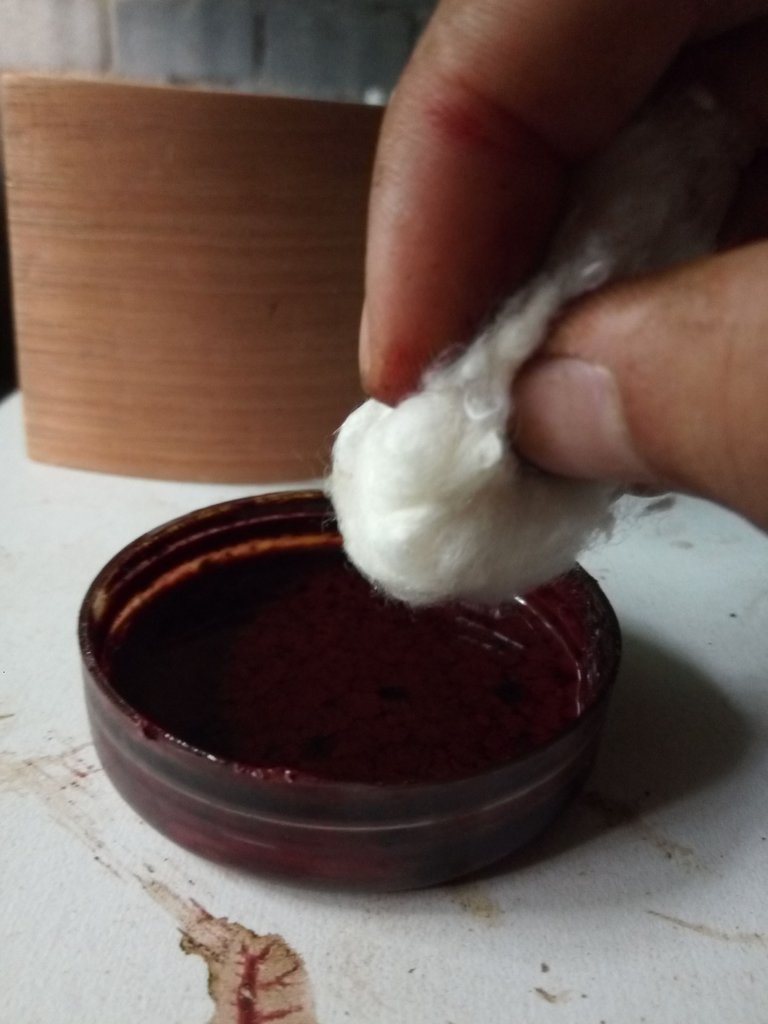 | 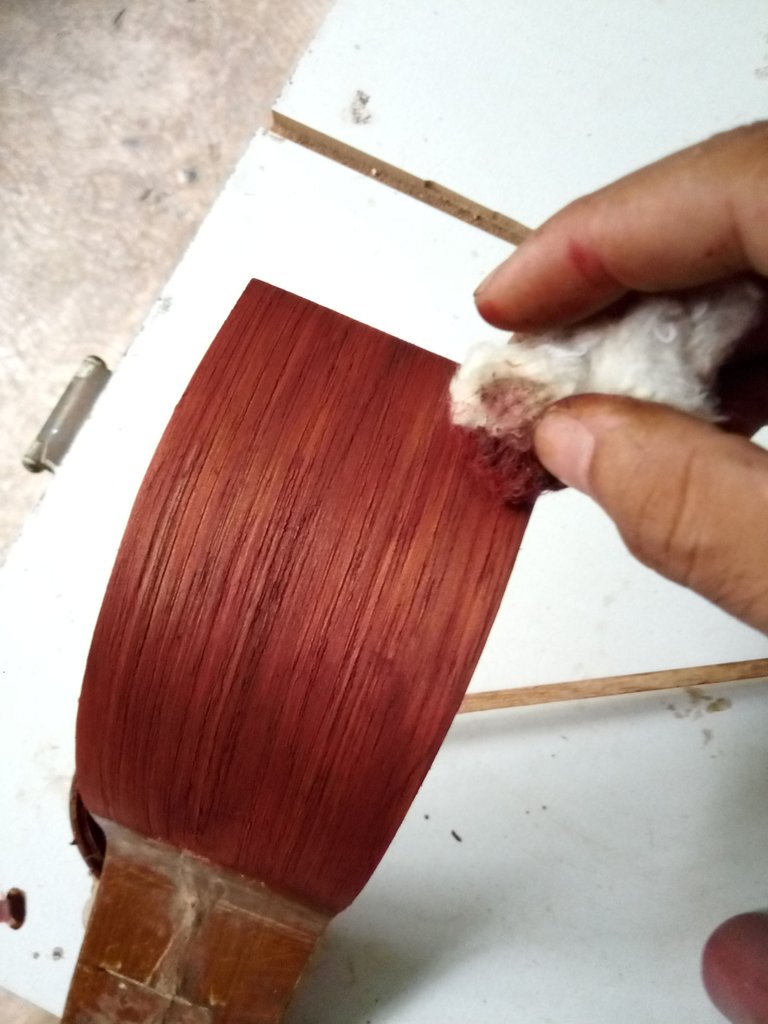 |
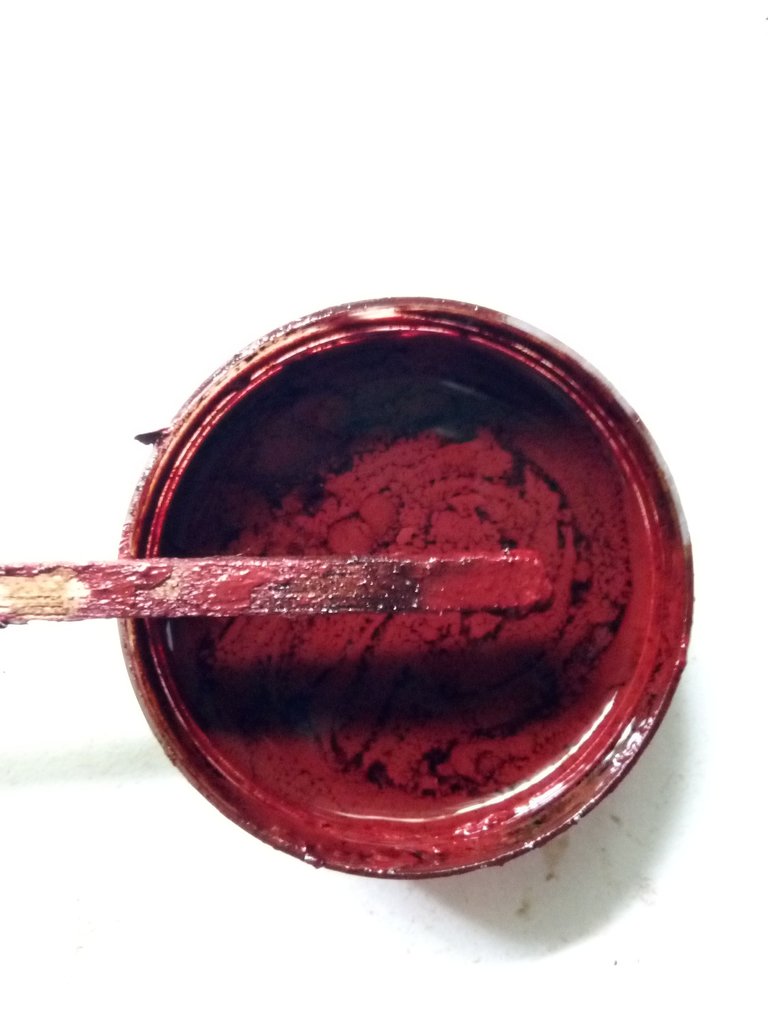
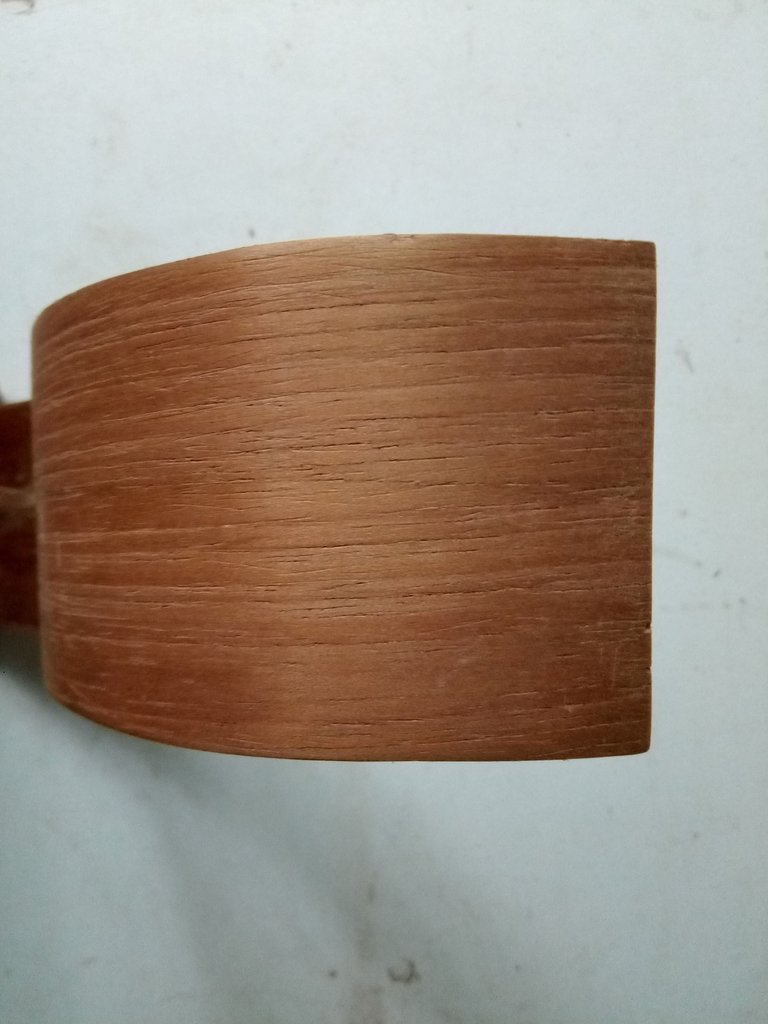
In this step we will focus on preparing the tone that had the instrument the idea is to approach, this tone, is a tona called in the market as African mahogany, it is necessary to have several inks to play in the ups and downs of tone here for the tone to be lighter we should just put more thiner, always try on a leftover wood before placing it on the surface already sanded. The way to apply it is by hand, with a cotton cloth, wet it in the ink, wring it out and pass it uniformly from one point to another, with three coats is enough, although this is relative because it depends on the intensity of the ink, the idea is that it is prepared very diluted...
En este paso nos enfocaremos en preparar el tono que tenía el instrumento la idea es acercarnos, este tono, es un tona llamado en el mercado como caoba africana, es necesario tener varias tintas para jugar en las subidas y bajada de tono acá para que el tono sea más claro debemos solo colocar más thiner, siempre probemos en una madera sobrante antes de colocarla en la superficie ya lijada. La forma de aplicarla es a mano, con un trapo de algodón, mojamos en la tinta, escurrimos y pasamos de manera uniforme de un punto a otro, con tres manos es suficiente, aunque esto es relativo porque depende de la intensidad de la tinta, la idea es que se prepare muy diluida...
Paso 5 / Step 5
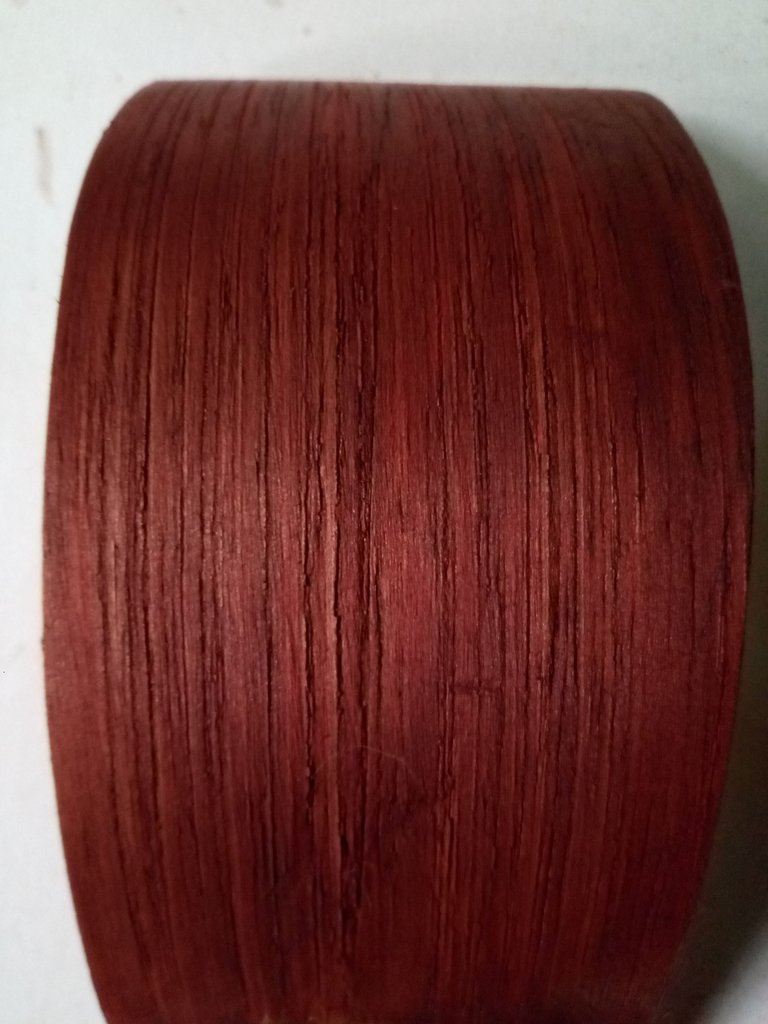 | 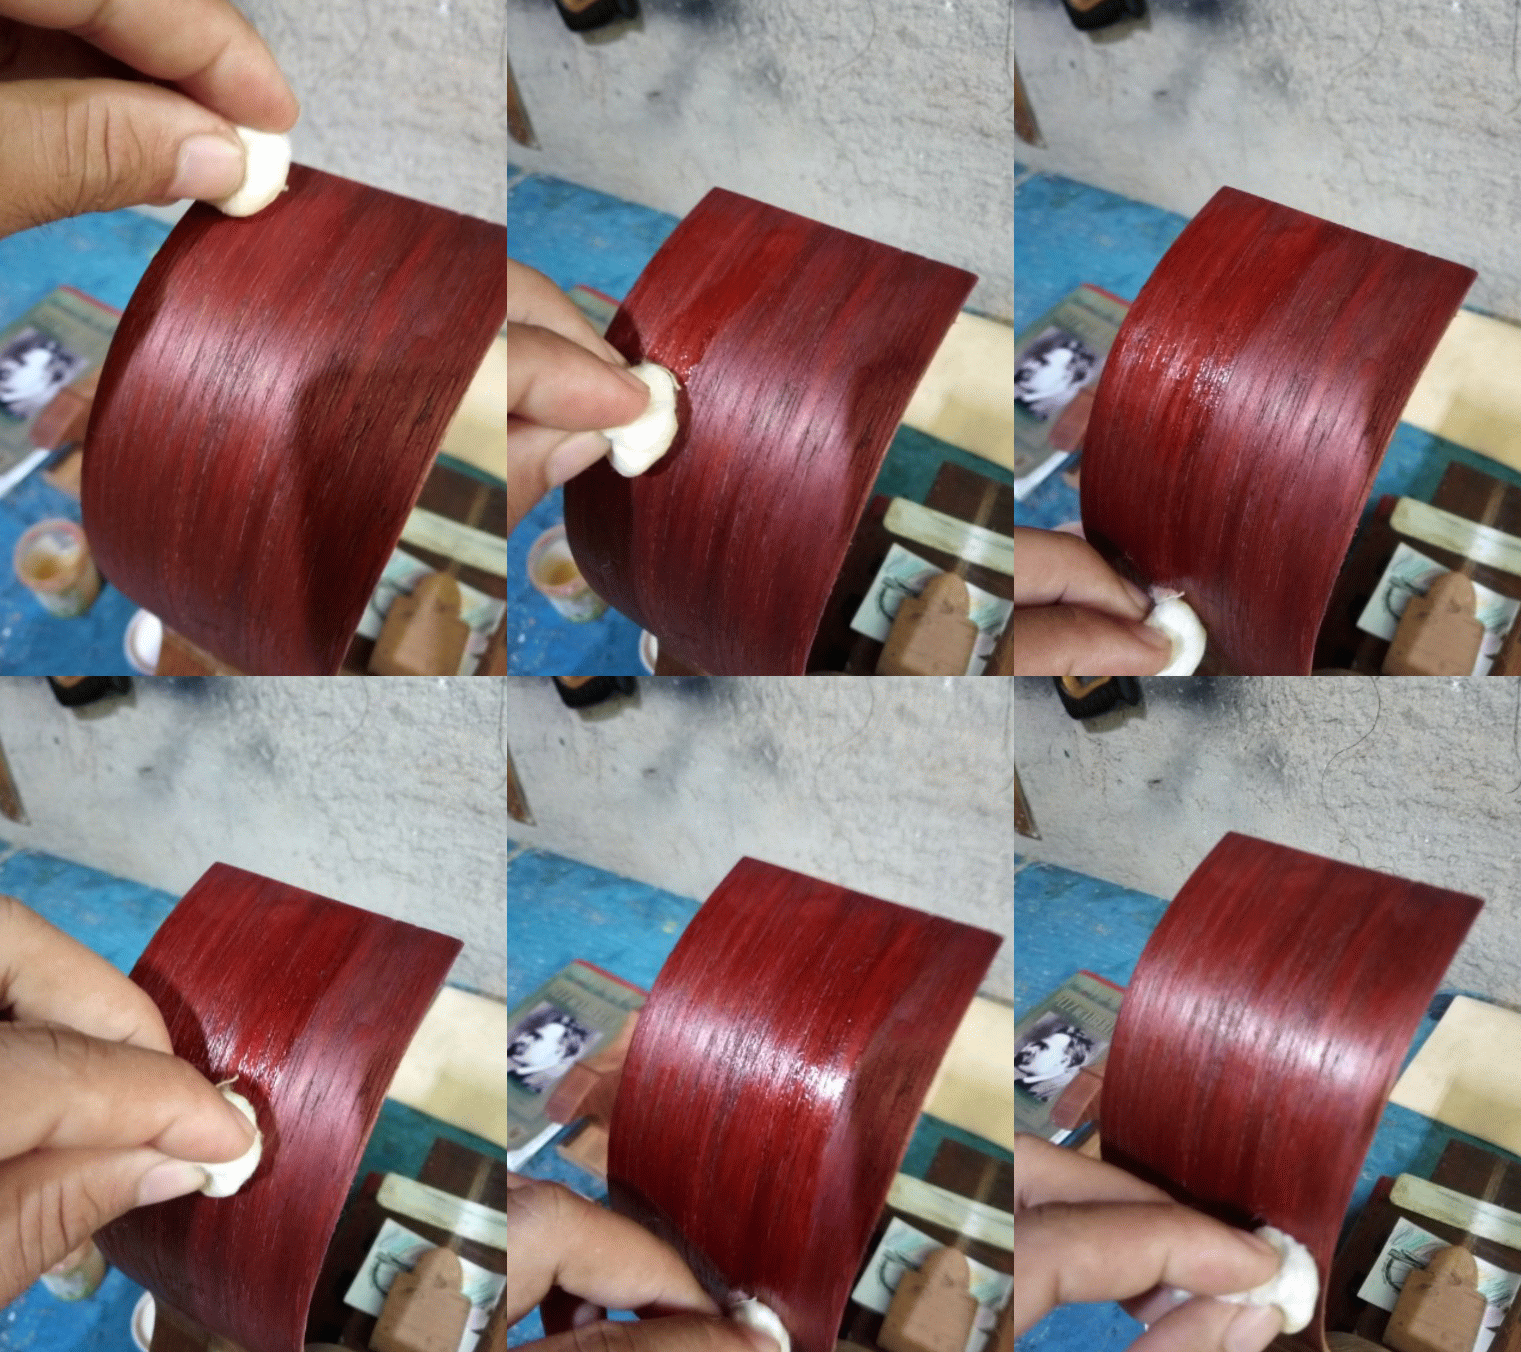 |
When the rings are dry and with the color we wanted, we would seal the wood, it is always important this (first inking and then sealing) if you use sealer first the ink should be applied with a gun, this we must always keep in mind, otherwise it will spoil the process, when applying four coats of the product and when dry we use sandpaper 320 for everything is super sealed and smooth, sanding very gently because we can bring a little ink.
Quantity of sealer and Thiner: S/C 1 parts x 3 parts of thiner high gloss.
Al estar los aros secos y con el color que queríamos, nos quedaría sellar la madera, siempre es importante esto (primero entintar y luego sellar) si usas sellador de primero la tinta deberías aplicarla con pistola, esto siempre lo debemos de tener en cuenta, de lo contraria estropeará el proceso, al aplicarle cuatro manos del producto y al estar seco usamos papel de lija de 320 para que todo quede super sellado y liso, lijar muy delicadamente por que podemos traer un poco la tinta.
Cantidad de sellador y Thiner: S/C 1 partes x 3 partes de thiner alto en brillo.
Parte 6 / Step 6
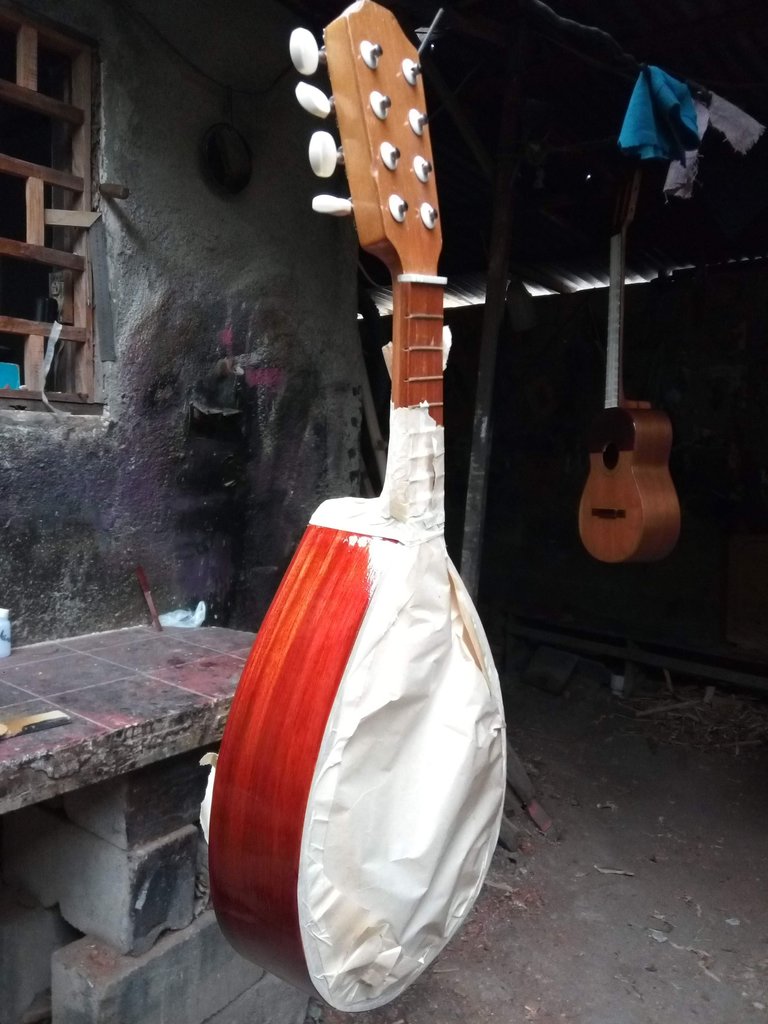
This last step we finish with the lacquer, this time I used automotive polyurethane which comes with three components" poly-activator-reducer" I advise you to buy twice the reducer (diluent), because sometimes it is very thick and hard to pass through the gun, but we can use our varnish of choice, in this step depends on both the budget and our goal of conservation of both sound and the object as it is appropriate to mask both covers or what is not going to lacquer.
Este último paso lo finalizamos con el lacado, en esta ocasión usé poliuretano automotriz el cual viene con tres componentes" poli-activador-reductor" les aconsejo comprar el doble de reductor (diluyente), ya que a veces queda muy espeso y cuesta pasar por la pistola, pero podemos usar nuestro barniz de preferencia, en este paso depende tanto del presupuesto como de nuestro objetivo de conservación tanto de sonido como del objeto al igual es oportuno enmascarar ambas tapas o aquello que no se vaya a laquear.
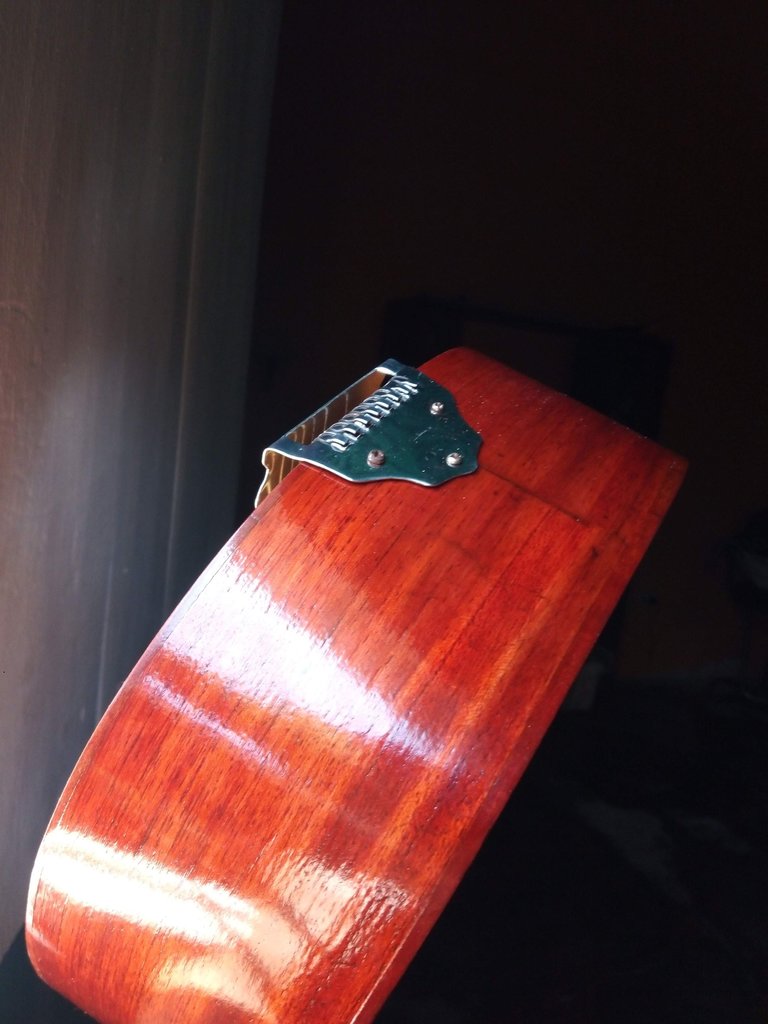 | 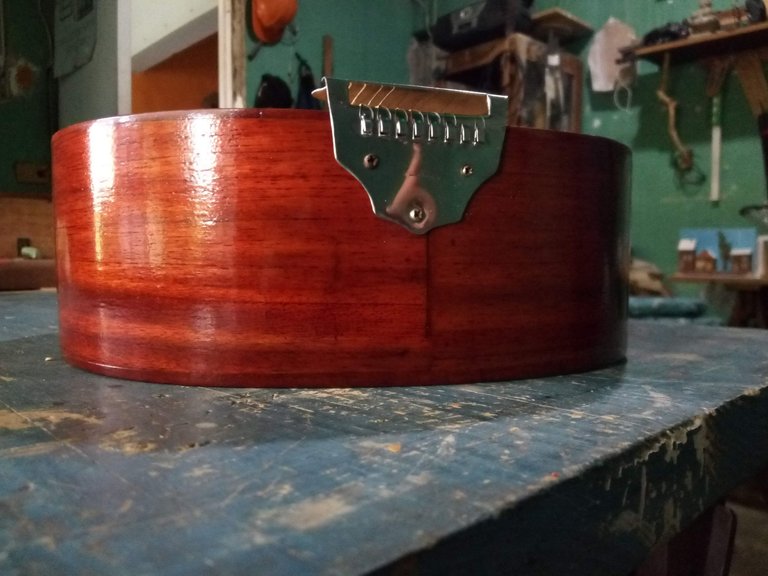 |
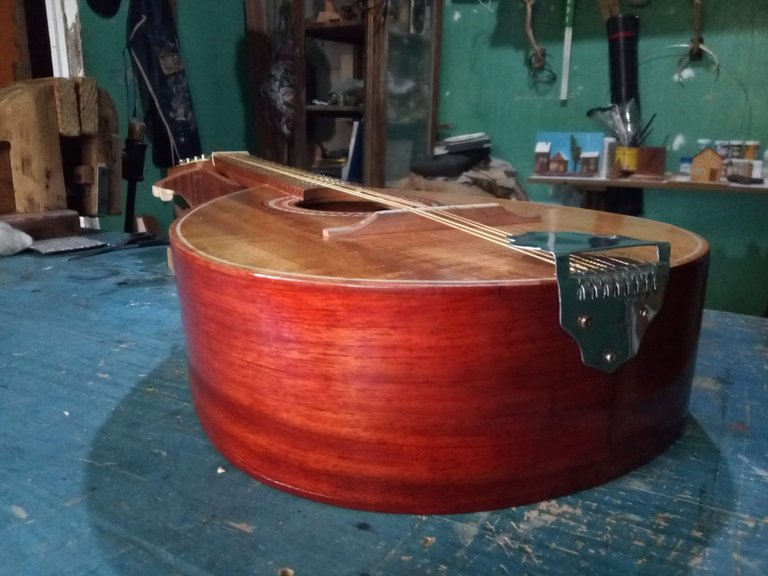
Here we finish the work and we can observe that the old mark is not visualized all at once, that is to say, the magic is not only magic, it follows an order to obtain a good final result.
All the processes can be applied for works of cabinetmaking, marquetry, carpentry and do-it-yourself...
Thank you for reading my post about one of the many things that are done in the luthier's trade, as in this case, the repair of a coup, if you have any questions or suggestions, see you in the comments section, until a future publication Deep Peace.
- Pictures taken by my Alcatel cell phone.
- Translation : DeepL
Acá finalizamos el trabajo y podemos observar que no se visualiza la antigua marca de golpe, es decir la magia no es solo magia se sigue un orden para obtener un buen resultado final.
Todos los procesos se pueden aplicar para trabajos de ebanistería, marquetería, carpintería y bricolaje...
Gracias por haber leído mi post sobre unas de las tantas cosas que se hace en el oficio de la luthería, como en este caso el arreglo de un golpe, si desean hacer alguna pregunta o sugerencia nos vemos en la sección de comentarios, hasta una próxima publicación Paz profunda.
- Fotografías tomadas por mi celular Alcatel.
- Traducción : DeepL


