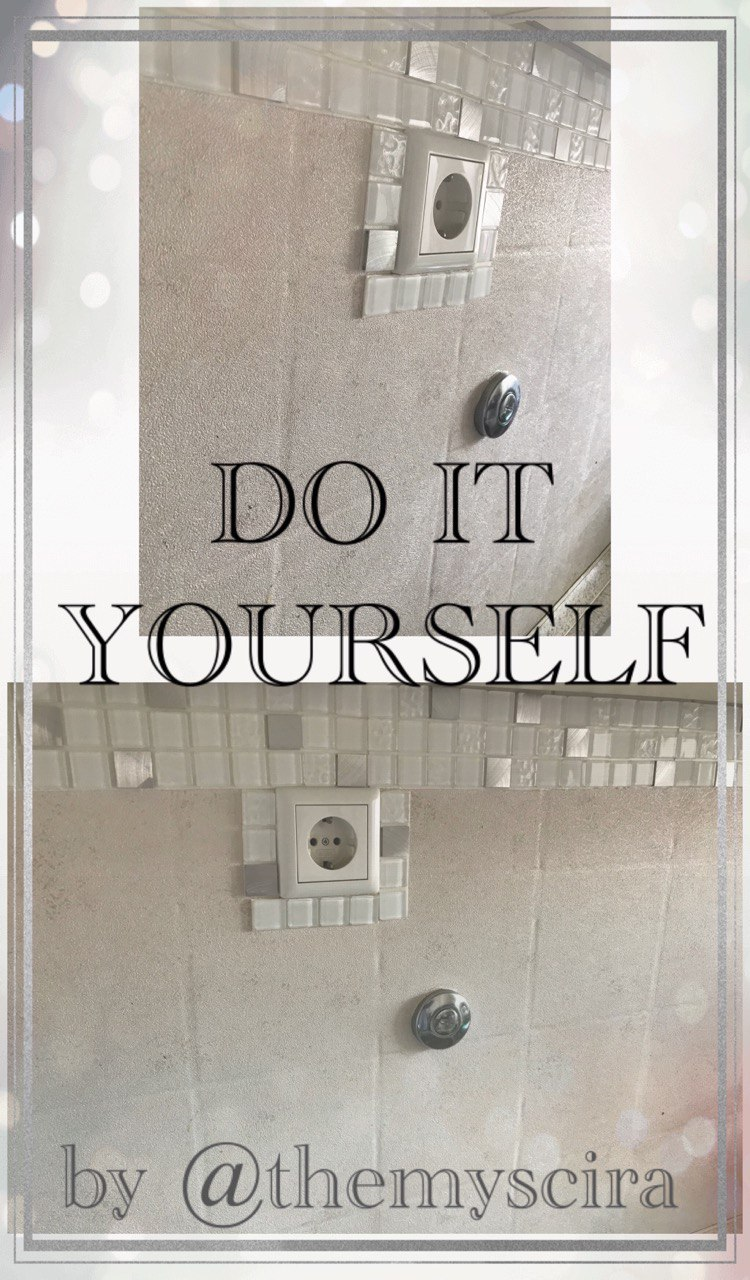
The wallet is pinching? And a new, tile play gel is not in it at the moment?
Yes, exactly the same problem is known to me, so I let my superbrain of creativity work again.
Who is so flush with cash that they can always afford an expensive home improvement? Probably for very few people. A 70s building is currently my living situation and many oldschool building measures have been incorporated here.
Including a tile mirror that looked terrible in the kitchen and simply didn't harmonise with my kitchen elements. It was covered with stickers and looked anything but beautiful. So I came up with the glorious idea of repainting it.
For this, I looked for a matching wallpaper that makes a complete picture with my kitchen, this wallpaper cost me 5 euros. Now what else do I need? Something to decorate it with, of course. My motto: I need glitter on it! So I simply strolled through a DIY store and lo and behold... small self-adhesive mosaic panels that could be cut to size without any problems.
Then came the most important question, how do I seal the whole thing to protect the wallpaper from typical kitchen conditions such as splashing grease or the effects of water? The brainwave was - elephant skin!
This is also used to protect the walls from children's greasy fingers. Lool
The wallpaper can be wiped and cleaned of grease without any problems and the wallpaper does not come off the tile when it comes into contact with water.
Yes Jackpot! On to the new tile spigel, of course @themyscira like-.
Self-made.
The wallpaper I chose, the elephant skin and the mosaic tiles cost a total of 25 euros.
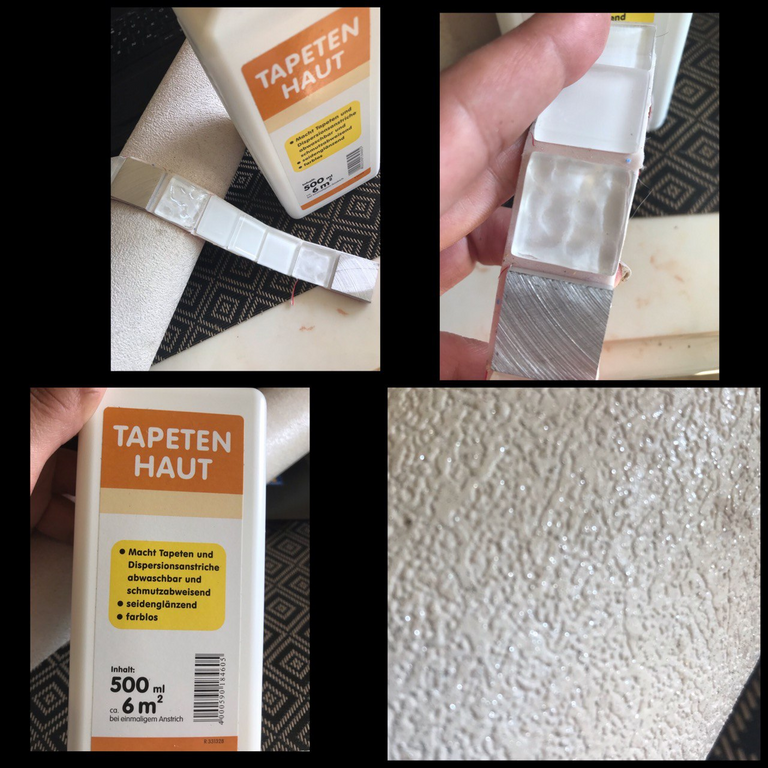
First I cleared the backsplash of dirt and measured out the strips that I didn't glue in one piece because of the sockets and the length of the backsplash.
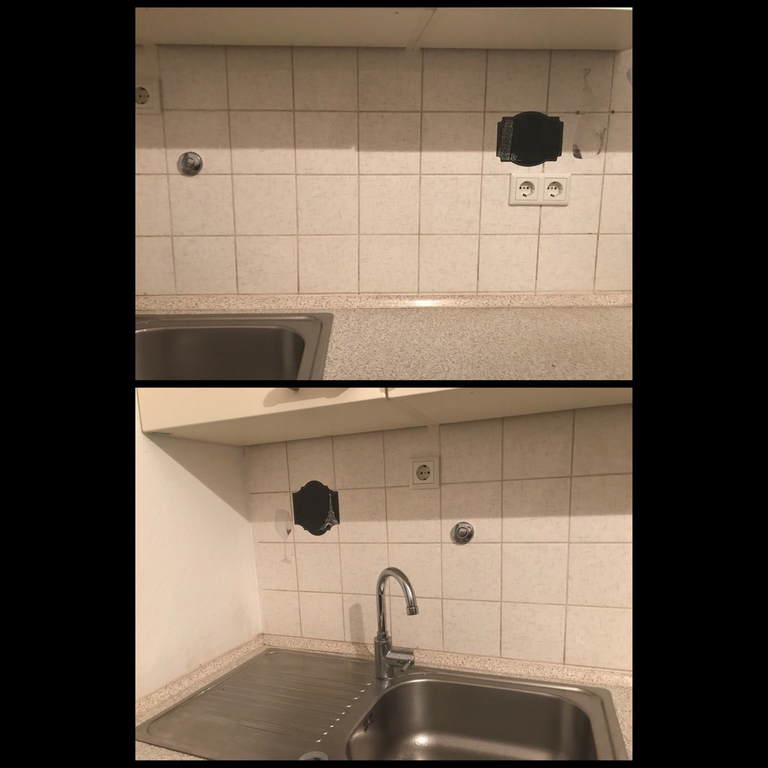
The sockets and other highlights of old connections were marked on the wallpaper and provisionally attached with tape to prevent them from slipping.
After this was done, I started to stick the strips on.
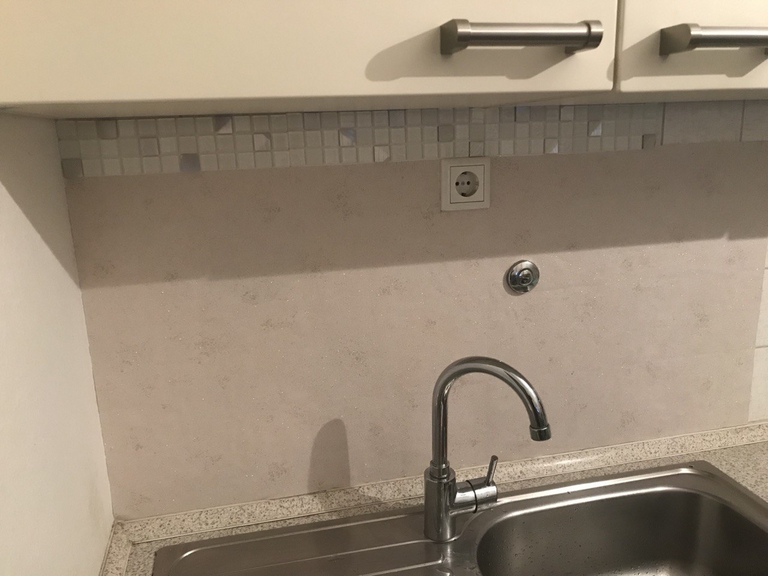
The sheets were now all in place and the mosaic tiles could be cut to size and then applied.
After everything was placed according to my ideas, I brushed the wallpaper with elephant skin once a day for 3 days to seal everything nicely.
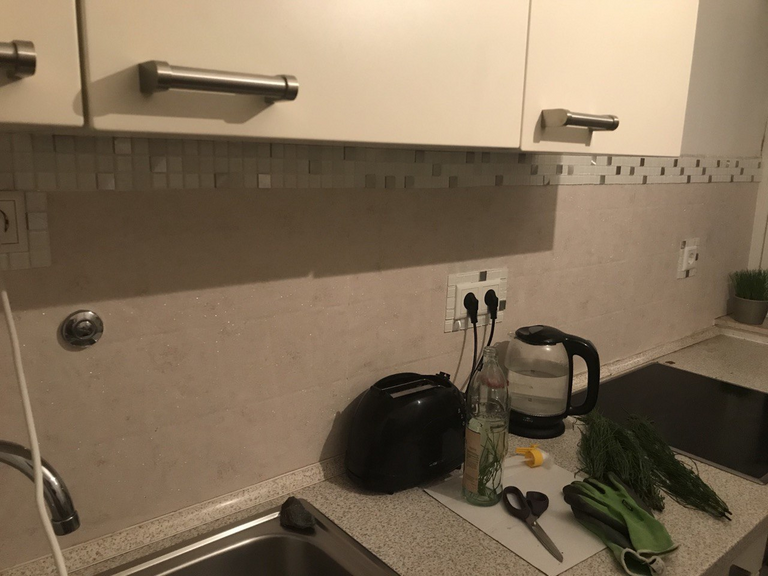
And here you can see the result of my idea to make the best out of the available space.
Until next time, dear self-makers
DE

Die Geldbörse kneift? Und ein neuer, Fliesenspielgel ist derzeit nicht drin?
Ja genau das Selbe Problem ist mir bekannt, also ließ ich wieder mein Superbrain an Kreativität wirken.
Bei wem sitzt die Kohle so locker, dass ständig eine kostspielige Verschönerung der Wohnung drin ist? Na wahrscheinlich bei den wenigsten. Ein 70er Jahre- Bau ist derzeit meine wohnliche Gegebenheit und hier sind viele oldschool Baumaßnahmen verarbeitet worden.
Einschließlich ein, in der Küche furchtbar ausschauender Fliesenspiegle der einfach mit meinen Küchenelementen nicht harmonierte. Er war mit Aufklebern beklebt und sah alles andere als schön aus. So kam ich auf die glorreiche Idee ihn neu zu bekleben.
Dafür schaute ich nach einer passenden Tapete, die mit meiner Küche ein gesamt Bild ergibt, diese Tapete hat mich 5 Euro gekostet. Nun was brauche ich noch?! Natürlich etwas zum Schmücken. Mein Motto: Da muss noch Glitzer drauf! Also schlenderte ich einfach durch einen Baumarkt und siehe da… kleine selbstklebende Mosaikplatten, die man ohne Probleme zurechtschneiden konnte.
Dann kam die wichtigste Frage, wie versiegel ich das ganze um die Tapete vor den typischen Küchengegebenheiten wie spritzendes Fett oder Wassereinflüssen schützen zu können. Der Geistesblitz war- Elefantenhaut!
Nutzt man auch um die Wände vor Kinderfettfingern zu schützen. Lool
Die Tapete lässt sich ohne Probleme abwischen und vom Fett befreien und die Tapete löst sich nicht von dem Fliesenspiegel, wenn die mit Wasser in Berührung kommt.
Ja Jackpot! Auf zum neuen Fliesenspeigel, natürlich @themyscira like-
Selbst gemacht.
Die von mir gewählte Tapete, die Elefantenhaut und die Mosaikplatten haben insgesamt 25 Euro gekostet.

Zuerst habe ich den Fliesenspiegel von Schmutz befreit und die Bahnen ausgemessen, die ich nicht in einem Stück geklebt habe, wegen den Steckdosen und der Länge des Fliesenspiegels.

Die Steckdosen und andere Hervorhebungen alter Anschlüsse wurden auf der Tapetenbahn angezeichnet und provisorisch mit Klebeband angebracht um ein verrutschen zu vermeiden.
Nach dem das gesehen war, fing ich auch schon an die Bahnen anzukleben.

Die Bahnen waren nun alle angebracht und die Mosaikplatten konnten zurechtgeschnitten werden und anschließend angebracht werden.
Nach dem alles nach meinen Vorstellungen platziert wurde, pinselte ich die Tapete 3 Tage einmal am Tag mit Elefantenhaut ein um das alles schön zu versiegeln.

Und hier seht ihr nun das Ergebnis meiner Idee aus dem Vorhanden das Beste zu machen.
Bis zum nächsten mal ihr Lieben Selbstmacher
