Hi, today I come with something I rarely do, but still enjoy doing, which is a TUTORIAL!!!!
Since a few days ago, the idea of renewing my image around here has been latent, so I started by uploading a new cover or background image, as you prefer to call it, but it didn't stop there, so I decided to update my banner and today the day has come.
For me the Banner here at Hive is like the signature in your email, it is something that everyone who wants to and decides to get to the end of your post, will see it!
When I first started Hive, I created one, I wanted it to cover the things that I like, that I am passionate about, such as my love for TV series, movies, music, my love for BSB (backstreet Boys) and, without a doubt, my love for animals by placing a doggie paw print, accompanied by a little doll that is supposed to be me and my name.

I must clarify that I don't have a high performance computer or knowledge in design, I do things with very basic tools actually, as they are; CANVA and Power Point, so experts, please if you read this don't be too hard on me.
Now after this great introduction, let's get to what we came for, let's create a Banner!!!!
2.Conexión a Internet
3.Paciencia y buena disposición!
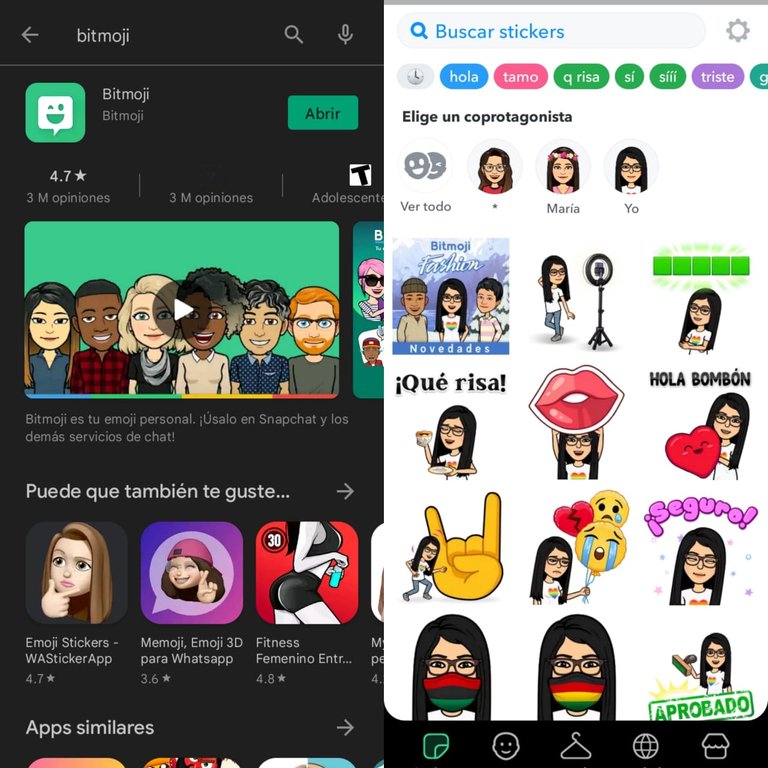
Opcional: Yo utilizo una aplicación en mi teléfono celular, que se llama Bitmoji, allí diseñé o creé un avatar de mí y es la muñequita que utilizo, esta aplicación podrás encontrarla en la Play Store.
What will we need? Well, here is a short list:
1.Desktop or Laptop Computer
2.Internet connection
3.Patience and willingness!
Optional: I use an application on my cell phone, which is called Bitmoji, there I designed or created an avatar of me and is the doll I use, this application can be found in the Play Store.
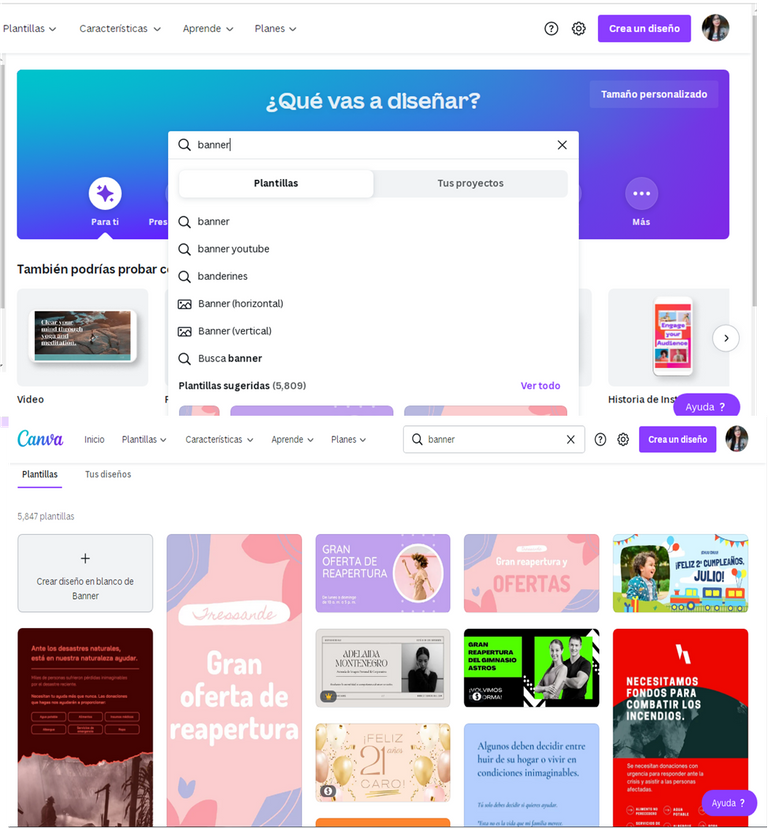
Now, having all this, we go to the computer, where we will open the CANVA website, do not worry if you do not have an account, creating one is very simple, just choose to log in with your google or facebook account, accept the permissions and that's it.
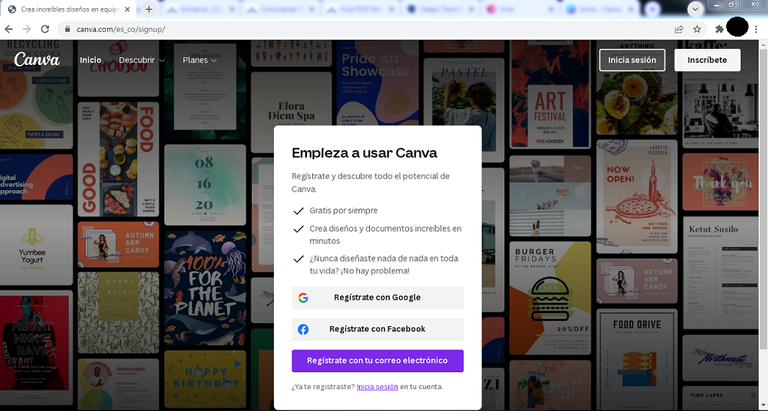
Once you are inside you don't have much to worry about, because the interface is quite friendly, quite simple I would say, so this is what will appear on the screen.
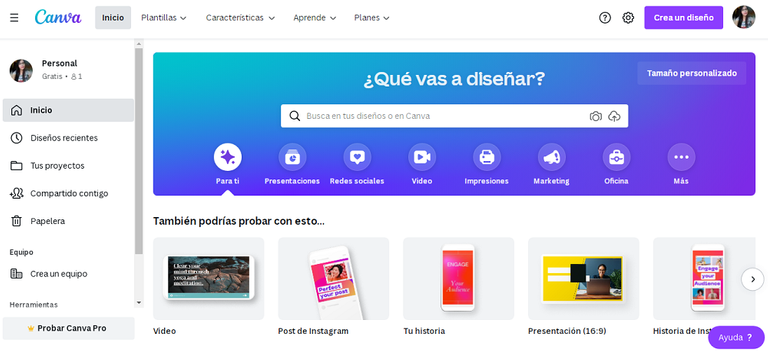
Now, if you look in the part of what you are going to design, you will immediately see a series of options and templates to create something much faster and simpler.
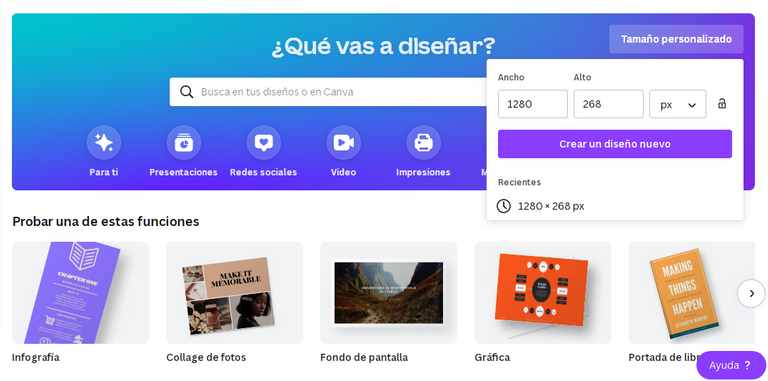
In my case, I already had in mind what I wanted. I wanted something simple, with a white background so that it wouldn't interfere with my bitmoji dolls and where I wouldn't have to be removing the backgrounds with worry that it wouldn't look perfect, so I chose something custom sized, a size I feel comfortable working with of 1280 x 268 px.
And this is what comes out, basically lots of themes, backgrounds or templates to choose from and a totally blank box.
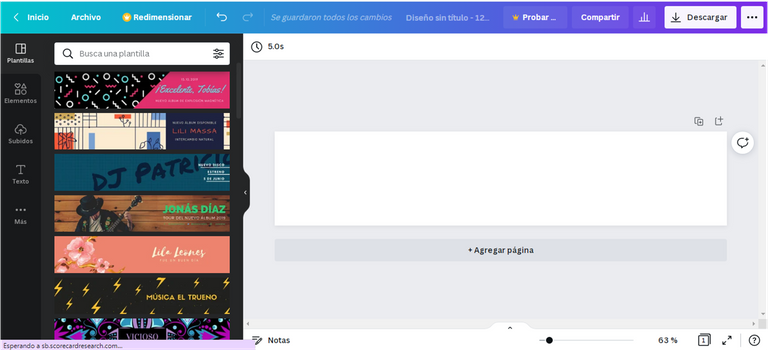
The steps to follow vary entirely depending on what you want to do, as I said, I already had in mind what I wanted to achieve, so this streamlined the process a bit.
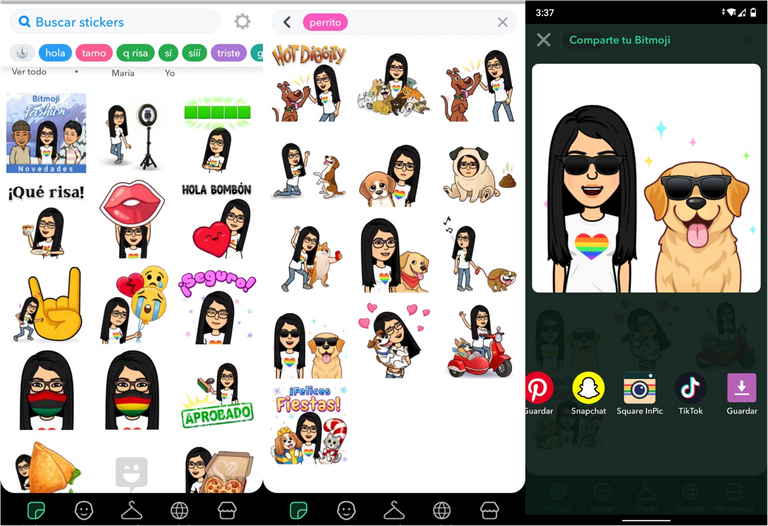
I took my phone and chose the images I wanted to appear in my banner. Bitmoji is a fairly simple application, so don't worry about it, after creating your avatar you can find several ways for your avatar to appear.
In the Search Stickers section, you write what you are looking for, press enter, and when you find the image of your choice, you must select it and download it or send it by mail, whatsapp, telegram, wherever you feel more comfortable to use it from the computer.
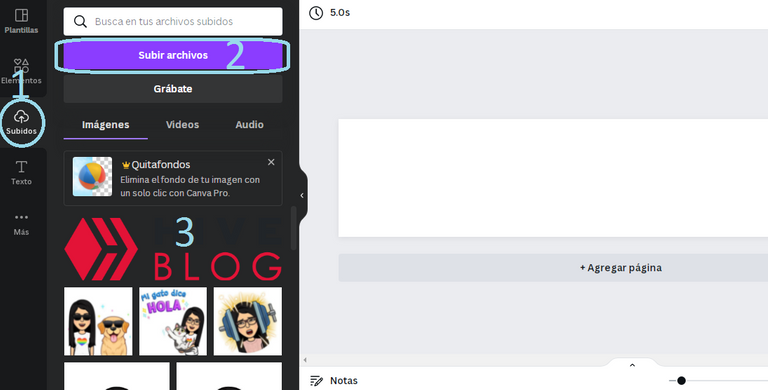
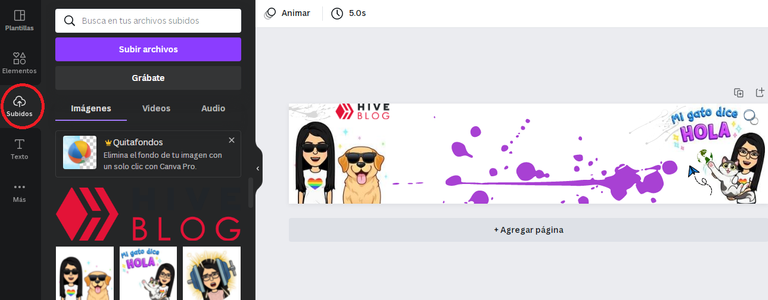
Now we return to CANVA, where we are going to upload the images that we are going to use, you can upload as in my case also the logo of HIVE, for this, we will go to the button where it says "Uploaded" and then to upload files, where we will be able to choose in our computer the images previously saved, so that these are uploaded to the page of CANVA, to be able to use them and when they are already completely loaded they will leave us in the part 3 of the image.
Once we have the images already loaded in the page, we are going to proceed to arrange them according to our tastes, for this we select the image and this goes directly to the page in this case in white that we have there in screen.
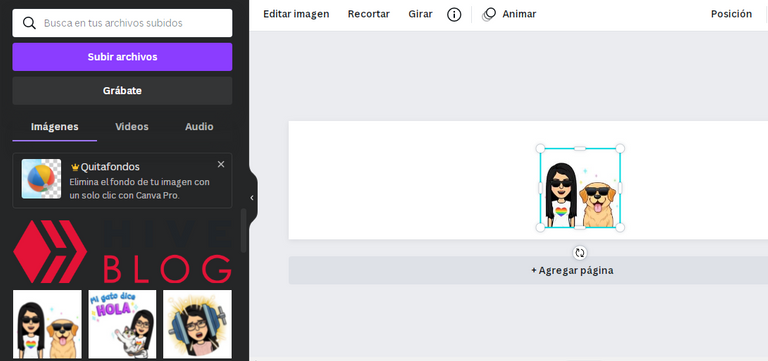
When we have the image already in the part of the template where we will work, we can select it by clicking on it and with the mouse pointer we can change its size, move it around and play with it a little bit, so to speak.
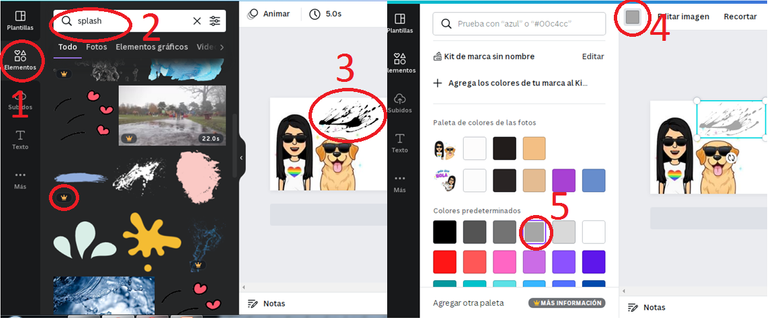
In my case, I went to the elements section because I wanted to find some things to decorate the image, so I started by looking for the word "Splash" because I wanted some subtle paint splashes on my image.
Here it is very important to select images that do not have the "crown", so that it is not premium and you don't get a horrible watermark. As the image I liked was white like the background, I decided to change its color to a light gray, so that it could be seen but with a subtle touch; so I selected it and then I went to the color box where I could choose the color I liked.
In this way we look for the "ornaments", figures that we want and we play a little with them at our convenience, as I did with the image of the world to make it look like the cat is playing with it, the airplane, and another bit of Splash.
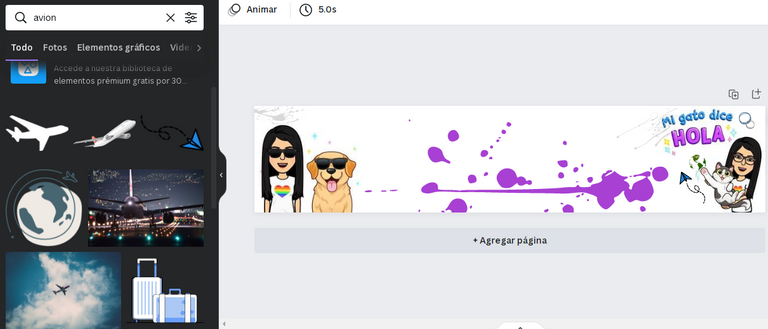
Now it is time to customize it even more and place the Hive logo, for which we must return to the "uploaded" section, select it and place it in the place of our preference, leaving the name at the end.
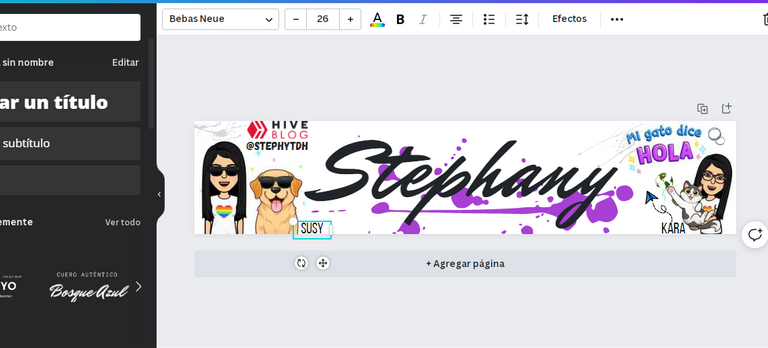
To place the name, we will have to go to the "text" part just below the uploaded option. There we will find several default fonts and text forms, it is up to you whether to choose one of those or do as I did and go to the option to add text and choose the font in a traditional way, as if we were doing it in word, power point or excel.

And now that you know how to place text, you write whatever you want in the image, in my case, I wrote my name, my HIVE user, and the name of my dog and my kitty.
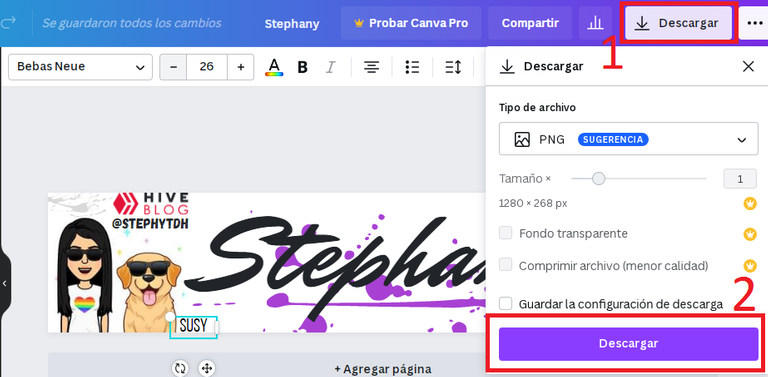
When you have your banner ready, simply download it, save it on your pc and it's ready for when you want to use it.
And that was all for today, I tried not to make it long or confusing, it was still long but hopefully not confusing. The steps can logically vary according to your needs, to the things you want, because this tutorial was made according to mine, however if you have any doubts along the way you can always consult me, my social networks are down here, just click on the logo and it will take you directly to my profile.
Thanks for reading me and don't forget to check out my new banner which is right down here at the end of the post. Huge hugs to all, see you soon!


