ENGLISH
Hello.
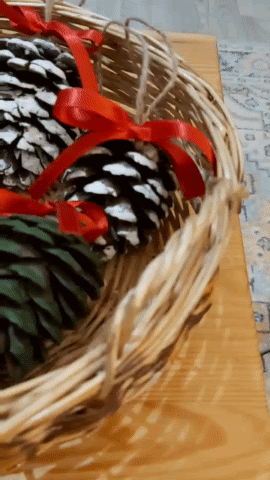
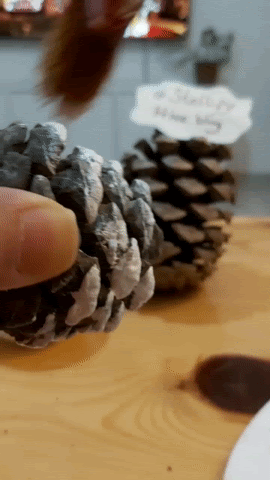
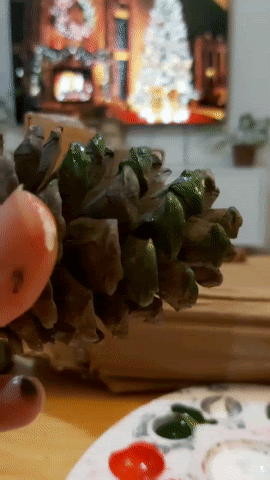
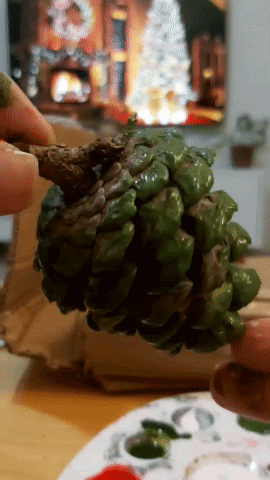
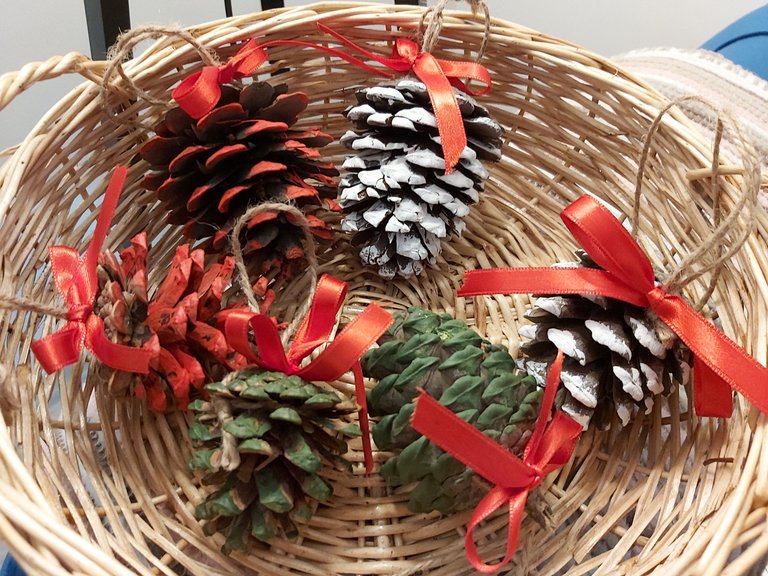
Today I came before you with a DIY project. I love making preparations before the new year. I ordered a Christmas tree for myself for the first time. It hasn't arrived yet, but I'm looking forward to it. It will make me very happy to decorate it. I forgot to buy the ornament to add to the top when ordering. I also made ornaments from natural materials that I would add to both the branches and the top. I love the pinecone look. There is always a pinecone in my house as a decoration. Since I collect too much in the summer, I thought I'd make some of it as a Christmas ornament.
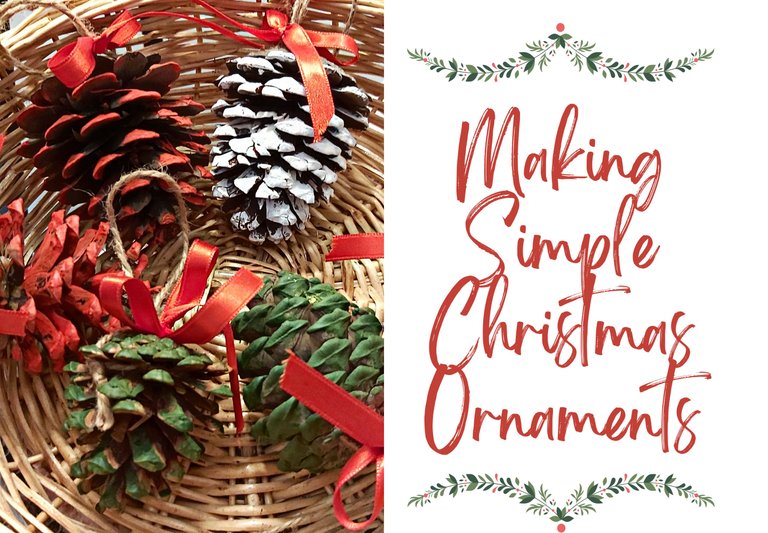
I have prepared tree ornaments that you will not have any difficulty with, but that you will like as an image. Now, if you wish, let's move on to the steps that I will talk about how I made the ornaments. Are you ready?
TÜRKÇE
Merhabalar.
Bugün sizlerin karşısına kendin yap projesi ile geldim. Yeni yıla girmeden hazırlıklar yapmayı çok seviyorum. Kendime ilk defa yılbaşı ağacı siparişi verdim. Henüz gelmedi ama onu büyük heyecanla bekliyorum. Üzerini süslemek beni çok mutlu edecek. Sipariş verirken tepesine ekleyeceğim süsü almayı unuttum. Ben de hem dallarına hem de tepesine ekleyeceğim doğal malzemeden süs yaptım. Çam kozalağı görüntüsünü çok seviyorum. Evimde dekor olarak mutlaka çam kozalağı bulunur. Yazın fazla topladığım için bir kısmını yılbaşı süsü yapayım dedim.
Hiç zorlanmayacağınız ama görüntü olarak çok beğeneceğiniz ağaç süsleri hazırladım. Şimdi dilerseniz süsleri nasıl yaptığımdan bahsedeceğim adımlara geçelim. Hazır mısınız?
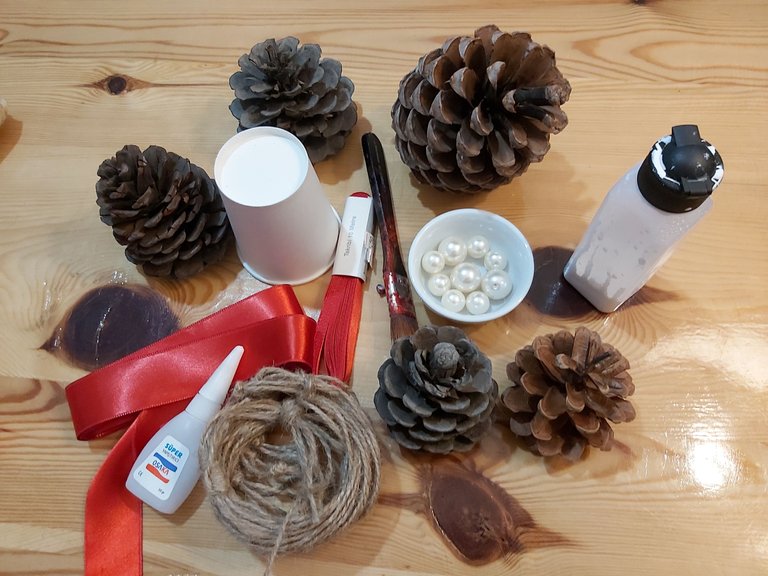
Meterials
- Acrylic Paint (Red|White|Green)
- Pinecone
- Red Ribbon Rope
- Plastic cup
- Straw Rope
- Scissors
- Bead
- Brush
- Glue
Malzemeler
- Akrilik Boya (Beyaz|Kırmızı|Yeşil)
- Çam Kozalağı
- Kırmızı Kurdele İp
- Plastik Bardak
- Hasır İp
- Makas
- Boncuk
- Fırça
- Yapıştırıcı
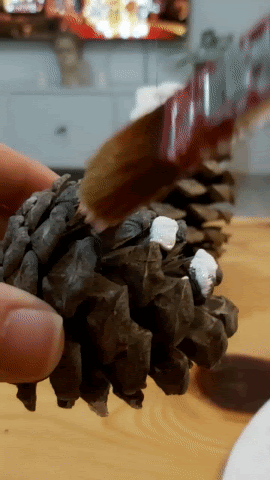
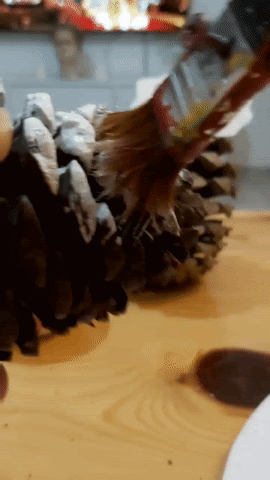
Cone Painting
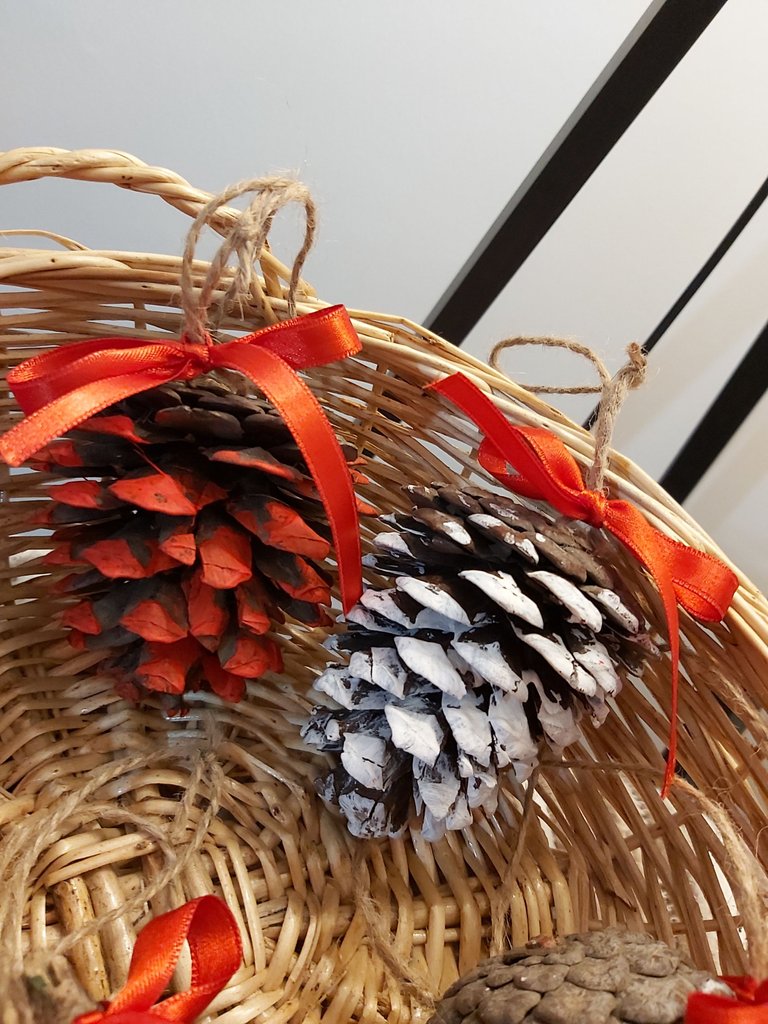
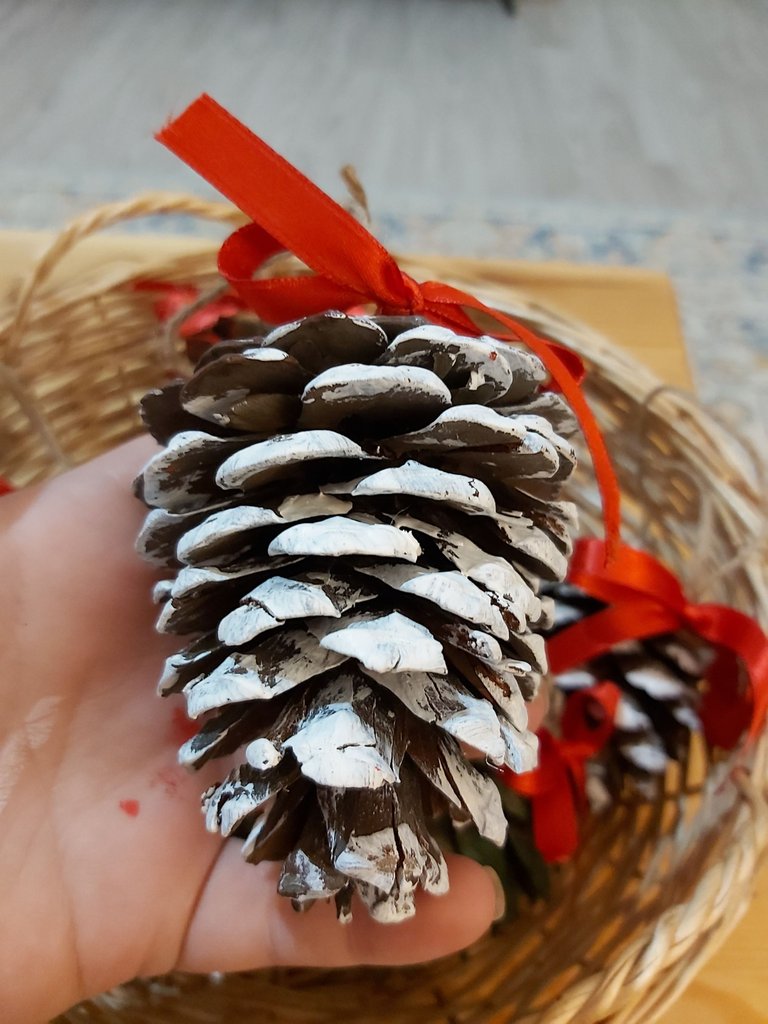
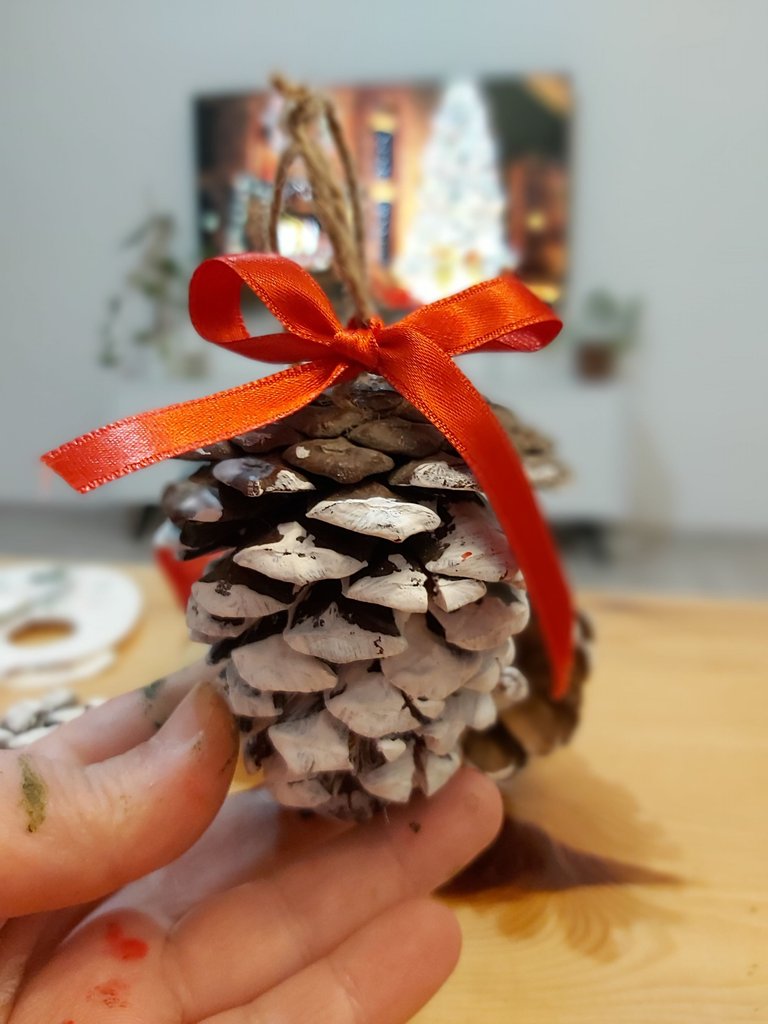
First of all, I started to paint the cones with white paint. I wanted to make it look like it had snowed so I didn't paint it completely. I just brush strokes on the ends.
Of course, if you wish, you can also paint the interior parts, but my preference was for the snowy look. The paint I use belongs to the Artdeco brand. I chose paint to be used on every surface.
Kozalak Boyama
Kozalakları öncelikle beyaz renk boya ile boyamaya başladım. Sanki kar yağmış görüntüsü vermek istedim bu yüzden tamamen boyamadım. Sadece uç kısımlarına fırça darbeleri vurdum.
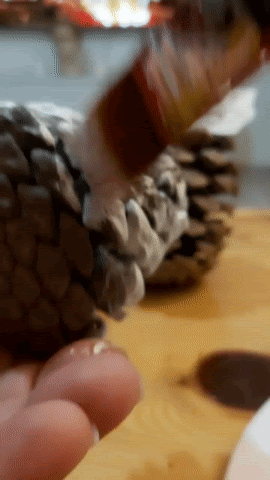
Tabi ki dilerseniz iç kısımlarını da boyayabilirsiniz ama benim tercihim kar yağmış görüntüden yana oldu. Kullandığım boya Artdeco markasına ait. Her yüzeyde kullanılacak boya tercih ettim.

I did the same with the red color. As you know, the color red is said to bring good luck on New Year's Eve. So I didn't want to skip using the color red. I also think it would look nice on a green tree.
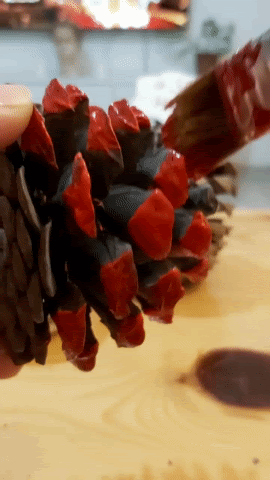
Aynı işlemi kırmızı renkte de uyguladım. Biliyorsunuz ki kırmızı renk yılbaşında uğur getirdiği söyleniyor. Bu yüzden kırmızı rengi kullanmayı atlamak istemedim. Hem yeşil ağaç üzerinde hoş duracağını düşünüyorum.
And finally, I applied green color paint. Since the cones are dark, the green color was not very clear, but I still did not want to skip the green color, which is one of the Christmas colors.
Ve son olarak yeşil renk boya uyguladım. Kozalaklar koyu olduğu için yeşil renk fazla belli olmadı ama yine de yılbaşı renklerinden olan yeşil rengi atlamak istemedim.
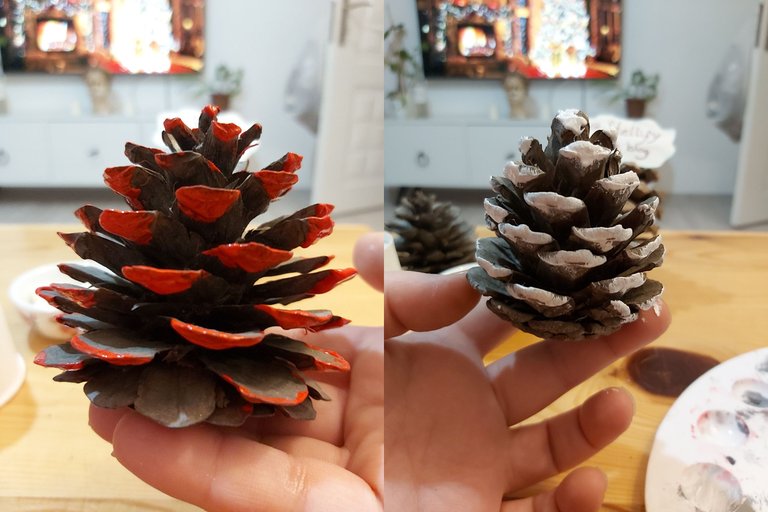
As you can see, cones were prepared with light touches. Don't you think they were too cute? I took them out to the balcony to dry quickly.
Gördüğünüz gibi hafif dokunuşlarla kozalaklar hazırlandı. Sizce de çok tatlı olmamışlar mı? Onları çabuk kuruması için balkona çıkarttım.
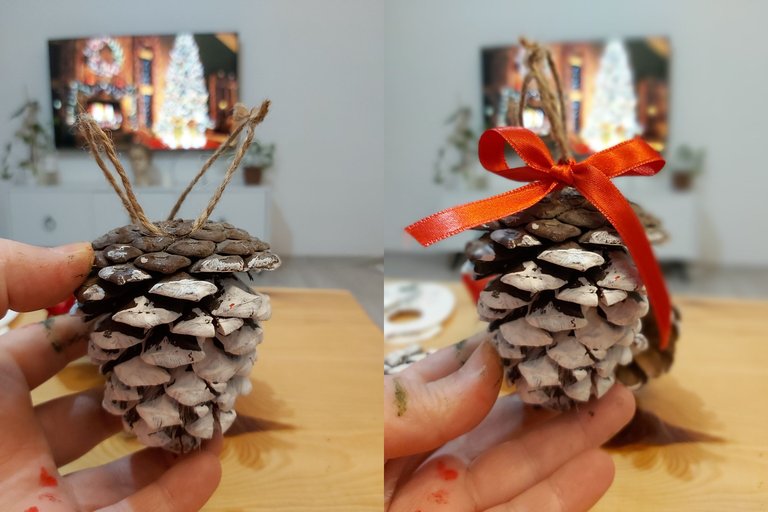
When the cones were dry, I had to thread a string to hang them. I also used straw rope to make it look natural. Then I made a rope bow with red ribbon. When the ribbon was added, my cone became much sweeter. I've always loved the finishing touches.
Meanwhile, I tucked the rope between the cones. You can fix it with silicone glue if you wish.
Kozalaklar kuruyunca onları asmak için ip geçirmem gerekiyordu. Ben de doğal durması için hasır ip kullandım. Ardından kırmızı renkli kurdele ile ipe fiyonk yaptım. Kurdele eklenince kozalağım çok daha tatlı oldu. Son dokunuşları her zaman çok sevmişimdir.
Bu arada ipi kozalakların arasına sıkıştırdım. Siz dilerseniz silikon yapıştırıcısı ile sabitleyebilirsiniz.
Lastly, there's the Christmas Tree Topper. Because the steps were long, I had to split the article into two. I will share the second part with you tomorrow.
Please continue to follow me. Tomorrow I will come to you with a very good article. Thank you in advance for your comments and support.
May the new year bring good wishes to all of us!
Stay with love!
xoxo
Son olarak Yılbaşı Ağacı Topper'i kaldı. Aşamalar uzun olduğu için yazıyı ikiye bölmek zorunda kaldım. İkinci kısımı ise yarın sizlerle paylaşacağım.
Lütfen beni takip etmeye devam edin. Yarın sizlere çok güzel bir yazı ile geleceğim. Şimdiden yorumlarınız ve destekleriniz için teşekkür ederim.
Yeni yıl hepimize güzel dilekler getirsin!
Sevgi ile kalın!
xoxo