Greetings my creative family of Hive Diy! Welcome to a new DIY filled with lots of love and dedication. I wish you all well and that this new week that starts today, is greatly blessed, allowing us to enjoy and keep in mind happiness, creativity and productivity, I hope it will be a great week for everyone.♡
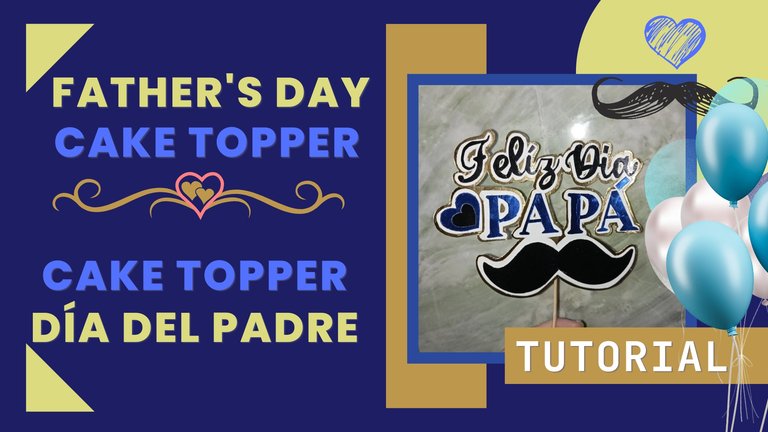
La tarde de hoy, les comparto una manualidad referente al día del padre, que fue el día de ayer, esto debido a dos cosas: primero porque tuve la semana llena de distintas cosas que hacer y no me alcanzó el tiempo para terminar está idea a tiempo y subirla antes del Día del Padre. Y segundo, porque muchas veces los regalos llegan tarde, pero seguro, considero que si lo dejaron para está semana por cualquier motivo, les es útil.
This afternoon, I share with you a Father's Day craft, which was yesterday, this because of two things: first, because I had a week full of different things to do and I didn't have enough time to finish this idea on time and upload it before Father's Day. And second, because many times gifts come late, but sure, I think that if you left it for this week for any reason, it is useful for you.
Así, tarde, pero seguro les traigo el tutorial de como hacer un hermoso Cake Topper para celebrar el día del Padre. Este detalle se le puede agregar a algún arreglo, a una torta, a un empaque de regalo, entre otras cosas. Le podemos dar varios usos, también podemos personalizarlo con los colores y combinaciones de nuestra elección y elegir el tamaño, así les dejó está idea que pueden usar para el otro año, dar un regalo tarde, pero seguro o incluso inspirarse, a continuación.
So, late, but surely I bring you the tutorial on how to make a beautiful Cake Topper to celebrate Father's Day. This detail can be added to an arrangement, a cake, a gift packaging, among other things. We can give it several uses, we can also customize it with the colors and combinations of our choice and choose the size, so I leave you this idea that you can use for the next year, give a gift late, but sure or even get inspired, below.
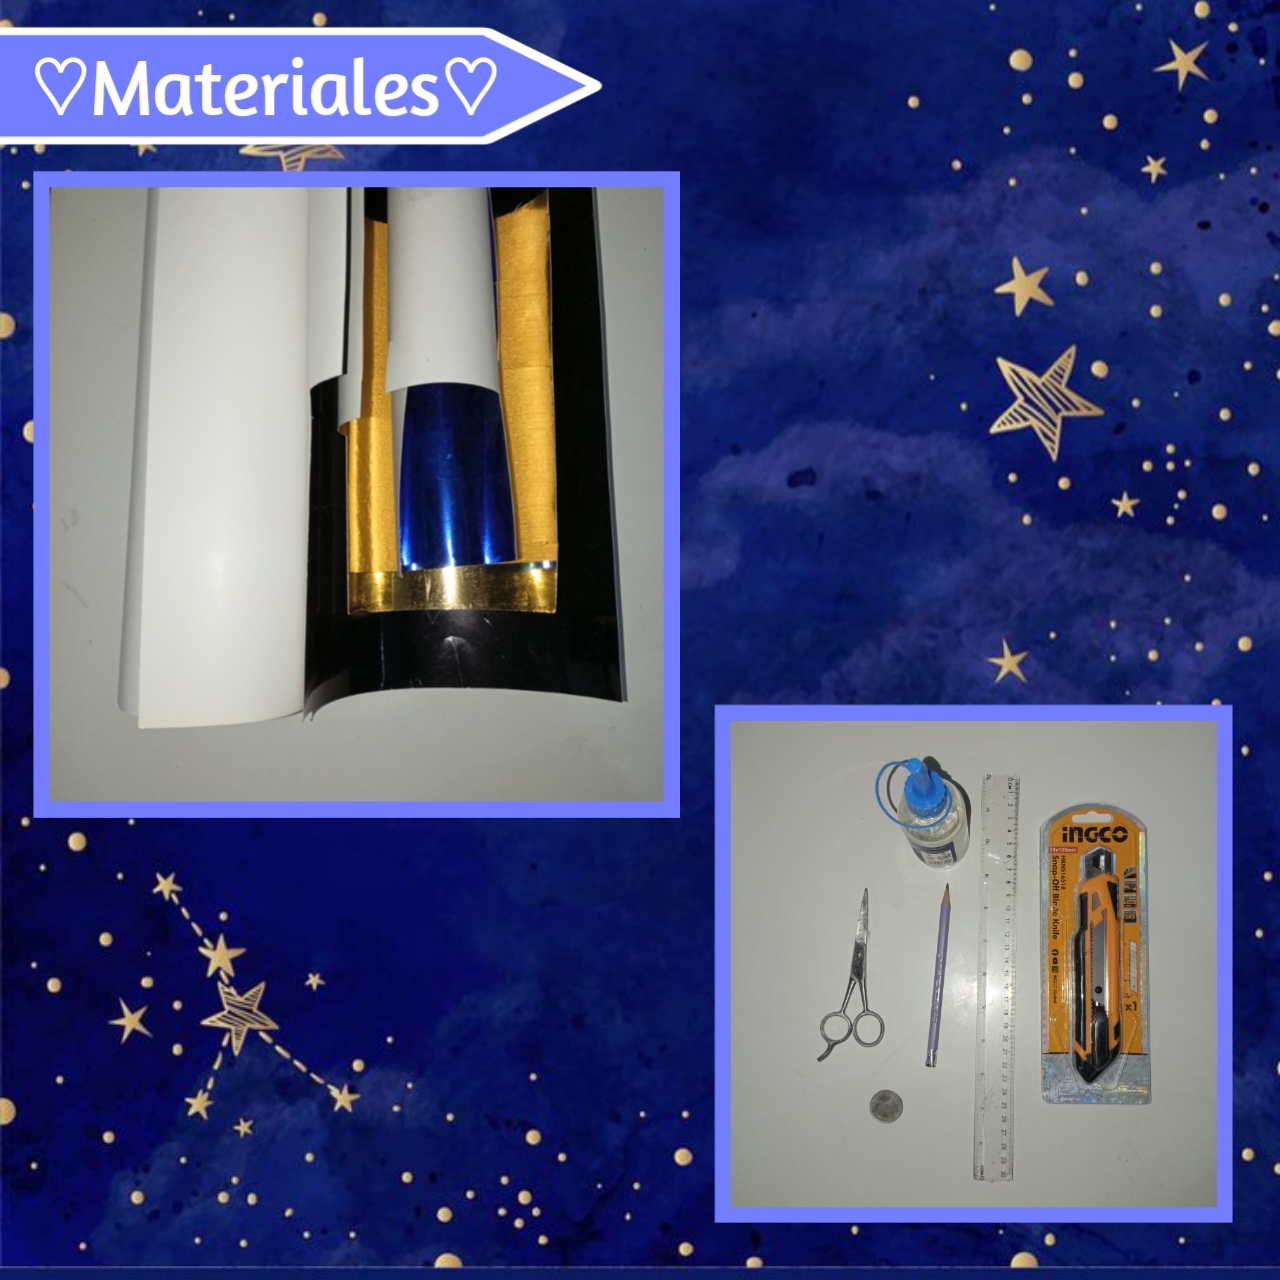
♡💙💛Materials💛💙♡
- Diferentes cartulinas; metalizadas, doble faz, decoradas
- Silicón
- Cutter/Exacto
- Palito de altura
- Tijera
- Lápiz
- 1 Moneda
- Different types of cardboard; metallized, double-sided, decorated
- Silicone
- Cutter/Exacto
- Height stick
- Scissors
- Pencil
- 1 Coin
♡🤍💙Step by Step💙🤍♡
Paso 1:
Step 1:
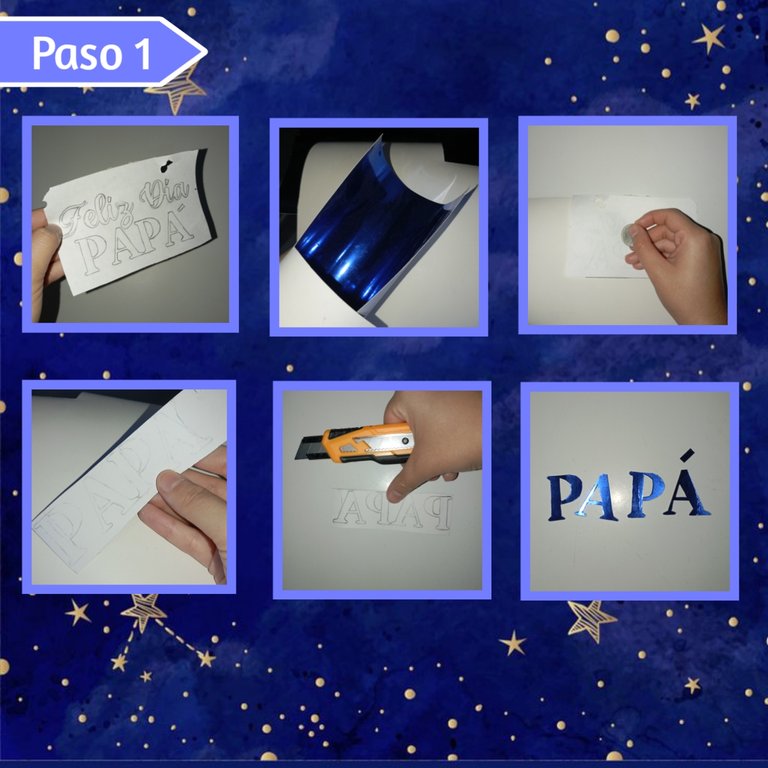
Para hacer este cake topper, empecé sacando una plantilla a mano de las palabras que usé, que son: "Felíz Día" y "PAPÁ", las cuales luego con ayuda de un lápiz remarque muy bien, así cada una de las letras y carácteres. con la plantilla lista, ahora vamos a tomar nuestra cartulina a elección, en este caso yo use azul metalizada, así la puse al revés y sobre está también coloque la palabra "papá" al revés, luego pase con cuidado una moneda por los trazos, hasta marcar por completo.
To make this cake topper, I started by drawing a template by hand of the words I used, which are: "Happy Day" and "DAD", which then with the help of a pencil I marked very well, so each of the letters and characters. With the template ready, now let's take our cardboard of choice, in this case I used metallic blue, so I put it upside down and on it also put the word "Dad" upside down, then carefully pass a coin through the strokes, until completely marked.
Así con la palabra ya bien marcada, empecé recortando con un cutter cada una de las letras.
So with the word already well marked, I started cutting out each of the letters with a cutter.
Paso 2:
Step 2:
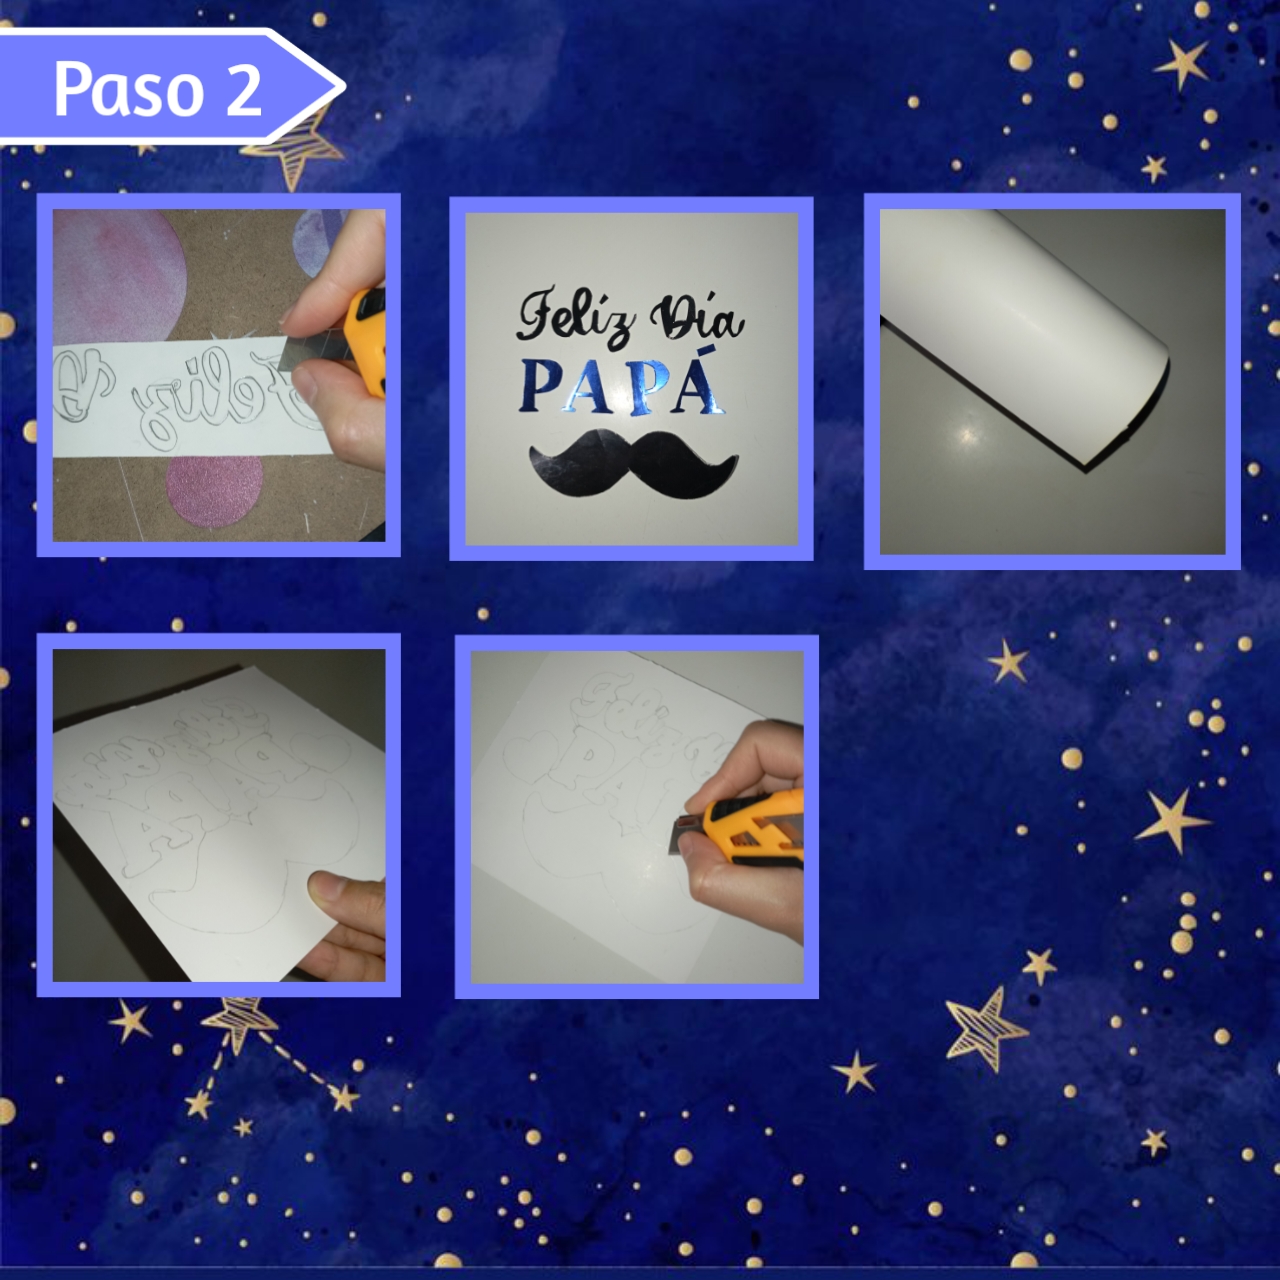
Así, haremos exactamente lo mismo con las siguientes palabras, en la cartulina a nuestra elección, al reverso pasamos nuestras últimas palabras y también un dibujo de un bigote, esto yo lo hice en cartulina negra metalizada, también conocida como cartulina espejo. Luego recortamos muy bien todo, proseguimos a agregar capas, así organizamos como queremos el Topper encima de cartulina blanca y con un lápiz marcamos la silueta alrededor, dejando un espacio pequeño, al terminar esto recortamos siguiendo la silueta.
So, we will do exactly the same with the following words, on the cardboard of our choice, on the back we pass our last words and also a drawing of a mustache, I did this on metallic black cardboard, also known as mirror cardboard. Then we cut out everything very well, we continue to add layers, so we organize as we want the Topper on top of white cardboard and with a pencil we mark the silhouette around, leaving a small space, when we finish this we cut following the silhouette.
Paso 3:
Step 3:
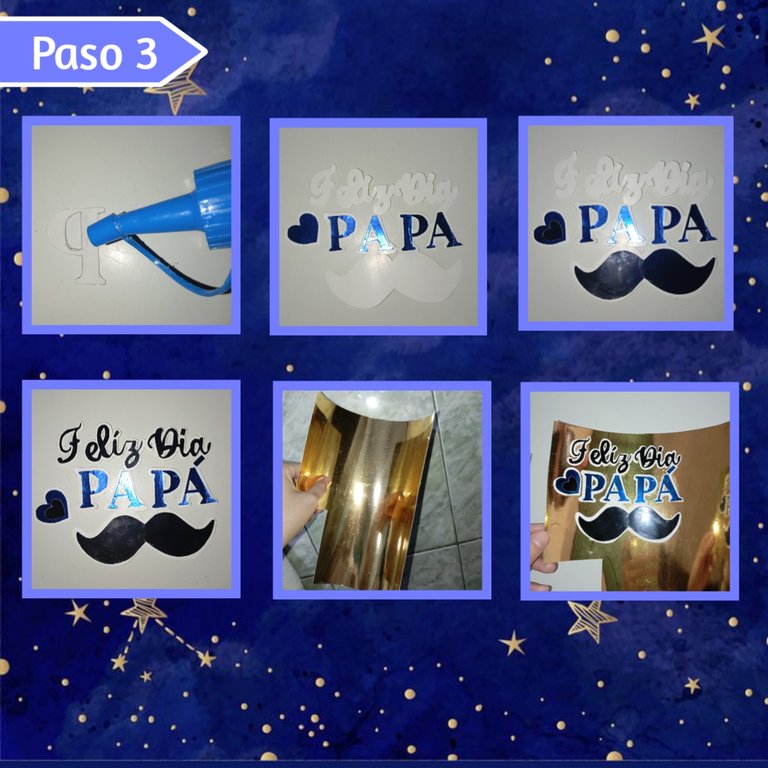
Ahora bien, con un borrador iremos borrando poco a poco y con cuidado, los rastros del borde del lápiz en la cartulina blanca, después tomaremos las palabras que recortamos al inicio y vamos a agregar silicón a cada pieza y pegando en el espacio correspondido, centrando bien. Ya con todo pegado seguimos con la otra capa, le agregaremos silicón a la pieza y la pegaremos con silicón encima de una cartulina en color dorado.
Now, with an eraser we will erase little by little and carefully, the traces of the pencil edge on the white cardboard, then we will take the words that we cut out at the beginning and we will add silicone to each piece and glue it in the corresponding space, centering it well. Once everything is glued we continue with the other layer, we will add silicone to the piece and glue it with silicone on top of a gold colored cardboard.
Paso 4:
Step 4:
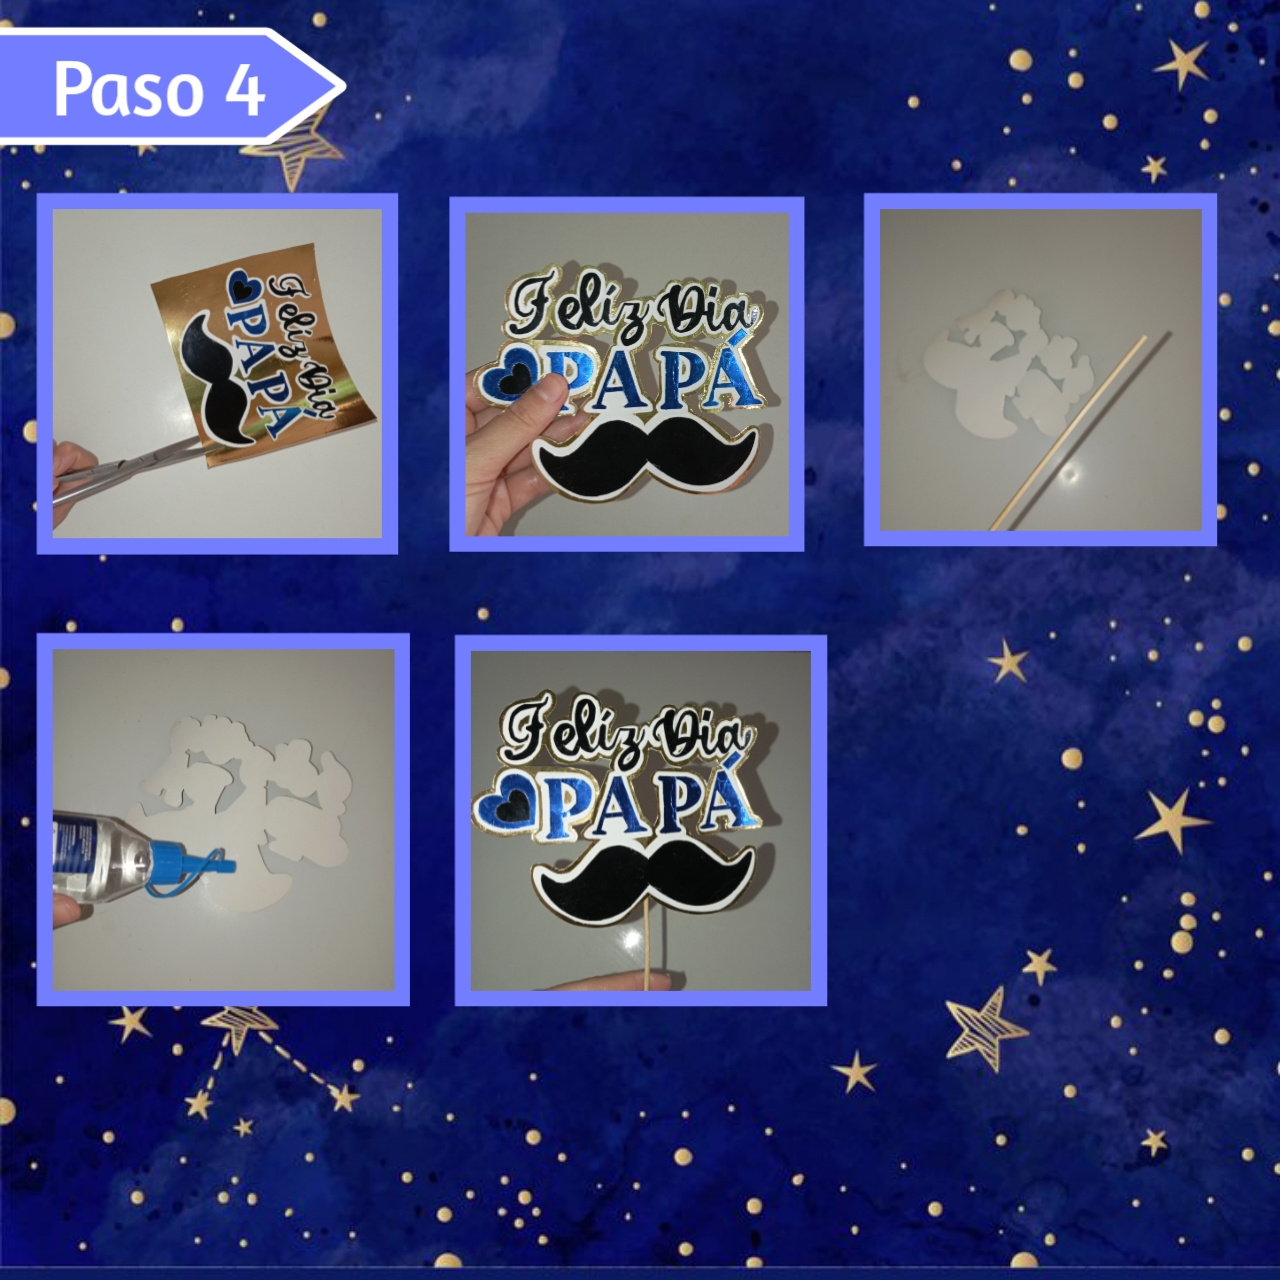
Para finalizar, continuaremos tomando nuestra tijera y cortando lo mejor posible dejando un pequeño borde de unos pocos milímetros (mm), en este punto si es de su agrado puedes poner otra capa adicional o como quieran, pero yo considero que con estas tres está bien. Por último, solo nos queda tomar nuestro palito de altura, agregar silicón en la parte trasera del Cake Topper y unir con el palito de altura, sosteniendo unos segundos hasta que seque y se mamtenga y fin.
To finish, we will continue taking our scissors and cutting as best as possible leaving a small edge of a few millimeters (mm), at this point if it is to your liking you can put another additional layer or as they like, but I consider that with these three is fine. Finally, we just need to take our height stick, add silicone on the back of the Cake Topper and join with the height stick, holding a few seconds until dry and mamtenga and end.
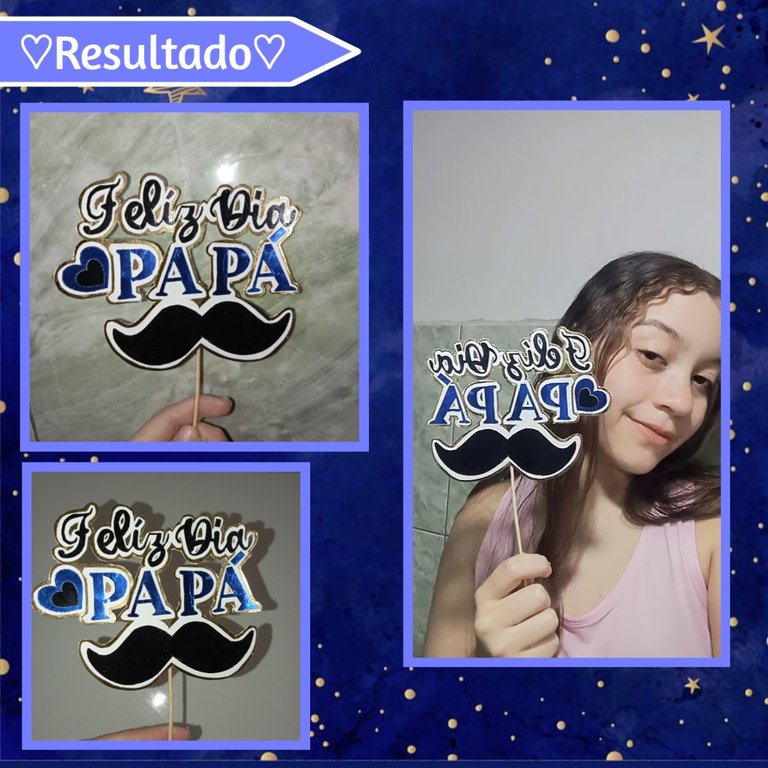
Así, es como en tres fáciles pasos y con algo de práctica podemos tener un Cake Topper sencillo, tanto para el día del Padre del próximo año, un regalo tarde, Pero seguro y como también es una pequeña guía para hacerlos de este tipo, pero con otra temática, solo es cuestión de cambiar pequeños detalles y personalizar a nuestra elección.☄️✨
This is how in three easy steps and with some practice we can have a simple Cake Topper, both for next year's Father's Day, a late gift, But for sure and as it is also a small guide to make them of this type, but with another theme, it's just a matter of changing small details and customize to our choice.☄️✨
Ya llegamos al final de está manualidad, espero les haya gustado y la puedan intentar hacer es un proceso que toma su tiempo, pero vale la pena, nada mejor que poder agregar está decoración a una linda torta o a un regalo especial. Felíz y bendecido Lunes querida familia, los quiero y espero leerlos en los comentarios, saludos y abrazos.✨☄️
We have reached the end of this craft, I hope you liked it and you can try it, it is a process that takes time, but it's worth it, nothing better than being able to add this decoration to a nice cake or a special gift. Happy and blessed Monday dear family, I love you and I hope to read you in the comments, greetings and hugs.✨☄️
💙🤍¡Gracias por leer!🤍💙
💙🤍Thanks for reading!🤍💙
Photos of my authorship taken from my Xiaomi Redmi 13C phone, edited in the free version of PixelLab and Canva

