Good morning my creative Hive Diy family! Happy and much more than blessed Wednesday, I wish you around here, besides a week full of good things, happiness, lots of health, crafts full of love, creativity and productivity, as I usually wish you, I simply hope that every day that passes you make the most of it and learn something new.♡
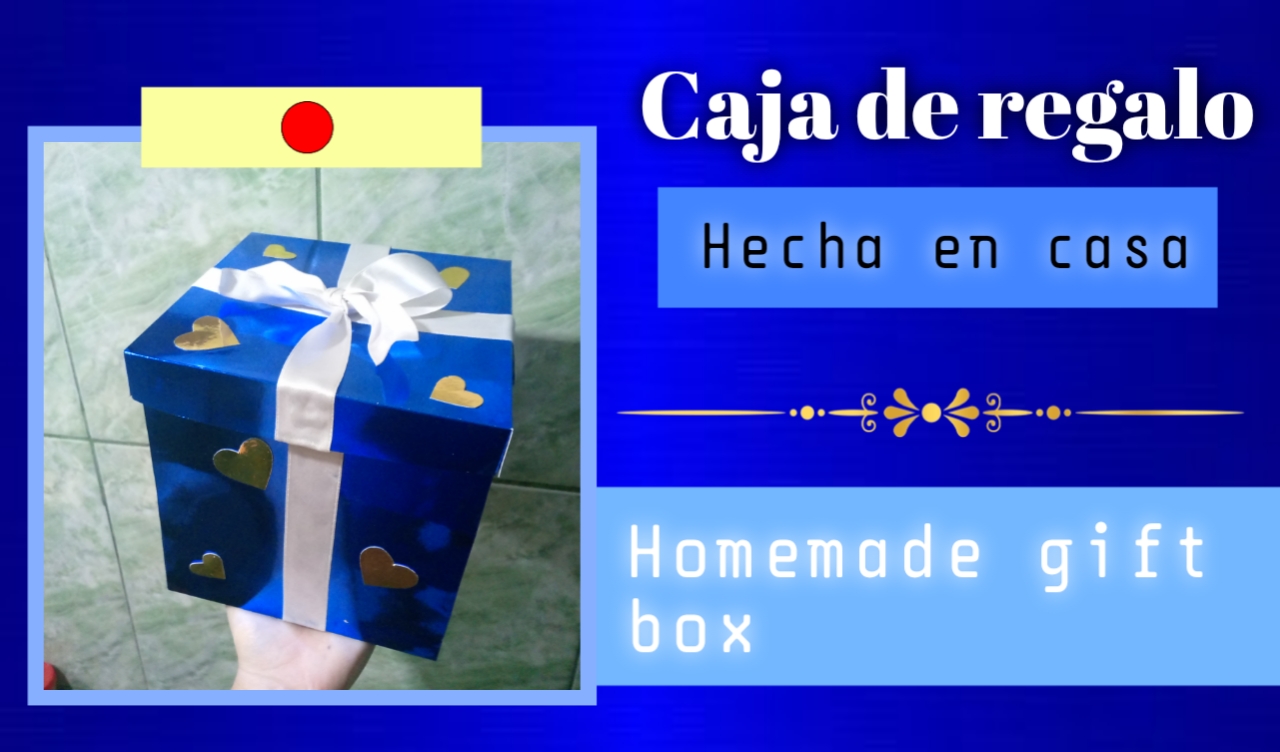
Les traigo el tutorial paso a paso, de cómo realice una hermosa caja, mucho más que ideal para introducir en está nuestros regalos para nuestras personas especiales, un empaque único para un regalo único marca la diferencia, más aún cuando lo hacemos nosotros mismos con mucho amor y cuidado. Es completamente personalizada, así que los detalles, colores y decoración entre otras cosas, lo elegimos nosotros a nuestro gusto y elección, lo mejor es que tenemos mucha variedad para crear, así que a continuación les muestro el proceso.
I bring you the tutorial step by step, how to make a beautiful box, much more than ideal to introduce in this our gifts for our special people, a unique packaging for a unique gift makes the difference, even more when we do it ourselves with love and care. It is completely personalized, so the details, colors and decoration among other things, we choose ourselves to our taste and choice, the best thing is that we have a lot of variety to create, so here I show you the process.
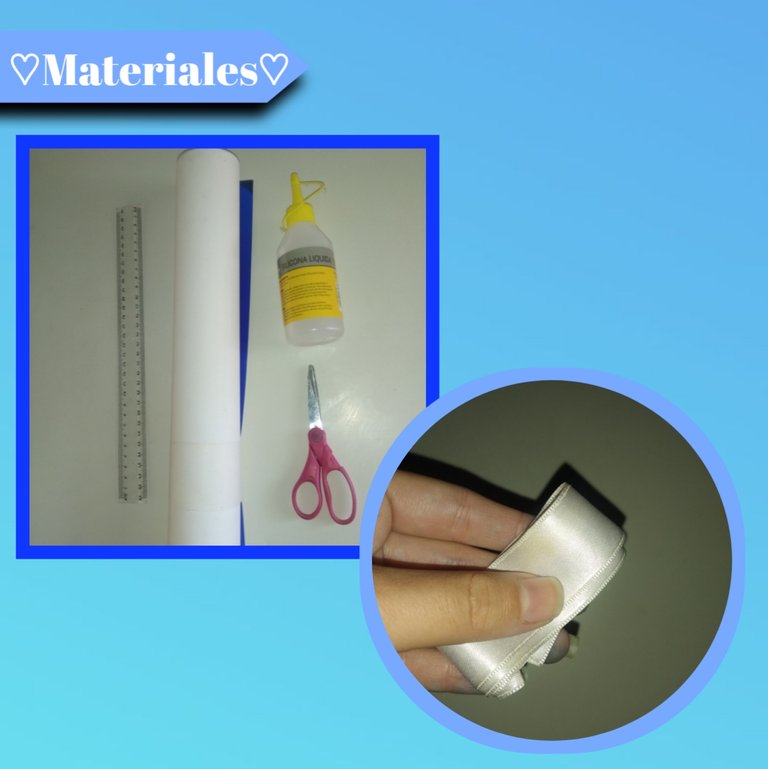
♡☄️Materials☄️♡
- Cartulinas decorativas
- Silicón
- Regla
- Tijeras
- Cinta gruesa
- Decorative cardboard
- Silicone
- Ruler
- Scissors
- Thick tape
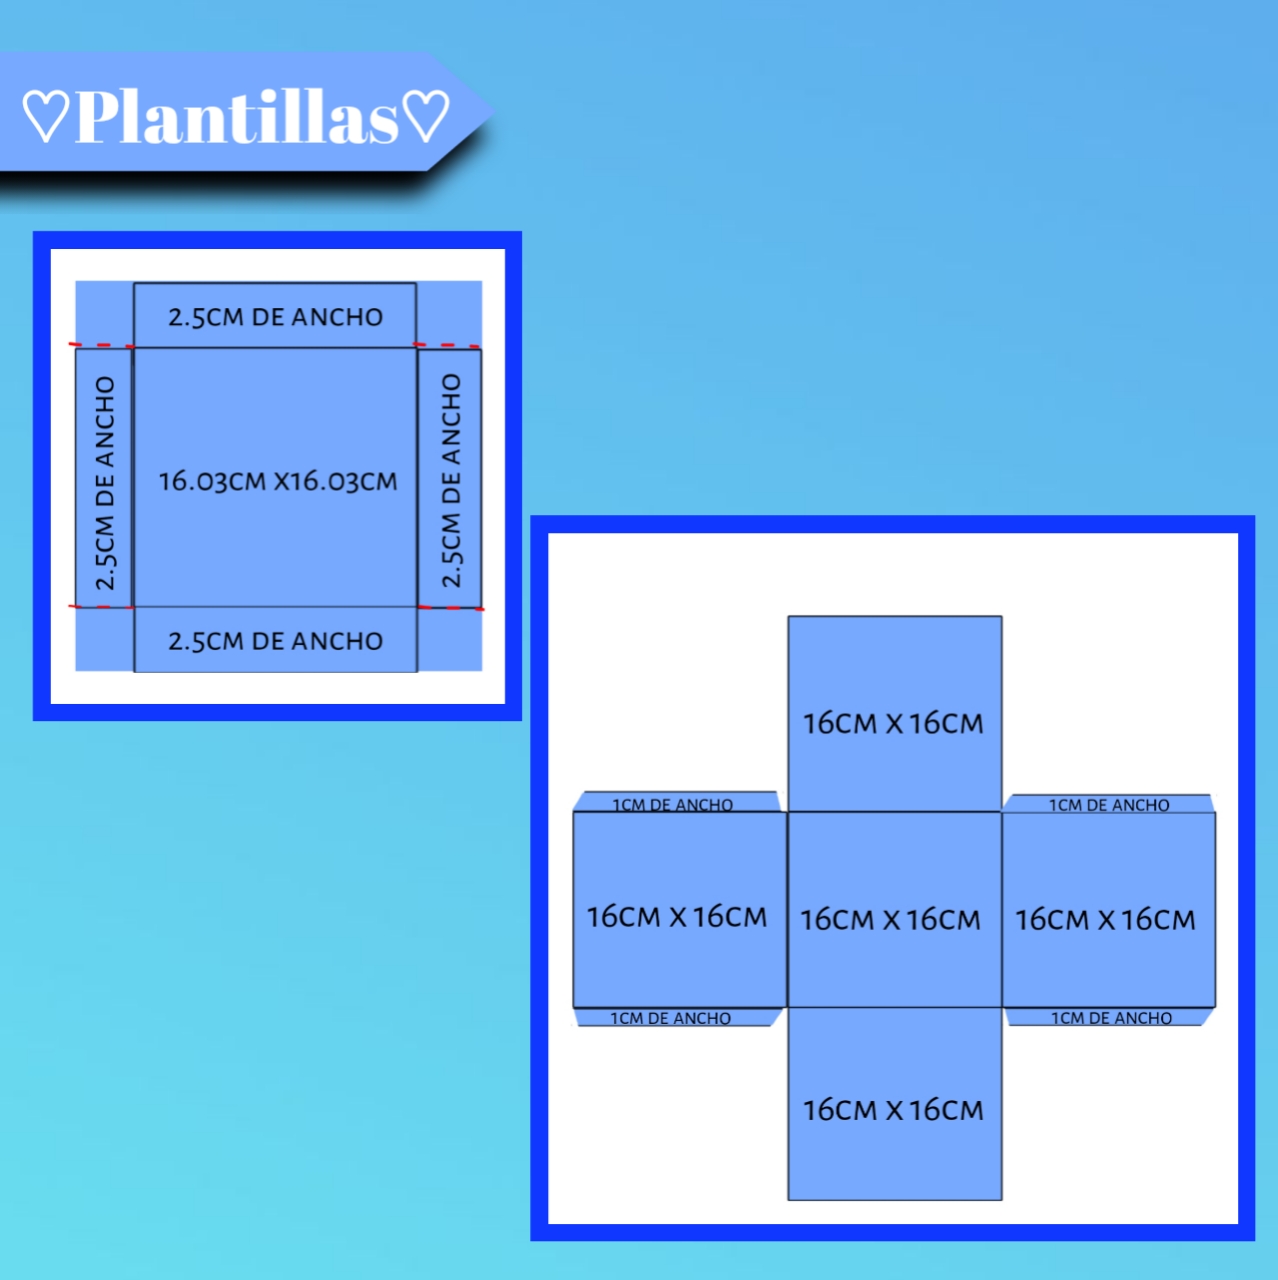
♡✨Template✨♡
♡👣☄️Step bye Step☄️👣♡
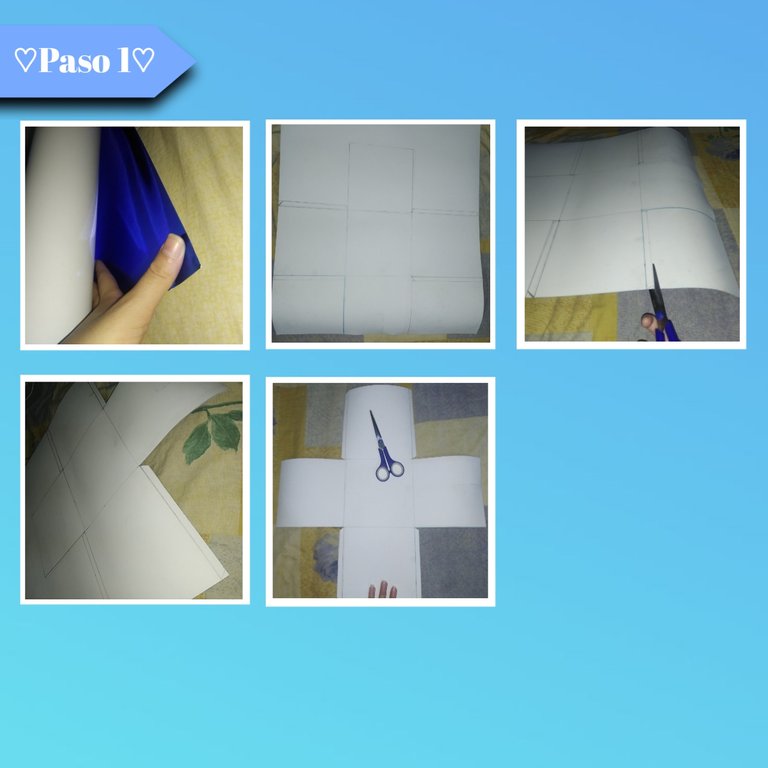
Paso 1:
Step 1:
Para empezar tomaremos nuestra cartulina principal, yo está vez utilicé una azul oscura, así primero la extenderemos, seguidamente tomaremos nuestra plantilla y la posicionamos encima de está, luego con la ayuda de un lápiz marcaremos toda esta, continuamos tomando nuestra tijera y porsupuesto recortando toda nuestra figura muy bien.
To start we will take our main cardboard, this time I used a dark blue, so first we will extend it, then we will take our template and position it on top of it, then with the help of a pencil we will mark all this, we continue taking our scissors and of course cutting out all our figure very well.
Paso 2:
Step 2:
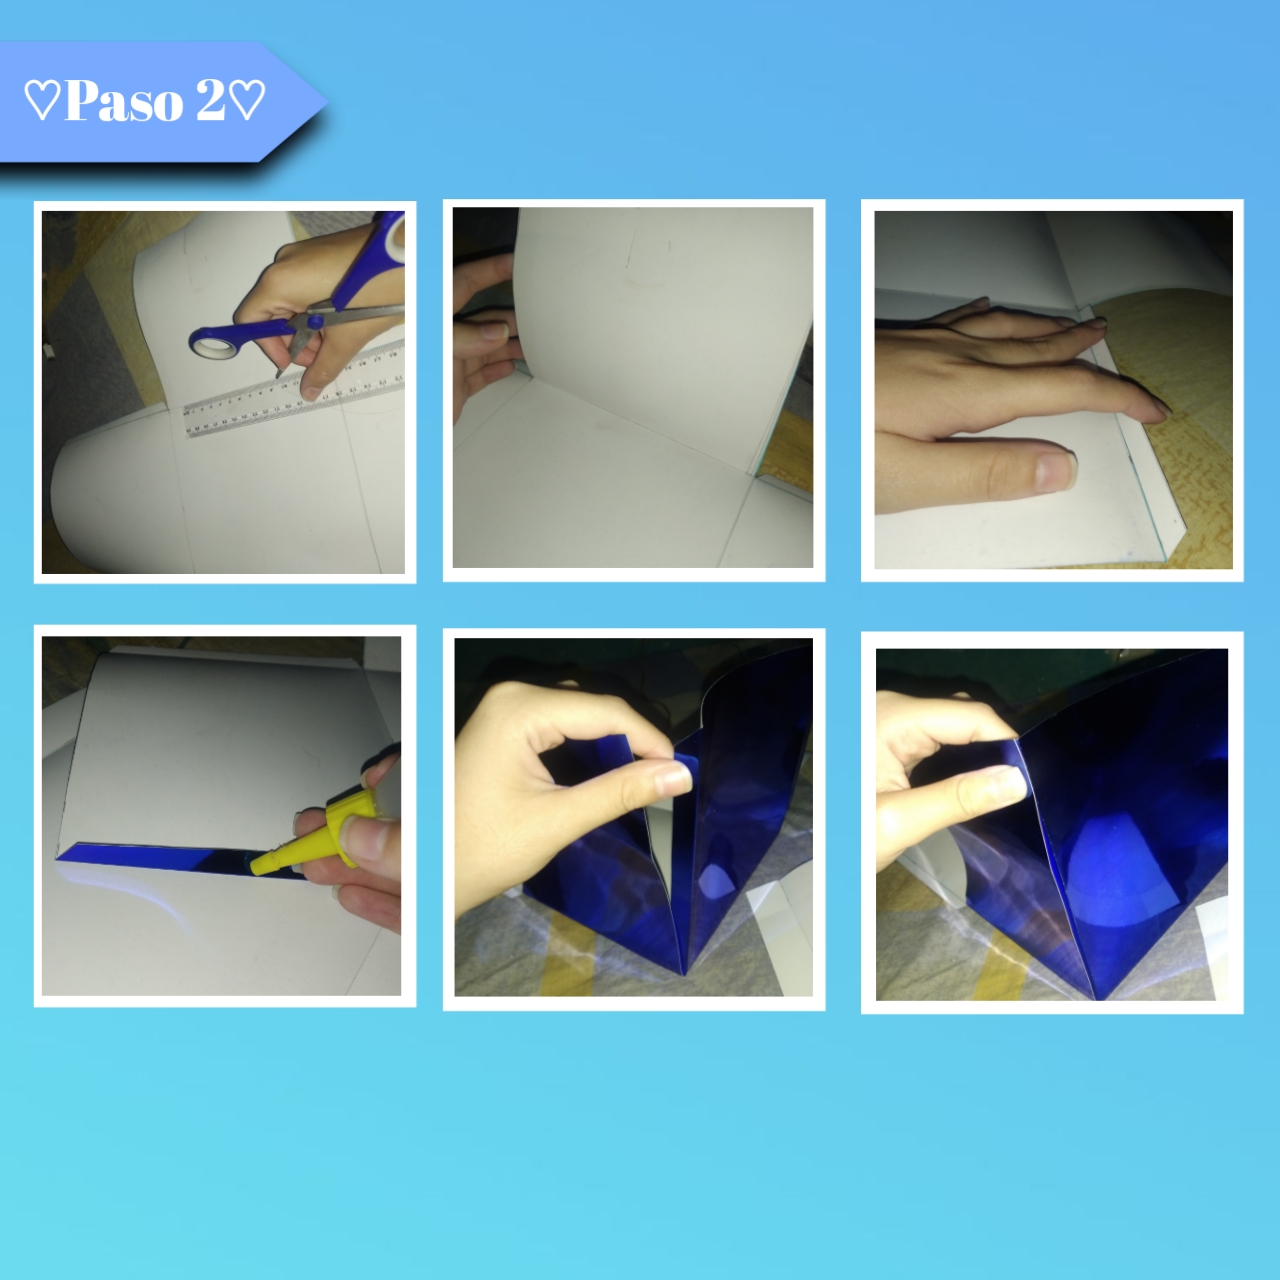
Seguimos, vamos a tomar nuestra regla y también una tijera, así acomodaremos la regla muy bien, de forma recta en en la líneas, después con una de las puntas de la tijera pasaremos está sobre las líneas, aplicando solo un poco de presión, lo suficiente para que se marqué, luego manteniendo la regla en el lugar doblaremos para marcar el dobles en cada parte, así haremos con todas las líneas. Continuando doblaremos los dobleces de los lados hacia adentro y agregaremos silicón, para terminar uniendo un cuadrado con el otro, formando una parte de la caja.
Next, we will take our ruler and also a scissors, so we will place the ruler very well, straight on the lines, then with one of the tips of the scissors we will pass it over the lines, applying just a little pressure, just enough to mark it, then keeping the ruler in place we will bend to mark the folds in each part, so we will do with all the lines. Continuing we will fold the folds of the sides inwards and add silicone, to finish joining one square with the other, forming a part of the box.
Paso 3:
Step 3:
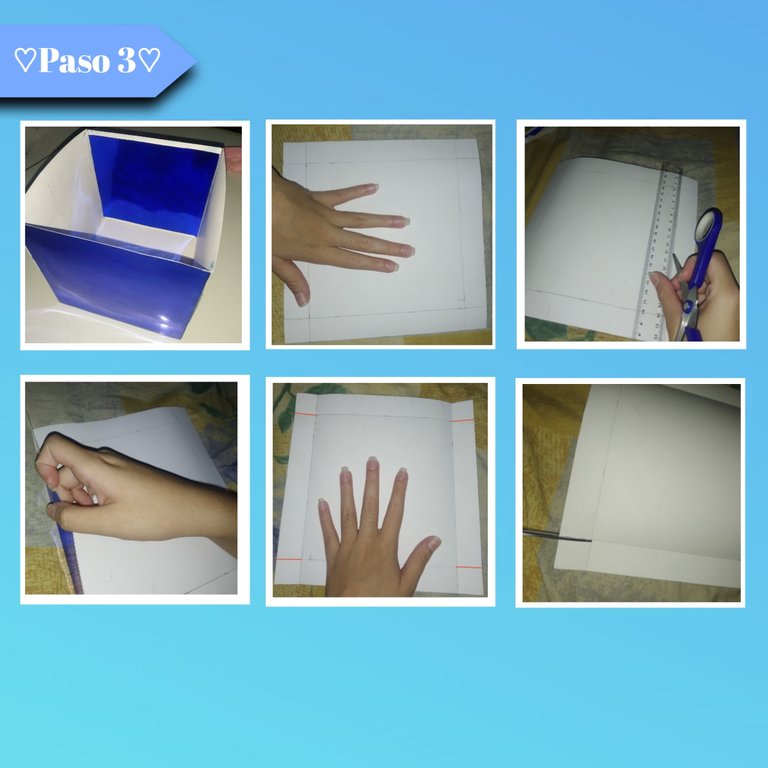
Continuamos pegando el otro lado de la caja, formando la misma, además agregué dos cuadrados de la misma cartulina por dentro, ya que la caja no estaba tan derecha porque mi cartulina vino en rollo. Por otro lado, vamos a armar la tapa, nuevamente tomamos la plantilla, pero está vez de la tapa y la marcamos en la cartulina, recortamos este cuadrado, continuamos marcando los dobleces y por último, recortamos las líneas que se marcan en rojo en la plantilla de forma recta, como se puede observar.
We continue gluing the other side of the box, forming the same, I also added two squares of the same cardboard on the inside, since the box was not so straight because my cardboard came in rolls. On the other hand, we are going to assemble the lid, again we take the template, but this time of the lid and we mark it on the cardboard, we cut this square, we continue marking the folds and finally, we cut the lines that are marked in red on the template in a straight way, as you can see.we continue gluing the other side of the box, forming the same, also I added two squares of the same cardboard inside, since the box was not so straight because my cardboard came in roll. On the other hand, we are going to assemble the lid, again we take the template, but this time of the lid and we mark it on the cardboard, we cut this square, we continue marking the folds and finally, we cut the lines that are marked in red on the template in a straight way, as you can see.
Paso 4:
Step 4:
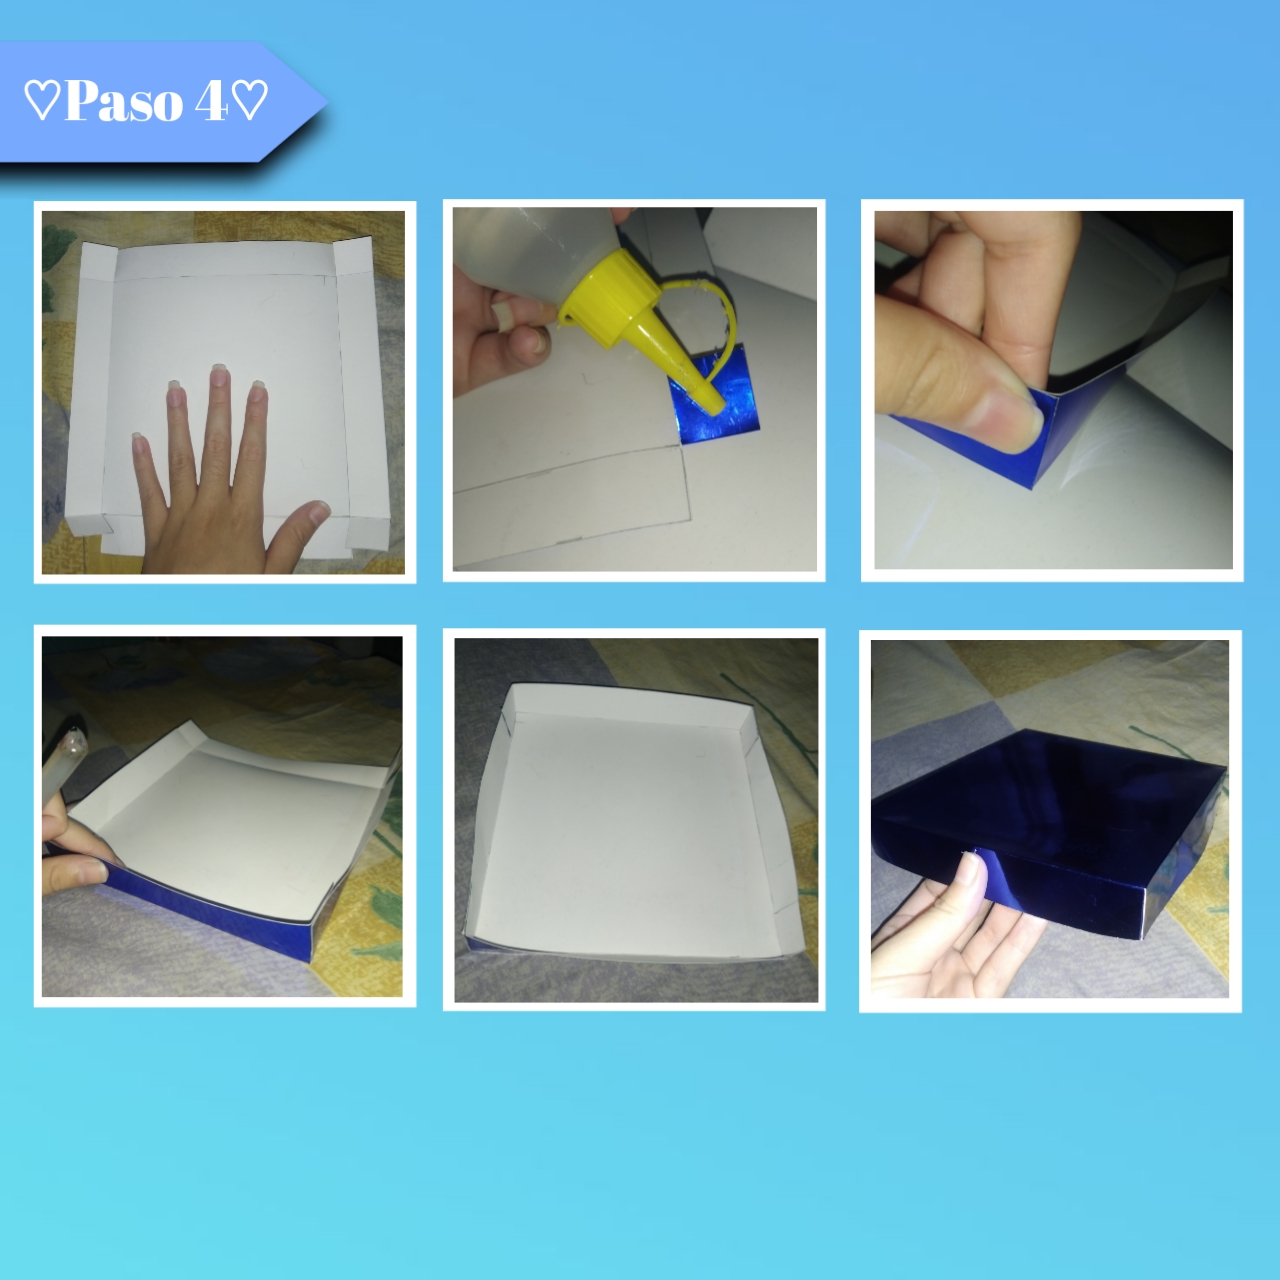
Aún seguimos con la tapa, ahora doblamos el pequeño cuadrado que nos queda hacia la plantilla y agregamos una pequeña cantidad de silicón, la esparcimos y vamos a unir está parte hacia adentro, pegando de un lado como se muestra, sin pasarse de la línea, así mismo haremos con los tres lados restantes hasta formar la tapa de la caja.
We still continue with the lid, now we fold the small square that we have left towards the template and add a small amount of silicone, we spread it and we will join this part inwards, gluing one side as shown, without going over the line, in the same way we will do with the three remaining sides to form the lid of the box.
Paso 5:
Step 5:
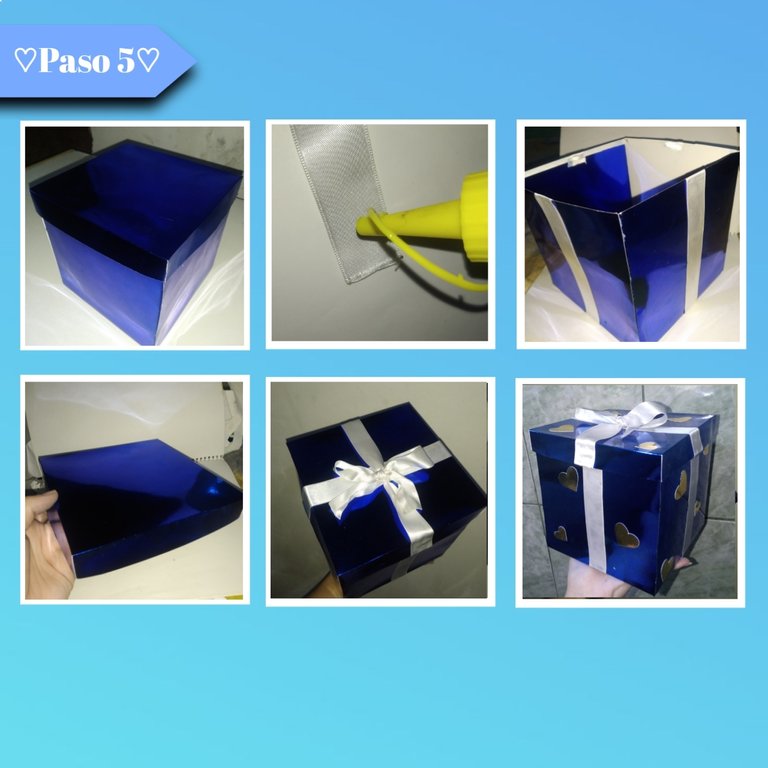
Ahora bien, ya al tener nuestra caja bien hecha, agregaremos los últimos detalles, para esto necesitaremos cinta gruesa, del color que combine con su cartulina o simplemente el de su preferencia, de está manera vamos a pegar está de manera centrada en cada uno de los cuatro cuadros de la caja. Después en la tapa pegaremos uno en el medio y seguidamente otro encima de ese cruzado en el medio, solo pegando a los bordes, para poder hacer con este mismo un lazo en el centro, por lo tanto tiene que ser más largo, por último recorté y le pegue unos cuantos corazones dorados por toda la caja.
Now, once we have our box well done, we will add the last details, for this we will need thick tape, in the color that matches your cardboard or simply the one of your preference, in this way we will glue it in a centered way in each of the four squares of the box. Then on the lid we will glue one in the middle and then another one on top of that crossed in the middle, only gluing to the edges, to be able to make with this same one a bow in the center, therefore it has to be longer, finally I cut out and glued a few golden hearts all over the box.
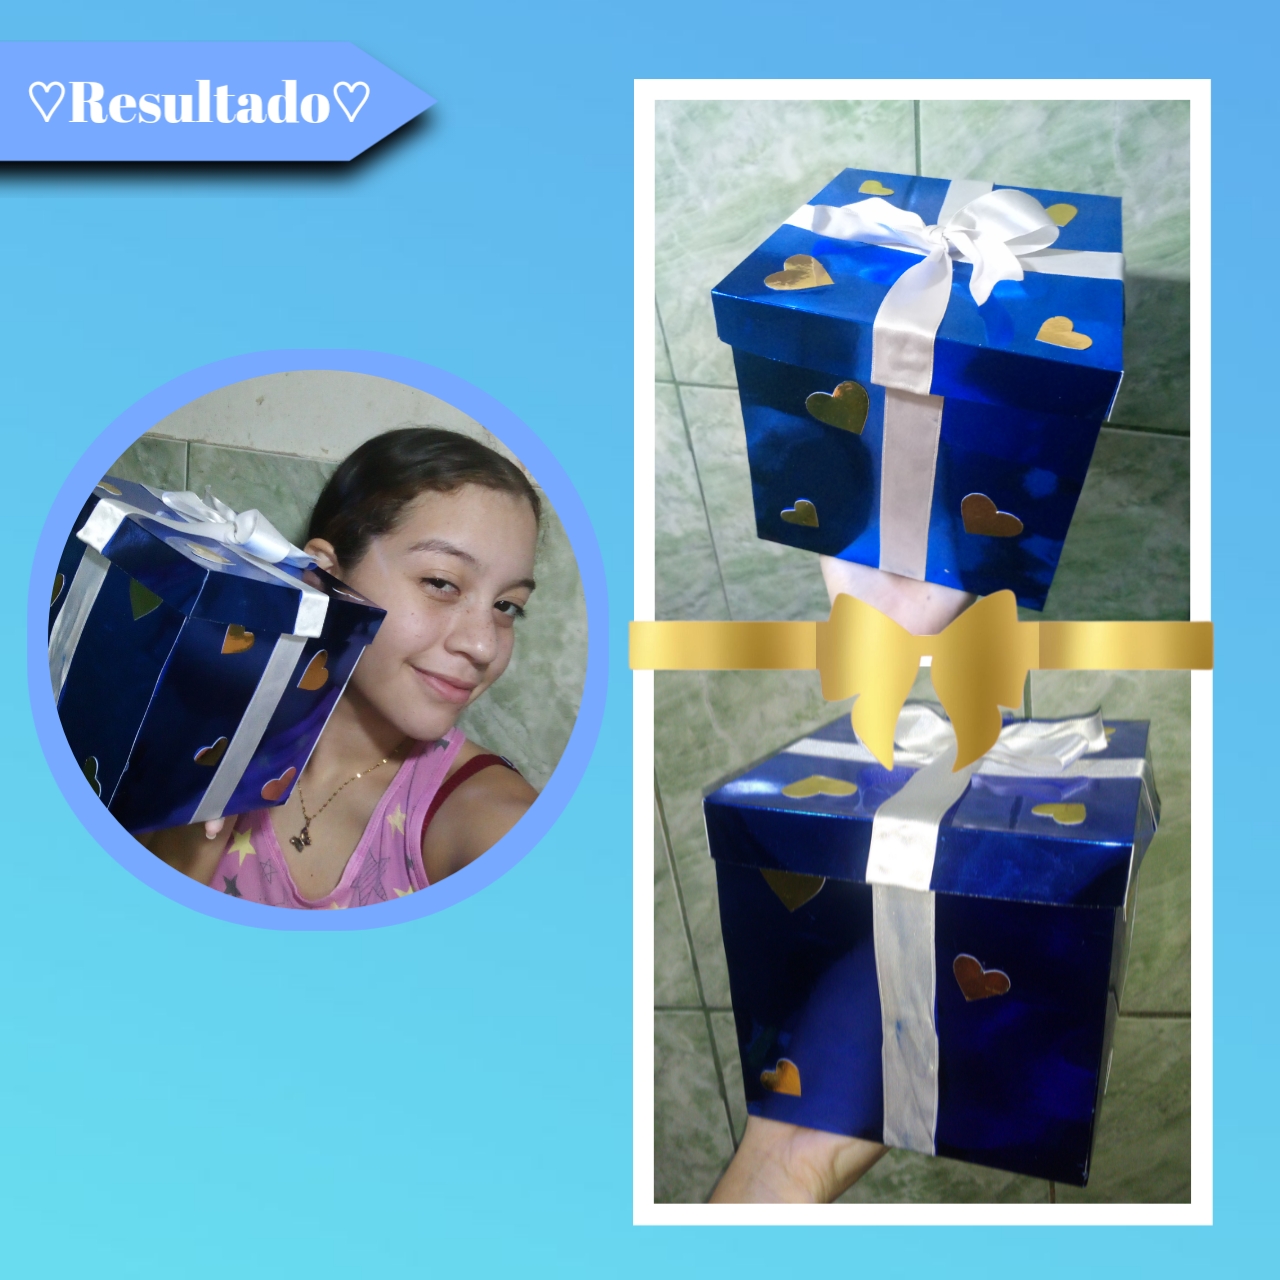
Así podremos obtener una hermosa caja, hecha en casa, que resulta una opción mucho más económica, personalizada y hermosa, algo mejorado sobre las cajas comunes que solemos conseguir en tiendas, que no están nada mal, pero podemos agregar nuestro toque personal. Además no tiene gran dificultad, si lleva su proceso, pero el resultado vale totalmente la pena, porque terminamos con una caja única y hecha desde la comodidad de nuestro hogar, ideal para distintas ocasiones y adaptable a distintos tamaños.
So we can get a beautiful box, homemade, which is a much more economical, personalized and beautiful option, something improved over the common boxes that we usually get in stores, which is not bad at all, but we can add our personal touch. In addition it is not very difficult, if it takes its process, but the result is totally worth it, because we end up with a unique box and made from the comfort of our home, ideal for different occasions and adaptable to different sizes.
Les dejó este tutorial a su disposición, pueden llevar a cabo muchos regalos e ideas con esta caja, yo en este caso específico la utilice para un obsequio de los cinco sentidos, para conformar una parte, la hice de manera especial, para una persona especial, así que espero les haya gustado y que puedan hacerla, les deseo una felíz tarde mi familia creativa, un abrazo lleno de cariño para todos.💙
I leave this tutorial at your disposal, you can carry out many gifts and ideas with this box, I in this specific case I used it for a gift of the five senses, to make a part, I made it in a special way, for a special person, so I hope you liked it and that you can make it, I wish you a happy afternoon my creative family, a hug full of love for everyone.💙
💙☄️¡Gracias por leer una vez más! Hasta pronto 💙☄️
💙☄️Thanks for reading once again! See you soon☄️💙
Photos of my authorship taken from my Xiaomi Redmi 7 phone, edited in the free version of PixeLab
