Versión Español
Reciban todas y todos los integrantes de mí querida comunidad de #Hive, un afectuoso y cordial saludo, bienvenidos a mi post, comparto con ustedes nuevas líneas y por primera vez publicando en esta comunidad, así que en busca de estar a la altura de todos estos maravillosos post que acá se publican y esperando que sea de su total y completo agrado.

Les ha pasado que de manera repentina le invitan a un cumpleaños, un compartir, y te encuentras que no tienes donde llevar ese pequeño detalle que regalarás a esa persona especial, a un amigo o compañero, pues eso pasa con más frecuencia de lo que se cree y por tal razón les traigo hoy a ustedes esta idea que te enseñará a elaborar tus propias bolsitas de regalos para que no te siga sucediendo este tipo de cosas, se trata de realizar, con materiales simples que consigues en casa, pequeñas bolsas que además de lindas son muy prácticas y puedes decorarla como gustes y para cualquier ocasión, bautizos, cumpleaños, navidad, aniversario, en fin son muy versátiles, para ello necesitarás de algunos materiales muy sencillo, así que acompáñame y te digo como elaborar tus propias bolsas de regalo.
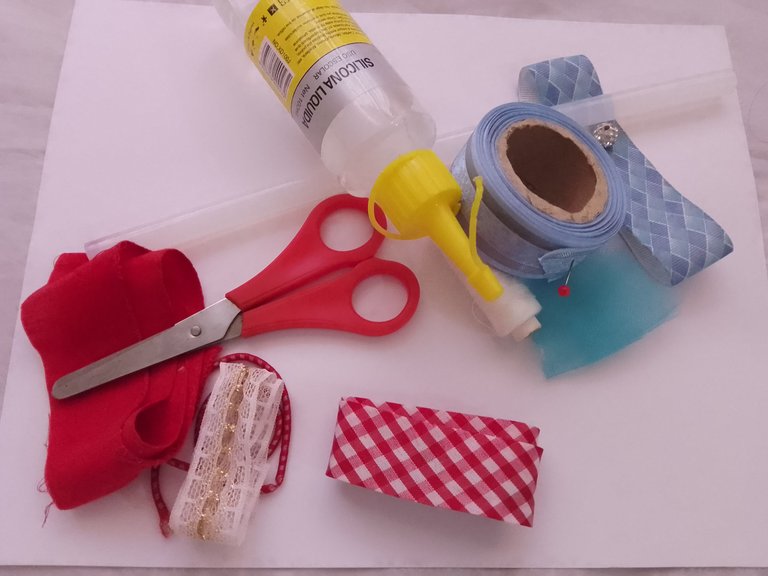
Para ello necesitaremos los siguientes materiales:
• Hojas de papel (cartulinas de colores, cartón, entre otras.)
• Cintas el color de tu preferencia
• Telas del color de tu preferencia
• Tijera
• Silicón en barra o líquido
• Aguja e hilo
• Cordones de tu preferencia
NOTA: el decorado será de tu gusto o preferencia.
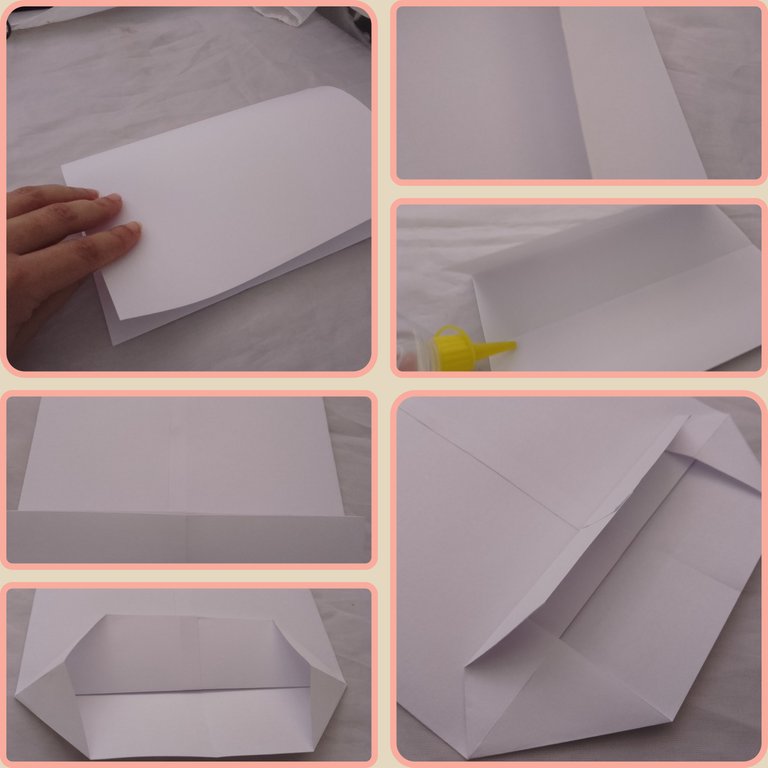
Para la elaboración de nuestra bolsa de regalo lo primero que vamos a hacer es tomar el papel y hacerle un doblé de forma horizontal y sin presionar, es solo para referencial el centro de la hoja, luego doblamos de un lado sobrepasando ligeramente el centro que habíamos marcado, posteriormente hacemos lo mismo con el otro lado, recordando que estos dobles si lo vamos a resaltar, luego sobre montamos un lado al otro y lo fijamos con el silicón, ahora le hacemos un ligero dobles en la parte de abajo, metiendo hacia adentro los dos lados, hecho esto vamos a doblar el lado de arriba sobrepasando el centro ligeramente igual con la parte de abajo, siempre fijando bien los dobles, aplicaremos el silicón en los cuatro lados de las esquinas solamente para bajar ambos lados y montarlos uno encima del otro, ahora dolaremos los lados de la bolsa haciéndolos coincidir con los dobles del fondo, abriremos luego la bolsa desdoblando los lados y el fondo, una vez conseguido esto los laterales de nuestra bolsa lo meteremos un tantito y marcando bien todos los bordes para darle forma prolija a nuestra bolsa, si la quieres más pequeña puedes cortar un poco y doblar los bordes hacia adentro.

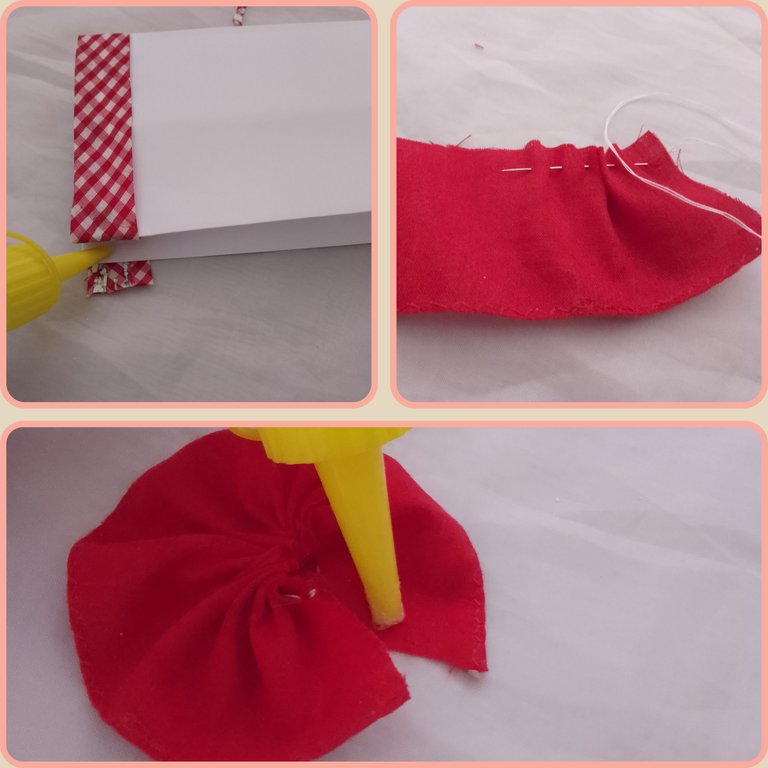
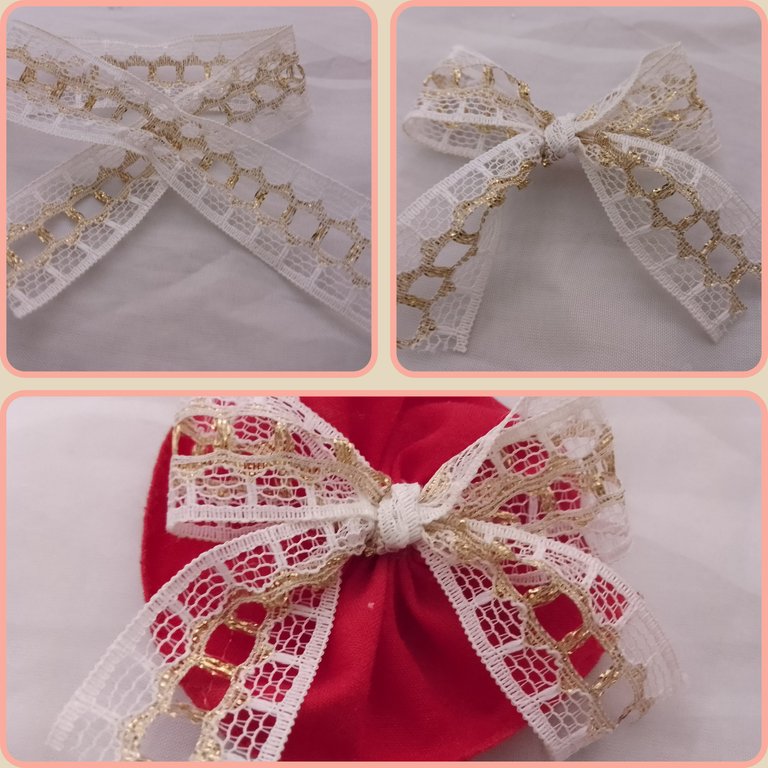
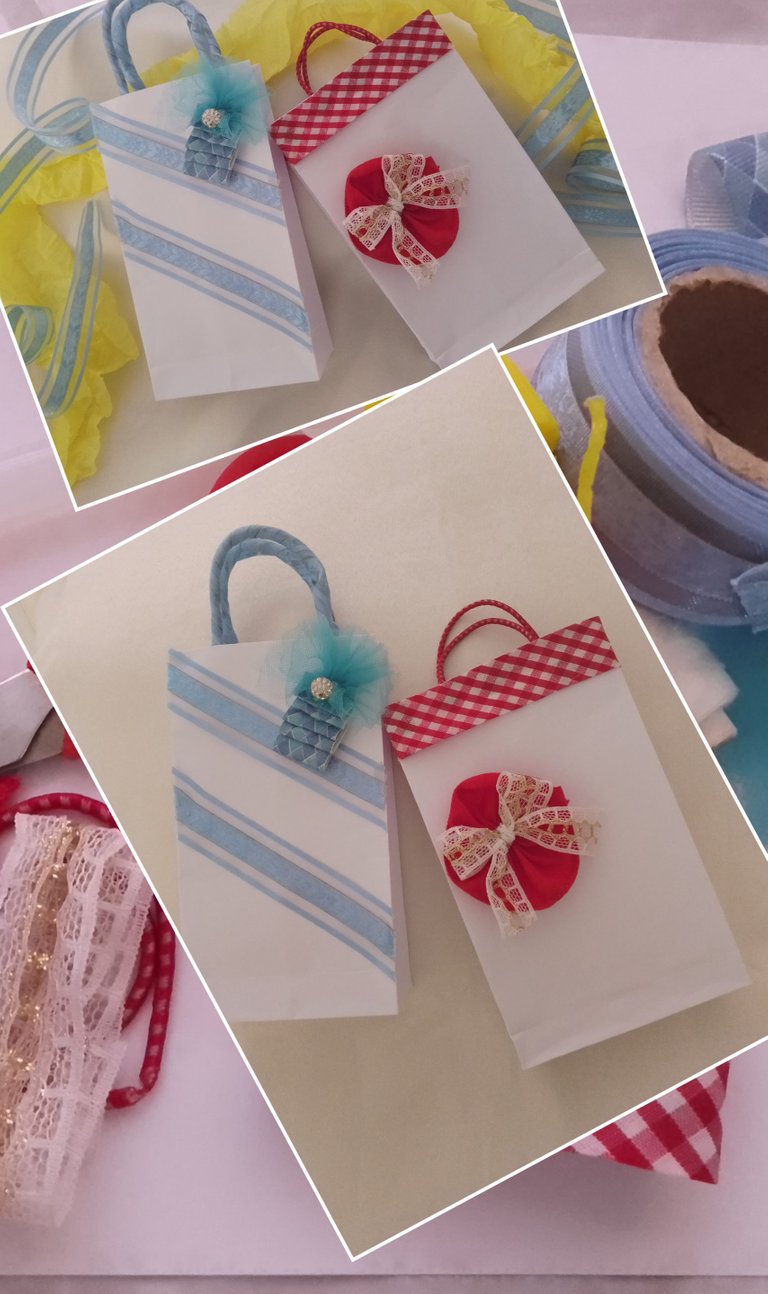
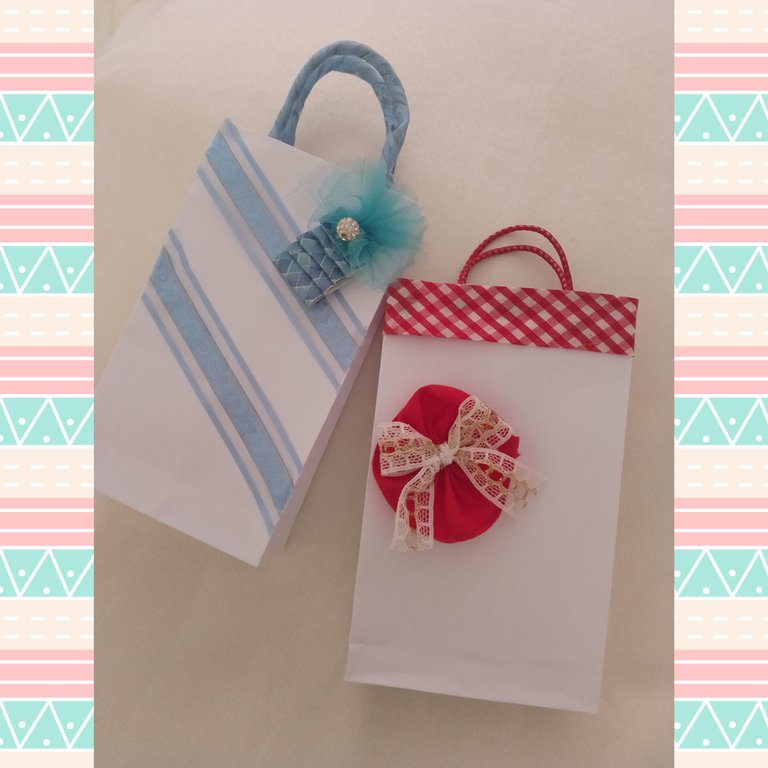
Para decorar la bolsa puede hacerlo con el material de su preferencia, en mi caso usé cinta y telas de diferentes colores, por ejemplo en la parte superior de mi bolsa le coloqué una cinta roja con blanco de 28cm aproximadamente, para las asas un par de cordones rojos de 12 cm cada uno los cuales fijé con un poco de silicón y con la ayuda de la aguja e hilo tomé un trozo de tela roja y formé una especie de flor colocándole en el centro un hermoso lazo que elaboré con una cinta blanca con vivos dorados de 27 centímetros aproximadamente.

Usted puede variar los adornos que quiera colocarles, quedan muy lindas y son súper prácticas, rápidas de hacer y los materiales accesibles, así que no hay más excusas para envolver tus regalos.
English Version
Receive all the members of my dear community of #Hive, a warm and cordial greeting, welcome to my post, I share with you new lines and for the first time publishing in this community, so looking to be at the height of all these wonderful posts that are published here and hoping that it will be of your total and complete pleasure.
It has happened to you that suddenly you are invited to a birthday, a sharing, and you find that you have nowhere to take that little detail that you will give to that special person, a friend or partner, well that happens more often than you think and for that reason I bring you today to you this idea that will teach you to make your own gift bags so you do not keep happening this kind of thing, it is about making, with simple materials that you get at home, small bags that besides being cute are very practical and you can decorate it as you like and for any occasion, baptisms, birthdays, Christmas, anniversary, in short they are very versatile, for this you will need some very simple materials, so join me and I'll tell you how to make your own gift bags.
For this we will need the following materials:
- Sheets of paper (colored cardboard, cardboard, among others.).
- Ribbons in the color of your choice
- Fabrics in the color of your choice
- Scissors
- Silicone stick or liquid
- Needle and thread
- Cords of your preference
NOTE: the decoration will be of your choice.
To make our gift bag the first thing we are going to do is to take the paper and make a fold horizontally and without pressing, it is only to referential the center of the sheet, then we fold on one side slightly exceeding the center that we had marked, then do the same with the other side, remembering that these doubles if we are going to highlight, then we mount one side to the other and fix it with silicone, now we make a slight double at the bottom, putting the two sides inward, Once this is done we are going to fold the top side over the center, slightly overlapping the bottom, always fixing the doubles well, we will apply the silicone on the four sides of the corners only to lower both sides and mount them one on top of the other, now we will fold the sides of the bag making them coincide with the doubles of the bottom, We will then open the bag unfolding the sides and bottom, once this is achieved the sides of our bag we will tuck it a little bit and marking well all the edges to give a neat shape to our bag, if you want it smaller you can cut a little and fold the edges inward.
To decorate the bag you can do it with the material of your choice, in my case I used ribbon and fabrics of different colors, for example at the top of my bag I placed a red ribbon with white of approximately 28cm, for the handles a couple of red cords which I fixed with a little silicone and with the help of the needle and thread I took a piece of red fabric and formed a kind of flower placing in the center a beautiful bow that I made with a white ribbon with purple vivid of 27 centimeters approximately.
You can vary the decorations you want to place them, they look very nice and are super practical, quick to make and affordable materials, so there are no more excuses to wrap your gifts.
Gracias por visitar mi post, espero les haya gustado, hasta una nueva oportunidad.
Thanks for visiting my post, I hope you liked it, until a new opportunity.
Saludos, besos y abrazos a la distancia.
Greetings, kisses and hugs from afar.

Foto tomada con mi teléfono Infinix 11, editada con GridArt, Collage Maker y FotoCollage, Traducción con el programa www.DeepL.com/Translator (versión gratis).
Photo taken with my Infinix 11 pone, edited with GridArt, Collage Maker y FotoCollage, Translation with the program www.DeepL.com/Translator (free version).