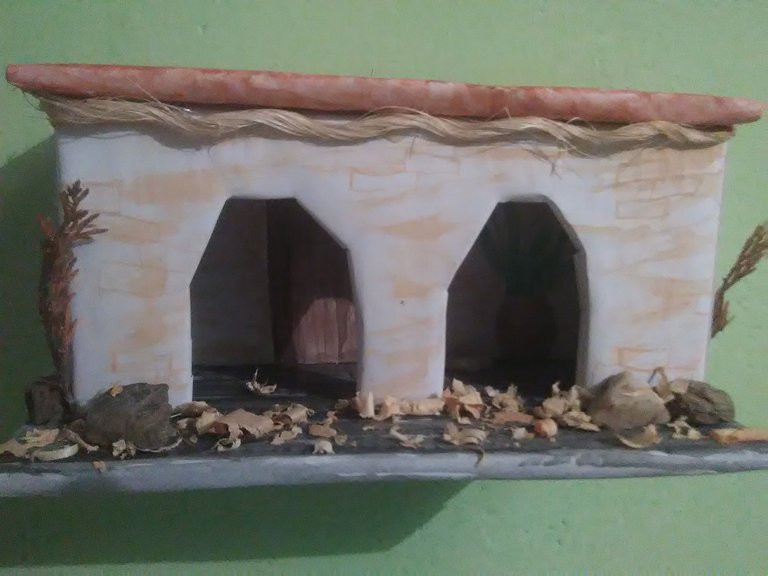
Decidí realizar una casa decorativa para la pared porque en el hogar de mis abuelos hay varias decoraciones que cuelgan en ellas, como elefantes, pájaros y flores, entonces quise hacer algo que se pudiese conservar por mucho tiempo aquí, para aprovechar la oportunidad. Para comenzar, primero nuestros...
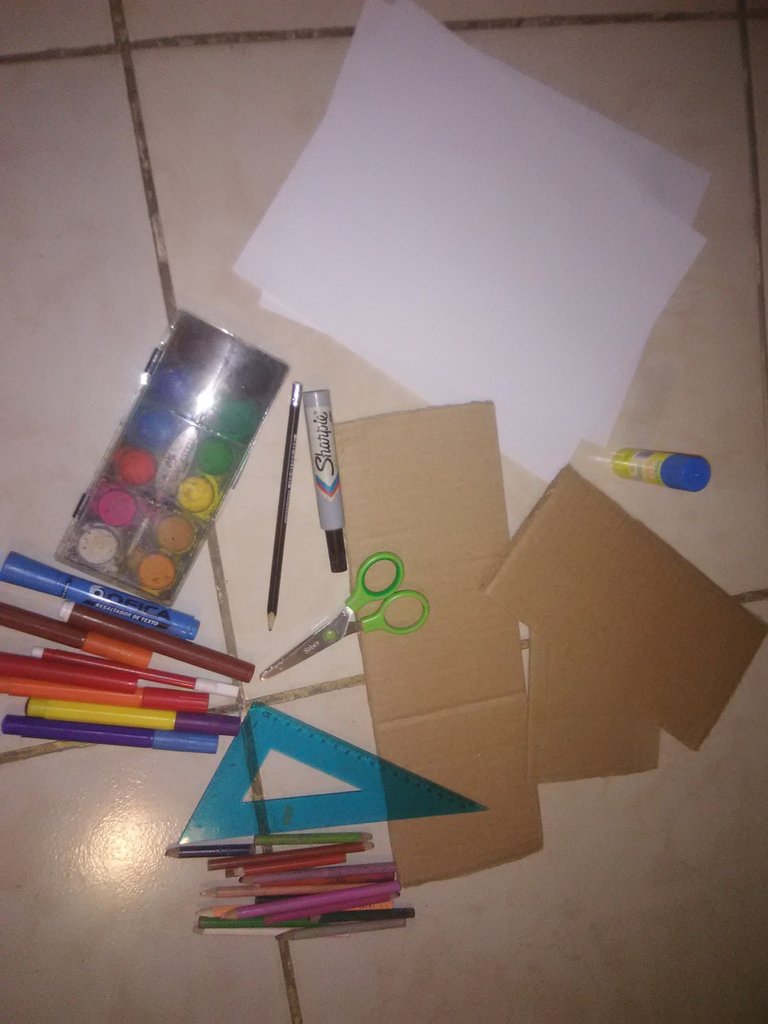
MATERIALES.
- Hojas de papel.
- Lápiz.
- Marcador negro punta fina.
- Marcadores de colores.
- Colores.
- Tijera.
- Regla.
- Pega.
- Acuarelas.
- Cartón.
PROCEDIMIENTO.
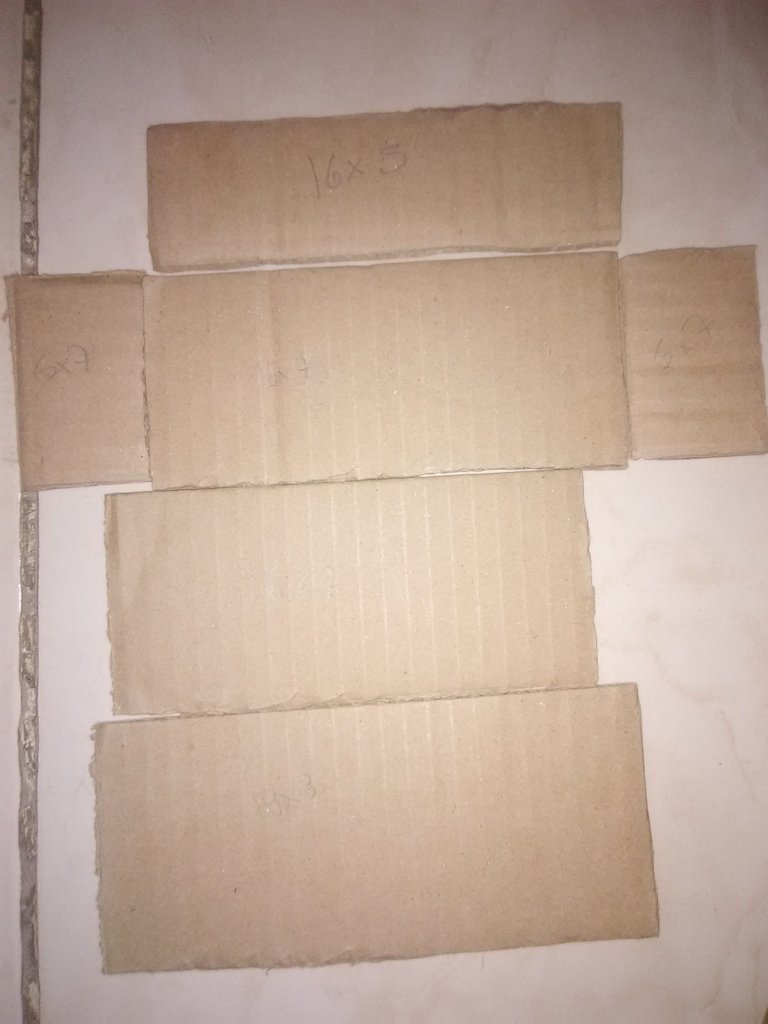
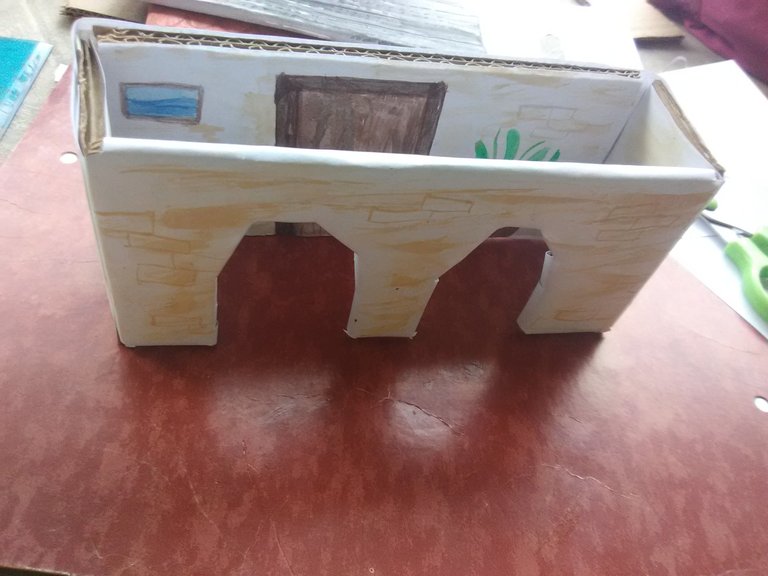
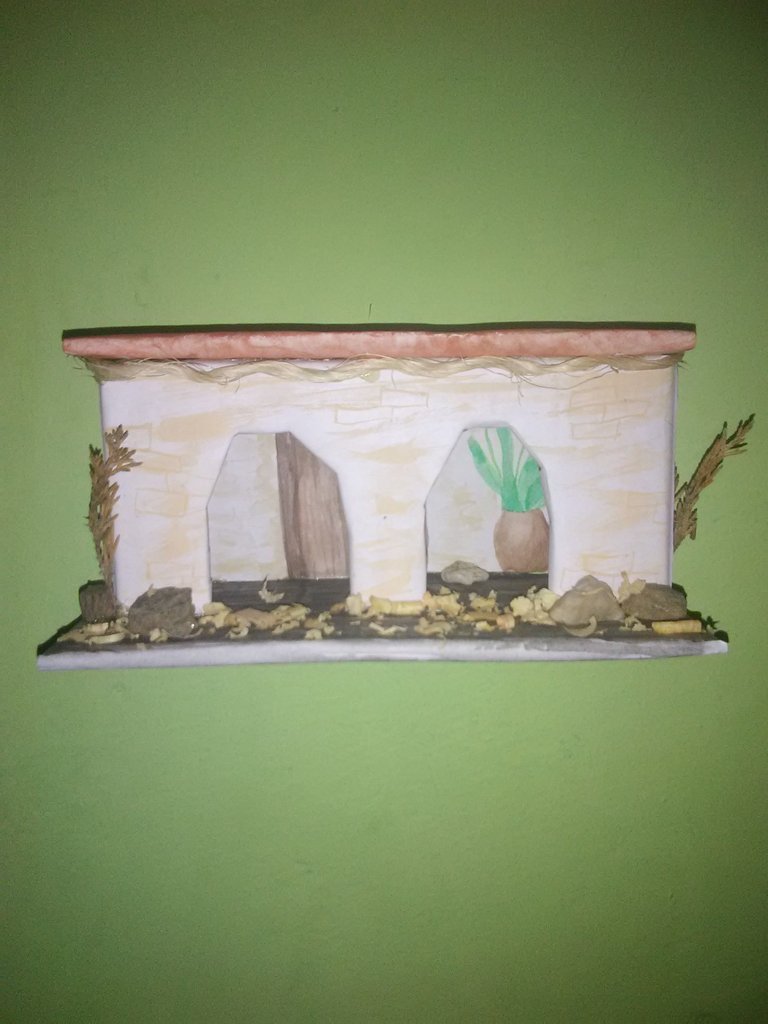
1.- Primero vamos a comenzar cortando nuestro cartón con las medidas que vamos a utilizar. Mi techo es de 16x5cm, las paredes del frente y de atrás son de 16x7cm, las paredes laterales son de 5x7cm y el piso es de 18x8cm.
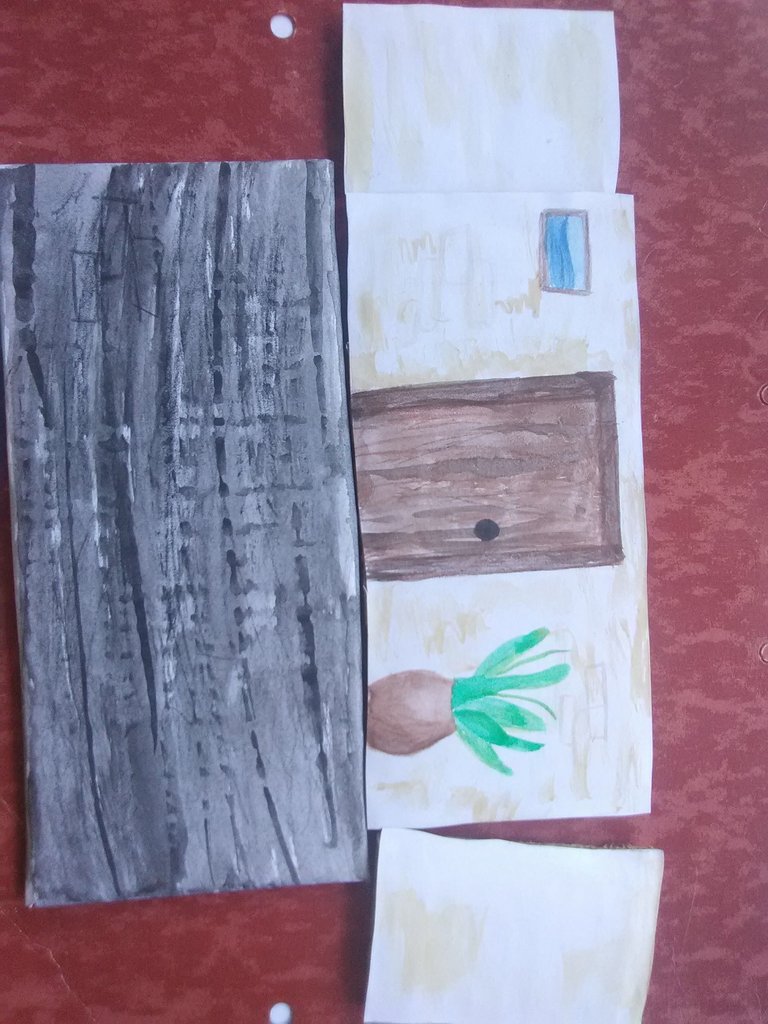
2.- A continuación cortaremos las hojas que van en la pared de atrás por el lado interior, ambas laterales igual en su lado interior y la que usaremos para el piso completamente. Yo decidí pintarlas con mis acuarelas, colores y marcadores, pero queda a creatividad de cada quién lo que deseen realizar.
3.- Luego procederemos a pegar todas las paredes y, después de pegadas, forraremos la parte exterior de todas ellas con otro papel y así podemos comenzar a colorear el exterior.
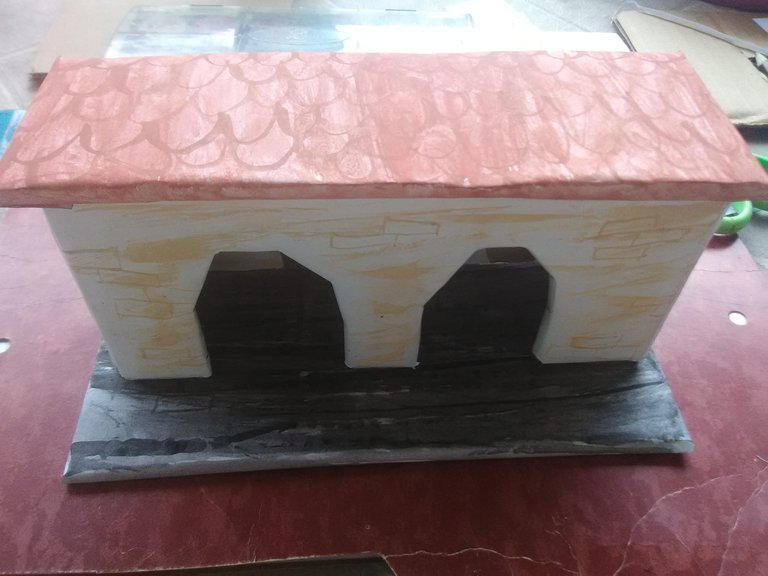
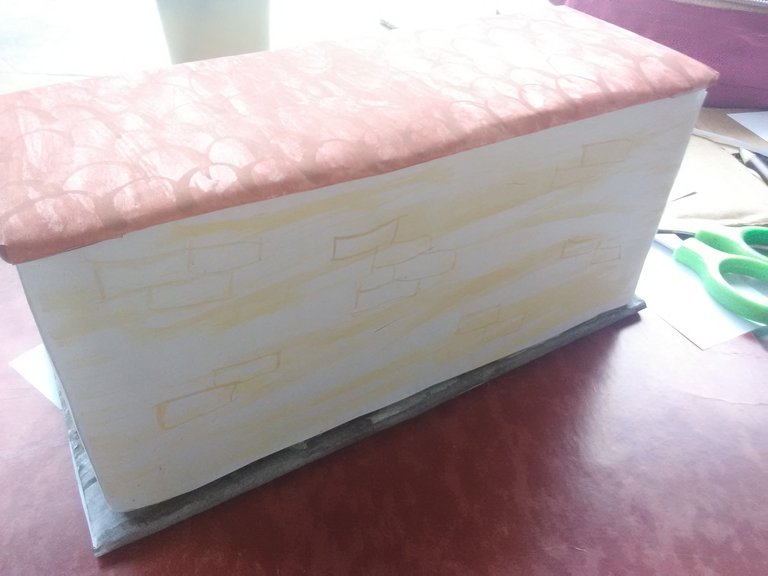
4.- Para finalizar, forraremos todo nuestro techo con papel y, como todo lo anterior, lo decoramos. Al tener todo esto, ya sólo debemos unir el piso y el techo con las paredes de nuestro casita (cada uno en su respectivo lugar) y así queda el resultado final principal.
Yo decidí agregarles algunas piedritas, ramitas y un poco de aserrín, más un detallito casi pegado al techo que es como una cuerdita. Estos detalles ya son opcionales porque la casita se ve bien sola, pero los agregué porque le dan un aspecto más realista a mi ambiente y me gustó más así.
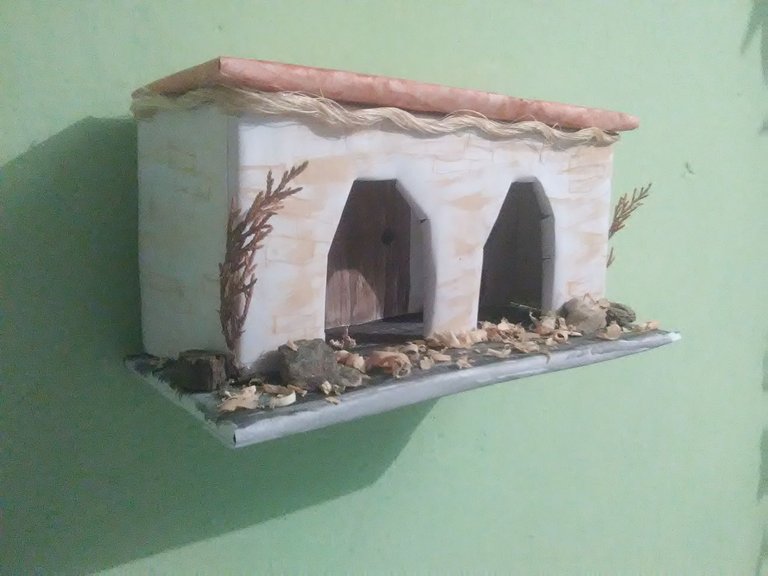
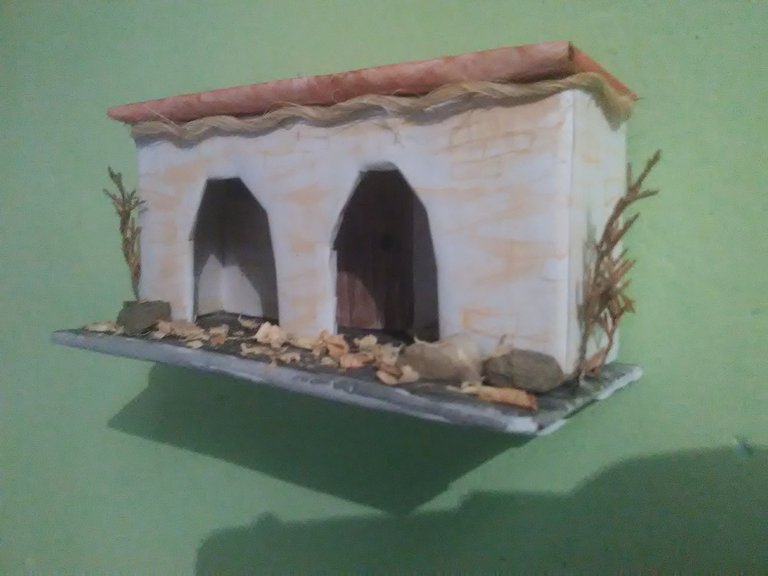

Bueno, como pueden ver, ya lo colgué, no perdí tiempo. Espero les haya gustado mucho y, si les gustan estos adornos, se animen a hacerlos, no son nada difíciles y con dedicación y amor quedan resultados muy buenos. Tengan siempre en cuenta que, si de verdad le ponen cariño a lo que hacen, les quedará mucho más bonito y será una grata experiencia el realizarlo, ¡nos leemos luego!

ENGLISH VERSION.
I decided to make a decorative house for the wall because in my grandparents' home there are several decorations hanging on them, such as elephants, birds and flowers, then I wanted to make something that could be kept for a long time here, to take advantage of the opportunity. To begin with, first our...
MATERIALS.
- Sheets of paper.
- Pencil.
- Black fine tip marker.
- Colored markers.
- Colors.
- Scissors.
- Ruler.
- Glue.
- Watercolors.
- Cardboard.
PROCEDURE.
1.- First we are going to start cutting our cardboard with the measures we are going to use. My roof is 16x5, the front and back walls are 16x7, the side walls are 5x7 and the floor is 18x8.
2.- Next we will cut the sheets that go on the back wall on the inside side, both sides the same on the inside side and the one we will use for the floor completely. I decided to paint them with my watercolors, colors and markers, but it is up to each one's creativity what you want to do.
3.- Then we will proceed to glue all the walls and, after gluing them together, we will line the outside of all of them with another paper and then we can start coloring the outside.
4.- To finish, we will line all our ceiling with paper and, like everything before, we decorate it. Once we have all this, we only have to join the floor and the roof with the walls of our little house (each one in its respective place) and that's the main final result.
I decided to add some pebbles, twigs and a bit of sawdust, plus a little detail almost attached to the ceiling that is like a string. These details are optional because the house looks good on its own, but I added them because they give a more realistic look to my environment and I liked it better that way.
Well, as you can see, I already hung it, I didn't waste any time. I hope you liked it a lot and, if you like these ornaments, I encourage you to make them, they are not difficult at all and with dedication and love, the results are very good. Always keep in mind that if you really put love to what you do, it will be much more beautiful and it will be a pleasant experience to make it, read you later!