✨️🧡🌼Español🌼🧡✨️
Muy buenas noches para todos mis apreciados amigos de Hive ✨️ espero esten muy bien disfrutando de la noche de hoy un abrazo enorme para todos en esta ingeniosa y creativa comunidad de artesanos #Diy espero que todos se encuentren muy bien 👍🏻 me gustaría mostrarles mi trabajo de costura más reciente pues se trata de un hermoso y elegante enterizo con detalle de escote cruzado también me gustaría mostrarles como hice y todo el proceso a seguir para que ustedes mismos elaboren el suyo. Los invito cordialmente a acompañarme en cada paso a seguir 😉🤗.

Estos fueron los materiales que use
• Máquina de coser
• Tijera
• Hilo de coser
• Tela
• Prenda de medida
• Elástica
• Botón
✨️Pasos✨️
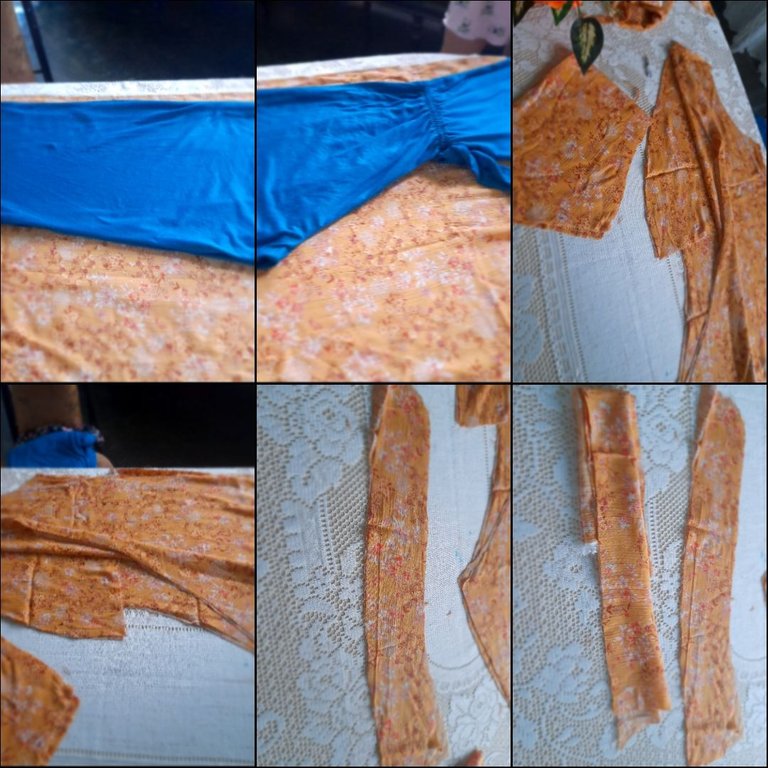
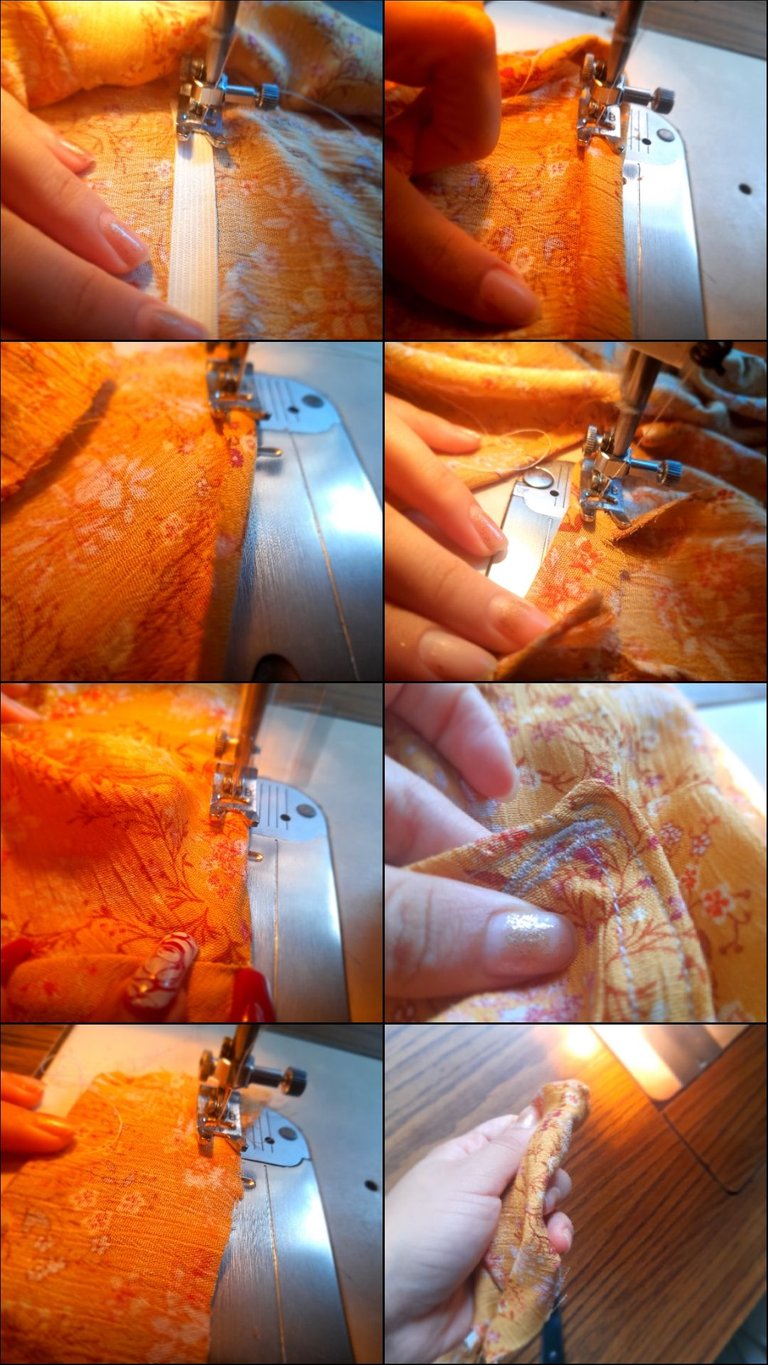
•✨️Voy a iniciar cortando todas las piezas de mi enterizo siendo estas dos piezas delanteras, dos traseras, un corte superior para el escote dividido en dos piezas con sus respectivos forros, un forro superior trasero, dos forros para la abertura trasera, dos orillas para las mangas, dos mangas y un tiro para el contorno de cintura a forma de cinturón.
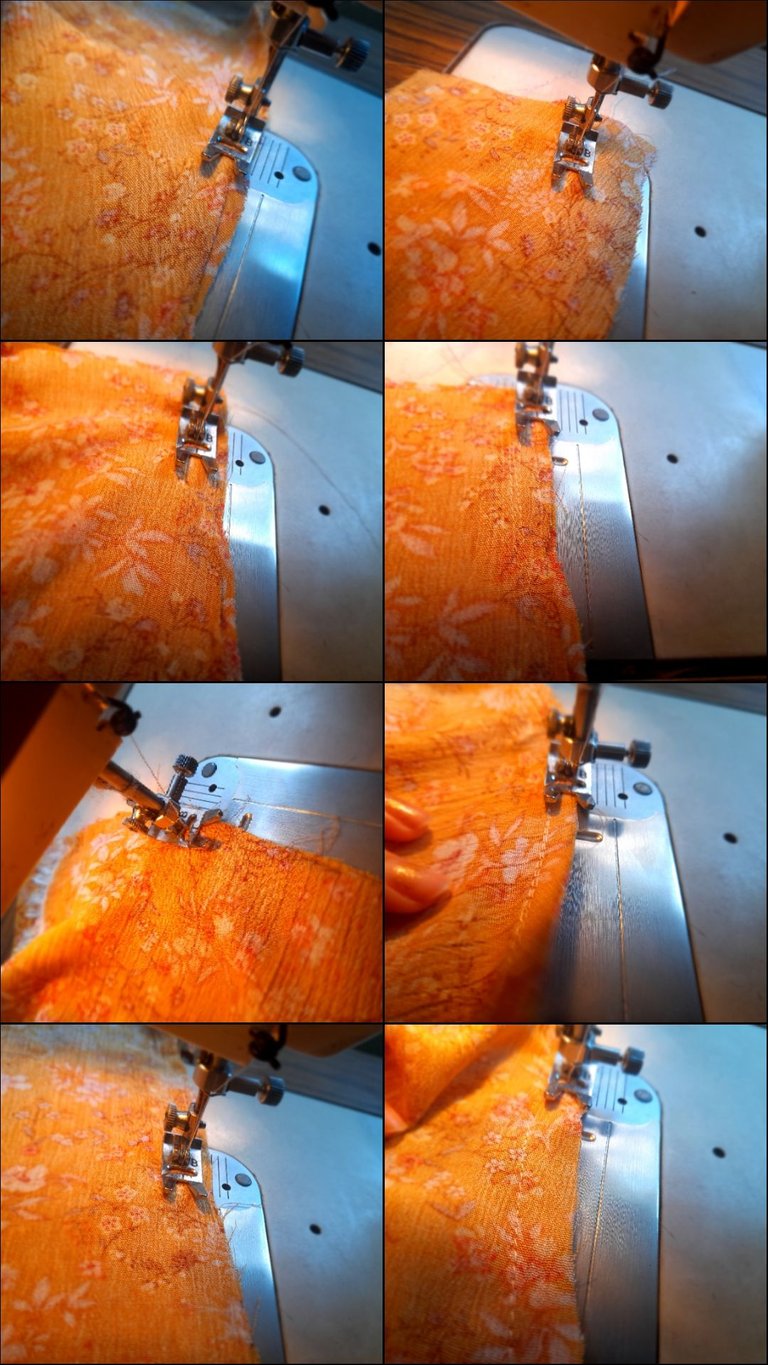
•✨️Continúo cosiendo las piezas frontales con costura recta y zigzag para luego coser los forros del escote con costura recta y zigzag y para dar caída voy a hacer una costura hacia la parte interna de forma recta luego voy a coser con costura recta la parte trasera dejando un espacio superior y aseguro nuevamente con zigzag.
Sigo armando la parte delantera poniendo el escote de forma cruzada y voy a coser con costura recta y zigzag y continúo cosiendo el enterizo por la parte interna de las piernas con costura recta y zigzag.
•✨️Voy a coser los forros traseros con costura recta y zigzag y la parte superior del cuello trasero con una costura recta para luego coser ambas partes en los hombros con costura recta y zigzag y coser alrededor de la abertura para fijarla bien. Sigo armando la manga con pliegues para luego coser con costura recta y zigzag luego voy a doblar las orillas de la manga y las colocaré del lado derecho de la tela y voy a coser con costura recta y zigzag para luego coser el enterizo en un de los extremos con costura recta y zigzag
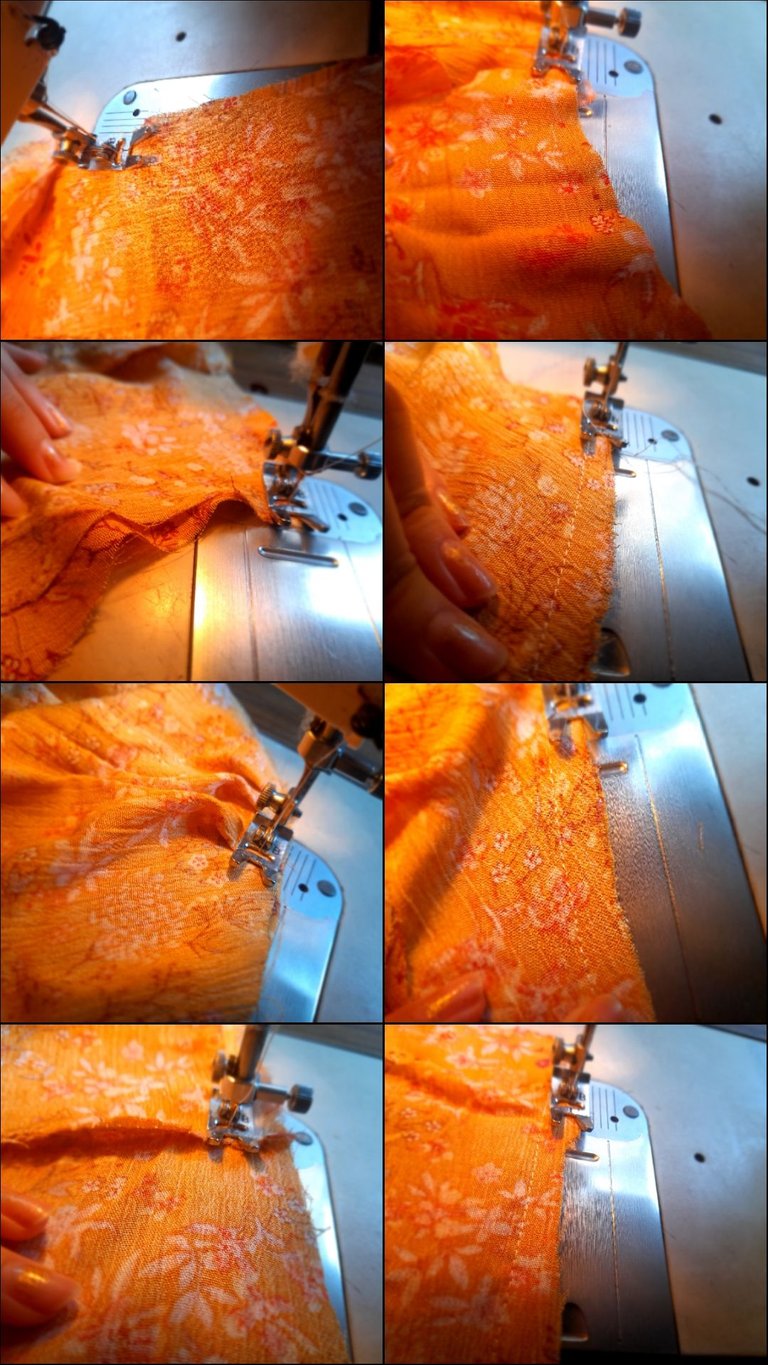
•✨️Colocaré mi elástica en el contorno de cintura y voy a coser mientras voy estirando con costura recta en ambos extremos luego voy a coser la orilla interna del forro con una costura de zigzag y continúo cosiendo el extremo faltante con costura recta y zigzag para luego coser el ruedo doblando la tela y cosiendo con costura recta. Voy asegurar con costura recta nuevamente alrededor de la parte superior y haré un ojal para la abertura trasera con una costura de zigzag y tensión en 1 y cosere un boton con una aguja de mano en la parte superior trasera y luego así coser el tiro por el lado reverso para voltear y coser en cada extremo a forma de cinturón culminando así este lindo diseño.
✨️🧡🌼Resultados🌼🧡✨️
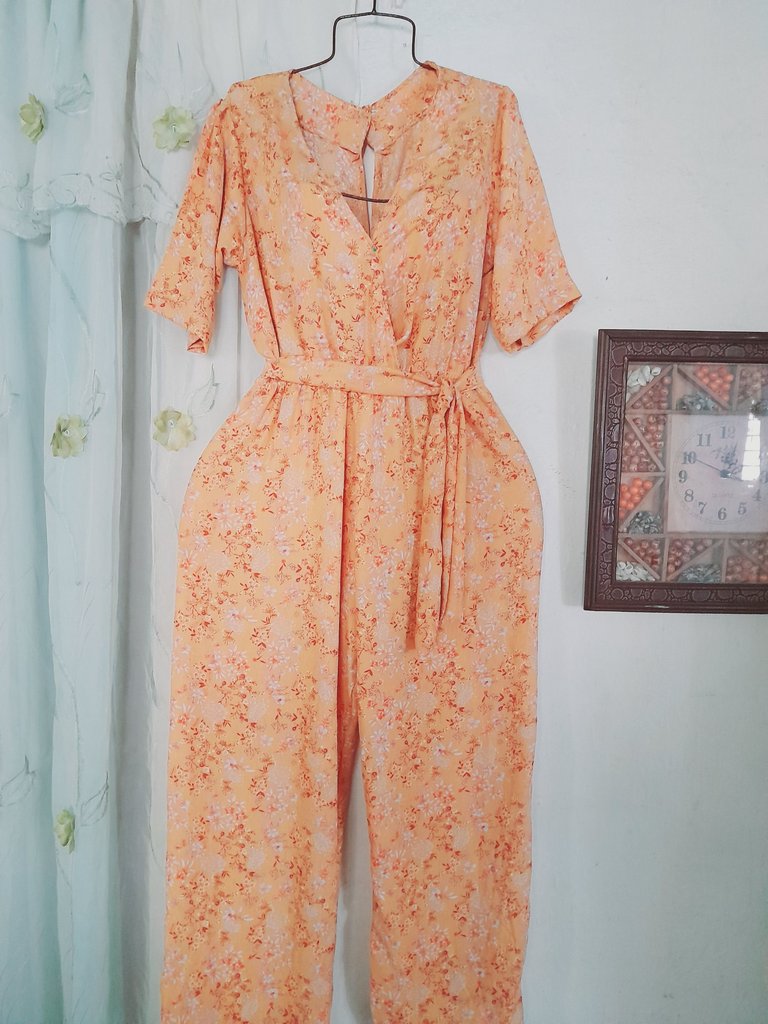
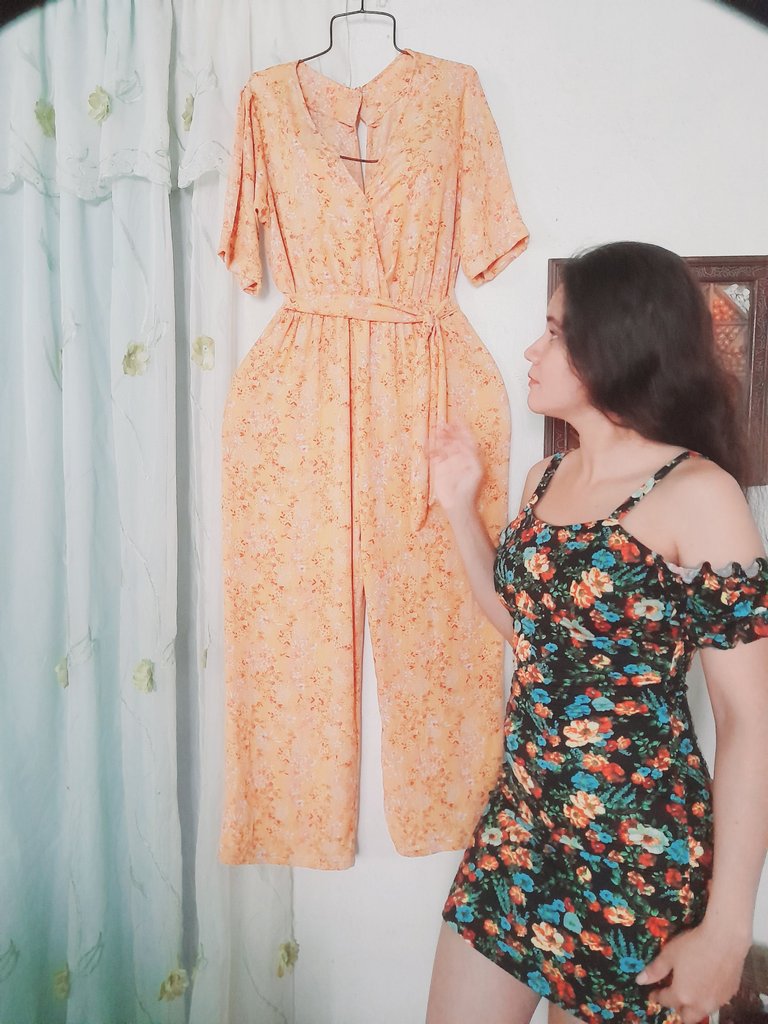
Si me tocara definir mi confección con una sola palabra diría "espléndida" un diseño ideal para lucir en cualquier ocasión y con diferentes combinaciones y accesorios 😉 me encanta como cae la tela y el color tan bonito 🧡 me alegro mucho haber compartido este pequeño espacio dedicado a la costura con todos ustedes ✨️ muchas gracias por haber tomado un minuto para leer mi post espero les guste mis amores 💕 Saludos y linda noche para todos ❤️.
🌼🧡✨️English✨️🧡🌼
Very good evening to all my appreciated Hive friends ✨️ I hope you are well enjoying the night today, a huge hug to everyone in this ingenious and creative community of #DIY artisans I hope you are all well 👍🏻 I would like to show you my work of the most recent sewing as it is a beautiful and elegant jumpsuit with a crossover neckline detail. I would also like to show you how I did it and the entire process to follow so that you can make yours yourselves. I cordially invite you to accompany me in every step to follow 😉🤗.
These were the materials I used
• Sewing machine
• Scissors
• Sewing thread
• Fabric
• Measurement garment
• Elastic
• Button
✨️Steps✨️
•✨️I'm going to start by cutting all the pieces of my jumpsuit, these being two front pieces, two back pieces, an upper cut for the neckline divided into two pieces with their respective linings, a back upper lining, two linings for the back opening, two edges for the sleeves, two sleeves and a pull for the belt-shaped waist contour.
•✨️I continue sewing the front pieces with a straight and zigzag seam and then sew the neckline linings with a straight and zigzag seam and to give the drape I am going to make a seam towards the inside in a straight way then I am going to sew the back part with a straight seam leaving an upper space and securing again with a zigzag. I continue assembling the front part, placing the neckline crosswise and I am going to sew with a straight and zigzag seam and I continue sewing the jumpsuit on the inside of the legs with a straight and zigzag seam.
•✨️I am going to sew the back linings with a straight and zigzag seam and the upper part of the back neck with a straight seam and then sew both parts on the shoulders with a straight and zigzag seam and sew around the opening to secure it well. I continue assembling the sleeve with pleats and then sew with a straight and zigzag seam, then I am going to fold the edges of the sleeve and place them on the right side of the fabric and I am going to sew with a straight and zigzag seam and then sew the onesie in one of the ends with straight and zigzag seam
•✨️I will place my elastic around the waist and I will sew while I stretch with a straight seam at both ends, then I will sew the inner edge of the lining with a zigzag seam and continue sewing the missing end with a straight and zigzag seam and then Sew the hem by folding the fabric and sewing with a straight seam. I'm going to secure with a straight seam again around the top and make a buttonhole for the back opening with a zigzag seam and tension at 1 and sew a button with a hand needle on the top back and then sew the shot along the Reverse side to turn and sew at each end to form a belt, thus completing this cute design.
🌼🧡✨️Results✨️🧡🌼
If I had to define my clothing with a single word I would say "splendid" an ideal design to wear on any occasion and with different combinations and accessories 😉 I love how the fabric falls and the beautiful color 🧡 I am very happy to have shared this small dedicated space to sewing with all of you ✨️ thank you very much for taking a minute to read my post I hope you like it my loves 💕 Greetings and nice night to all ❤️.
💁♀️Todas las fotografías son de mi autoría capturadas con mi Samsung Galaxy A12 y editadas en GridArt.
El texto y resumen es totalmente de mi autoría.
Texto traducido en el traductor Google.💁♀️
💁♀️All the photographs are my own, captured with my Samsung Galaxy A12 and edited in GridArt.
The text and summary is entirely my own.
Translated text in Google translator.💁♀️