🌸Español🌸
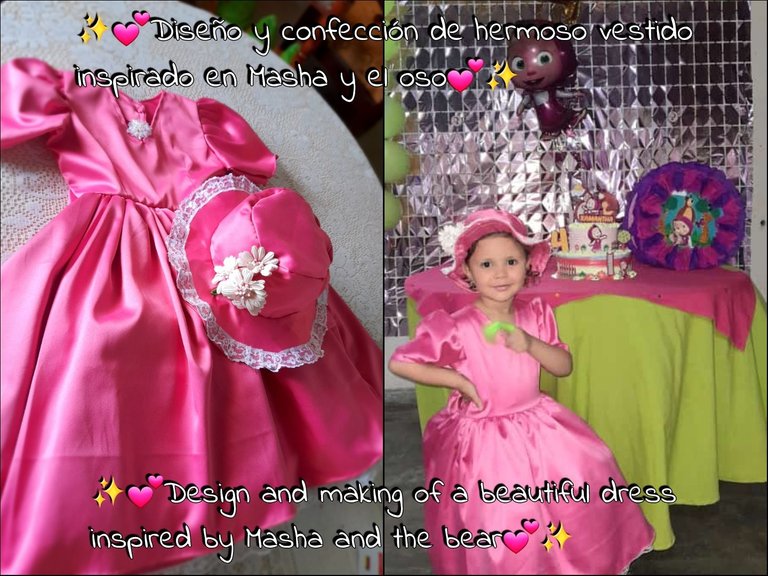
Hola hola querida comunidad feliz noche para todos 😊 reciban todos un cordial saludo espero que todos se encuentren muy bien 😘 hoy vengo con muchas sorpresas 😉 hace poco uno de mis post iba dedicado al bautizo de mi sobrina 😍 hice un vestido para esta ocasión el cual sin duda alguna quedo muy hermoso 💕 y como luego vendría su cumpleaños (el día de ayer) decidí hacerle como regalo un hermoso vestido inspirado en la temática de este la cual se basó en su serie favorita de "Masha y el Oso" y la verdad hoy vengo muy contenta a compartir todo el proceso que este llevó para que todos aprendamos algo nuevo el día de hoy, por eso te invito a quedarte conmigo y mirar uno a uno los pasos a seguir 😉.
Estos fueron los materiales que use
• Tela
• Máquina de coser
• Tijera
• Hilo de coser
• Medidas de la niña
• Encaje
• Flores plásticas
• Papel pelón
💕Pasos💕
• Cómo primer paso con la medidas de la niña sacaré la parte superior del vestido siendo este de 38 cm de ancho en la parte del busto y de largo 29 cm y 26 cm en la parte del cuello.
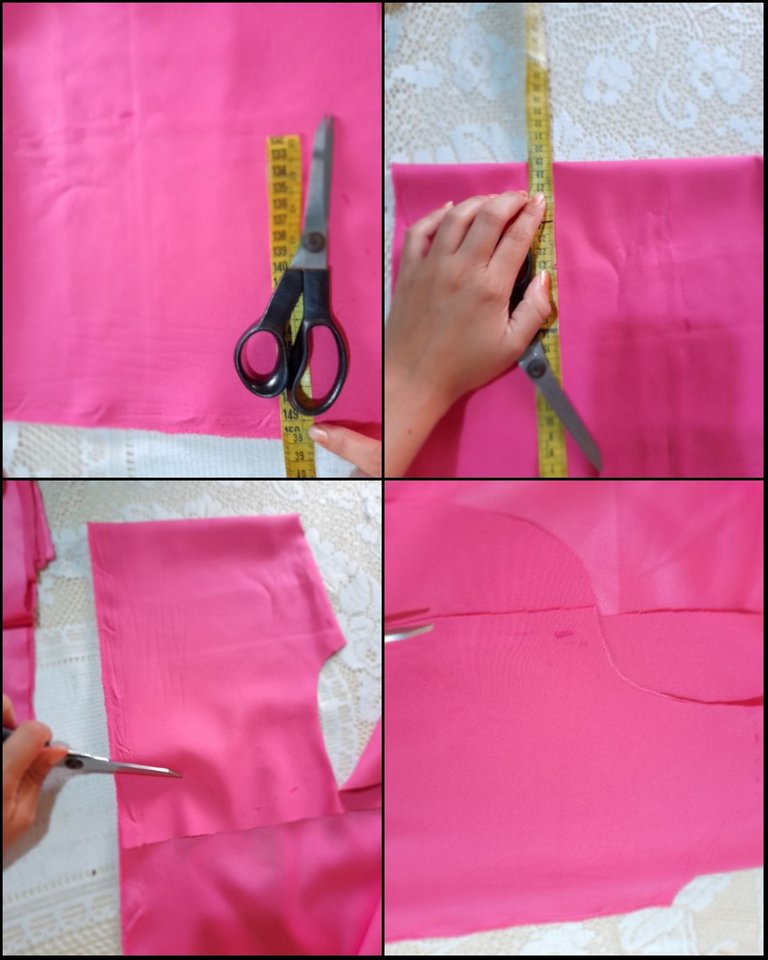
• Luego cortaremos las mangas doblando la tela y midiendo 12 cm de ancho para la orilla y 23 cm de largo.
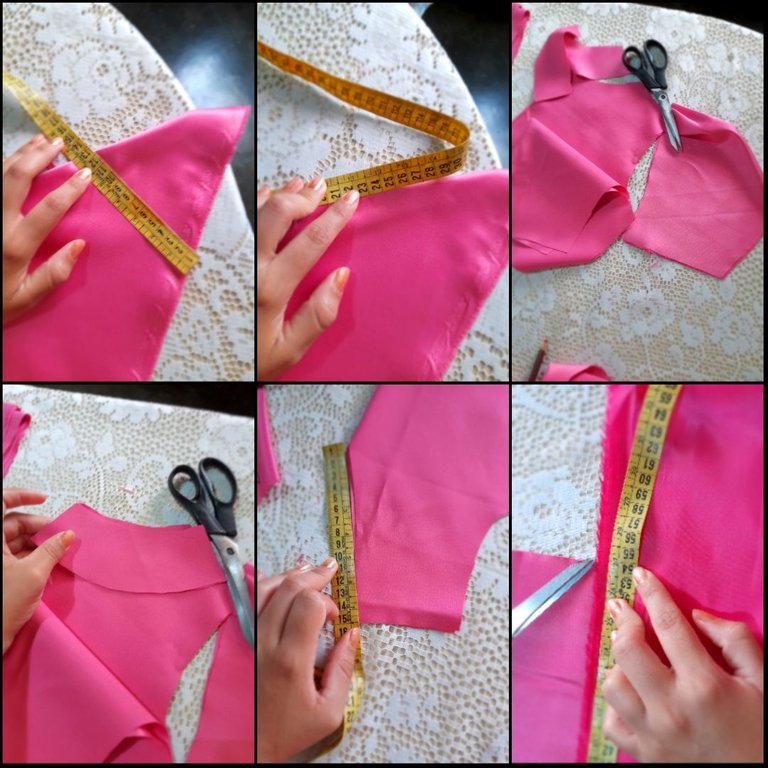
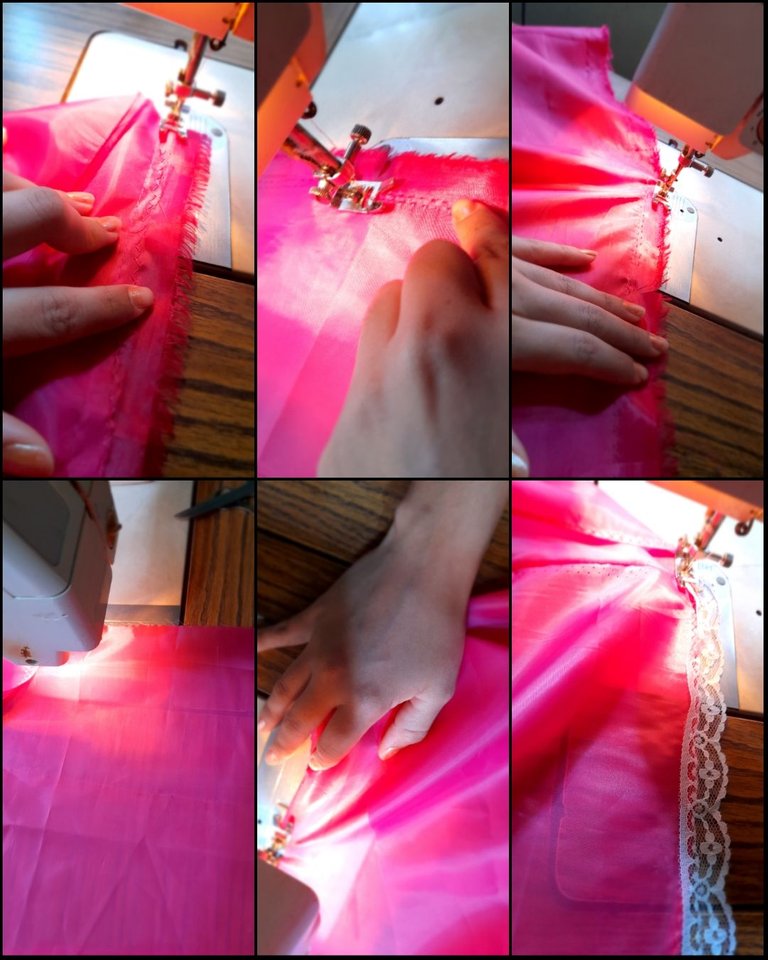
Luego cortaremos los forros para la parte superior trasera y delantera, corto la pieza delantera la cual corte con una caída de 15 cm para un cuello "v". Cortamos el fondo del vestido y la falda con todo el ancho de la tela y un largo de 54 cm.
• Pasare una costura recta con las puntadas en 4 en las orillas de la falda para hacerlas ondeadas y luego cerraré la falda del fondo con costura recta dejando una abertura de 8 cm y aseguro con una costura de zigzag y repito el proceso con la falda del vestido luego haré la orilla del vestido con mi pie especial para ruedos colocando la máquina en zigzag 3 y puntada 2 y voy cosiendo metiendo la tela por la abertura del pie luego de esto aprovecho para hacer las orillas de la manga. Y aprovecho para asegurar nuevamente las costuras de falda con otra de zigzag.
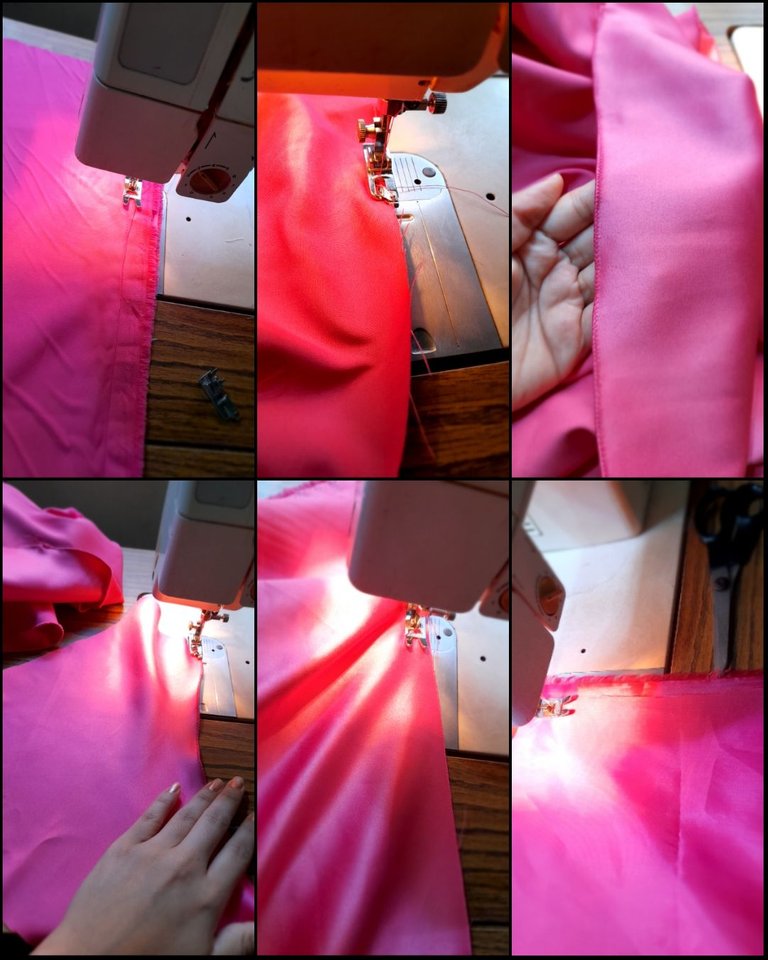
• Pisare las costuras del fondo del vestido para evitar que se dañen los tejidos de la tela y luego voy doblando la orilla y paso una costura de zigzag para comentar a coser el encaje con una costura recta.
• Me aseguraré de que las faldas estén bien ondeadas y luego iré cosiendo los forros de las piezas superiores colocando estos por el lado derecho de la tela y pasando una costura recta y haré las pinzas para darle más cuerpo y caída al vestido. Luego cierro la parte de los hombros con costura recta y zigzag.
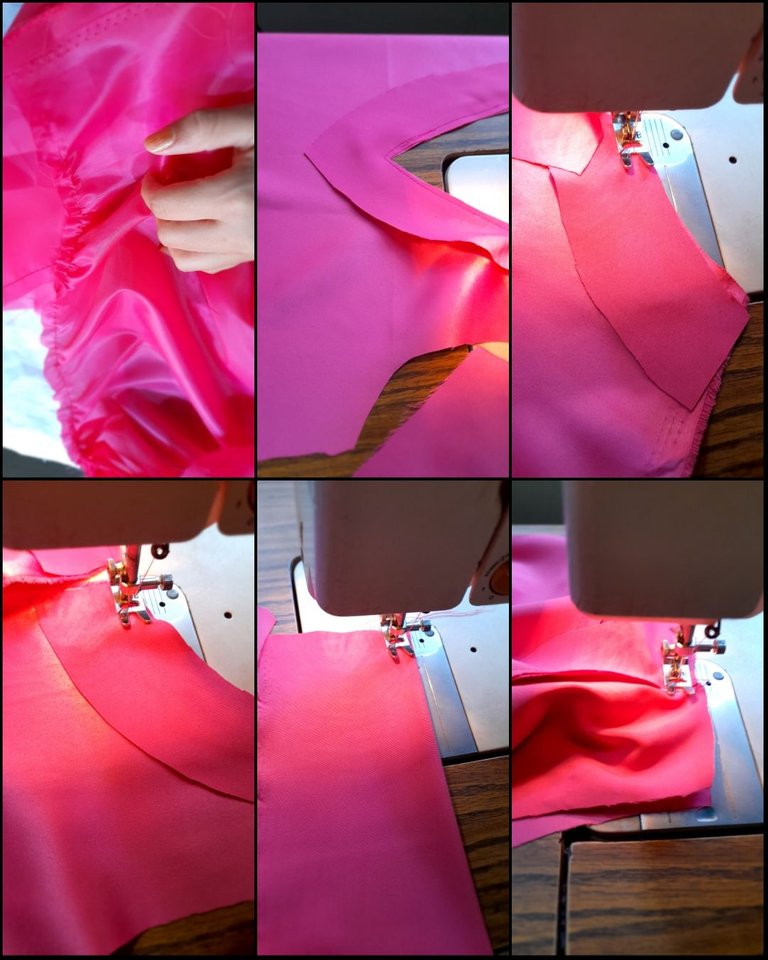
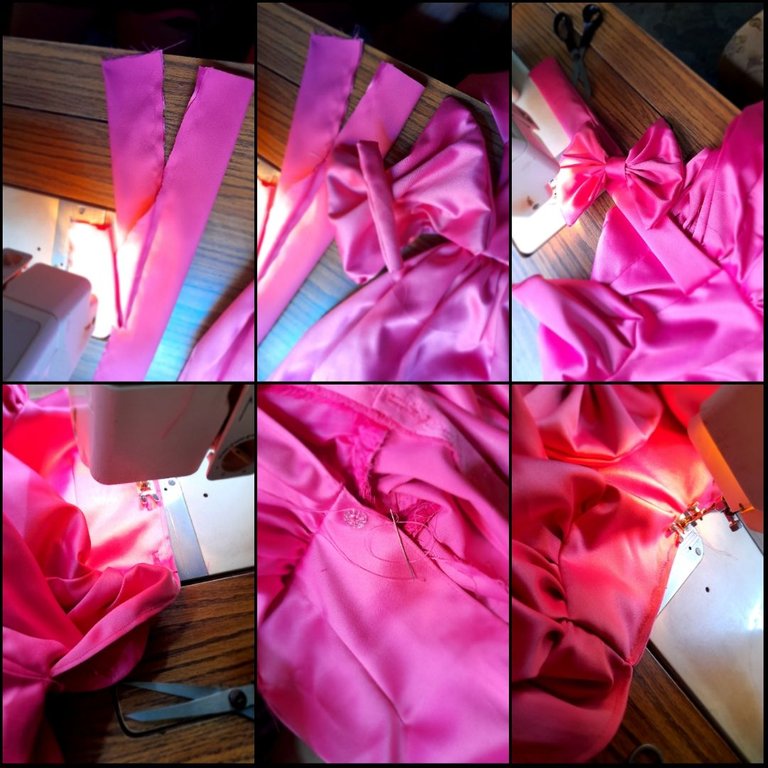
• Voy cosiendo las mangas haciendo pequeños pliegues con costura recta y zigzag para asegurar y luego cierro el vestido en ambos extremos con costura recta y zigzag. Uno el fondo del vestido y la falda con una costura recta y luego continúo cosiendo estas con el cuerpo del vestido con costura recta y zigzag luego en la parte trasera doblare hacia adentro la tela y pasaré una costura recta hasta la abertura que deje terminando así el vestido. Luego haré el lazo con un trozo de tela cosiendo este por el lado reverso y dejando una pequeña abertura para voltearlo.
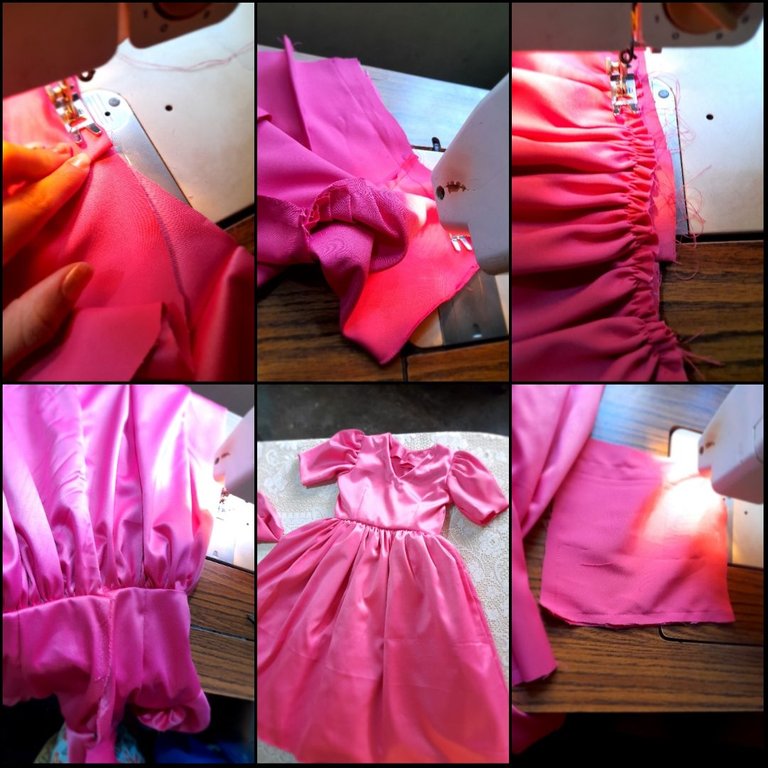
• Luego voy a coser los tirantes de los extremos por el lado reverso para luego voltearlos siendo estos de 54 cm de largo y también voy a coser el tirante del medio del lazo para armar mi lazo a mano usando una aguja de mano e hilo.
Luego cosere con costura recta en cada extremo del vestido cada tirante con el lazo.
Luego haré un bordado por la orilla del cuello y con la máquina en 2 de zigzag y 1 en puntadas haré los ojales para luego colocar los botones cosidos a mano.
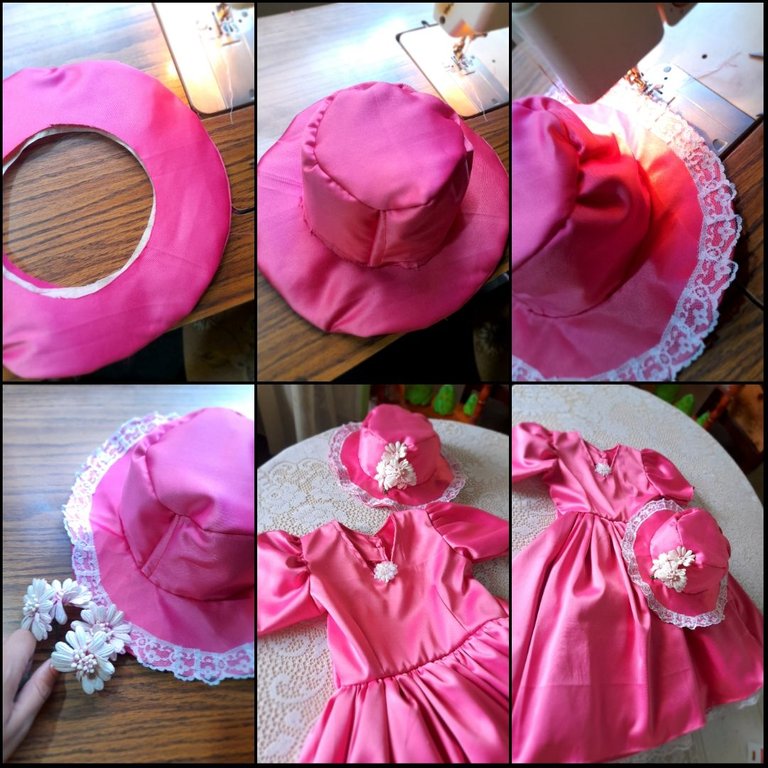
• Para el sombrero tomaré un sombrero de muestra cortando una a una las partes y usando papel pelón para darle cuerpo a este. Cosiendo el cuerpo del sombrero con el papel pelón con la tela en ambos extremos luego cosere la parte superior y la volteare.

• Continúo forrando el ala del sombrero por ambas partes y volteando quedando este forrado de una vez luego uno el cuerpo del sombrero con el ala con costura recta pero a mano pues quise que no quedara con ningún detalle luego con la máquina coloqué encaje en la orilla pasando una costura recta y para tapar el detalle donde uní las piezas use flores plásticas decorativas cosiendo estas a mano con mucho cuidado 😅 y pues terminando así mi traje completo.
🐻Resultados🐻
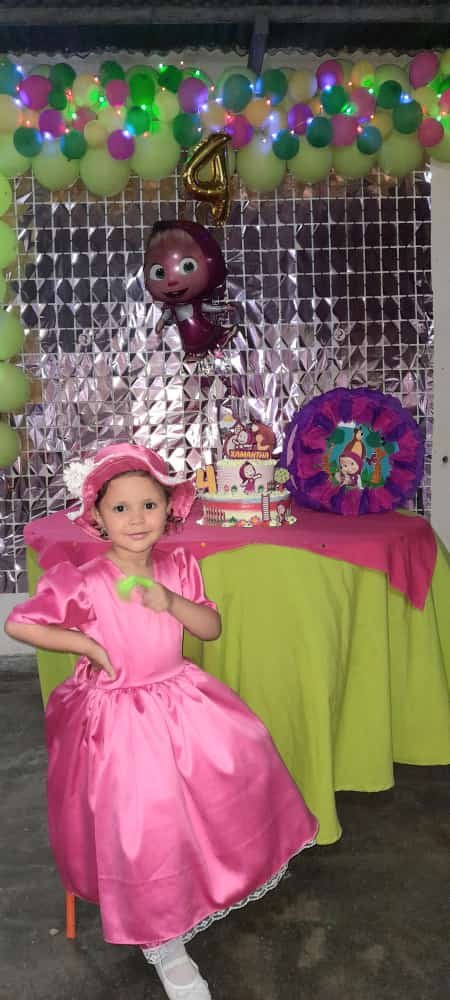
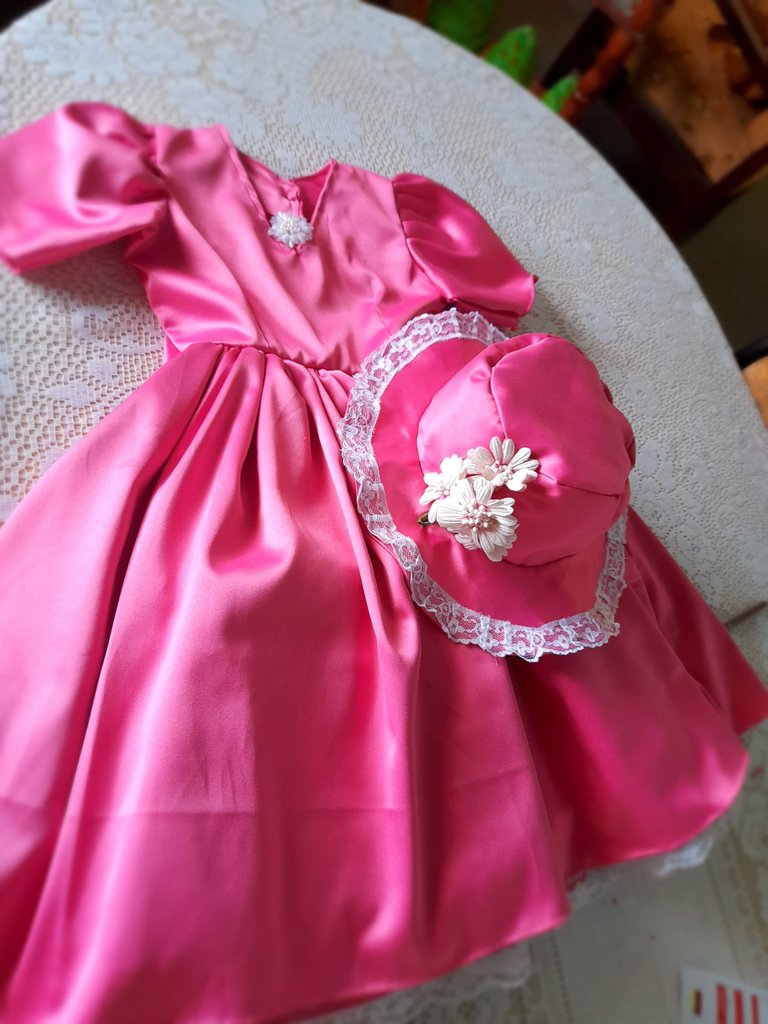
Me siento muy feliz y contenta porque con mucho cariño hice este vestido y los resultados fueron excelentes más de lo que yo esperaba tenía una expectativa muy alta que logre cumplir pero lo que más me llena de alegría es que mi sobrina celebró un año más de vida muy feliz al lado de todos sus seres queridos como toda una princesa 👸🏻 espero de verdad les haya gustado este largo post lleno de tantos tips y técnicas de costura.
Gracias por dedicarme un minuto de su tiempo hasta pronto!😊😘
🌸English🌸
Hello hello dear community happy night to all 😊 receive a cordial greeting I hope everyone is very well 😘 today I come with many surprises 😉 recently one of my posts was dedicated to my niece's christening 😍 I made a dress for this occasion which Without a doubt, it was very beautiful 💕 and since her birthday would come later (yesterday) I decided to give her a beautiful dress inspired by the theme of this dress as a gift, which was based on her favorite series of "Masha and the Bear" and the truth Today I am very happy to share the whole process that this took so that we all learn something new today, so I invite you to stay with me and look at the steps to follow one by one 😉.
These were the materials I used
• Fabric
• Sewing machine
• Scissors
• Sewing thread
• Girl measurements
• Lace
• Plastic flowers
• Bald paper
💕Steps💕
• As the first step with the girl's measurements, I will take the upper part of the dress, this being 38 cm wide at the bust and 29 cm long and 26 cm at the neck.
• Then we will cut the sleeves by folding the fabric and measuring 12 cm wide for the edge and 23 cm long. Then we will cut the linings for the upper back and front, I cut the front piece which I cut with a 15 cm drop for a "v" neck. We cut the bottom of the dress and the skirt with the entire width of the fabric and a length of 54 cm.
• I will pass a straight seam with the stitches in 4 on the edges of the skirt to make them wavy and then I will close the bottom skirt with a straight seam leaving an 8 cm opening and secure with a zigzag seam and repeat the process with the bottom skirt. dress then I will make the edge of the dress with my special foot for hems placing the machine in zigzag 3 and stitch 2 and I'm sewing putting the fabric through the opening of the foot after this I take advantage to make the edges of the sleeve. And I take the opportunity to secure the skirt seams again with another zigzag.
• I will step on the bottom seams of the dress to avoid damaging the fabric and then I will fold the edge and pass a zigzag seam to comment on sewing the lace with a straight seam.
• I will make sure that the skirts are billowy and then I will sew the linings of the upper pieces placing these on the right side of the fabric and passing a straight seam and I will make the darts to give the dress more body and drape. Then I close the part of the shoulders with a straight and zigzag seam.
• I sew the sleeves making small pleats with straight and zigzag seams to secure and then I close the dress at both ends with straight and zigzag seams. I join the bottom of the dress and the skirt with a straight seam and then I continue sewing these with the body of the dress with a straight and zigzag seam, then in the back I will fold the fabric inwards and I will pass a straight seam up to the opening that I leave thus finishing the dress. Then I will make the bow with a piece of fabric, sewing it on the wrong side and leaving a small opening to turn it around.
• Then I'm going to sew the straps at the ends on the reverse side and then turn them over, being these 54 cm long and I'm also going to sew the strap in the middle of the bow to assemble my bow by hand using a hand needle and thread. Then I will sew with a straight seam at each end of the dress each strap with the bow. Then I will do an embroidery on the edge of the neck and with the machine in 2 zigzag and 1 stitches I will make the buttonholes and then place the buttons sewn by hand.
• For the hat I will take a sample hat, cutting the parts one by one and using bald paper to give it body. Sewing the body of the hat with the bald paper with the fabric at both ends, then I will sew the top part and flip it.
• I continue lining the brim of the hat on both sides and turning it over, leaving it lined at once, then I join the body of the hat with the brim with a straight seam but by hand because I wanted it not to have any detail, then with the machine I placed lace on the edge passing a straight seam and to cover the detail where I joined the pieces, I used decorative plastic flowers, sewing these by hand very carefully 😅 and thus finishing my complete suit.
🐻Results🐻
I feel very happy and content because I made this dress with a lot of love and the results were excellent, more than I expected. I had a very high expectation that I was able to fulfill, but what fills me the most with joy is that my niece celebrated another year of life. very happy next to all her loved ones like a princess 👸🏻 I really hope you liked this long post full of so many tips and sewing techniques. Thank you for dedicating a minute of your time to me. See you soon!😊😘
💁♀️Todas las fotografías son de mi autoría capturadas con mi Samsung Galaxy A12 y editadas en GridArt.
El texto y resumen es totalmente de mi autoría.
Texto traducido en el traductor Google.💁♀️
💁♀️All the photographs are my own, captured with my Samsung Galaxy A12 and edited in GridArt.
The text and summary is entirely my own.
Translated text in Google translator.💁♀️