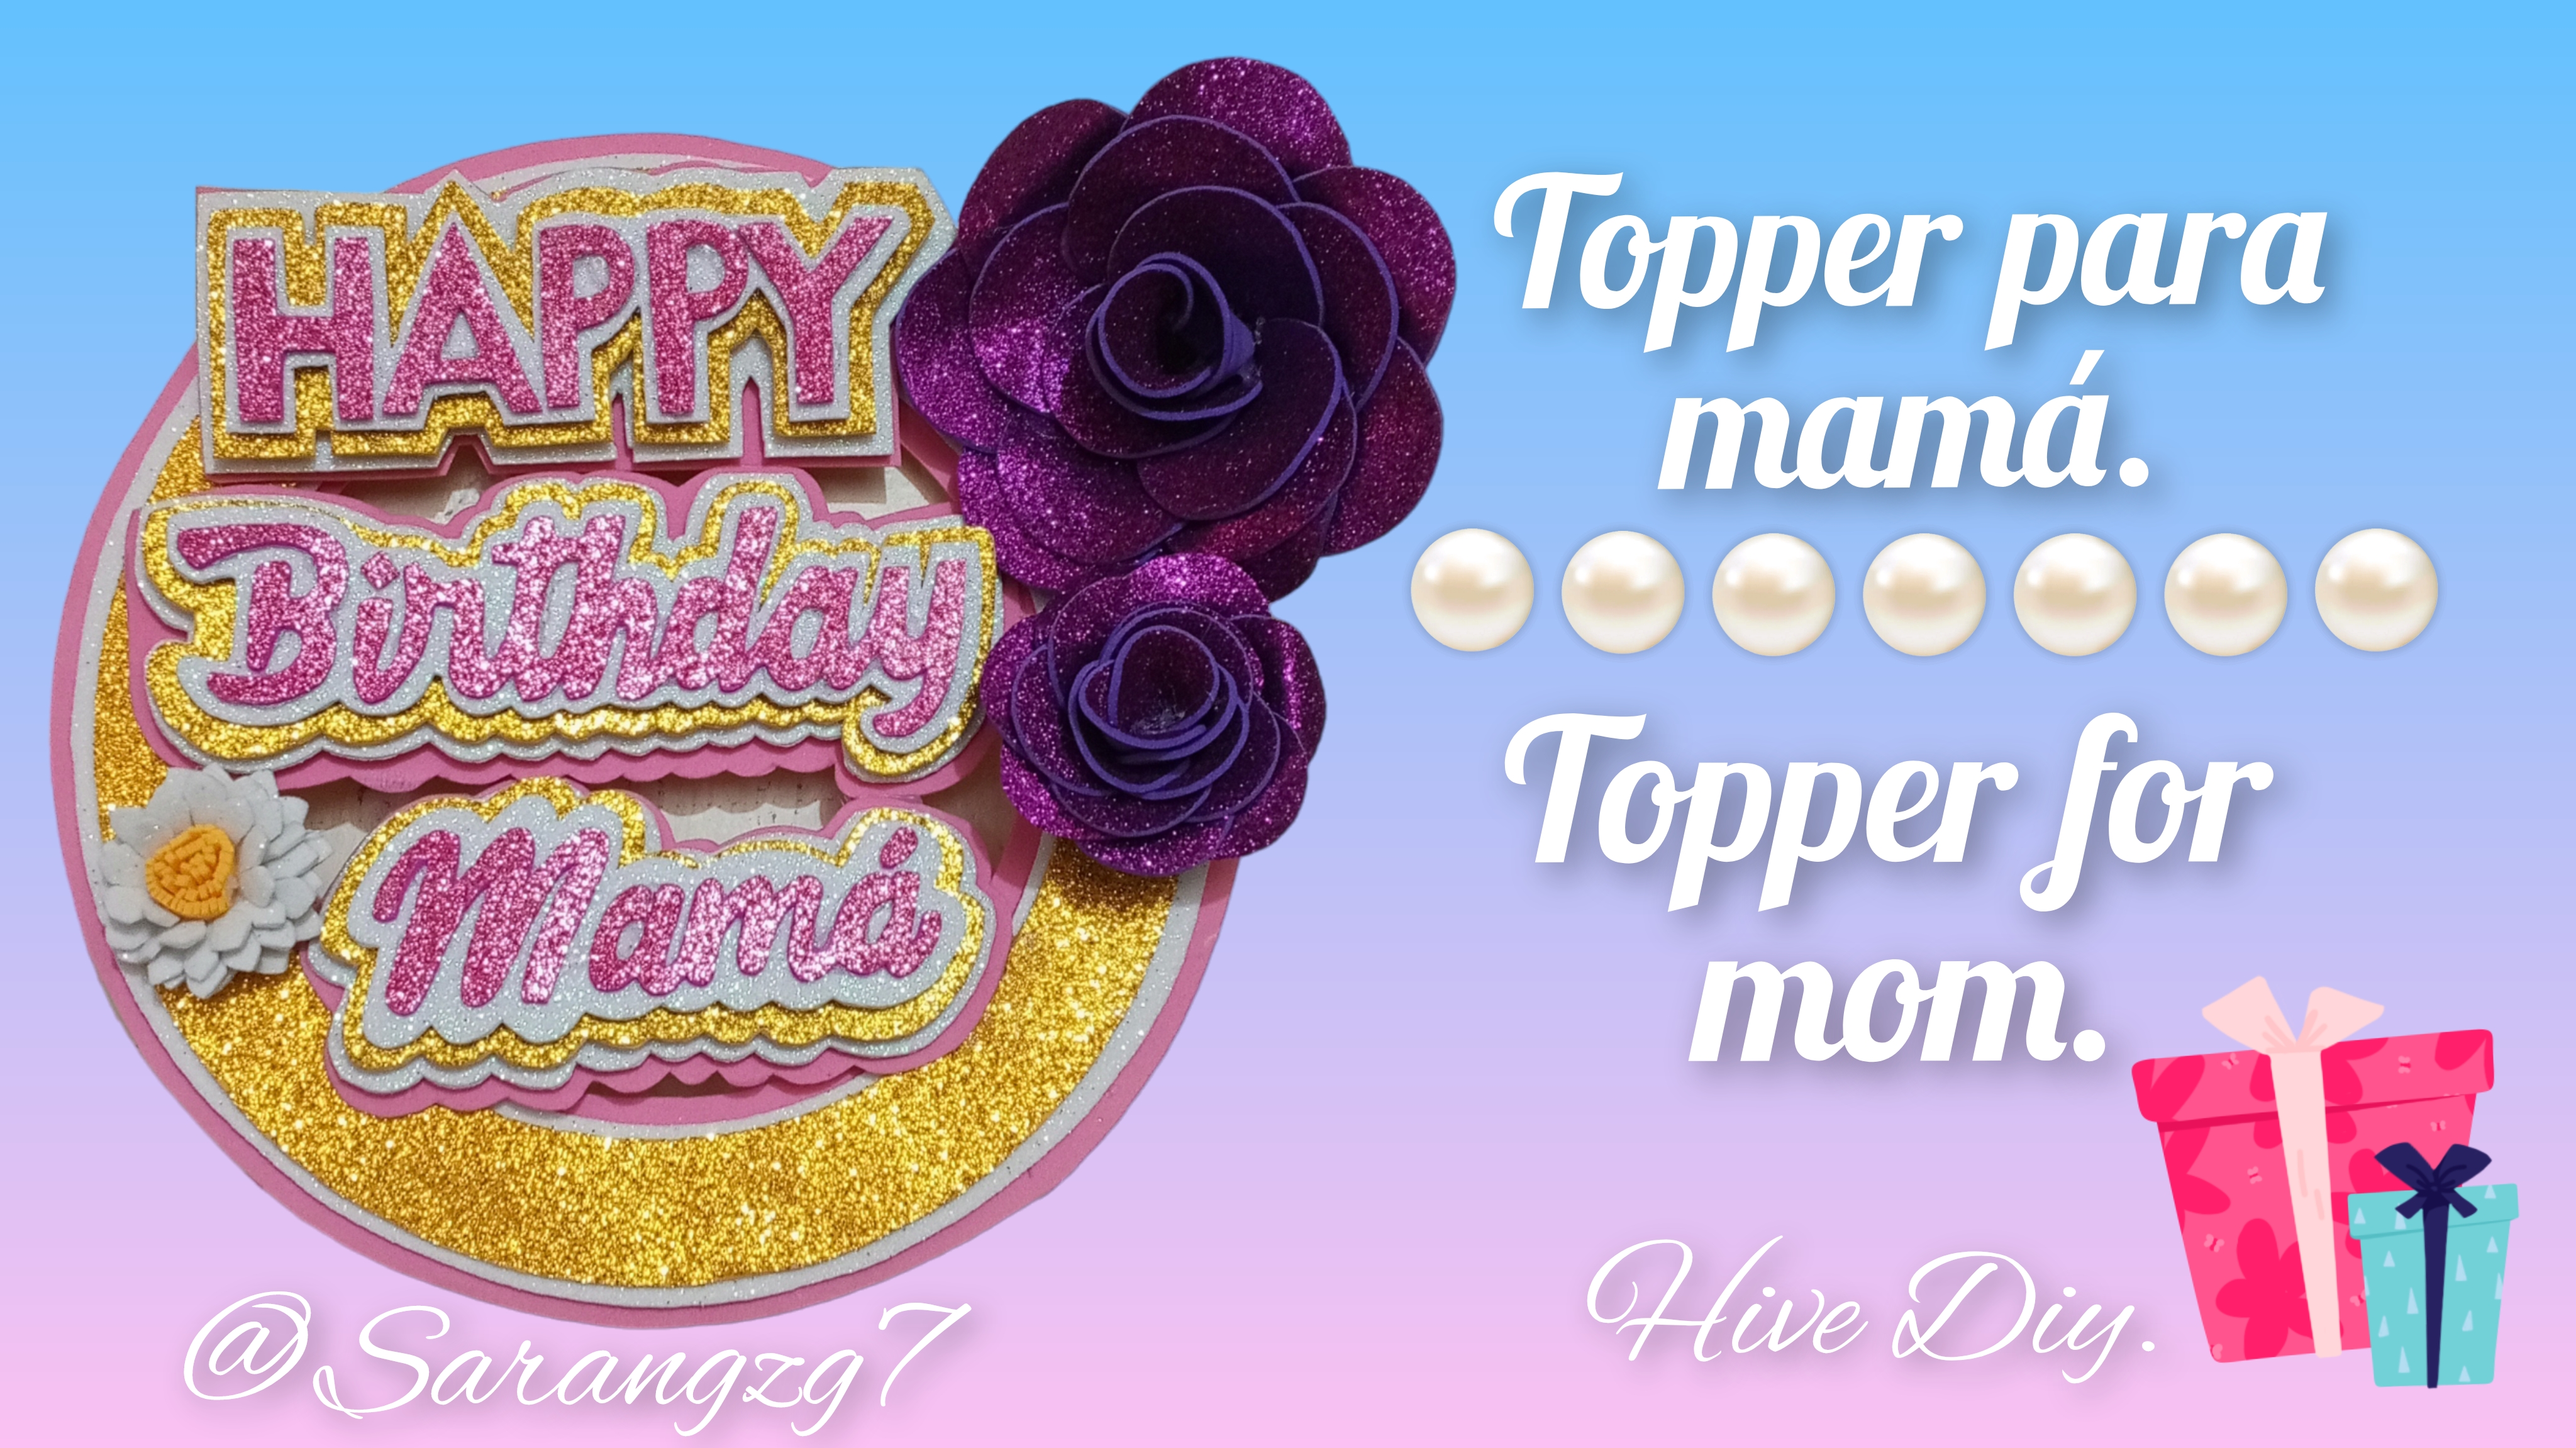
Holis amigos de Hive Diy espero se encuentren todos muy bien, yo estoy muy contenta de poder hacer mi primera publicación en esta comunidad.
Hello friends of Hive Diy I hope you are all well, I am very happy to be able to make my first publication in this community.
En esta oportunidad les traigo una manualidad muy especial para mí, pues es un Topper que le hice a mi mamá por su cumpleaños.
This time I bring you a very special craft for me, it is a Topper that I made for my mom for her birthday.
Cada vez que hago un Topper para mis seres queridos intento superarme a mí misma haciendolos cada vez más complejos, nunca he hecho un curso de como hacerlos correctamente, 😁 pero uso mi ingenio para hacerlos lo mejor posible.
Every time I make a Topper for my loved ones I try to improve myself by making them more and more complex, I have never taken a course on how to make them correctly, 😁 but I use my ingenuity to make them the best possible.
Los cumpleaños de mi mamá son muy especiales para mí, así que siempre intento hacerle un Topper super hermoso que demuestre lo mucho que la amo con cada detalle, suelo tardarme mucho y estresarme mucho también 😣 ya que cuido cada detalle lo máximo que puedo, tomando en cuenta que no soy experta claro. 🤭
My mom's birthdays are very special for me, so I always try to make her a super beautiful Topper that shows how much I love her with every detail, I usually take a long time and get a lot stressed too 😣 since I take care of every detail as much as I can, taking Keep in mind that I am not an expert of course. 🤭
Sin más preámbulo los dejo con la lista de materiales y el paso a paso de esta manualidad.
Without further ado I leave you with the list of materials and the step by step of this craft.
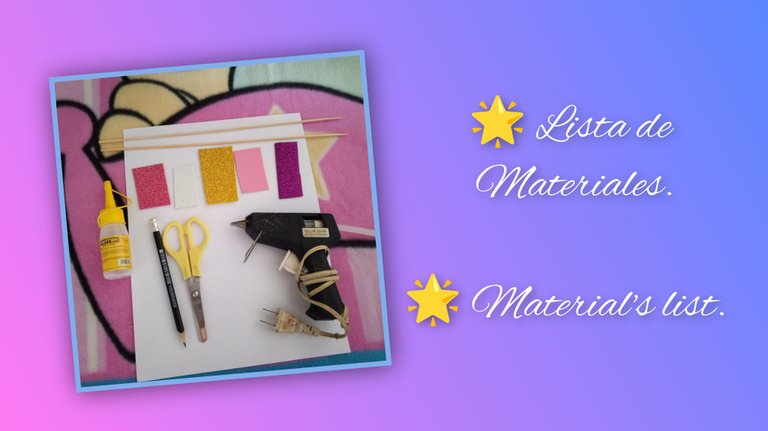
- Foami escarchado: rosado, blanco, dorado y fucsia.
- Foami sencillo rosado.
- Lápiz.
- Silicón líquido.
- Barra de silicón.
- Pistola de silicón.
- Tijera.
- Hoja blanca.
- Palillos de altura.
🥰MATERIALS🥰
- Frosty foam: pink, white, gold and fuchsia.
- Simple pink foam.
- Pencil.
- Liquid silicone.
- Silicone bar.
- Silicone gun.
- Scissors.
- White sheet.
- Chopsticks height.
🥰STEP BY STEP🥰
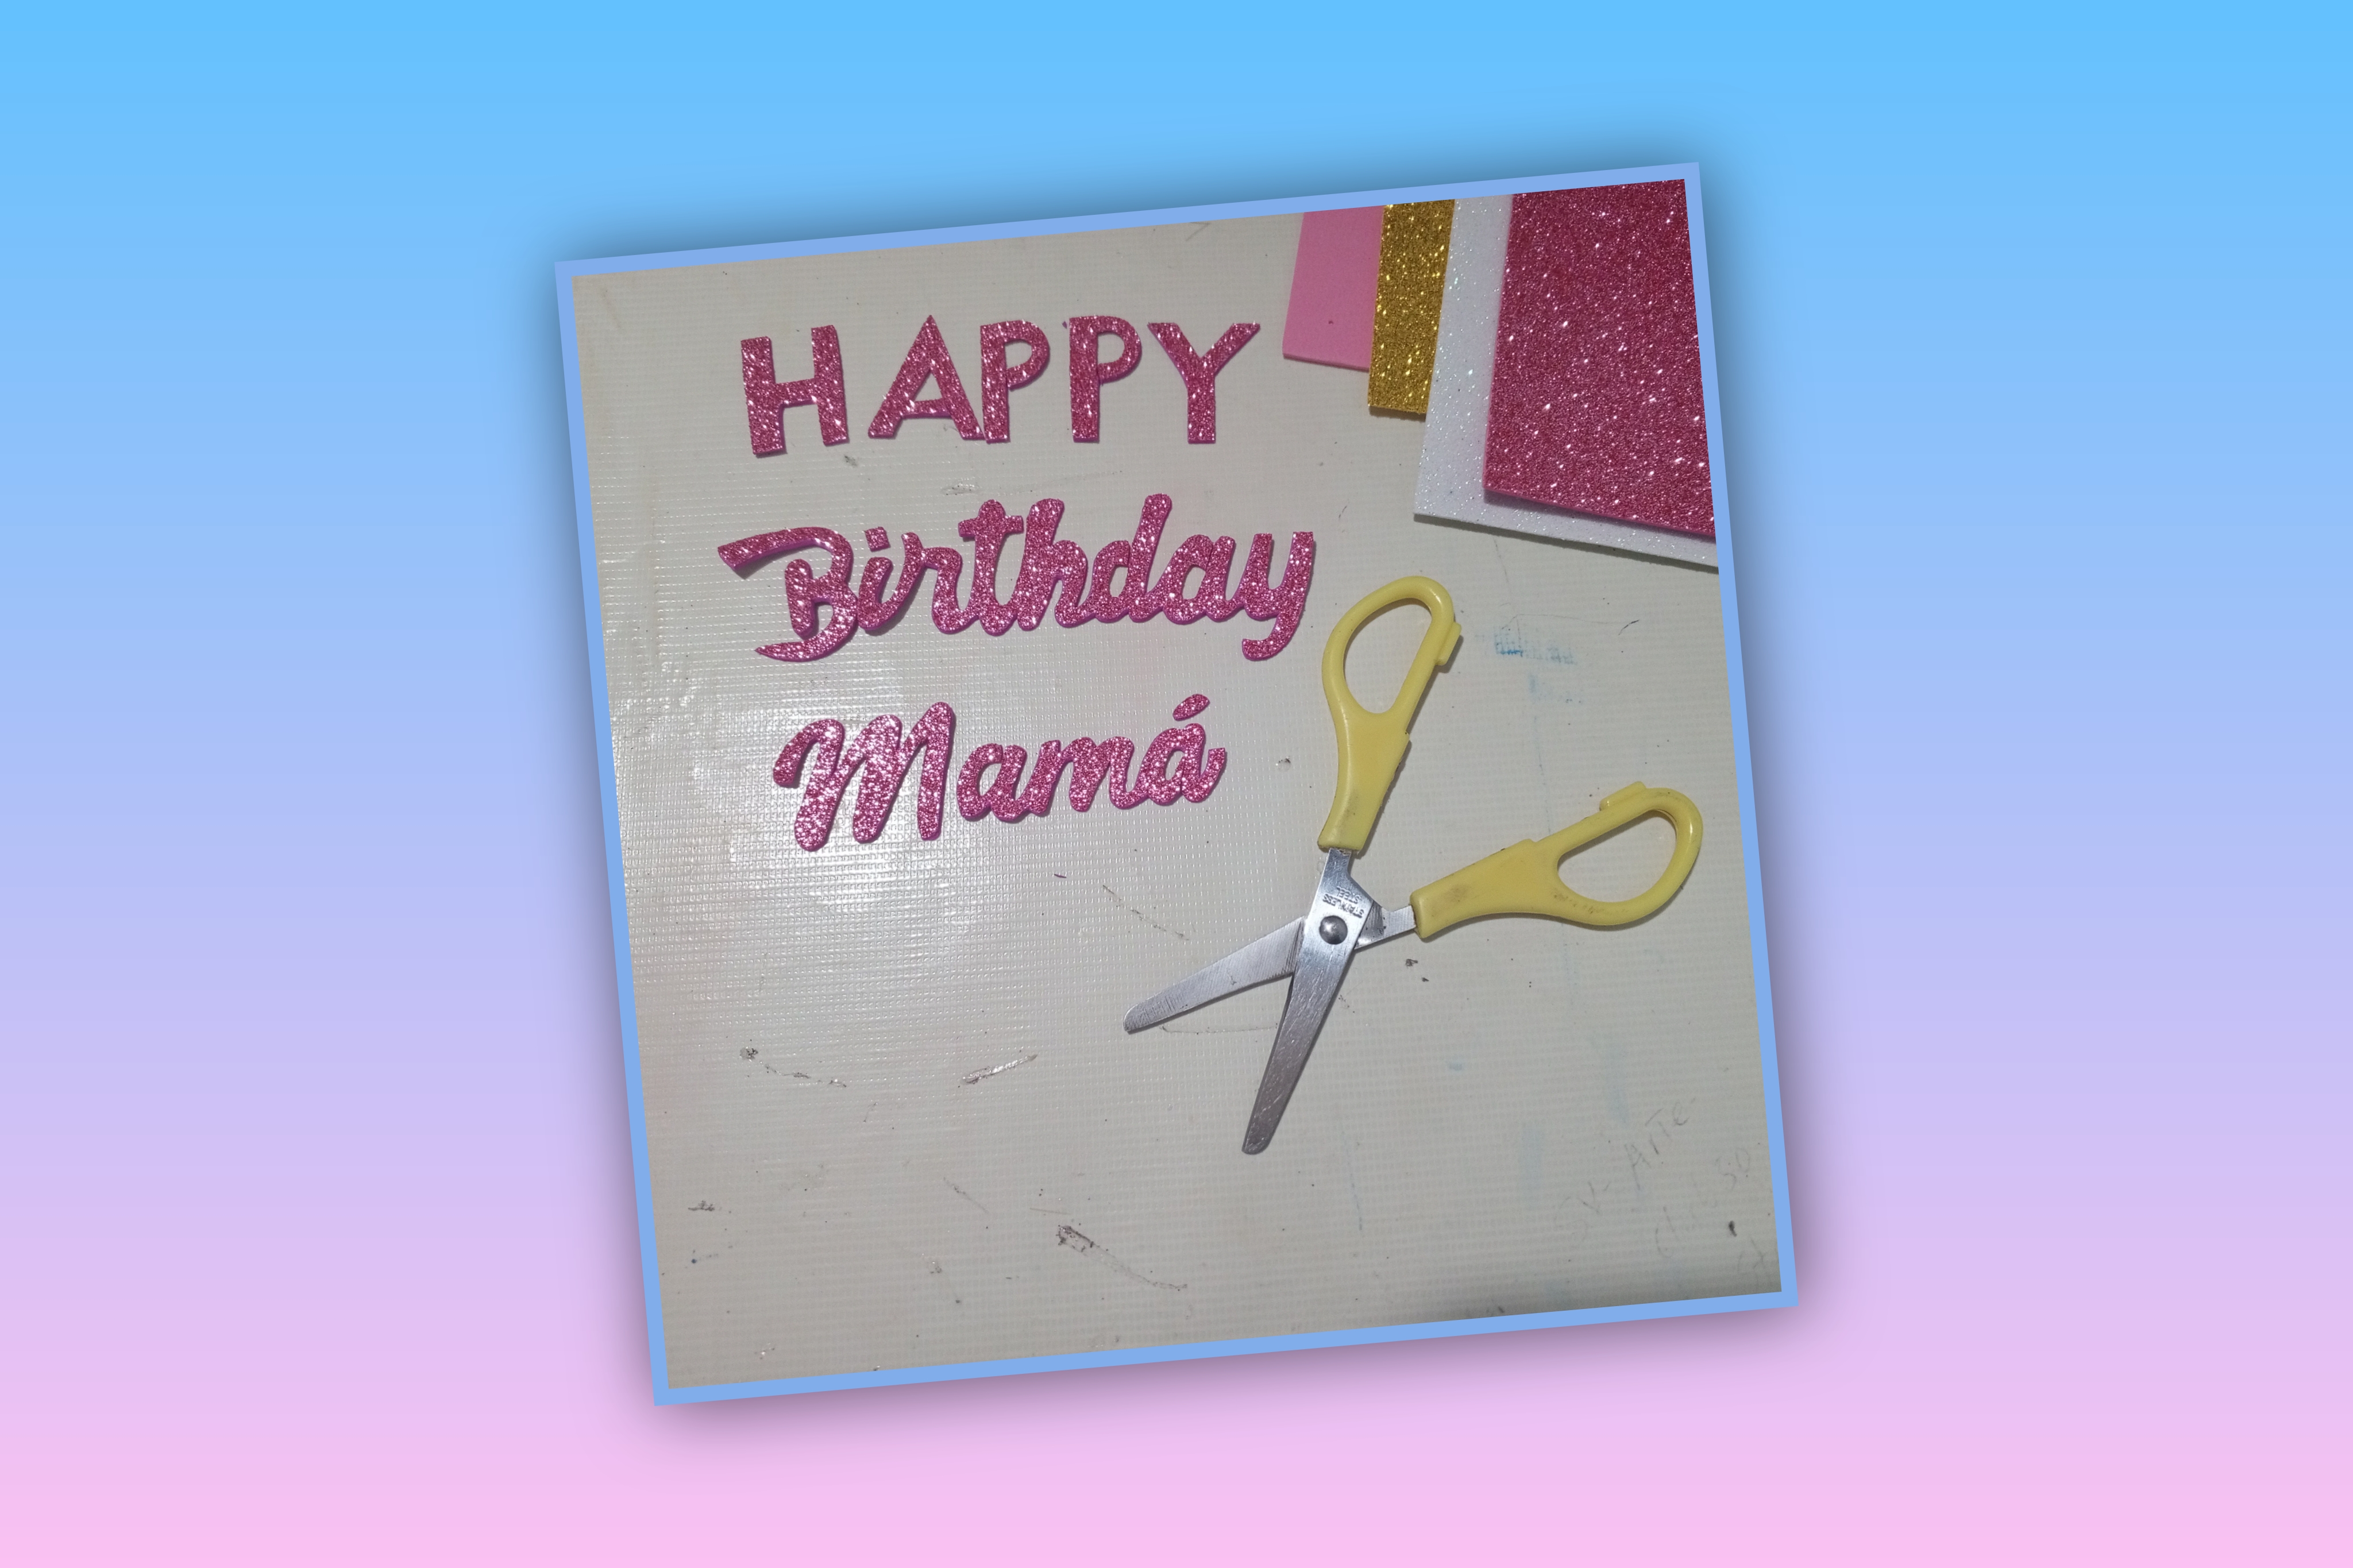
El primer paso fue traspasar mis moldes al foami escarchado rosado y luego recortar las letras. Sé que en las fotos el foami se ve como fucsia, pero realmente es rosado, no sé porque la cámara lo captó más oscuro de lo que es. 😅
The first step was to transfer my molds to the pink frosted foam and then cut out the letters. I know that in the photos the foam looks fuchsia, but it is really pink, I don't know why the camera captured it darker than it is. 😅
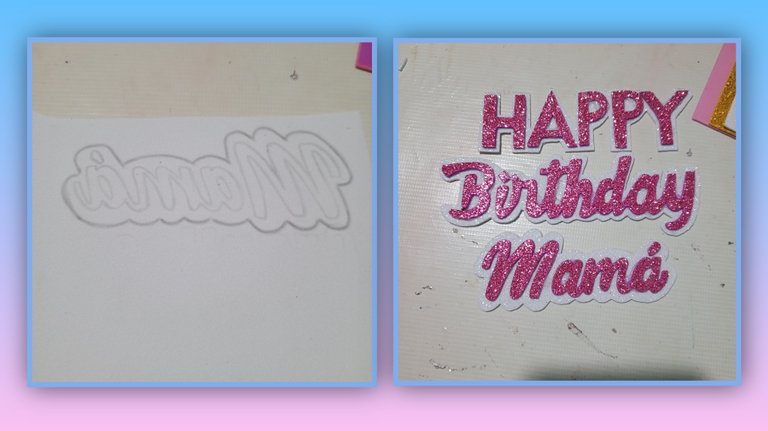
Una vez recortadas las letras tome mi foami blanco escarchado con la parte escarchada hacía abajo y comencé a traferir las letras recortadas nuevamente al foami.
Once the letters were cut out, I took my frosty white foam with the frosted side down and began to transfer the cut out letters back to the foam.
Cómo pueden ver en la imagen donde les muestro el ejemplo con la palabra "mamá" luego de traferir la palabra le hago un borde de medio centímetro aproximadamente y recortó para luego pegar con silicón líquido las letras a la base.
As you can see in the image where I show you the example with the word "mom", after transferring the word I make a border of approximately half a centimeter and cut it out and then glue the letters to the base with liquid silicone.

Luego hago exactamente el mismo procedimiento para hacer la base con el foami dorado.
Then I do exactly the same procedure to make the base with the golden foam.
Luego le pegue con silicón caliente esos trozos de foami a la parte de atrás de las letras, normalmente esto se hace con cinta adhesiva doble cara, pero como no tengo toca ingeniarselas e improvisar.
Then I glued those pieces of foam to the back of the letters with hot silicone. Normally this is done with double-sided adhesive tape, but since I don't have any, I have to come up with ideas and improvise.
Luego pegue las letras al fondo de foami dorado.
Then glue the letters to the gold foam background.
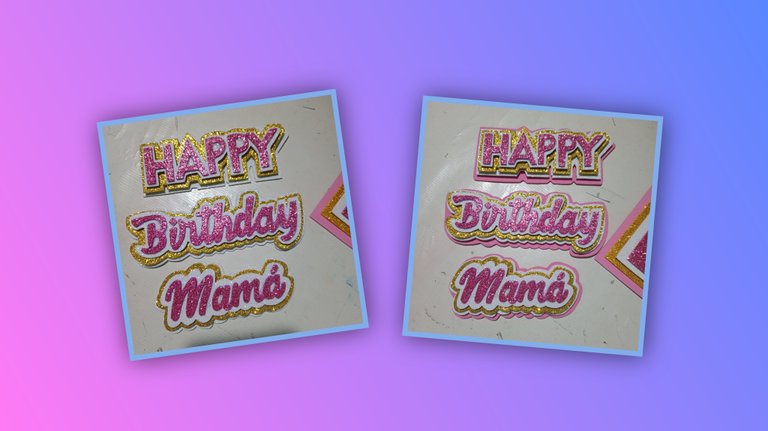
Repetí el mismo procedimiento para agregar otra capa de foami escarchado blanco y por último otra de foami rosado sencillo.
I repeated the same procedure to add another layer of white frosted foam and finally another layer of simple pink foam.
El siguiente paso fue... Ir a comprar más material 🤭 porque use casi todo el material que había comprado solamente en hacer las letras. 😆
The next step was... Go buy more material 🤭 because I used almost all the material I had bought just to make the letters. 😆

Después de comprar más material, procedí a hacer este molde circular con la ayuda de una tapa de la cocina, luego lo transferí al foami dorado escarchado.
After buying more material, I proceeded to make this circular mold with the help of a kitchen lid, then transferred it to the frosted gold foami.
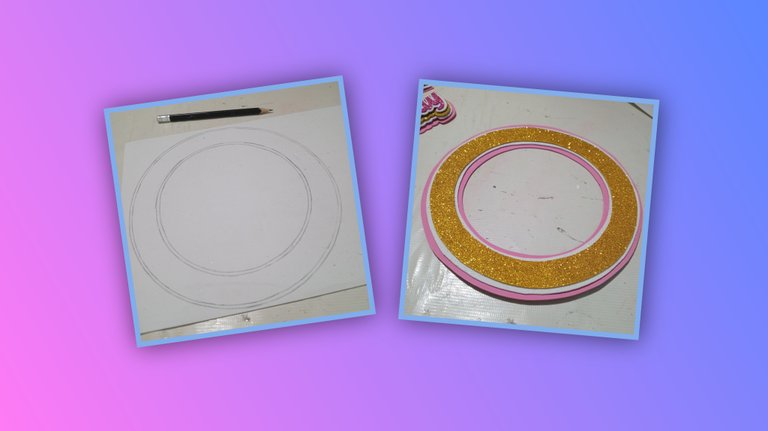
Para elaborar los demás círculos hice lo mismo que con las letras, traspase el molde al foami y le hice un borde de medio centímetro más ancho para que quedarán más grandes que el primer círculo.
To make the other circles I did the same as with the letters, I transferred the mold to the foam and made an edge half a centimeter wider so that they would be larger than the first circle.
Al tener los 3 círculos listos pegue uno encima del otro poniendo el grande abajo luego el mediano y por último el más pequeño, en este caso sería el rosado, luego el blanco y encima el dorado.
Once you have the 3 circles ready, glue one on top of the other, putting the large one at the bottom, then the medium one and finally the smallest one, in this case it would be the pink one, then the white one and on top the gold one.
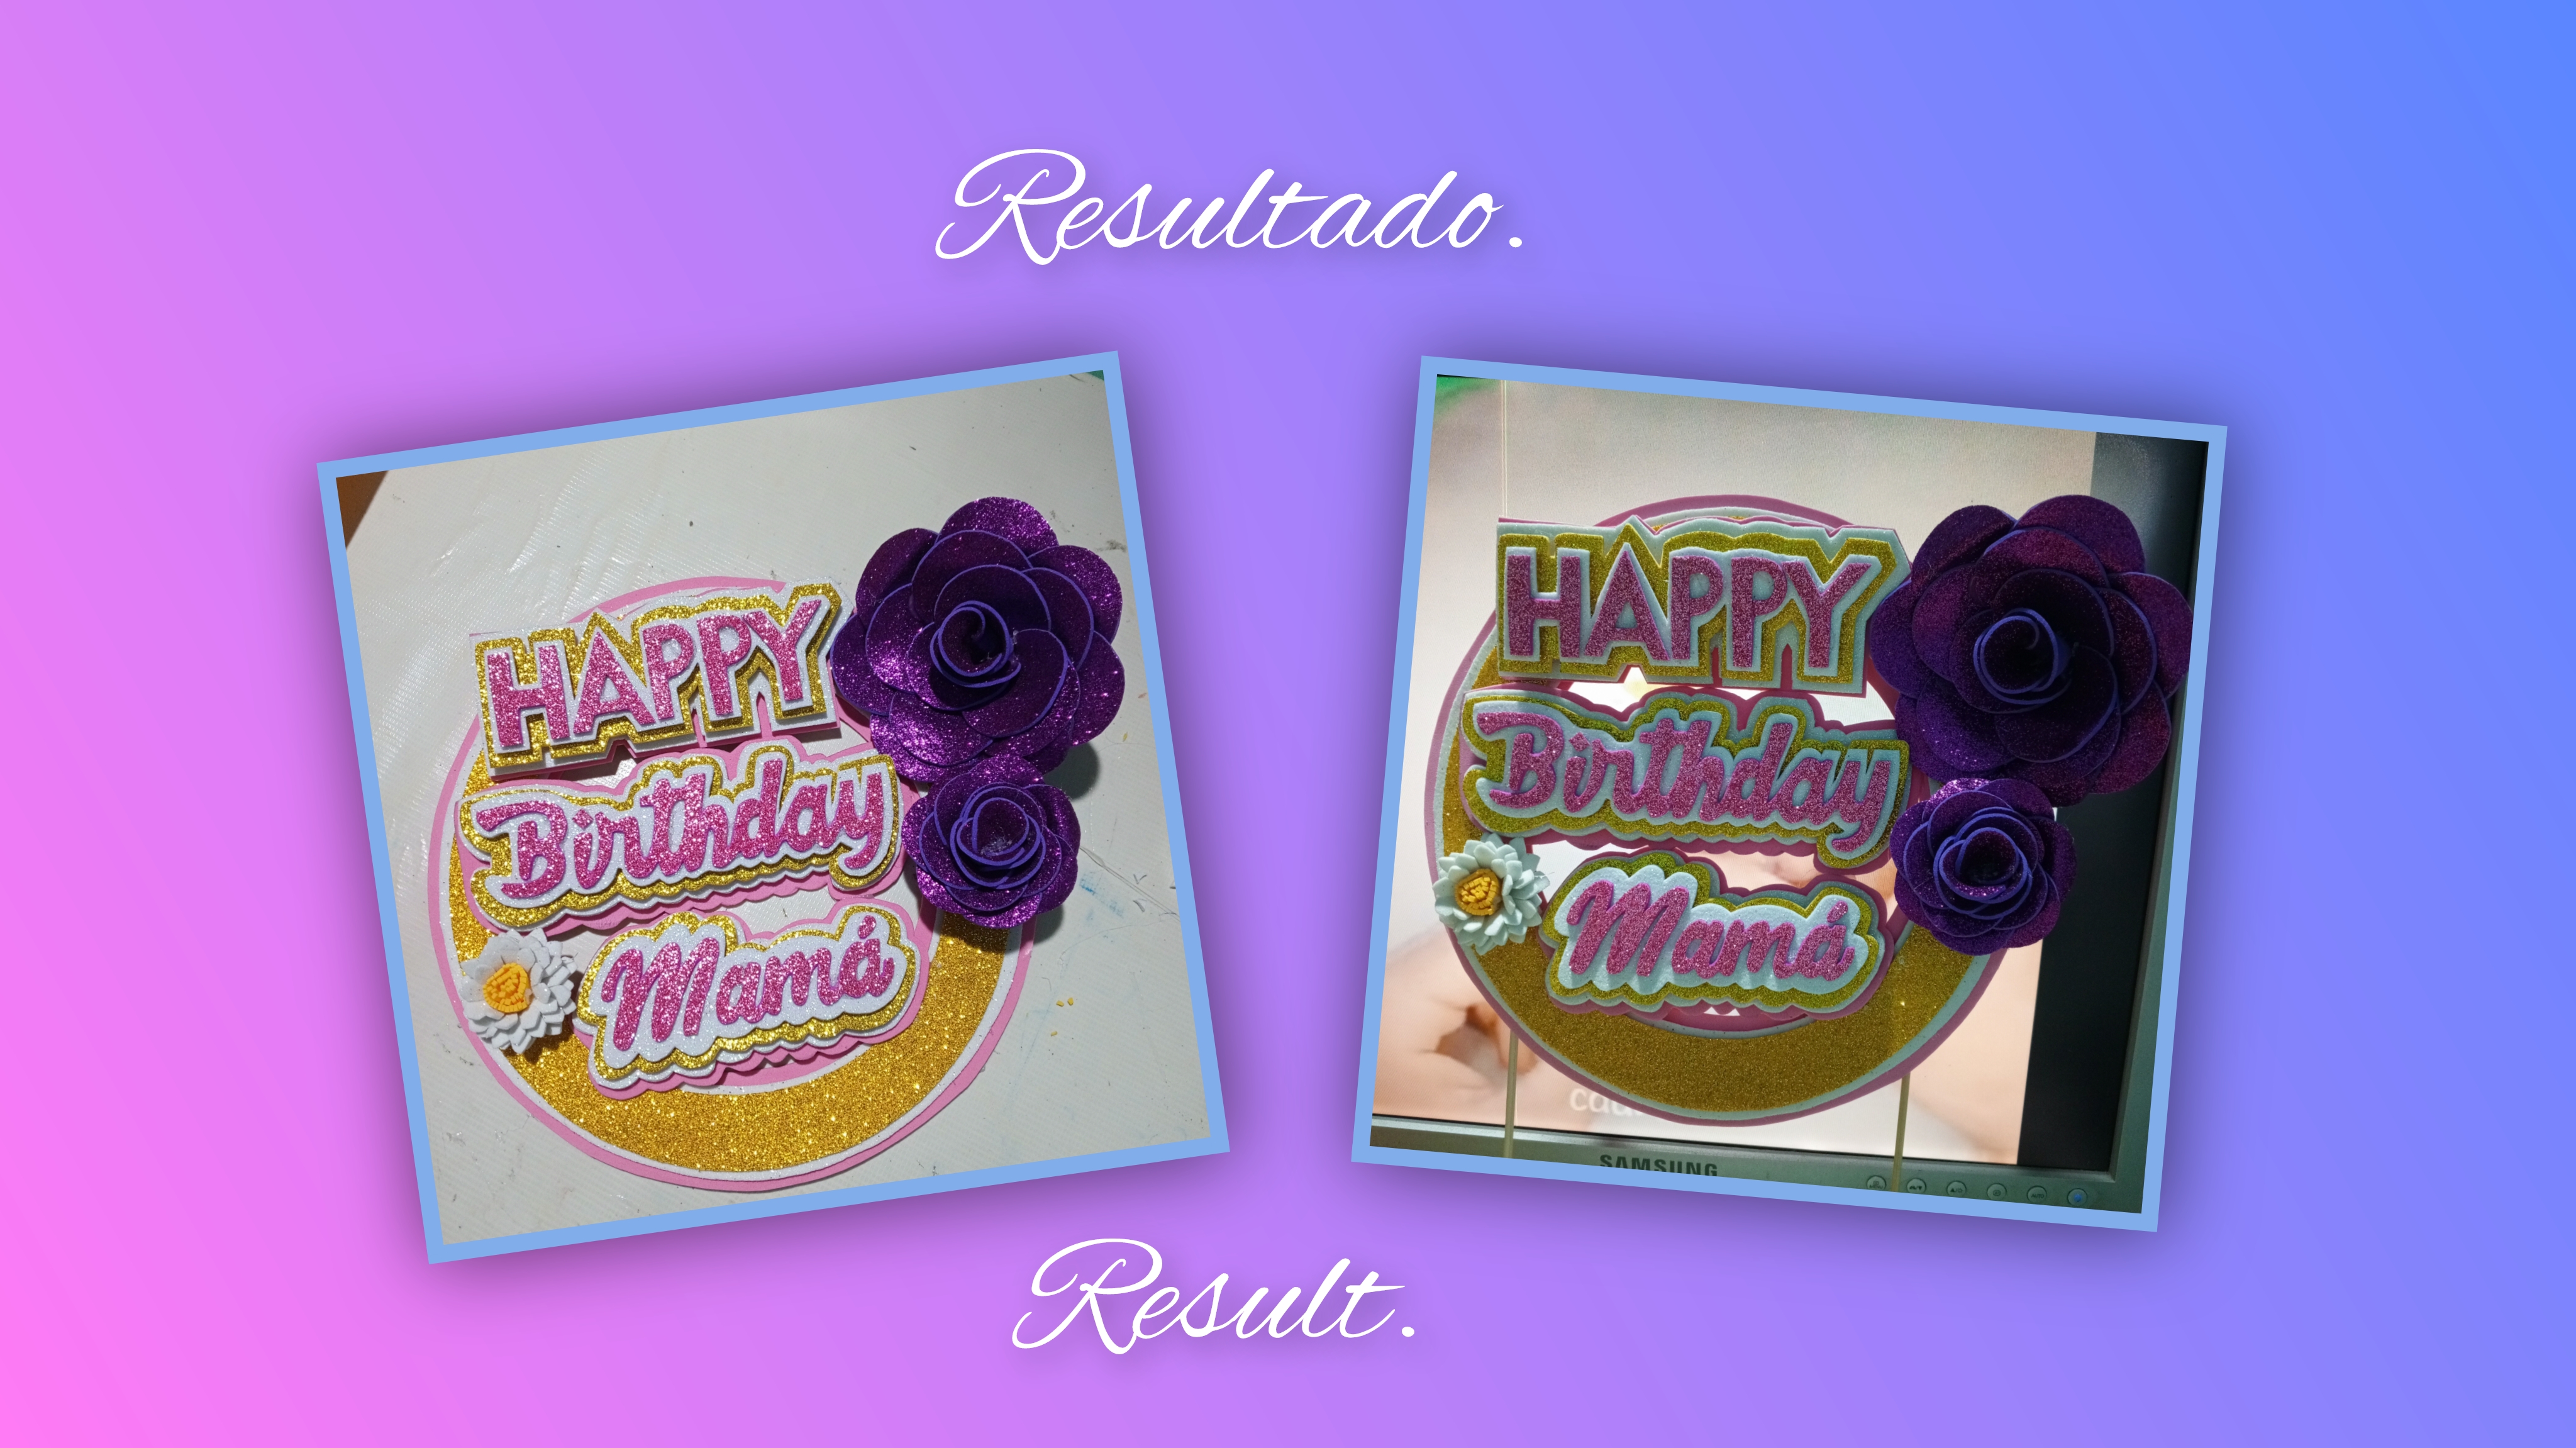
Luego de tener está base círcular lista, lo que hice fue pegar las letras que previamente había hecho.
After having this circular base ready, what I did was glue the letters that I had previously made.
A menara de adorno para darle más vida al Topper decidí hacer estás rosas modaras y esa flor blanca que me parecieron tan lindas. 🥰
As a decoration to give more life to the Topper I decided to make these purple roses and that white flower that I thought were so pretty. 🥰
Y por último pero no menos importante pegue con silicón caliente los palillos de altura, decidí ponerle dos porque la verdad está bastante grande el topper y quiero que quede bien resistente.
And last but not least, I glued the height toothpicks with hot silicone. I decided to put two because the truth is that the topper is quite big and I want it to be very resistant.
¿Qué les pareció? Espero les haya gustado mucho el resultado, a mí me encantó hacerlo y compartirlo con todos ustedes.
What did you think? I hope you liked the result very much, I loved doing it and sharing it with all of you.
Nos vemos en un próximo post, que estén bien y Dios los bendiga, bye.🥰😘💜🌹🪷
See you in a next post, be well and God bless you, bye.🥰😘💜🌹🪷
Todas las imágenes de este post son de mi autoría tomadas con mi teléfono Tecno Spark 10 Pro editadas en PicsArt.
All the images in this post are my own, taken with my phone Tecno Spark 10 Pro edited in PicsArt.
Traducción al inglés: Traductor Google.
https://translate.google.com/?hl=es&sl=es&tl=en&op=translate
English translation: Google Translate. https://translate.google.com/?hl=es&sl=es&tl=en&op=translate


