Saludos mis queridos amigos, los meses han pasado volando que ya nos huele a navidad, y cada una de las cosas que ella representa, época de compartir , de reencuentro familiar, de decorar y hasta darle un cariñito a nuestro hogar, sin dejar a un lado la ilusión de los niños esa tan deseada espera de santa con sus regalos. Por esas razones yo suelo disfrutar mucho esta época.
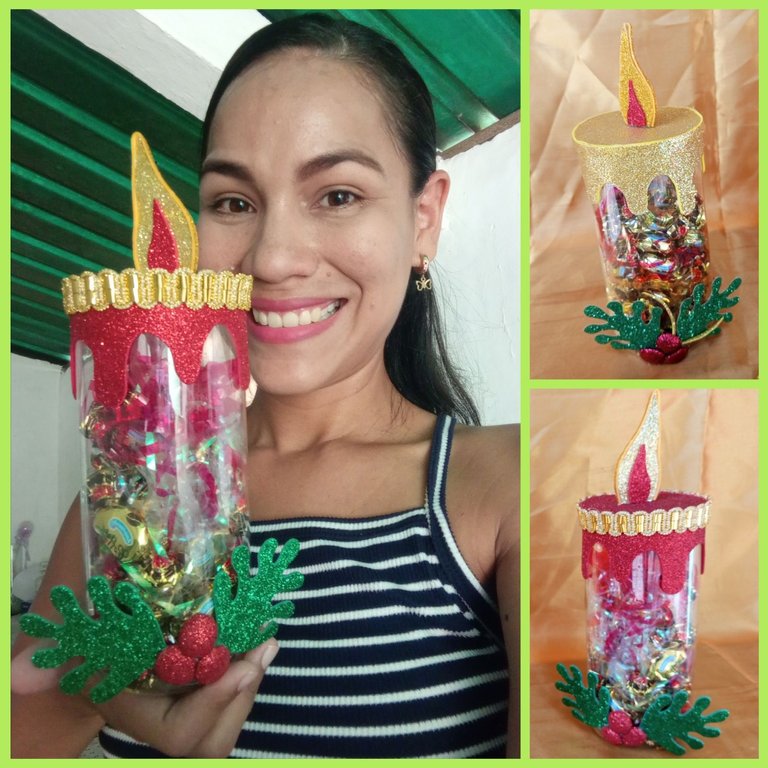
Y pensando en ello, les vengo a mostrar cómo elaborar una prática dulcera en forma de vela ñavideña.
Greetings my dear friends, the months have flown by and it smells like Christmas, and each of the things it represents, time to share, family reunion, decorate and even give a little love to our home, without leaving aside the illusion of the children that so desired waiting for Santa with their gifts. For these reasons I usually enjoy this time of the year.
And with this in mind, I am going to show you how to make a practical candle holder in the shape of a Christmas candle.
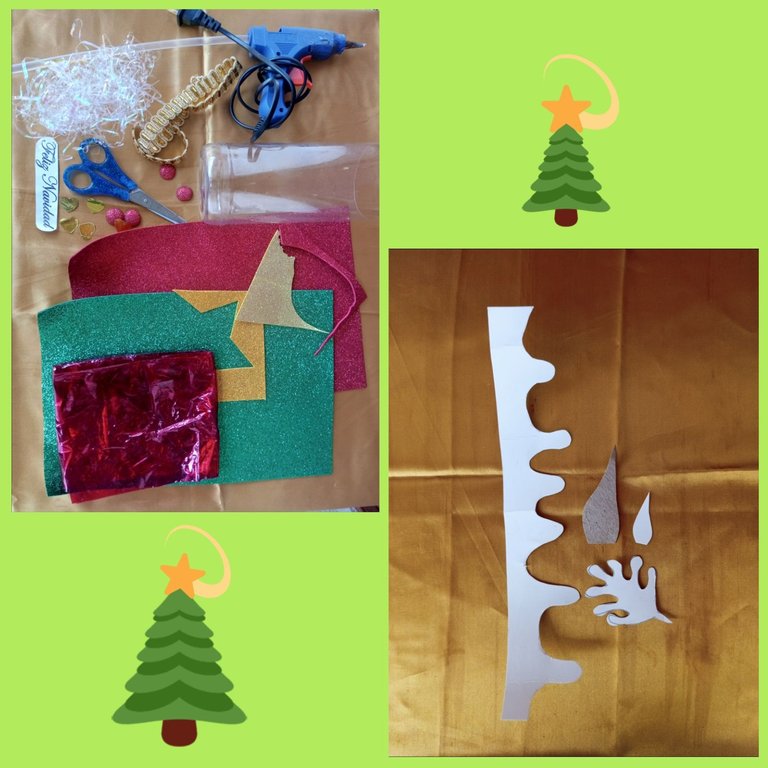
| Materiales: | Materials: |
|---|
- foami escarchado color:Rojo,verde, dorado.
- Papel celofán rojo.
- Pistola de silicón.
- Tijera.
- Cordón dorado de modelo de su preferencia.
- Cabello de angel (tornasol)
- pelotitas rojas recicladas.
- Patrones de nuestra vela.
- botella de plástico.
- frosted foami color: red, green, gold.
- Red cellophane paper.
- Silicone gun.
- Scissors.
- Golden cord of the model of your choice.
- Angel hair (litmus)
- Recycled red balls.
- Patterns of our candle.
- Plastic bottle.
Paso a Paso: / Step by Step:
| Paso 1: | Step 1: |
|---|
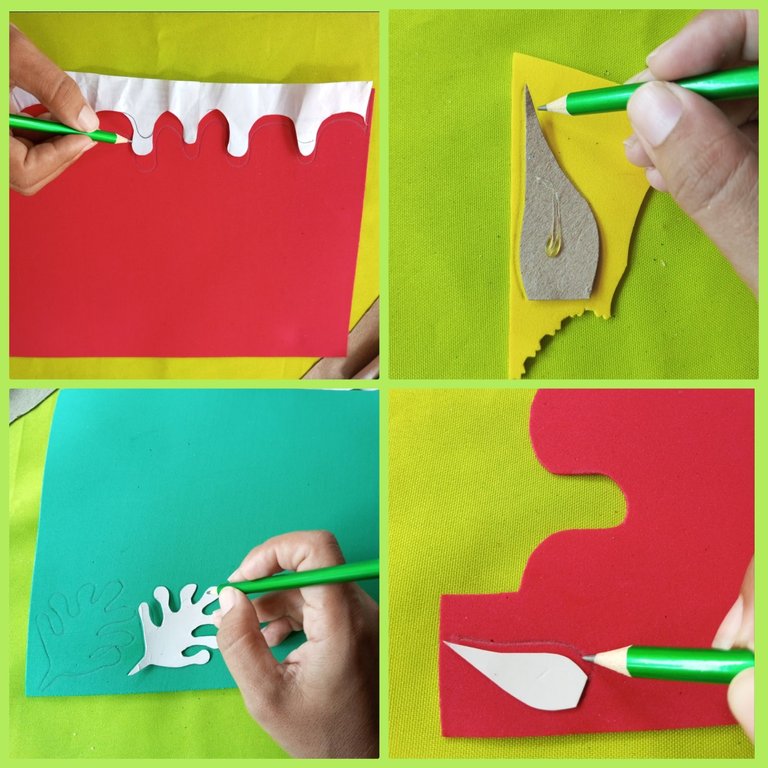
Marcamos nuestros patrones en su respectivo Foami.
We mark our patterns on their respective Foami.
| Paso 2: | Step 2: |
|---|
Marcamos la circunferencia de la botella en el foami rojo.
We mark the circumference of the bottle on the red foami and cut them out.

| Paso 3: | Step 3: |
|---|
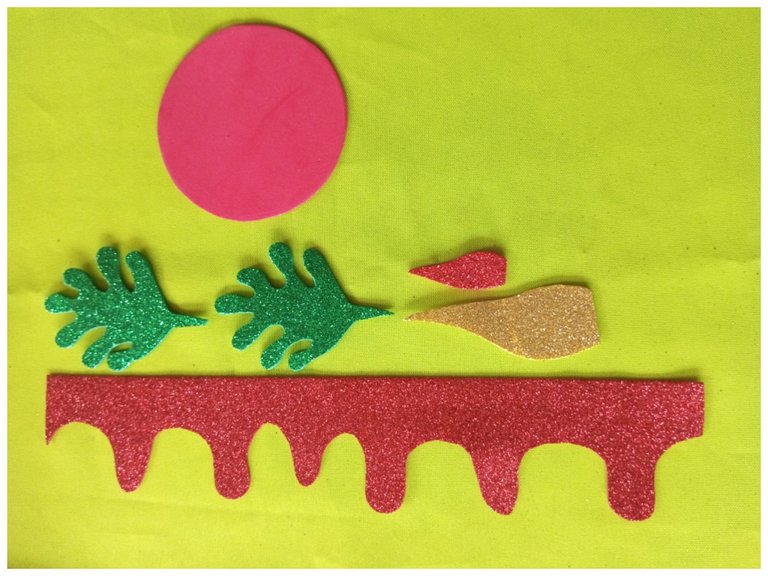
Los recortamos.
We cut them out
| Paso 4: | Step 4: |
|---|
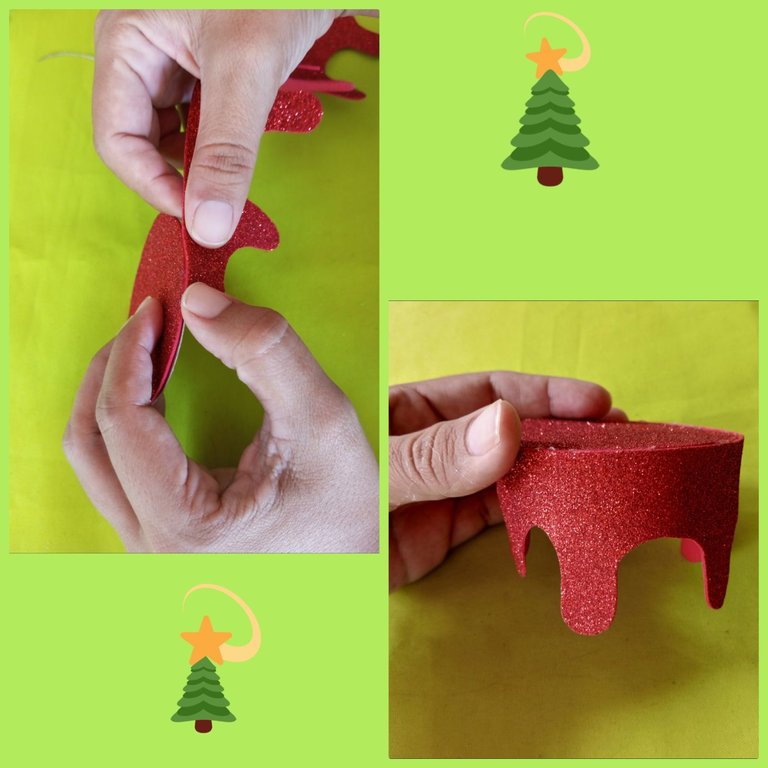
Luego luego iniciamos con el proceso de pegar las piezas. Primero alrededor del círculo lo que va a representar el borde de la vela.
Then we start the process of gluing the pieces together. First around the circle which will represent the edge of the candle.
| Paso 5: | Step 5: |
|---|
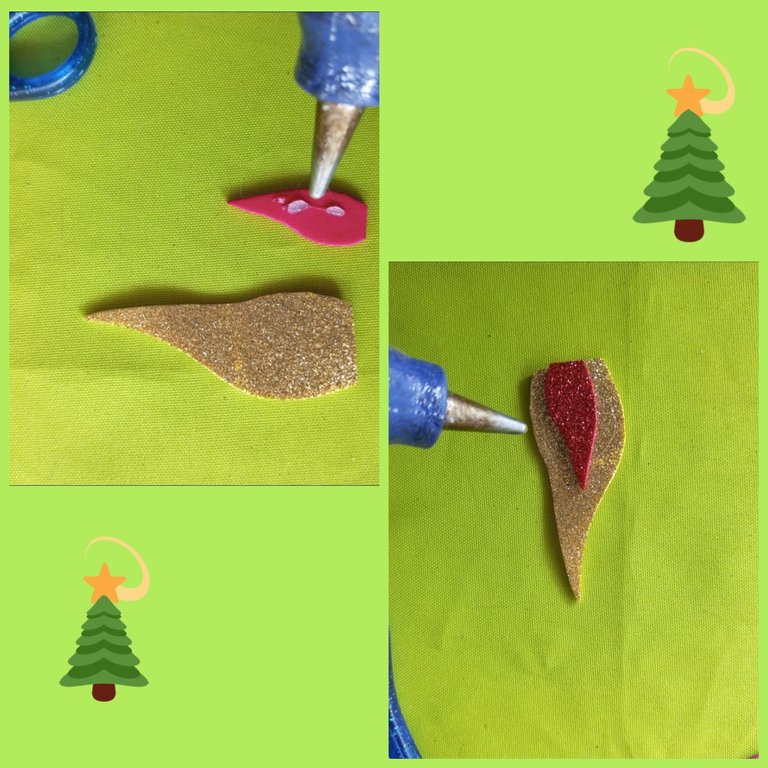
Segundo con la ayuda de la pistola de silicón lo rojo,en el centro de la llama.
Second with the help of the silicone gun the red, in the center of the flame.
| Paso 6: | Step 6: |
|---|
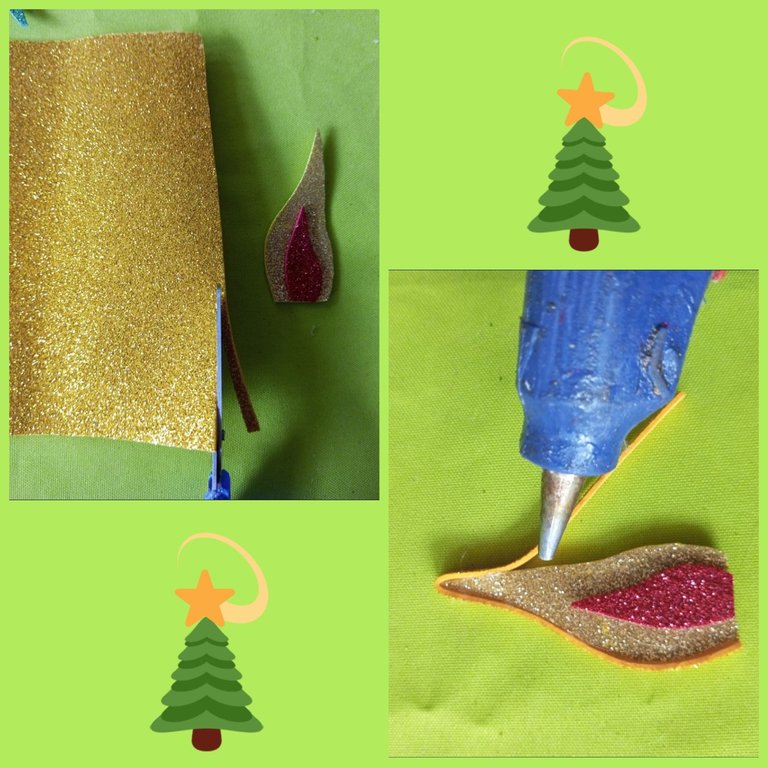
Tercero picamos una tira delgada para que cubra el borde de la llama y se vea un mejor acabado.
Third, we chop a thin strip to cover the edge of the flame for a better finish.
| Paso 7: | Step 7: |
|---|
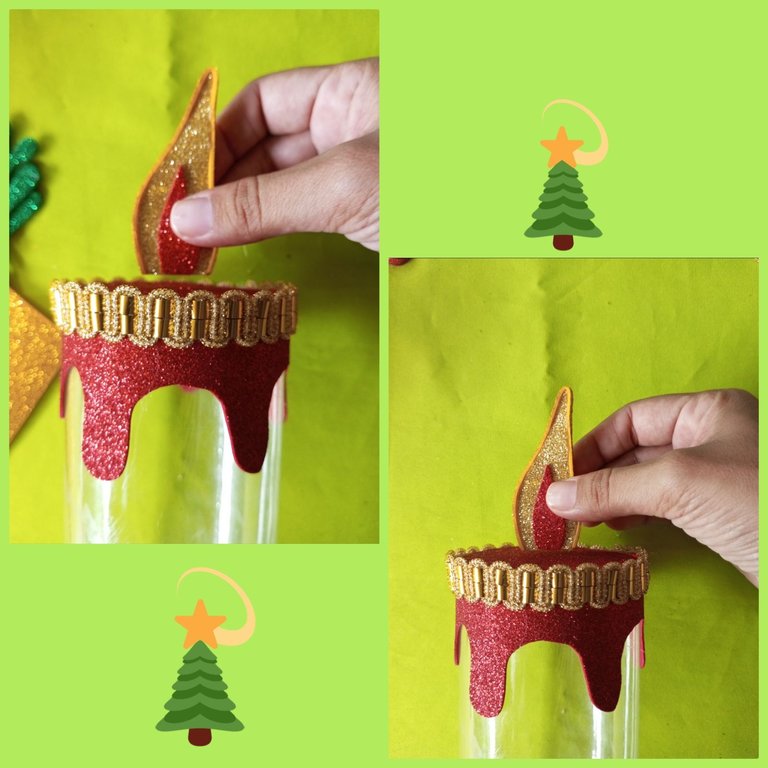
Hecho eso la pegamos en la base.
Once that is done, we glue it to the base.
| Paso 8: | Step 8: |
|---|
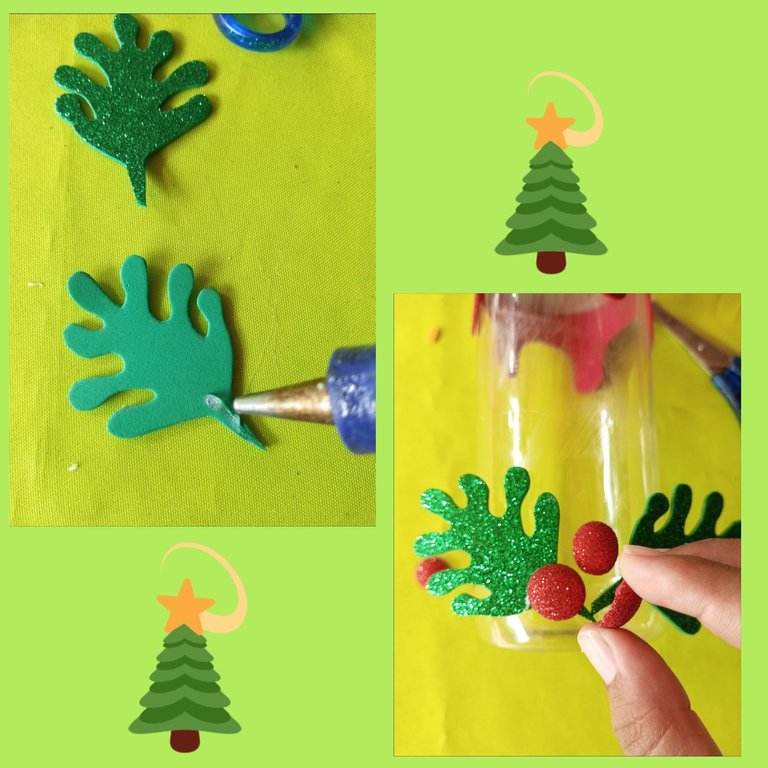
Luego echamos silicón en las hojas y en los circulitos que teníamos para representar las cerezas.
Then we put silicone on the leaves and on the little circles we had to represent the cherries.
| Paso 9: | Step 9: |
|---|
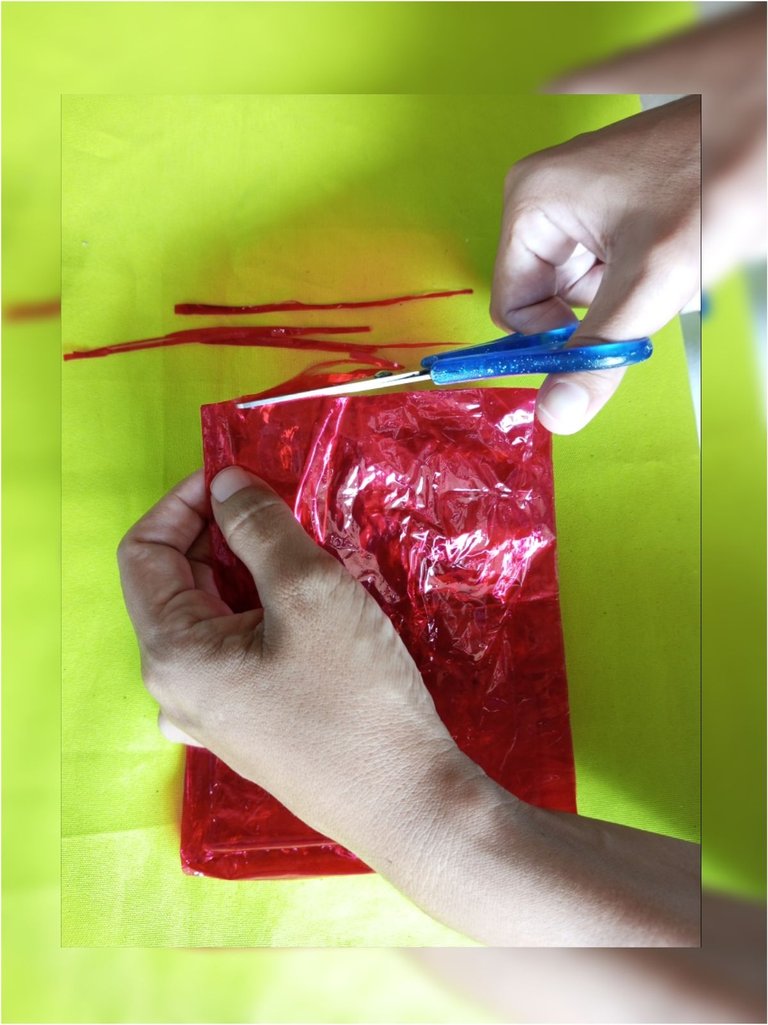
Picamos el celofán rojo en delgadas tiras.
Cut the red cellophane into thin strips.
| Paso 9: | Step 9: |
|---|
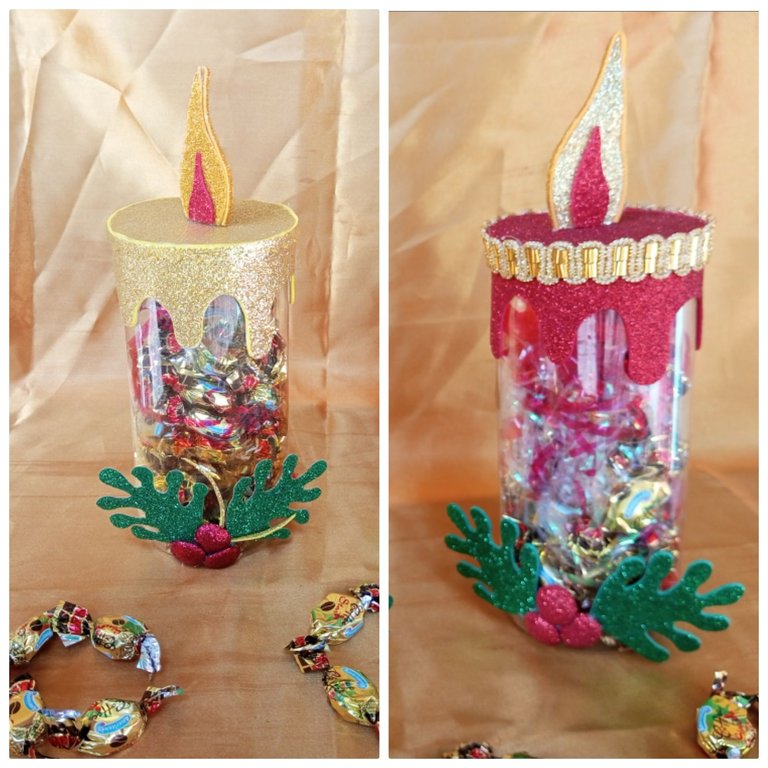
Finalmente lo mezclamos con el tornasol y rellenamos nuestros dulceros con caramelos.
Esto es opcional pueden colocarle galletas y otro dulce que prefieran.De la misma manera el color de nuestra vela puede varias de acuerdo a la decoración en nuestro hogar. Por eso en esta oportunidad les comparto uno con detalles rojos y otro dorado.
Finally, we mix it with the litmus and fill our candy boxes with candies.
This is optional, you can add cookies and other sweets of your choice.In the same way the color of our candle can vary according to the decoration in our home. That's why in this opportunity I share with you one with red details and another golden one.
Me despido deseándoles éxitos y muchas bendiciones para su vida, gracias por tu visita.
- Todas las fotos son de mi propiedad.
- Editadas por la aplicación LyrebirdStudio Photo Collage Editor.
- Traductor usado Deelp.
I say goodbye wishing you success and many blessings for your life, thank you for your visit.
- All photos are my property.
- Edited by LyrebirdStudio Photo Collage Editor application.
- Translator used Deelp.


