Hace unos días compartí con ustedes lo bello que había quedado mi closet después de una restauración low cost hecha en casa, y por si quedaron con alguna curiosidad de cómo fue el proceso, o si quieren hacerlo en casita, por aquí les comparto el paso a paso.

Como les comenté en mi post anterior, este closet originalmente era de un tono rojizo que detestaba (lo pueden ver en el listón inferior), por lo que al poco tiempo decidí pintarlo de negro, algunas partes con spray y en otras como las gavetas usé la técnica del decuopage (cubrir la superficie con servilletas y pega) y luego pinté de negro, y es precisamente esta parte la que comenzó a dar problemas, pues hace unos años comenzó a despegarse.
Por supuesto no se veía lindo y sumado a que algunas manillas se habían roto, tan solo verlo me ponía de mal humor (no es broma), así que un día me puse a buscar alternativas para restaurarlo de la manera más económica posible.
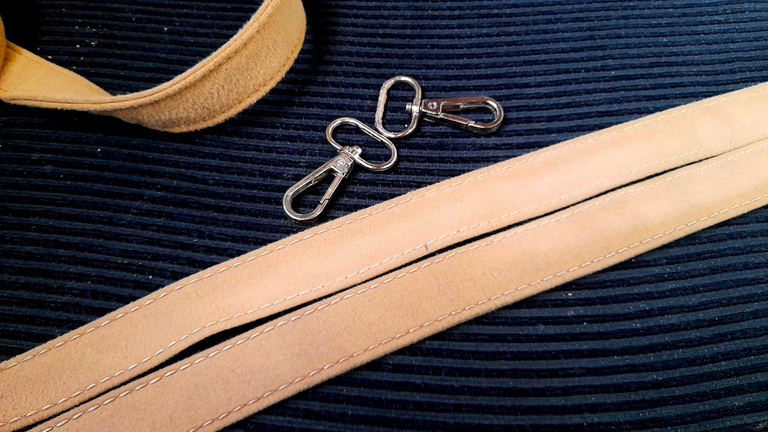
Por ejemplo, no podía gastar en manillas, así que tocaba ser creativos, así que me fui a Pinterest a buscar ideas, y me encontré con unas manillas hechas con cuero y de inmediato las amé, y aunque no tenía cuero como tal, sí tenía unas correas sin uso que eran de unas carteras viejas, así que eso serviría.
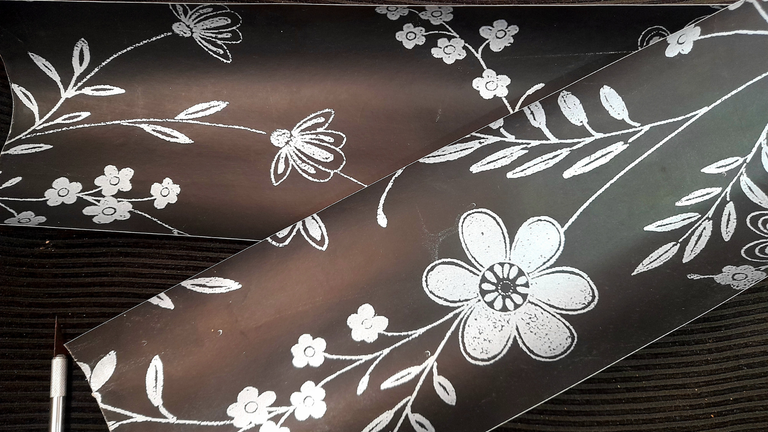
Primer problema resuelto, ahora venía uno más complicado que era resolver el tema de las gavetas y después de mucho pensar me decidí por cubrirlas con un papel tapiz que tenía en casa y con esto resolvería mi segundo problema.
La idea no era cubrir todo el closet, pero la verdad quería cubrir las gavetas y las dos puertas encima de ellas porque me parecía se vería mejor, pero luego de medir me di cuenta que el papel no alcanzaba, así que tocó decidir si lo usaba solo para las gavetas, y después de mucho pensar decidí que me arriesgaría, y por suerte amé el resultado.

Y ahora sí, después de esta introducción un poco larga, vamos al paso a paso que es súper sencillo.
MATERIALES
Para las manillas
• Correas de cartera (pueden ser cinturones o cualquier cosa similar)
• Tornillos
• Destornillador
• Tijera
• Lápiz
• Regla
• Pistola de silicón
Para las gavetas
• Papel tapiz
• Pega blanca
• Pincel
• Cutter (exacto)
• Tijeras
• Regla
PROCEDIMIENTO
Para las manillas
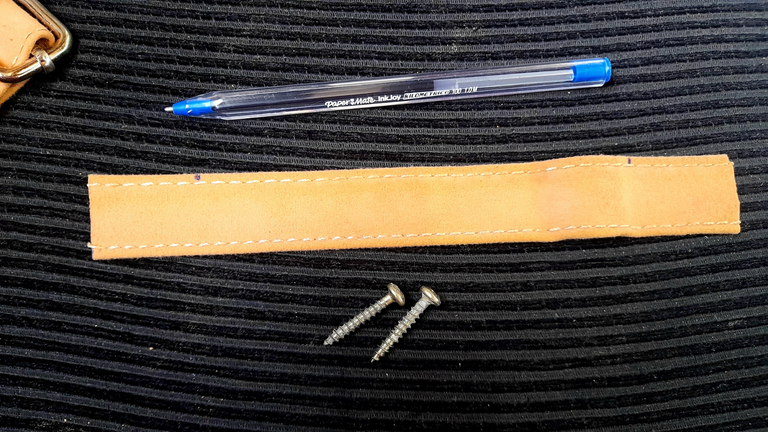
○ Decidir de qué tamaño queremos nuestras manillas, medir y recortar.
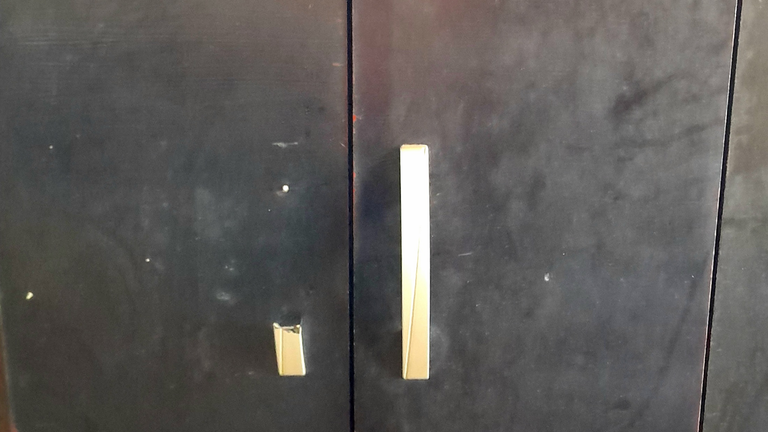
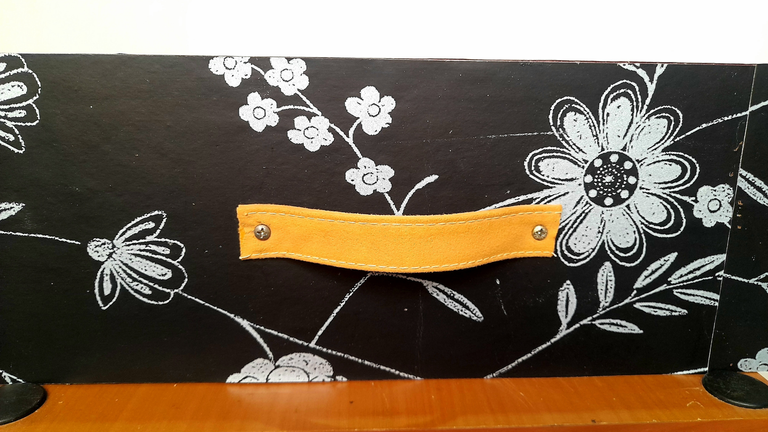
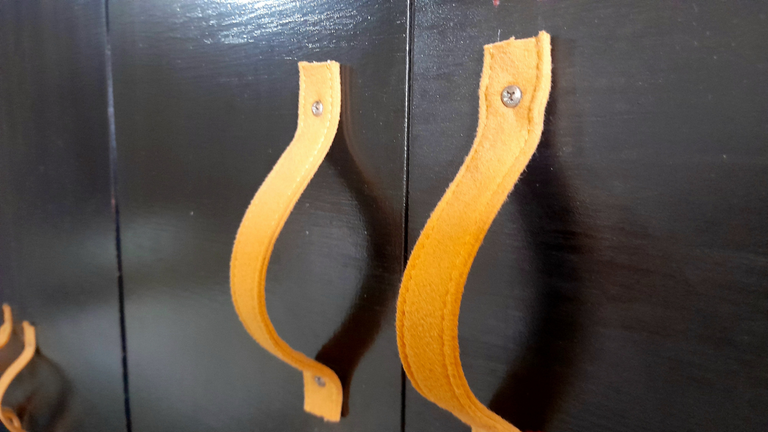
En mi caso yo decidí hacer que resaltaran con una especie de curva, lo que logré recortando un poco más largas las tiras y al ser bastante gruesas, tomaron una forma muy bonita.
○ Listas las piezas que necesitaría (9 en total), lo siguiente era fijarlas, para ello con ayuda de un tornillo abrí el huequito a todas las tiras para luego unirlas a la puerta con los tornillos que tenían las manijas anteriores.

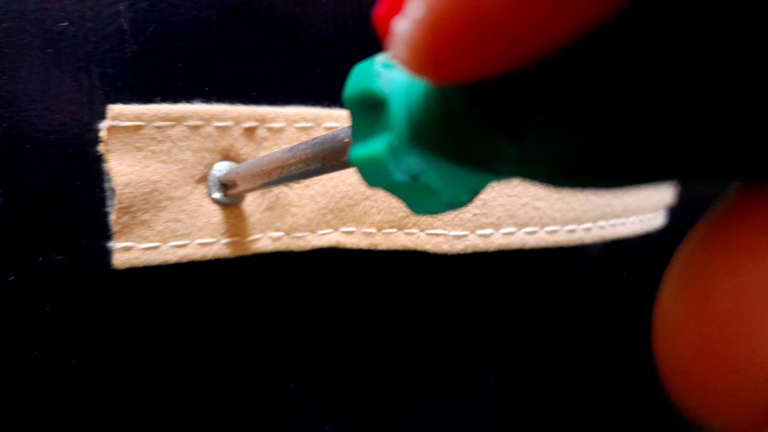
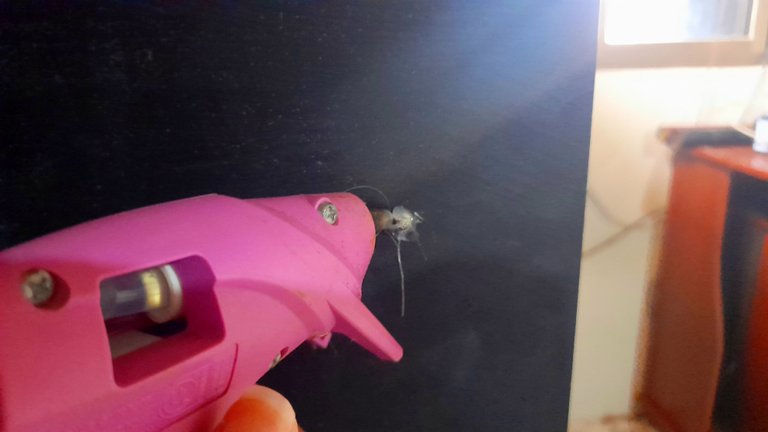
○ El último paso sería asegurar con silicón caliente el tornillo por la parte interior del closet, y listo. Unas manillas nuevas sin gastar nada. Y la verdad yo quedé enamorada, cada vez que las veo suspiro (tampoco es broma).
Para las gavetas
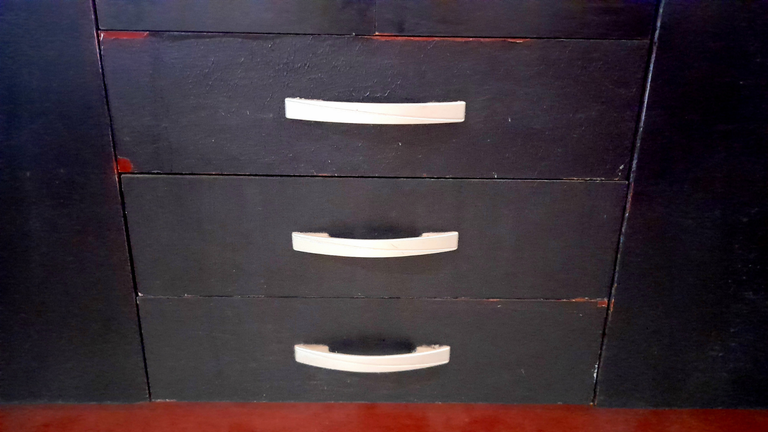
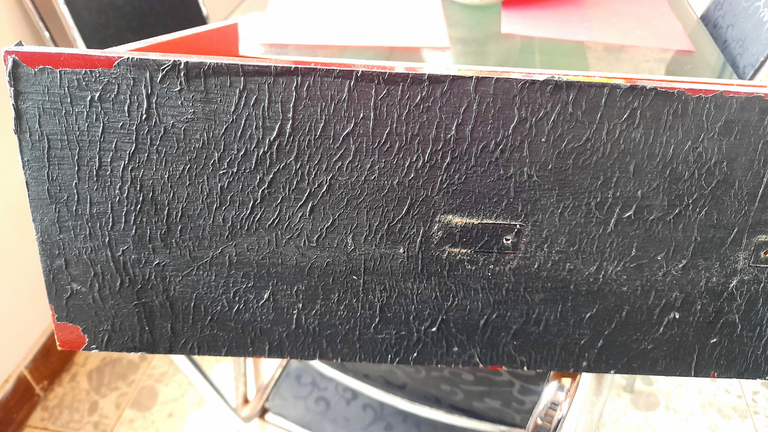
○ Retiramos las manillas y limpiamos muy bien la gaveta, quitando por completo la servilleta pintada.

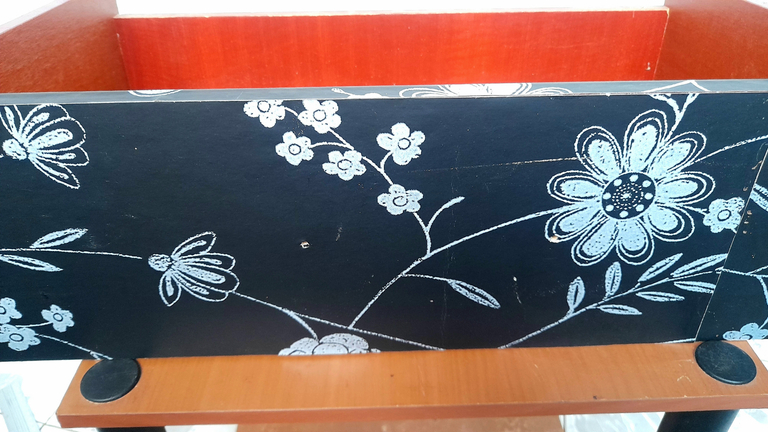
○ Lo siguiente es medir la parte delantera de nuestras gavetas recortar las piezas necesarias, tanto del frente como de los bordes.
Seguidamente, con ayuda de un pincel, pegamos por secciones el papel, para asegurarnos que no queden imperfecciones.

Una vez cubiertas todas las áreas, colocamos las manillas según el procedimiento anterior y todo listo.
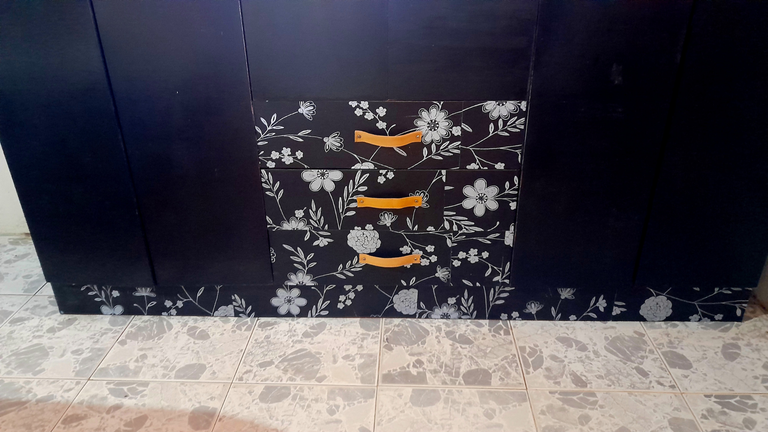
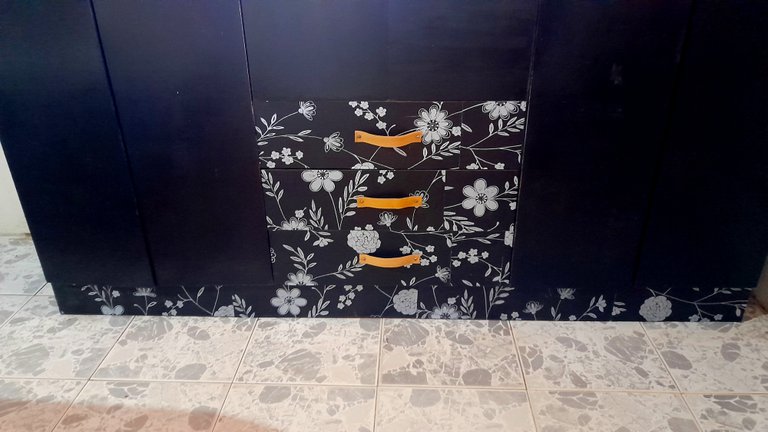
Para dar por terminada mi renovación decidí agregar un listón de papel tapiz a la parte inferior del closet que nunca terminé de pintar y quedó absolutamente hermoso.
Una renovación que sin dudas me dejó feliz porque mi closet luce precioso y no gasté absolutamente nada. ¿Qué puede ser mejor? Un closet nuevo quizá 🤪, pero amé mi viejo nuevo closet.

A few days ago I shared with you how beautiful my closet was after a low cost restoration done at home, and in case you were curious about how the process went, or if you want to do it at home, here I share with you the step by step.
As I mentioned in my previous post, this closet was originally a reddish tone that I hated (you can see it in the ribbon below), so soon after I decided to paint it black, some parts with spray paint and in others like the drawers I used the decuopage technique (cover the surface with napkins and glue) and then painted it black, and it is precisely this part that began to give problems, because a few years ago it began to peel off.
Of course it didn't look nice and added to the fact that some handles were broken, just looking at it made me feel bad (no kidding), so one day I started to look for alternatives to restore it in the most economical way possible.
For example, I couldn't spend on handles, so I had to be creative, so I went to Pinterest to look for ideas, and I found some handles made with leather and I immediately loved them, and although I didn't have leather as such, I did have some unused straps that were from some old wallets, so that would work.
First problem solved, now came a more complicated one which was to solve the issue of the drawers and after much thought I decided to cover them with a wallpaper that I had at home and this would solve my second problem.
The idea was not to cover the whole closet, but I really wanted to cover the drawers and the two doors above them because I thought it would look better, but after measuring I realized that the paper was not enough, so I had to decide whether to use it only for the drawers, and after much thought I decided to take the risk, and luckily I loved the result.
And now, after this long introduction, let's go to the step by step, which is super simple.
MATERIALS
For the handles
- Purse straps (can be belts or anything similar)
- Screws
- Screwdriver
- Scissors
- Pencil
- Ruler
- Silicone gun
For the drawers
- Wallpaper
- White glue
- Paintbrush
- Cutter (exact)
- Scissors
- Ruler
PROCEDURE
For the handles
○ Decide what size we want our handles, measure and trim.
In my case I decided to make them stand out with a sort of curve, which I accomplished by trimming the strips a little longer and being quite thick, they took on a very nice shape.
○ Ready the pieces I would need (9 in total), the next thing was to fix them, for this with the help of a screw I opened the hole to all the strips and then attach them to the door with the screws that had the previous handles.
○ The last step would be to secure with hot silicone the screw on the inside of the closet, and that's it. New handles without spending anything. And the truth is that I fell in love, every time I see them I sigh (no kidding).
For the drawers
○ We remove the handles and clean the drawer very well, completely removing the painted napkin.
○ Next is to measure the front of our drawers cut out the necessary pieces, both front and edges.
○ Next, using a paintbrush, we glue the paper in sections, to make sure there are no imperfections.
○ Once all the areas are covered, we place the handles according to the previous procedure and everything is ready.
To finish my renovation I decided to add a strip of wallpaper to the bottom of the closet that I had never finished painting and it looked absolutely beautiful.
A renovation that undoubtedly left me happy because my closet looks gorgeous and I spent absolutely nothing. What could be better? A new closet maybe 🤪, but I loved my old new closet.